

乘风破浪,遇见最美Windows 11之现代Windows桌面应用开发 - Microsoft Edge WebView2运行时
前言
对现代化Windows桌面应用而言,越来越多的应用程序采用Hybrid混合架构,即原生客户端技术+Web网页技术嵌入的混合模式提供应用服务,这样既有原生技术先天的端能力优势,又有来自Web技术的快速开发、灵活部署的优势。
目前主流的方案肯定是"基于嵌入式Chromium框架(简称CEF)"解决方案,但是带来的问题就是程序安装包体积巨大,因为它必须要把整个Chromium内核完整的打包进去,而微软原生控件WebView或者WebBrowser控件由于其技术或背后浏览器框架跟不上现代步伐,很难满足实际场景需求,那么随着Microsoft Edge积极采用Chromium内核,并被Windows 10/11内置,基于它诞生了WebView2这个控件,未来我们有希望可以直接通过使用WebView2来替代CEF,从而大幅降低混合架构开发模式下的安装包体积,提高程序运行效率。
采用WebView2的核心优势:1、缩小应用程序安装包体积大小。2、降低应用程序磁盘空间占用。3、节约Hybrid架构开发实现成本。4、减少应用分发的CDN流量消耗。5、优化浏览器运行内核维护成本。
核心提要:1、从Windows 11开始的操作系统版本将直接内置WebView2运行时;2、Microsoft 365应用程序v2101版本已开始依赖WebView2运行时提供和Web无差体验的新功能和特性;3、截止到目前,WebView2运行时已被超过2亿台Windows设备部署。4、WebView2运行时自带对H264编码的支持,无需额外编译配置。
什么是Microsoft Edge WebView2
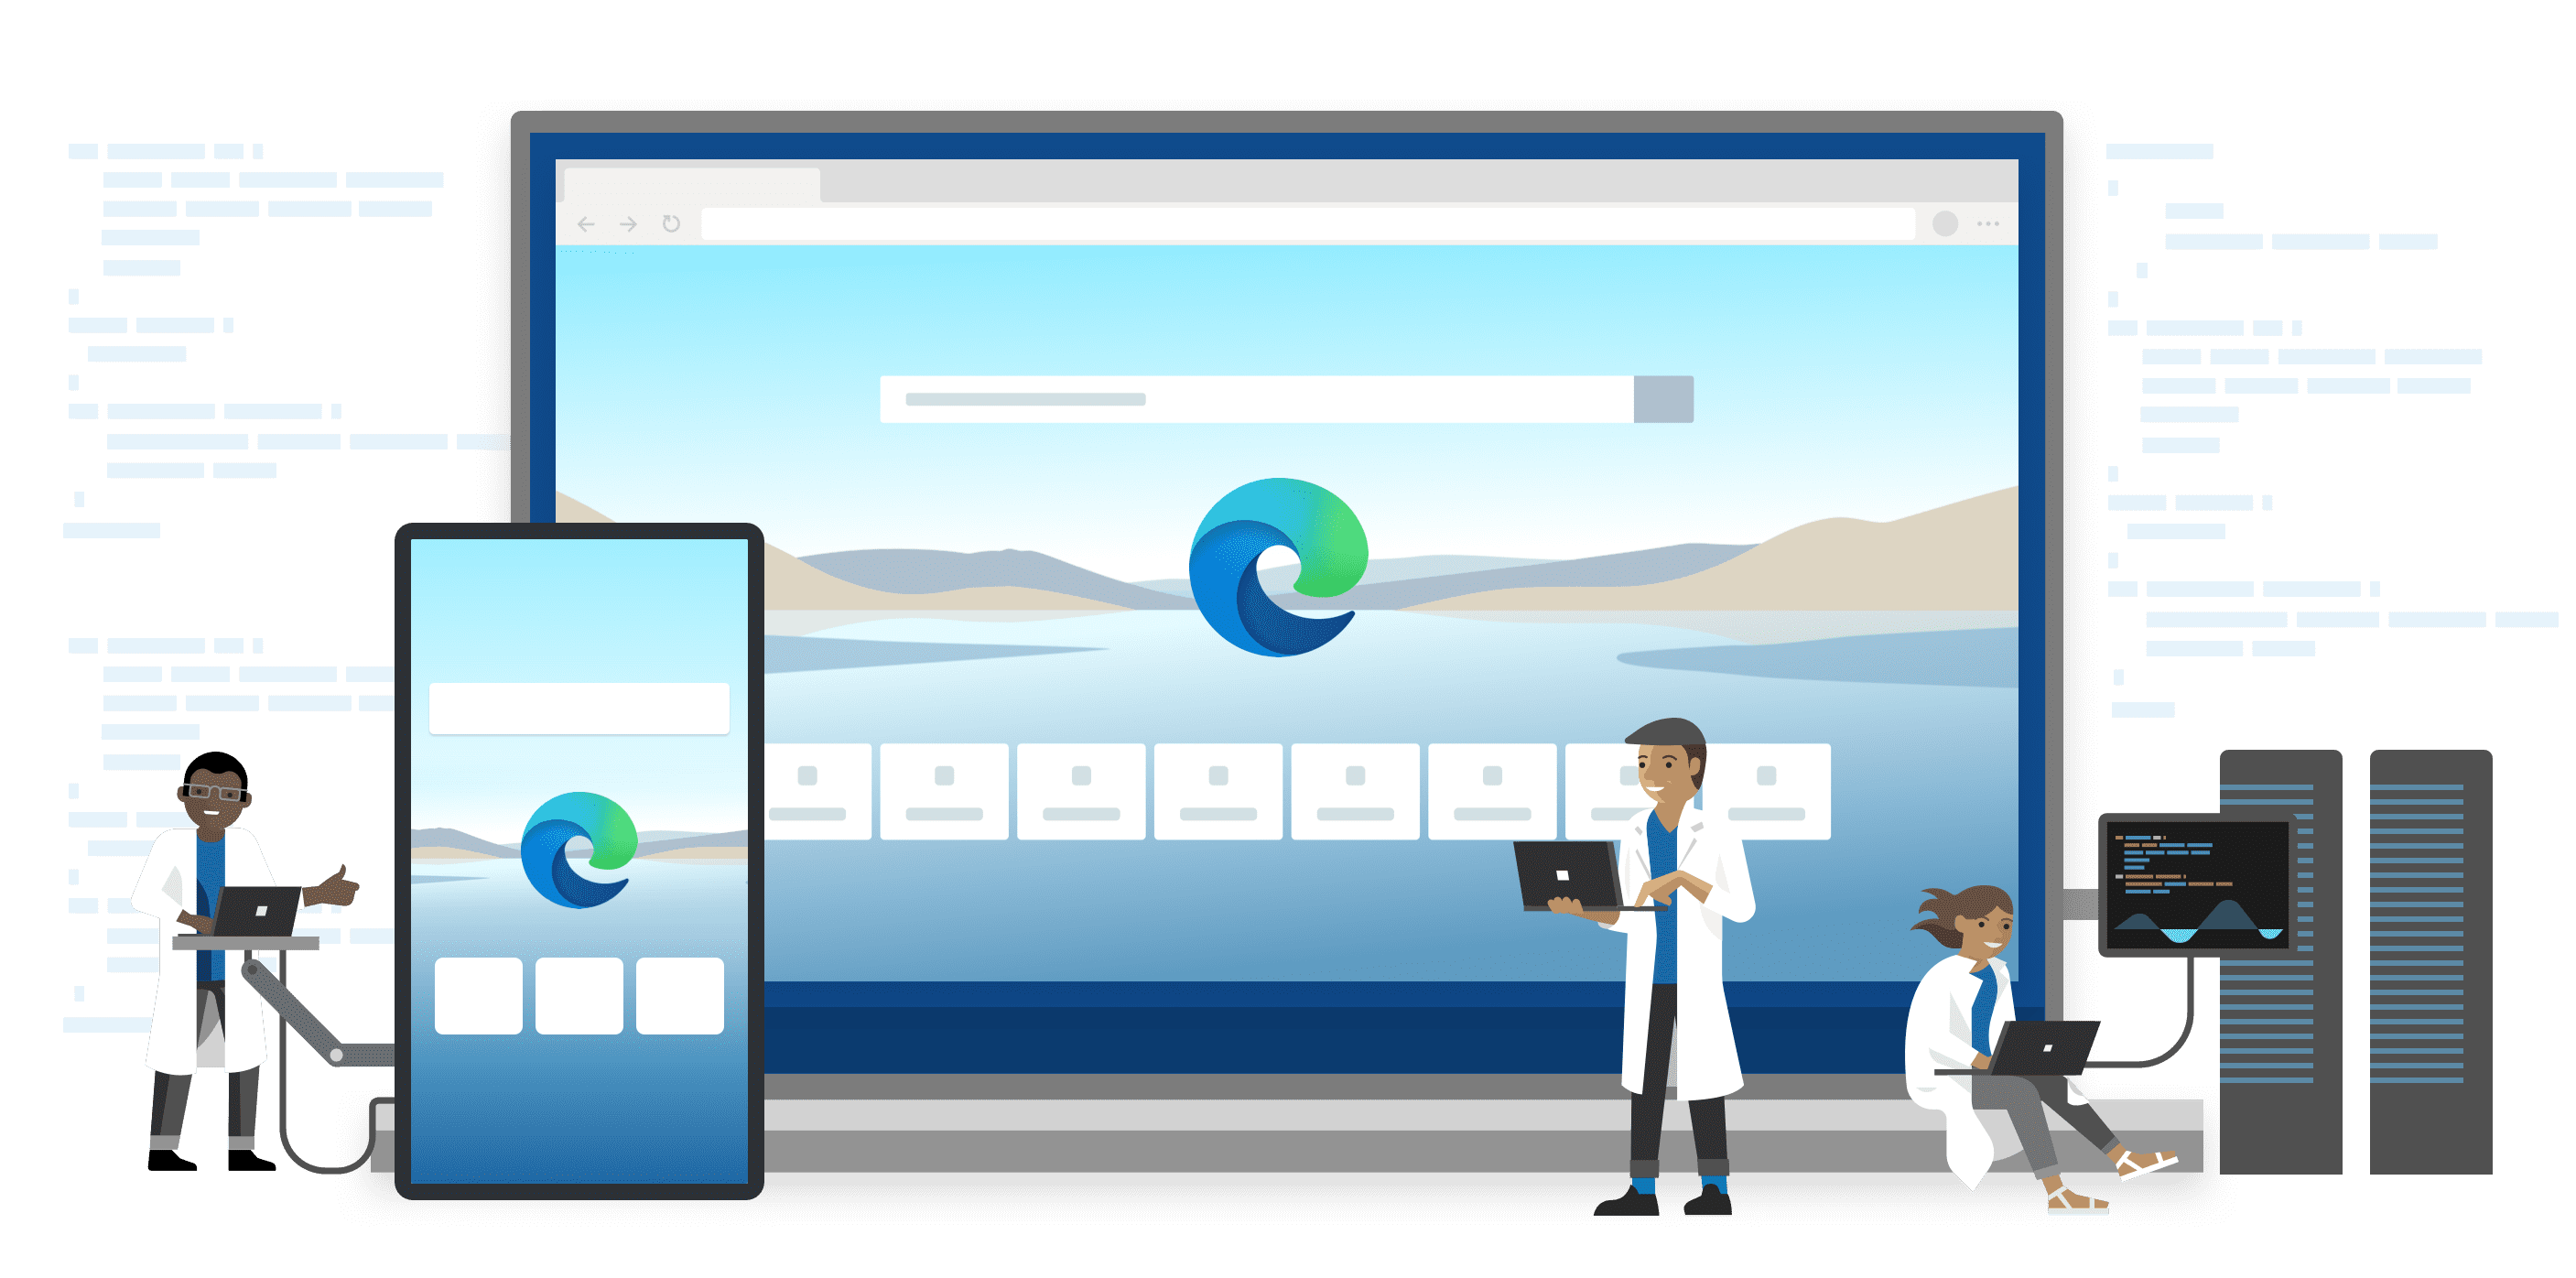
Microsoft Edge WebView2控件允许在本机应用中嵌入Web技术(HTML、CSS以及JavaScript)。WebView2控件使用Microsoft Edge(Chromium)作为绘制引擎,以在本机应用中显示Web内容。使用WebView2,可以在本机应用的不同部分嵌入Web代码,或在单个WebView实例中生成所有本机应用。
什么是WebView2运行时
https://developer.microsoft.com/zh-cn/microsoft-edge/webview2/#download-section
WebView2运行时简介
"WebView2运行时(Webview2 Runtime)"是一个可再发行运行时,并充当WebView2(或)Web平台的基础组件。此概念类似于Visual C++/.NET应用的.NET运行时。"WebView2运行时"包含经过修改的Microsoft Edge(Chromium)二进制文件,这些二进制文件针对WebView2应用进行了微调和测试。安装WebView2运行时后,它不会显示为用户可见的浏览器应用。例如,用户没有浏览器桌面快捷方式或"开始"菜单中的条目。
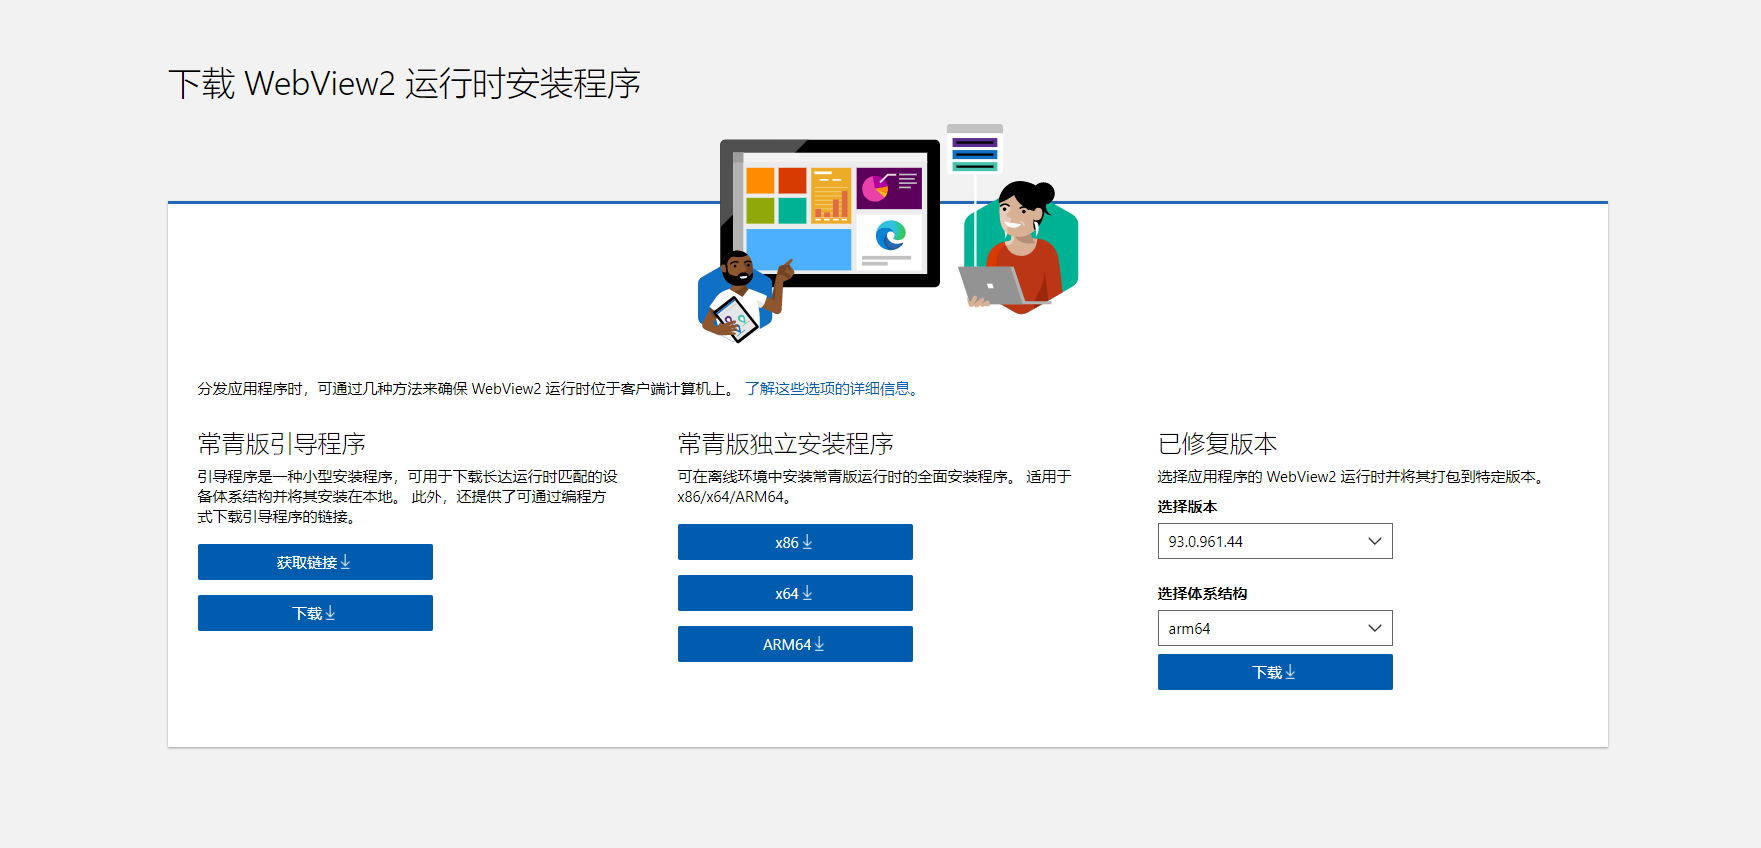
有两种不同的方法将"WebView2运行时"分发和更新到客户端计算机:常青分发模式和离线分发模式。
常青分发模式(Evergreen Runtime)
在“常青分发模式(Evergreen Runtime)”下,WebView2运行时不与你的应用打包,但最初使用联机引导程序或脱机安装程序安装到客户端上。之后,WebView2运行时将在客户端计算机上自动更新。然后,你可以从最新的WebView2 SDK分发使用最新WebView2 API的WebView2应用更新。建议大多数开发人员使用常青分发模式。
-
优点:
- 基础Web平台(WebView2运行时)自动更新,无需你进行更多工作。
- 客户端系统上WebView2运行时所需的磁盘空间更少,因为WebView2运行时由客户端上的所有WebView2应用共享。
- 在符合条件的系统上,Microsoft Edge和Evergreen WebView2运行时的二进制文件在同一版本上时硬链接在一起。此链接为磁盘占用、内存和性能带来了好处。
-
缺点:
- WebView2应用不能指定需要WebView2运行时的特定版本。
离线分发模式(Offline Runtime)
在“离线分发模式(Offline Runtime)”下,下载特定版本的WebView2运行时,并随应用包中的WebView2应用一起打包它。随应用打包的WebView2运行时仅由WebView2应用使用,而客户端计算机上任何其他应用不会使用。
-
优点:
- 你可以更加控制WebView2运行时的版本控制。你知道哪些WebView2 API可用于你的应用,因为你控制哪个版本的WebView2运行时可用于你的应用。你的应用无需测试是否有最新的API。
-
缺点:
- 你需要自己管理WebView2运行时。WebView2运行时不会在客户端上自动更新,因此若要使用最新的WebView2 API,必须定期更新应用以及更新后的WebView2运行时。
- 如果安装了多个WebView2应用,则客户端上需要更多磁盘空间。
- 离线分发运行时无法通过使用安装程序进行安装。
宣告超过2亿设备的覆盖
https://blogs.windows.com/msedgedev/2021/08/31/webview2-windows-app-sdk-winui2-runtime-cdp-helper/
我们一直在努力提高WebView2运行时在Windows机器上的可用性。我们很高兴地宣布这项工作的两项更新。首先,WebView2运行时将在Windows11机器中内置。其次,我们看到许多应用程序,包括Microsoft Office,开始将WebView2 Runtime与其应用程序一起部署。迄今为止,WebView2 Runtime已安装在超过2亿台Windows设备上! WebView2 Runtime的日益普及将使以首选的Evergreen分发模式部署WebView2应用程序变得更加容易。
WebView2和Microsoft 365应用版
Microsoft 365应用开始提供依赖"WebView2运行时(Webview2 Runtime)"的新功能或改进功能。例如,Outlook中的会议室查找器和会议Insights功能。WebView2是Microsoft Edge使用的渲染引擎,在桌面应用程序中显示基于Web的功能。
通过使用"WebView2运行时(Webview2 Runtime)",我们可以更轻松地为您的用户提供跨设备平台外观和感觉相同的Office功能。反过来,这种一致的体验可帮助您的用户学习和使用这些功能,而无需了解每个设备平台上Office的细微差别。
例如,通过使用"WebView2运行时(Webview2 Runtime)",在运行Windows的设备上使用Outlook和在Web上使用Outlook时,房间查找器功能看起来相同。Office加载项也将开始依赖"WebView2运行时(Webview2 Runtime)"。
WebView2要求在运行Office的设备上安装"WebView2运行时(Webview2 Runtime)"。如果设备上未安装"WebView2运行时(Webview2 Runtime)",您的用户将无法使用依赖于WebView2的Office功能。
因此,在2021年4月,我们开始在运行Windows且安装了Microsoft 365应用程序版本2101或更高版本的设备上安装"WebView2运行时(Webview2 Runtime)"。
重要
- "WebView2运行时(
Webview2 Runtime)"不会在设备上安装Microsoft Edge(完整浏览器),并且不需要在设备上安装Microsoft Edge。 - 在设备上安装"WebView2运行时(
Webview2 Runtime)"后,不会更改用户的默认浏览器选择。
官方示例
勤学勤练
创建解决方案及目录
1. 新建名为"HelloWebView2"的解决方案
dotnet new sln -o HelloWebView2

2. 切换到"HelloWebView2"目录
cd .\HelloWebView2\

创建.Net Core的Wpf项目
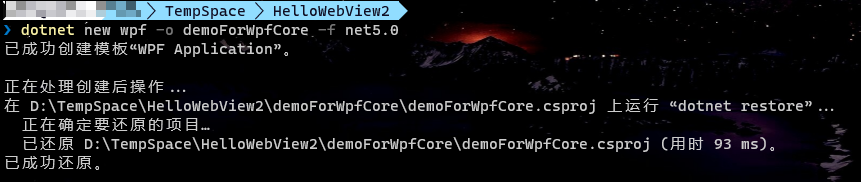
1. 创建名为"demoForWpfCore"的Wpf项目
dotnet new wpf -o demoForWpfCore -f net5.0
2. 添加"demoForWpfCore"到解决方案
dotnet sln add .\demoForWpfCore\demoForWpfCore.csproj

3. 切换到"demoForWpfCore"目录
cd .\demoForWpfCore\

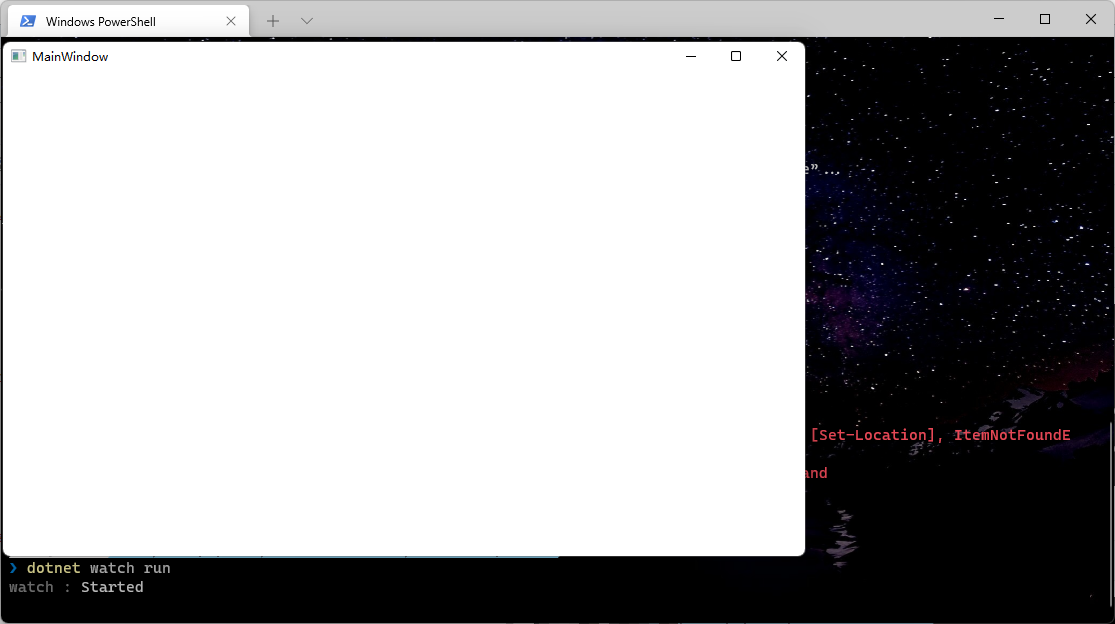
4. 运行"demoForWpfCore"项目
dotnet watch run
创建WinUI 3的桌面项目
1. 添加WinUI3的空白项目
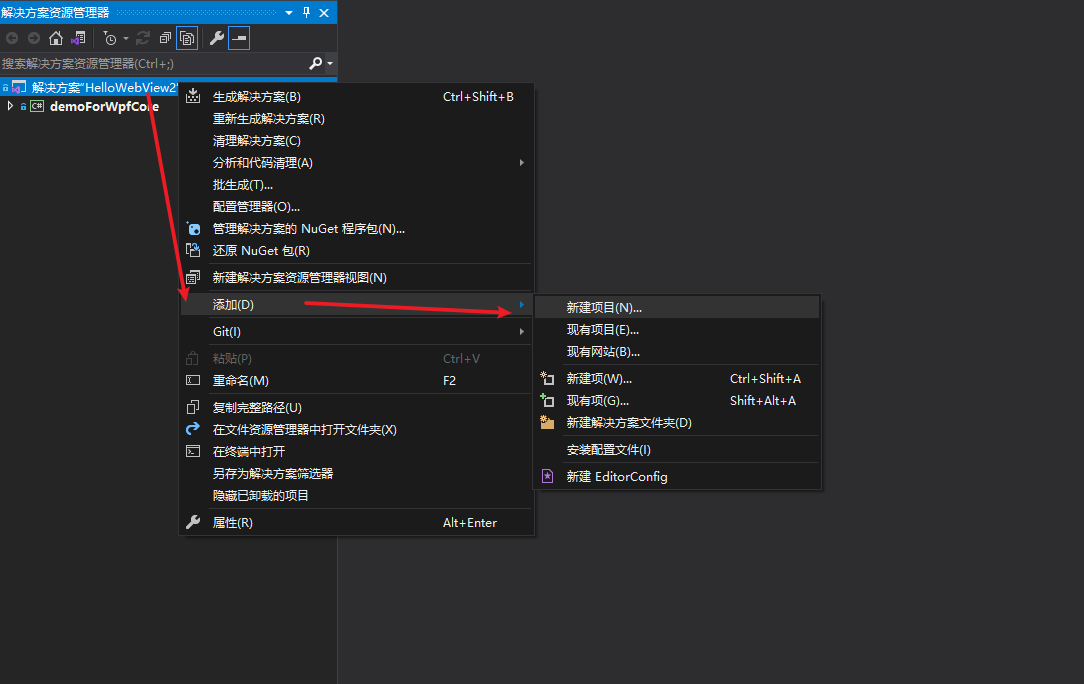
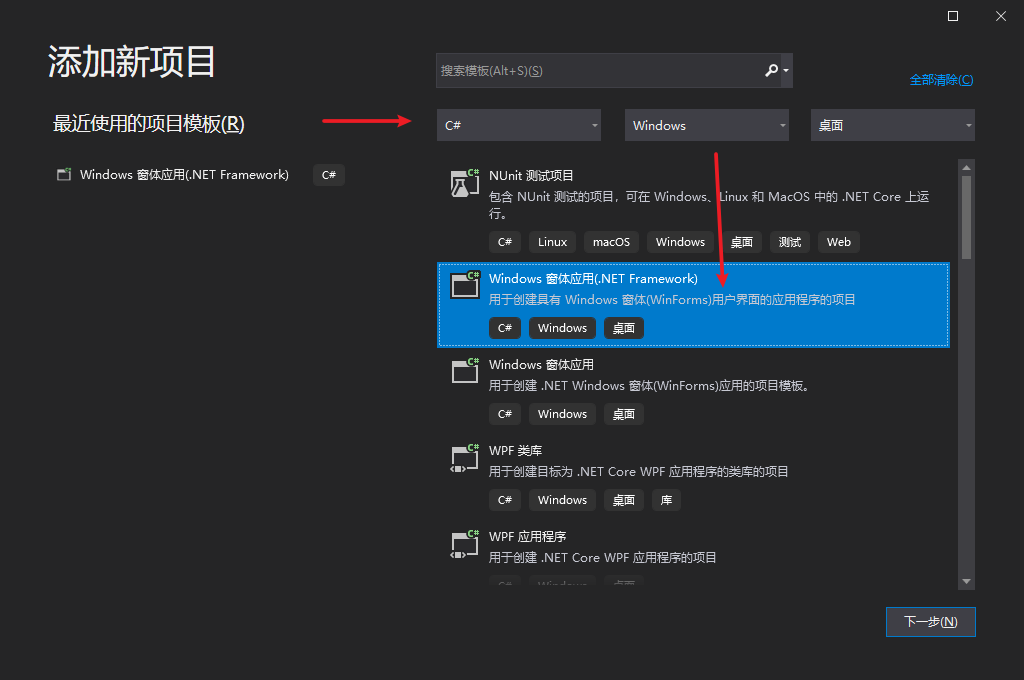
在解决方案上右键,添加 => 新建项目,筛选C#语言,Windows平台,WinUI项目类型。
选择"打包的空白应用(桌面版WinUI 3)(Blank App, Packaged(WinUI 3 in desktop))"项目类型,然后单击"下一步"按钮。
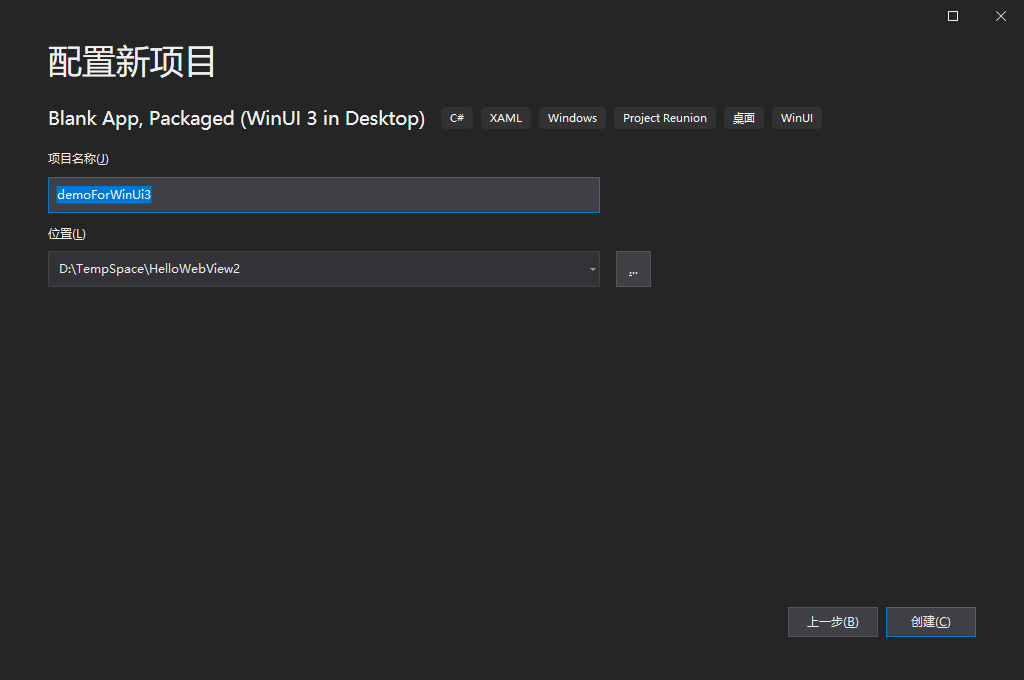
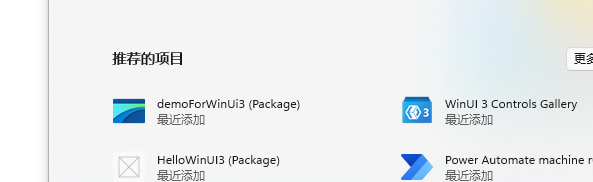
创建名为demoForWinUi3的项目。
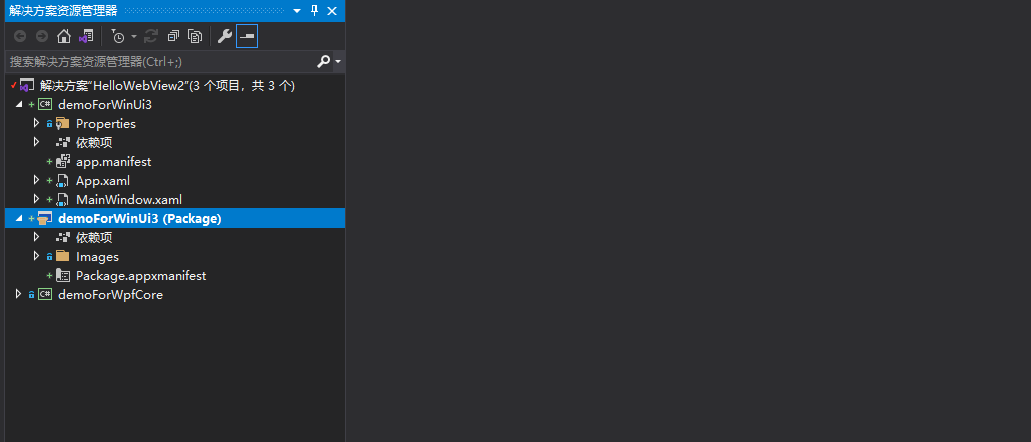
创建成功之后,会发现多了两个项目,一个是demoForWinUi3桌面项目,一个是demoForWinUi3 (Package)打包项目。
创建.Net Framework的Winforms项目
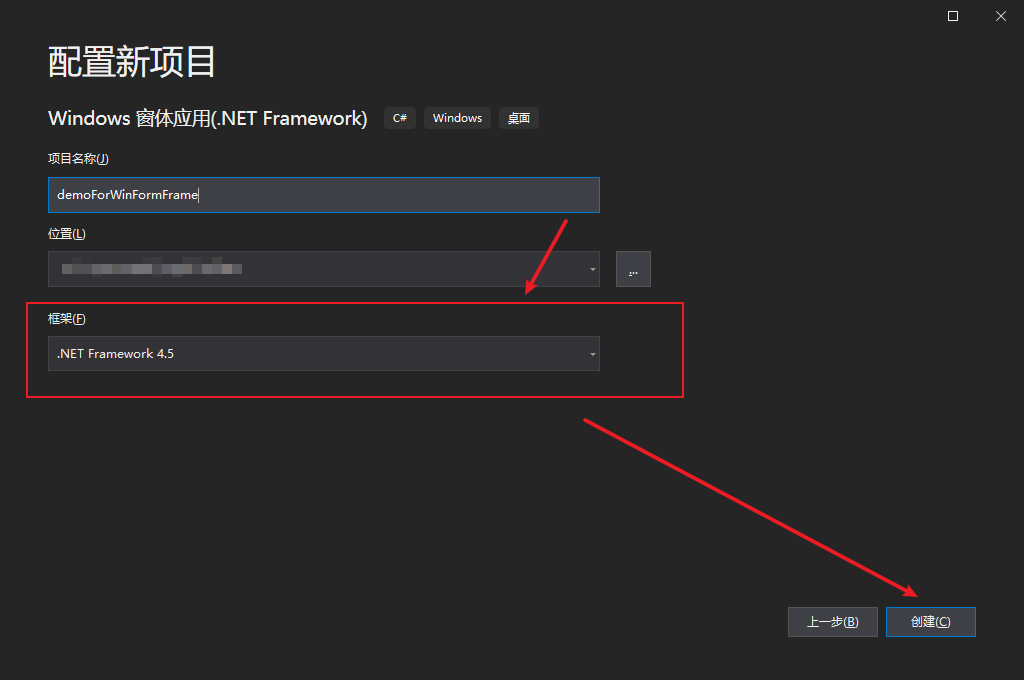
1. 创建名为"demoForWinFormFrame"的WinForms项目
这里需要将框架最低设置为:.Net Framework 4.5,这是目前WebView2的WinFroms包最低兼容版本。
2. 运行"demoForWinFormFrame"项目

.Net Framework WinForms项目添加并使用WebView2控件
.Net Framework WinForms项目安装WebView2包
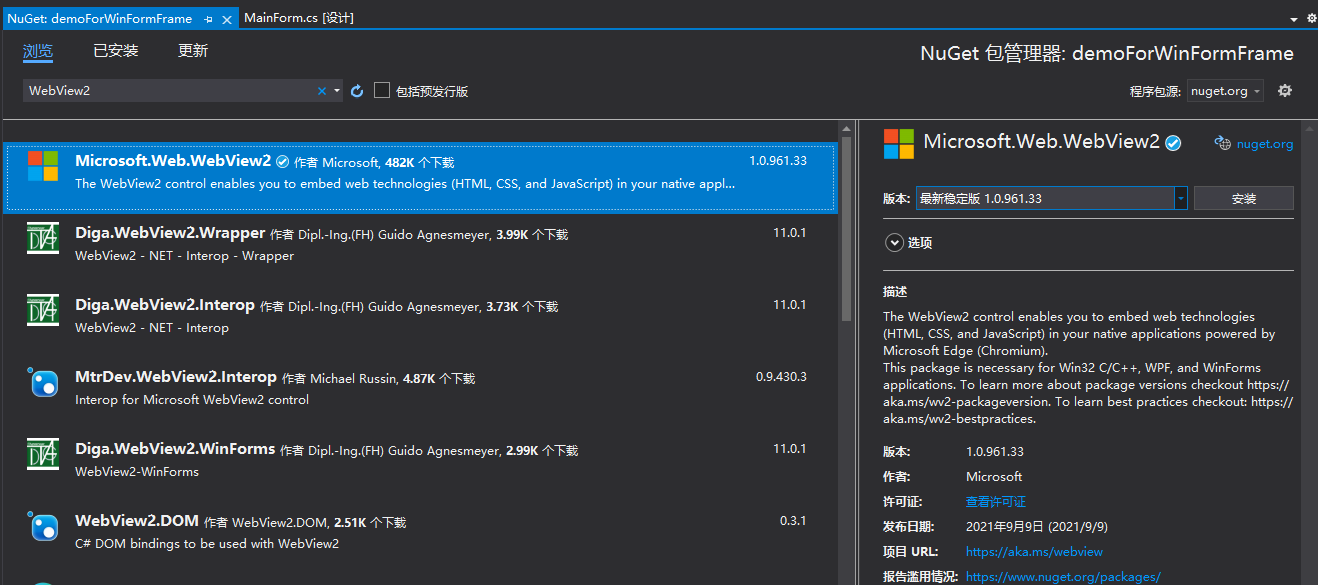
在demoForWinFormFrame项目右键进入"管理Nuget程序包"。
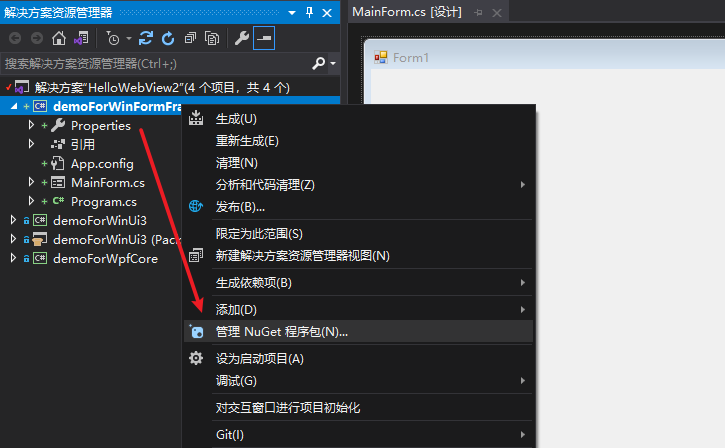
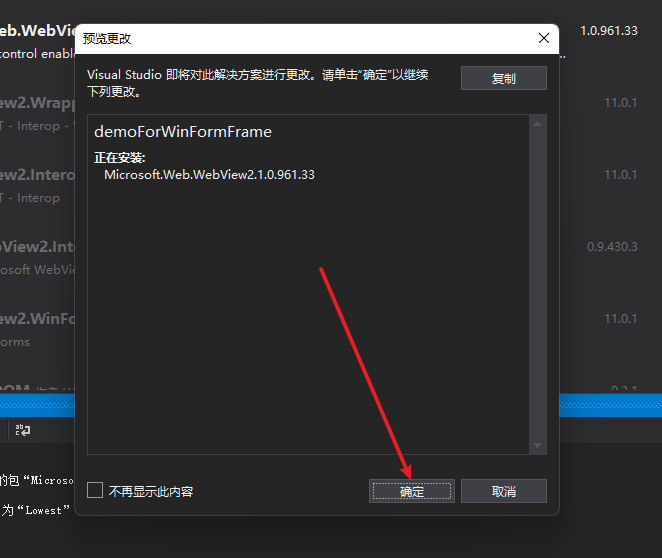
搜索关键词WebView2即可找到Microsoft.Web.WebView2这个包,安装即可。
初探嵌入WebView2控件
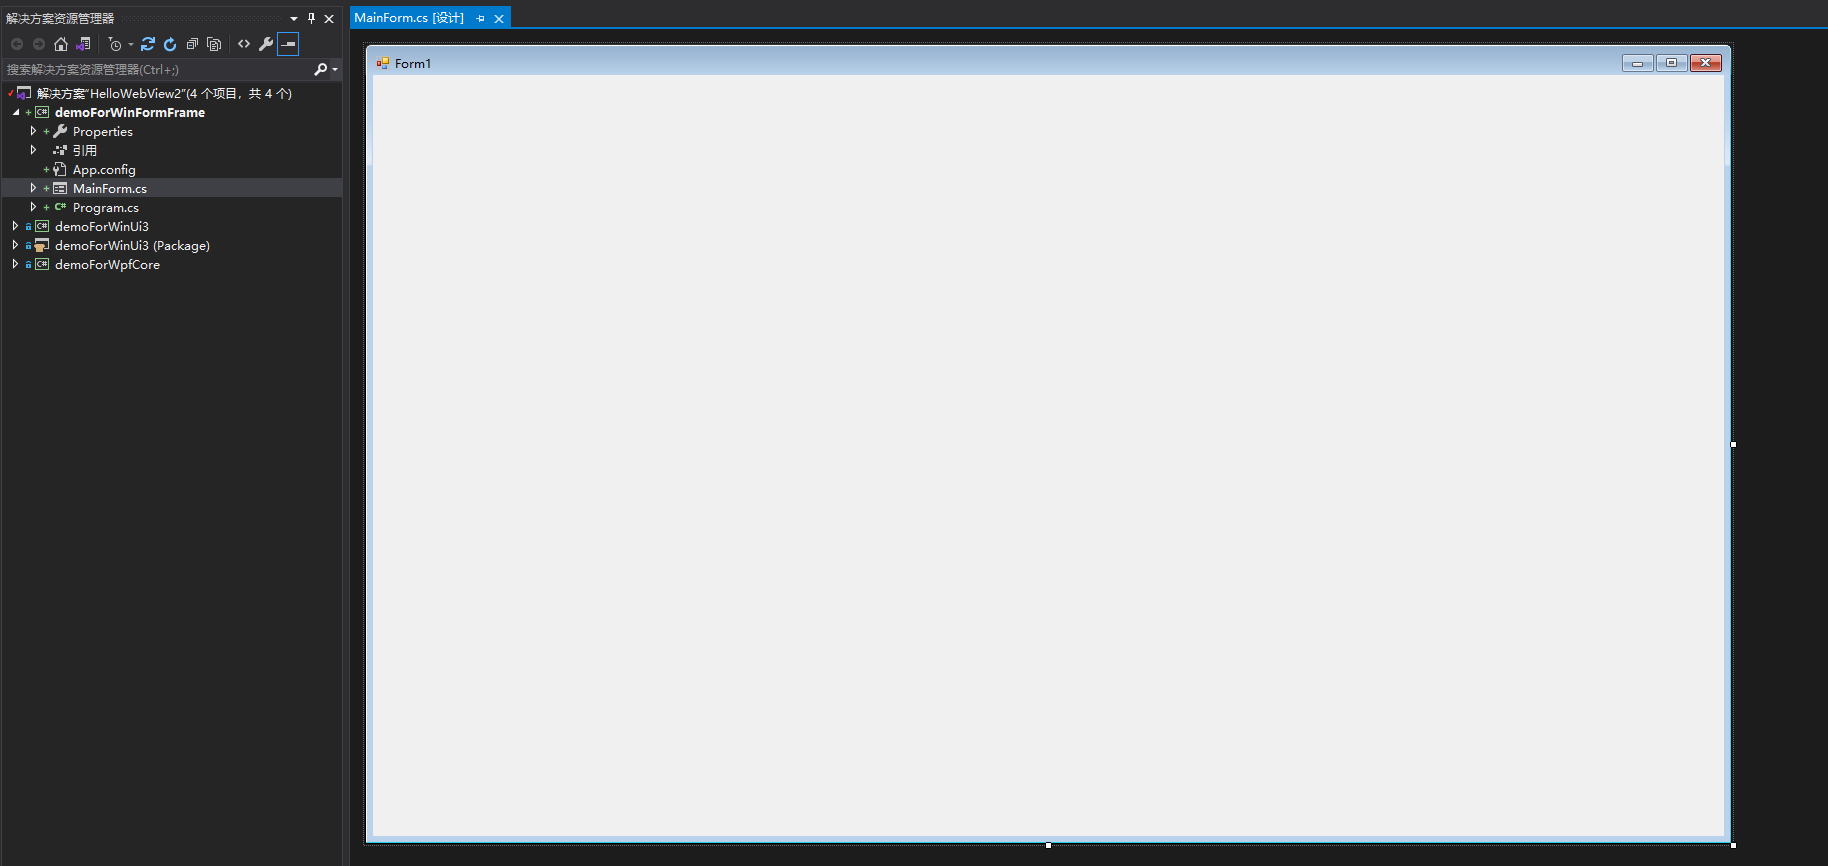
双击打开MainForm.cs文件,打开窗体设计视图。
在Visual Studio顶部菜单的"视图" => "工具栏",这时候我们会看到顶部会多出来一个WebView2 Windows Forms Control组,里面有个控件叫WebView2控件。

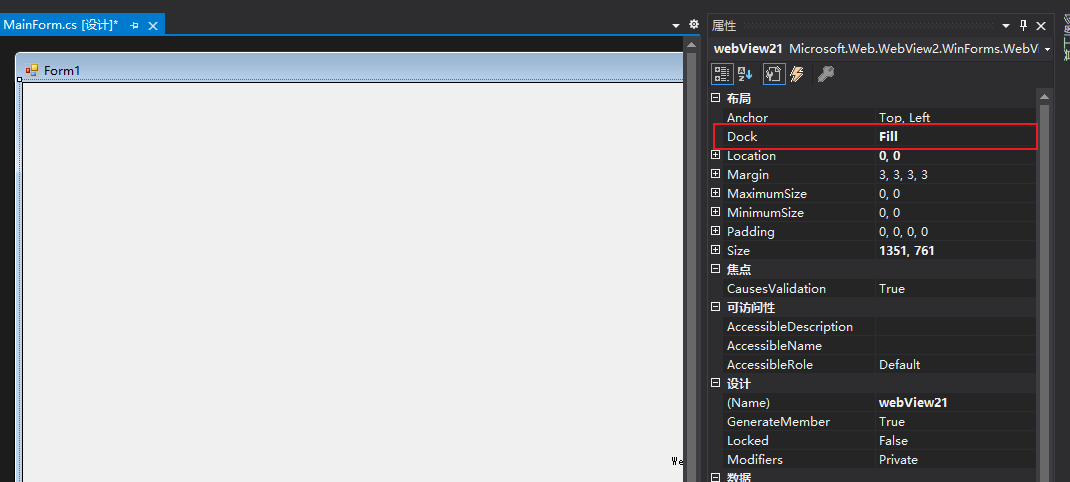
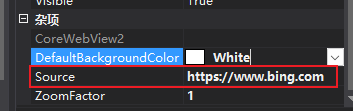
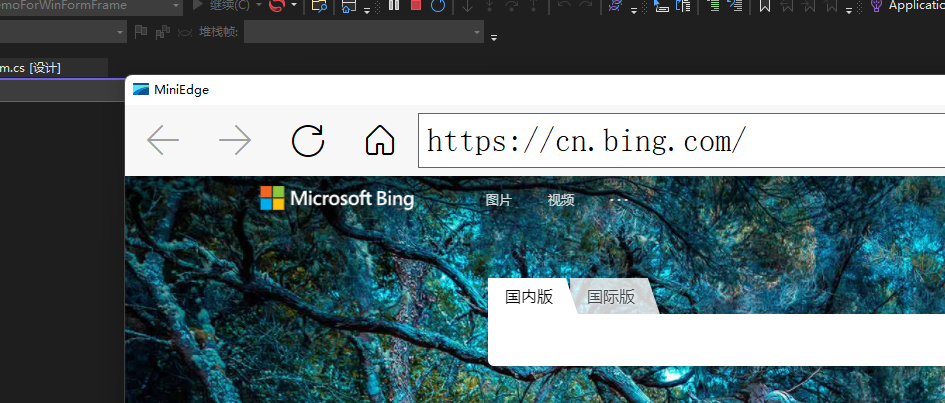
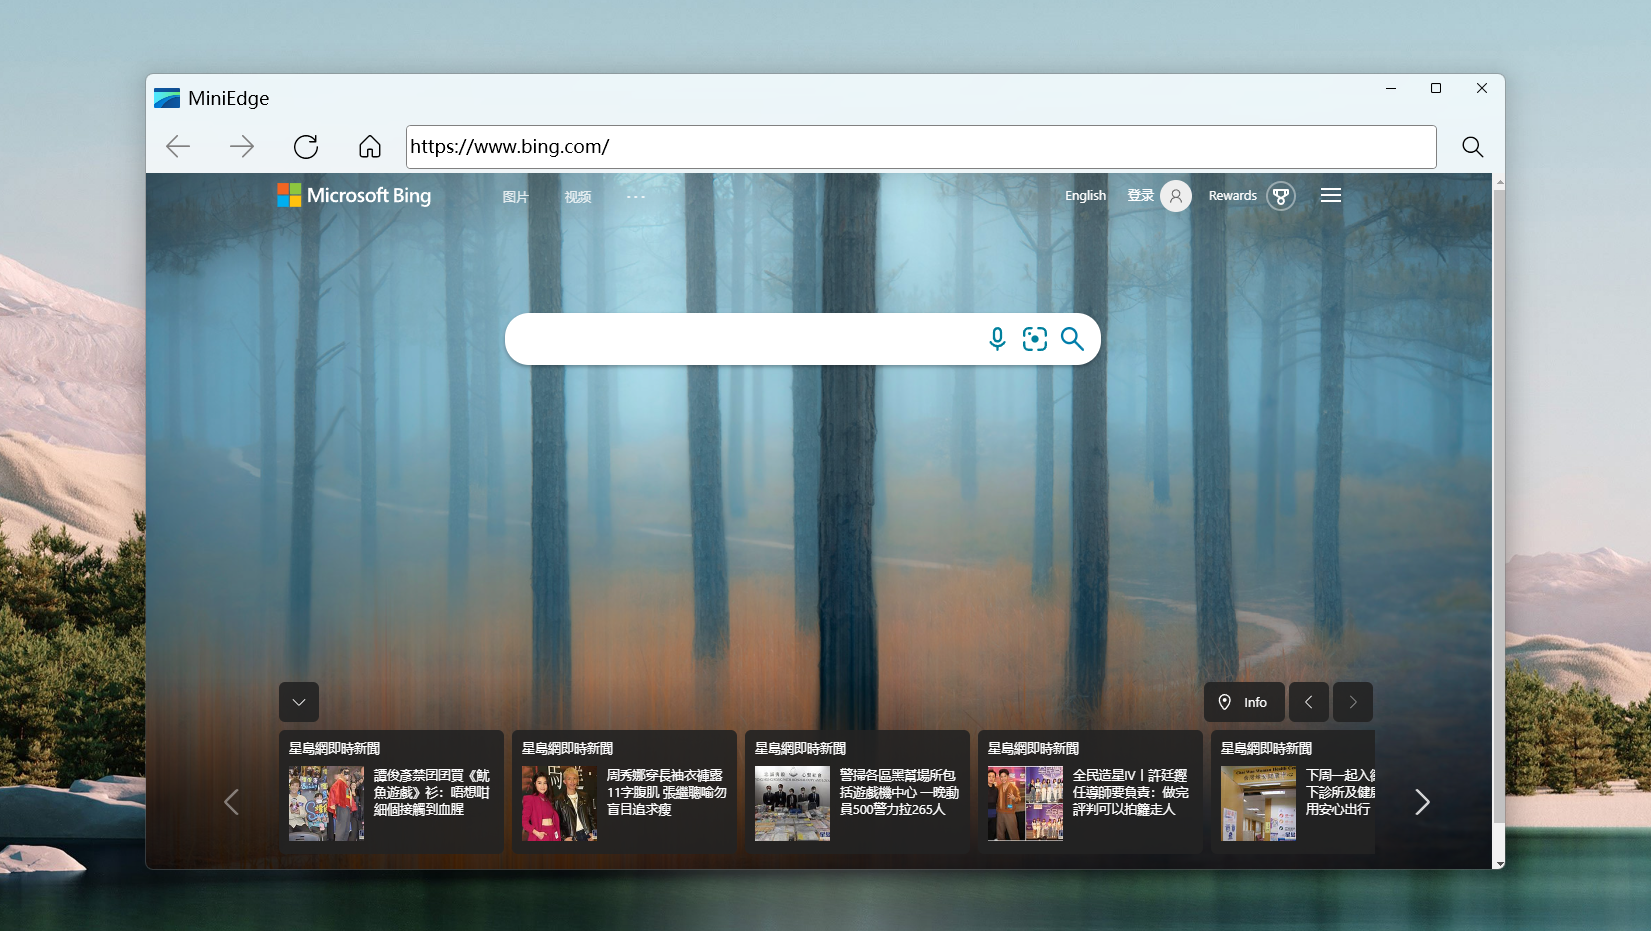
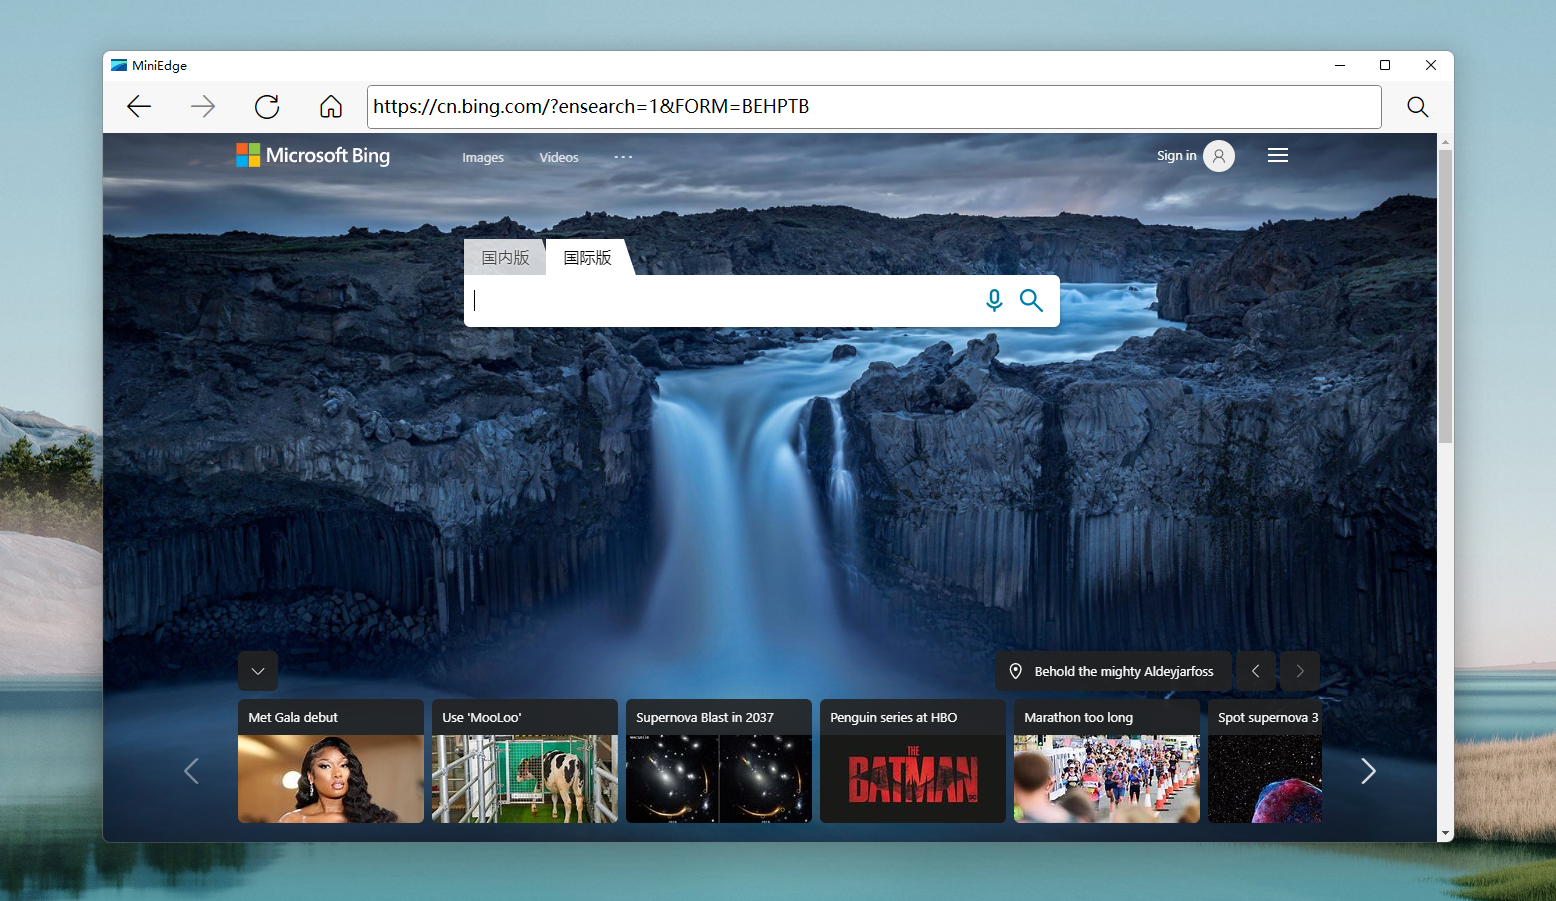
我们把它拖到右侧的窗体中,并且填充显示,并且我们给他取名为WebViewForMain,设置其初始的Source值为https://www.bing.com。
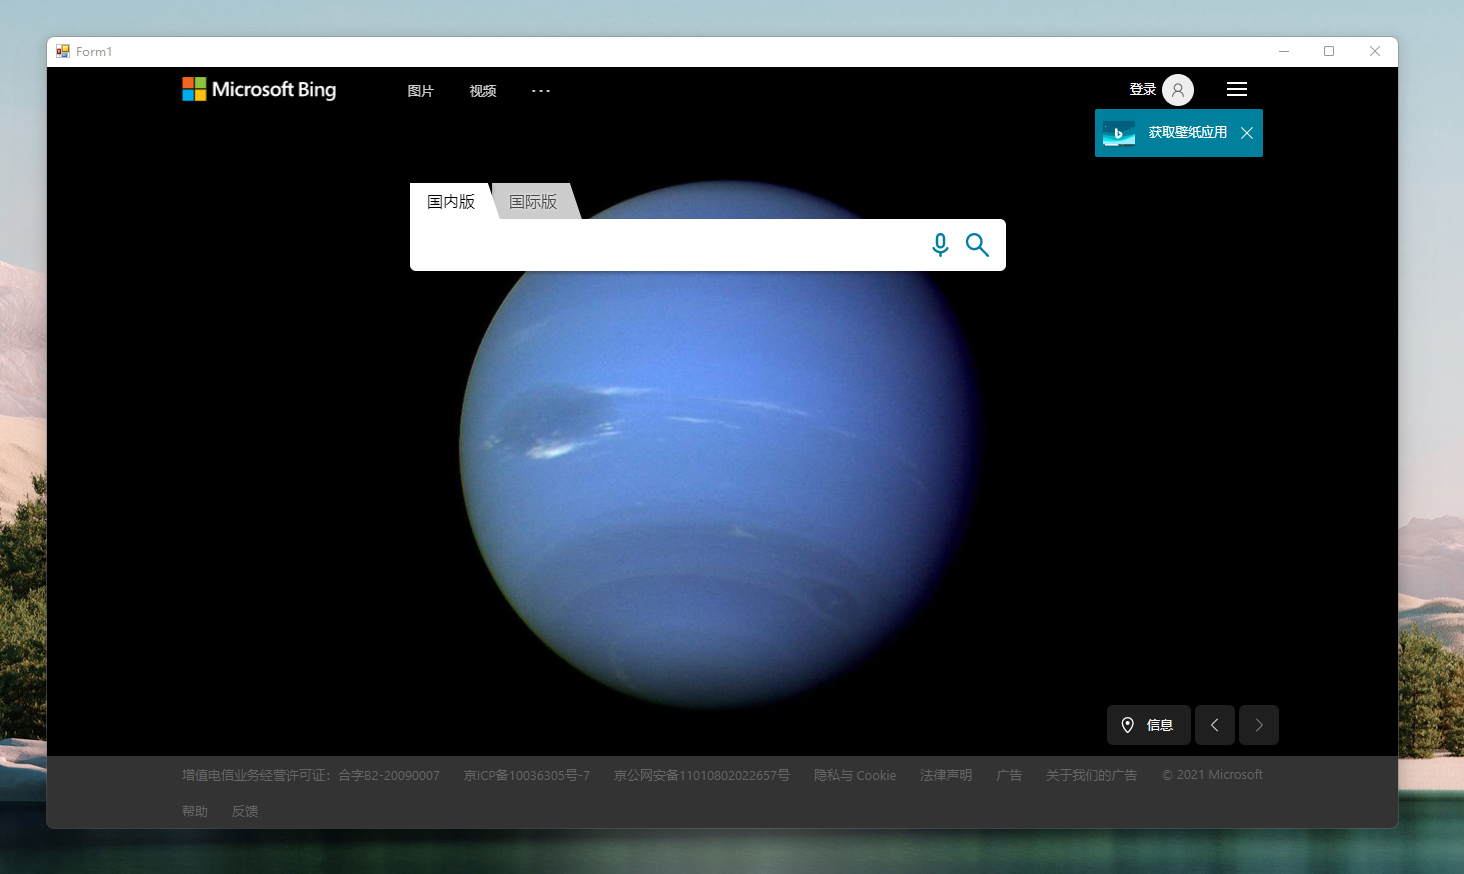
接下来,我们运行看看效果
给WebView添加导航功能
为了更好的展示WebView2的相关能力,我们当然需要给它插上导航的翅膀,为此我们需要构建一个可输入的面板和导航按钮。
1. 使用字体图标来构建按钮,准备字体资源
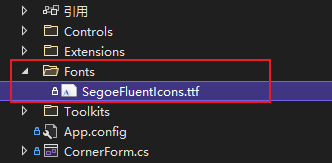
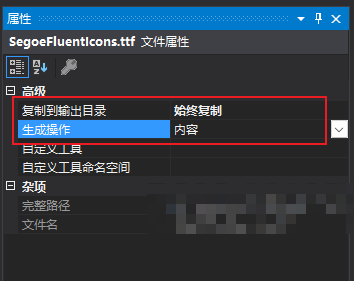
首先,我们还是需要引入SegoeFluentIcons.ttf这个字体图标文件,我们把它放在根目录的Fonts文件夹中,生成操作需设置成"内容",复制到输出目录设置为"始终复制"。

然后我们需要借助一个IconfontHelper的类来读取字体资源。
public class IconfontHelper
{
    //提供一个字体系列集合,该集合是基于客户端应用程序提供的字体文件生成的。
    private static System.Drawing.Text.PrivateFontCollection pfcc;

    public static System.Drawing.Text.PrivateFontCollection PFCC
    {
        get { return pfcc ?? LoadFont(); }
    }
    public static System.Drawing.Text.PrivateFontCollection LoadFont()
    {
        pfcc = new System.Drawing.Text.PrivateFontCollection();
        pfcc.AddFontFile(Environment.CurrentDirectory + "/Fonts/SegoeFluentIcons.ttf");
        return pfcc;
    }
}
2. 实验性的在WinForms上支持字体图标,并构建按钮
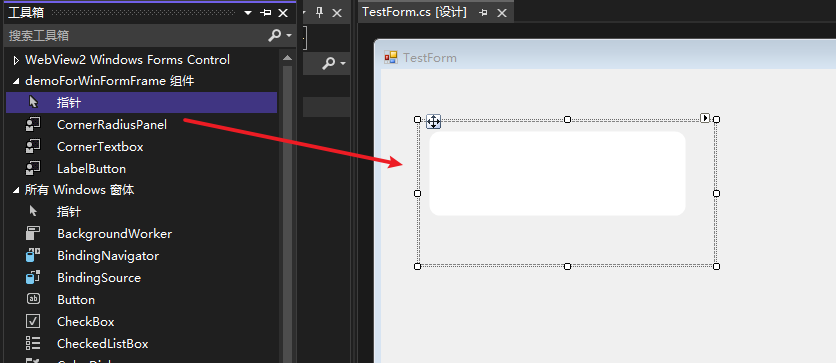
我们先尝试通过Panel + Label的组合来实现一个字体图标的按钮效果。
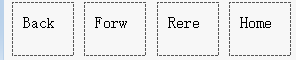
从左侧工具箱中拖取两个控件组合成上诉截图效果,然后在MainForm的Load函数中,我们需要给Label挂载图标字体和指定图标。
public MainForm()
{
    InitializeComponent();
    Load += MainForm_Load;
}

private void MainForm_Load(object sender, EventArgs e)
{
    InitButtonStyle();
}
具体初始化按钮样式的方法如下:
/// <summary>
/// 初始化按钮样式
/// </summary>
private void InitButtonStyle()
{
    #region InitButtonStyle

    // 后退按钮
    TextBlockForNaviBack.Text = "\ue0a6";
    TextBlockForNaviBack.Font = new Font(IconfontHelper.PFCC.Families[0], 24);

    // 前进按钮
    TextBlockForNaviForward.Text = "\ue0ab";
    TextBlockForNaviForward.Font = new Font(IconfontHelper.PFCC.Families[0], 24);

    // 停止按钮
    TextBlockForNaviStop.Text = "\ue106";
    TextBlockForNaviStop.Font = new Font(IconfontHelper.PFCC.Families[0], 26);

    // 刷新按钮
    TextBlockForNaviRefresh.Text = "\ue149";
    TextBlockForNaviRefresh.Font = new Font(IconfontHelper.PFCC.Families[0], 24);

    // 主页按钮
    TextBlockForNaviHome.Text = "\ue10f";
    TextBlockForNaviHome.Font = new Font(IconfontHelper.PFCC.Families[0], 24);

    // 搜索按钮
    TextBlockForNaviTarget.Text = "\uf78b";
    TextBlockForNaviTarget.Font = new Font(IconfontHelper.PFCC.Families[0], 24);

    #endregion
}
查看下运行效果:
效果还算让人满意。
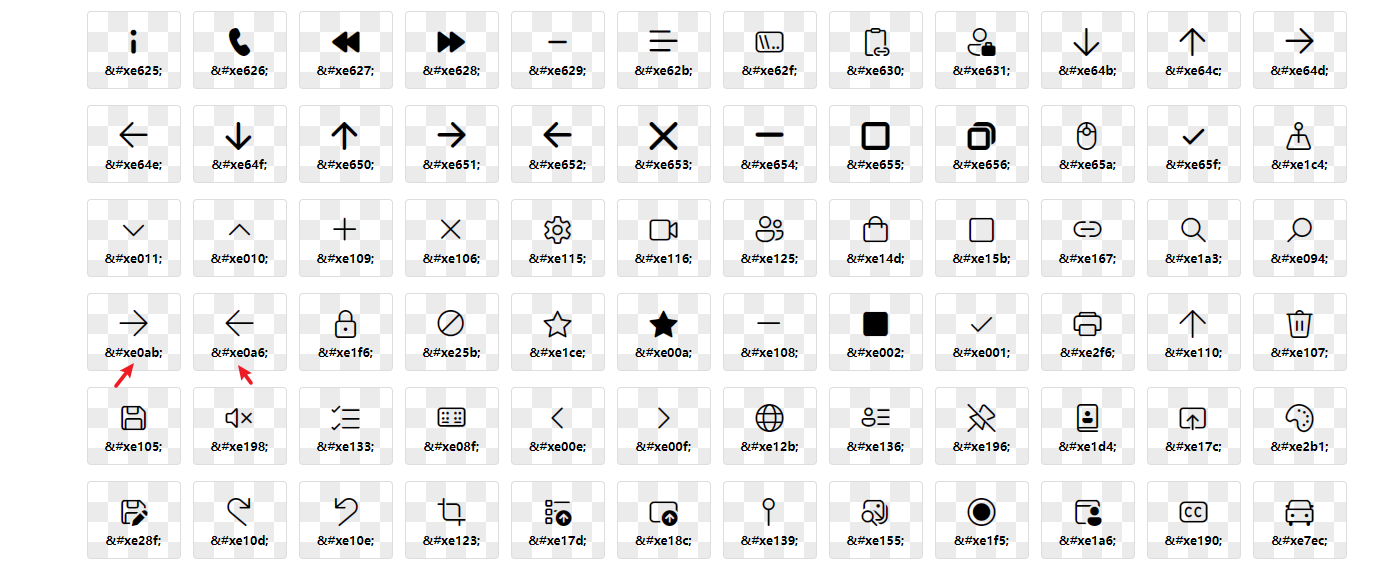
这里有个技巧就是,我应该如何得到每个图形对应的这个字符文本,这里我找到一个能够预览字体图标的小网站IconFont Preview By Luckly,进入后,我们选择解析本地的ttf文件。
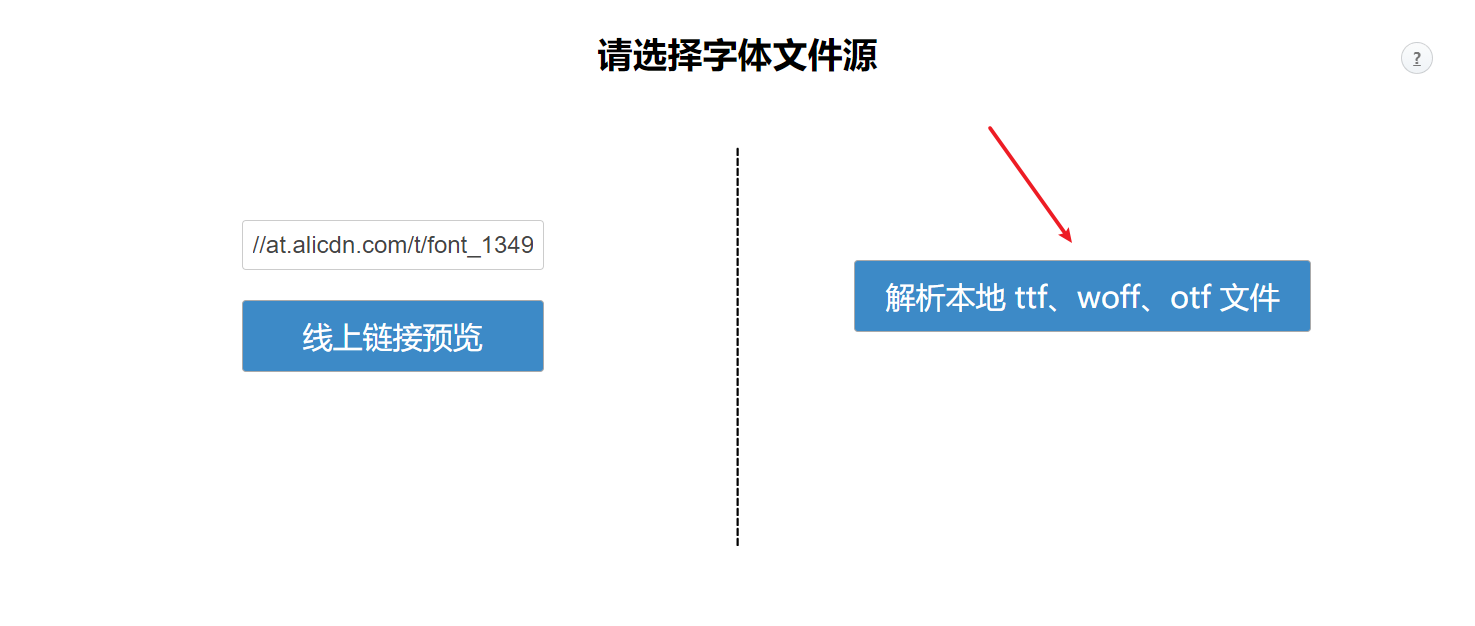
然后选中前面的SegoeFluentIcons.ttf文件上传并解析,然后它会把字体中所有图标的Unicode编码展示出来,这里我们以前进和后退两个图标为例,我们会看到他们的编码都是以开头和;结尾的,我们只需要提取剩下的字符,加上前缀\ue即可,比如前进按钮编码而言,最终的编码为\ue0ab,依次类推即可。
- 为Windows 11风格构建圆角按钮和圆角输入框控件,并自定义响应事件
我们知道,Win10是直角风格,但是Win11开始微软开始推行圆角,甚至默认窗体,你原来是直角的都会自动给你加成圆角。
那么我们也想办法来构建一组圆角的控件,查了一些资料,说实话没有找到特别满意的方案,最终找了个妥协的,那就是依靠绘制来做的一个圆角Panel来构建控件的圆角,它还有个缺点就是不太方便去改变颜色了。
public class CornerRadiusPanel: Panel
{
    protected override void OnPaint(PaintEventArgs e)
    {
        Graphics g = e.Graphics;
        g.SmoothingMode = SmoothingMode.AntiAlias;
        g.FillRoundedRectangle(new SolidBrush(Color.White), 10, 10, this.Width - 40, this.Height - 60, 10);
        SolidBrush brush = new SolidBrush(
            Color.Transparent
            );
        g.FillRoundedRectangle(brush, 12, 12, this.Width - 44, this.Height - 64, 10);
        g.DrawRoundedRectangle(new Pen(ControlPaint.Light(Color.Transparent, 0.00f)), 12, 12, this.Width - 44, this.Height - 64, 10);
        g.FillRoundedRectangle(new SolidBrush(Color.Transparent), 12, 12 + ((this.Height - 64) / 2), this.Width - 44, (this.Height - 64) / 2, 10);
    }
}
首先我们新建一个名为CornerRadiusPanel的自定义控件,让它继承自Panel,通过重写OnPaint这个事件来实现圆角的绘制,绘制的底色暂且先用白色Color.White,这里还依赖一个全局静态帮助类GraphicsExtension,有了它,我们便可以构建一个圆角的面板。
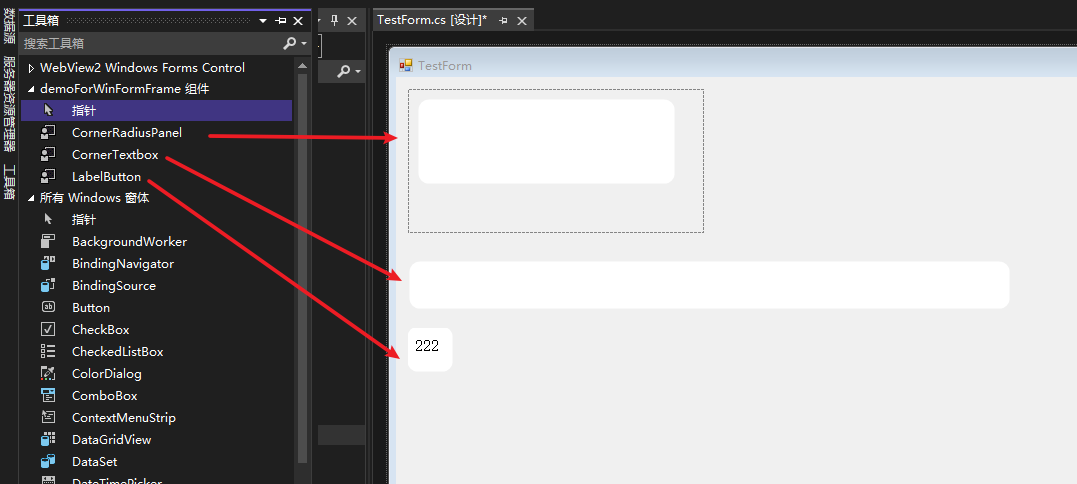
基于它,我们结合Label和TextBox这两个自带控件,分别组建自定义控件LabelButton和CornerTextbox,都用这个CornerRadiusPanel做圆角的底盘。
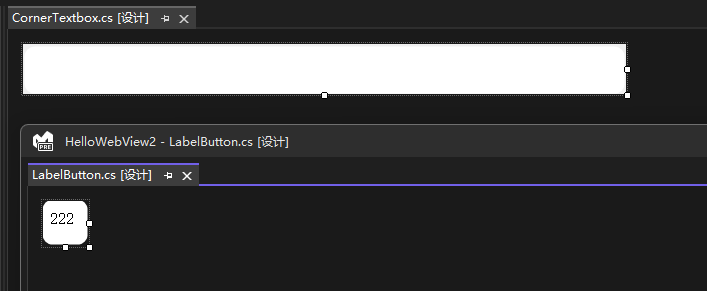
控件的相对位置可能需要耐心的调整,为了更加精致一点,这里我们的LabelButton控件采用45x45的尺寸,CornerTextbox控件采用603x50的尺寸,其中内嵌的TextBox字体大小采用20pt。
.Net Core Wpf项目添加并使用WebView2控件
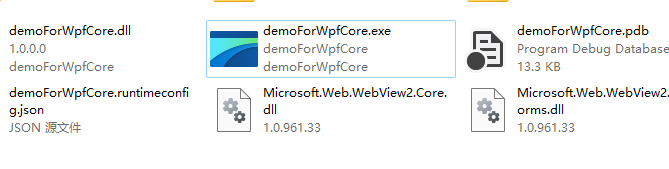
.Net Core的WPF项目安装WebView2包
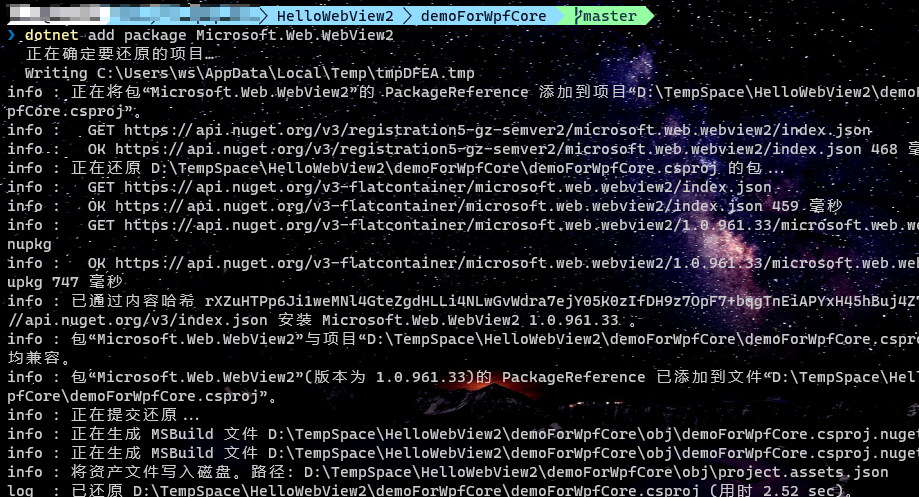
a. 命令行安装"Microsoft.Web.WebView2"
dotnet add package Microsoft.Web.WebView2
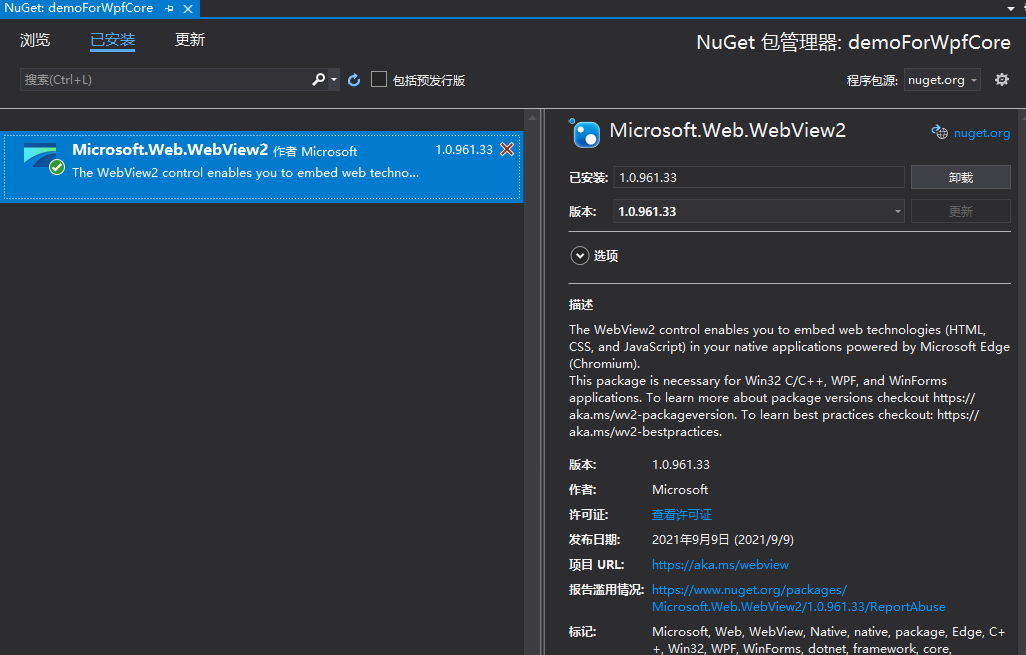
b. 或者项目右键Nuget包管理,通过可视化界面安装"Microsoft.Web.WebView2"
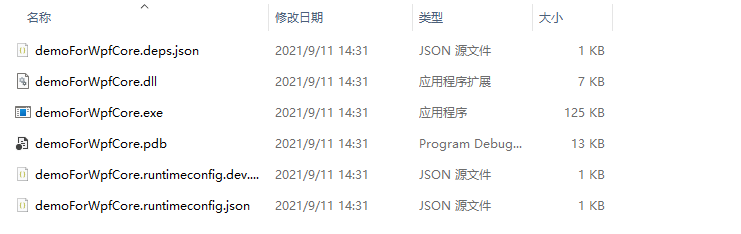
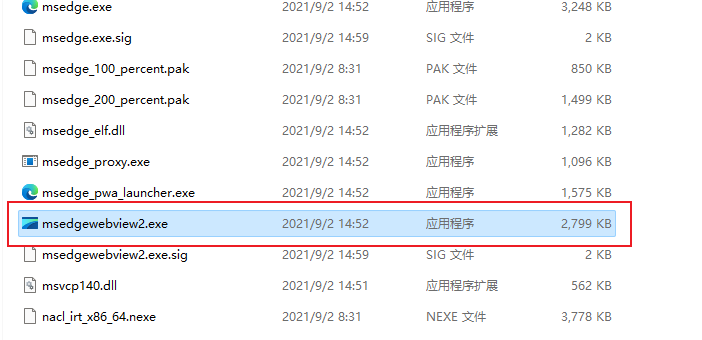
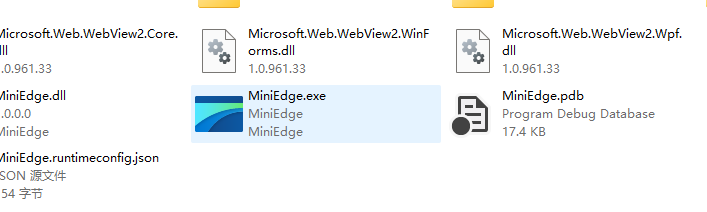
c. 安装之前,Bin目录结构
d. 安装之后,Bin目录结构
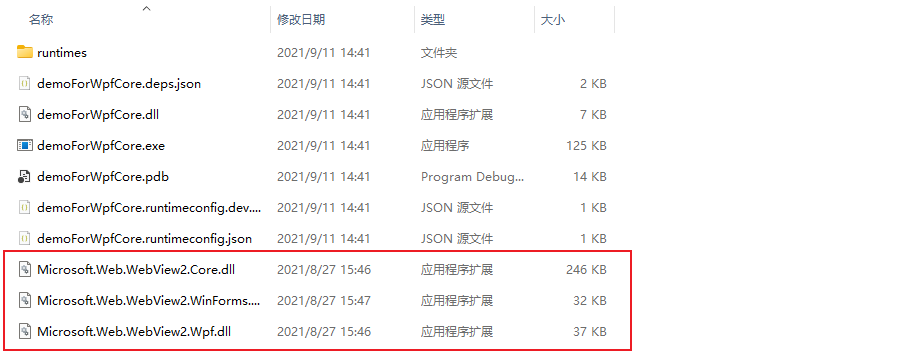
发现,新增了Microsoft.Web.WebView2.Core.dll、Microsoft.Web.WebView2.WinForms.dll、Microsoft.Web.WebView2.Wpf.dll这三个文件。
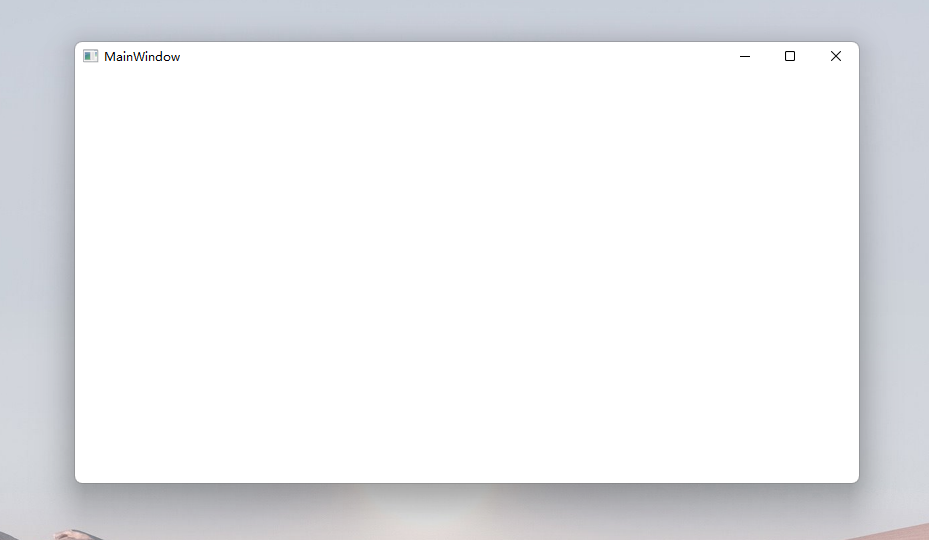
e. 安装之后,运行效果
f. 命令行打开项目位置
explorer.exe .
初探嵌入WebView2控件
https://docs.microsoft.com/zh-cn/microsoft-edge/webview2/get-started/wpf
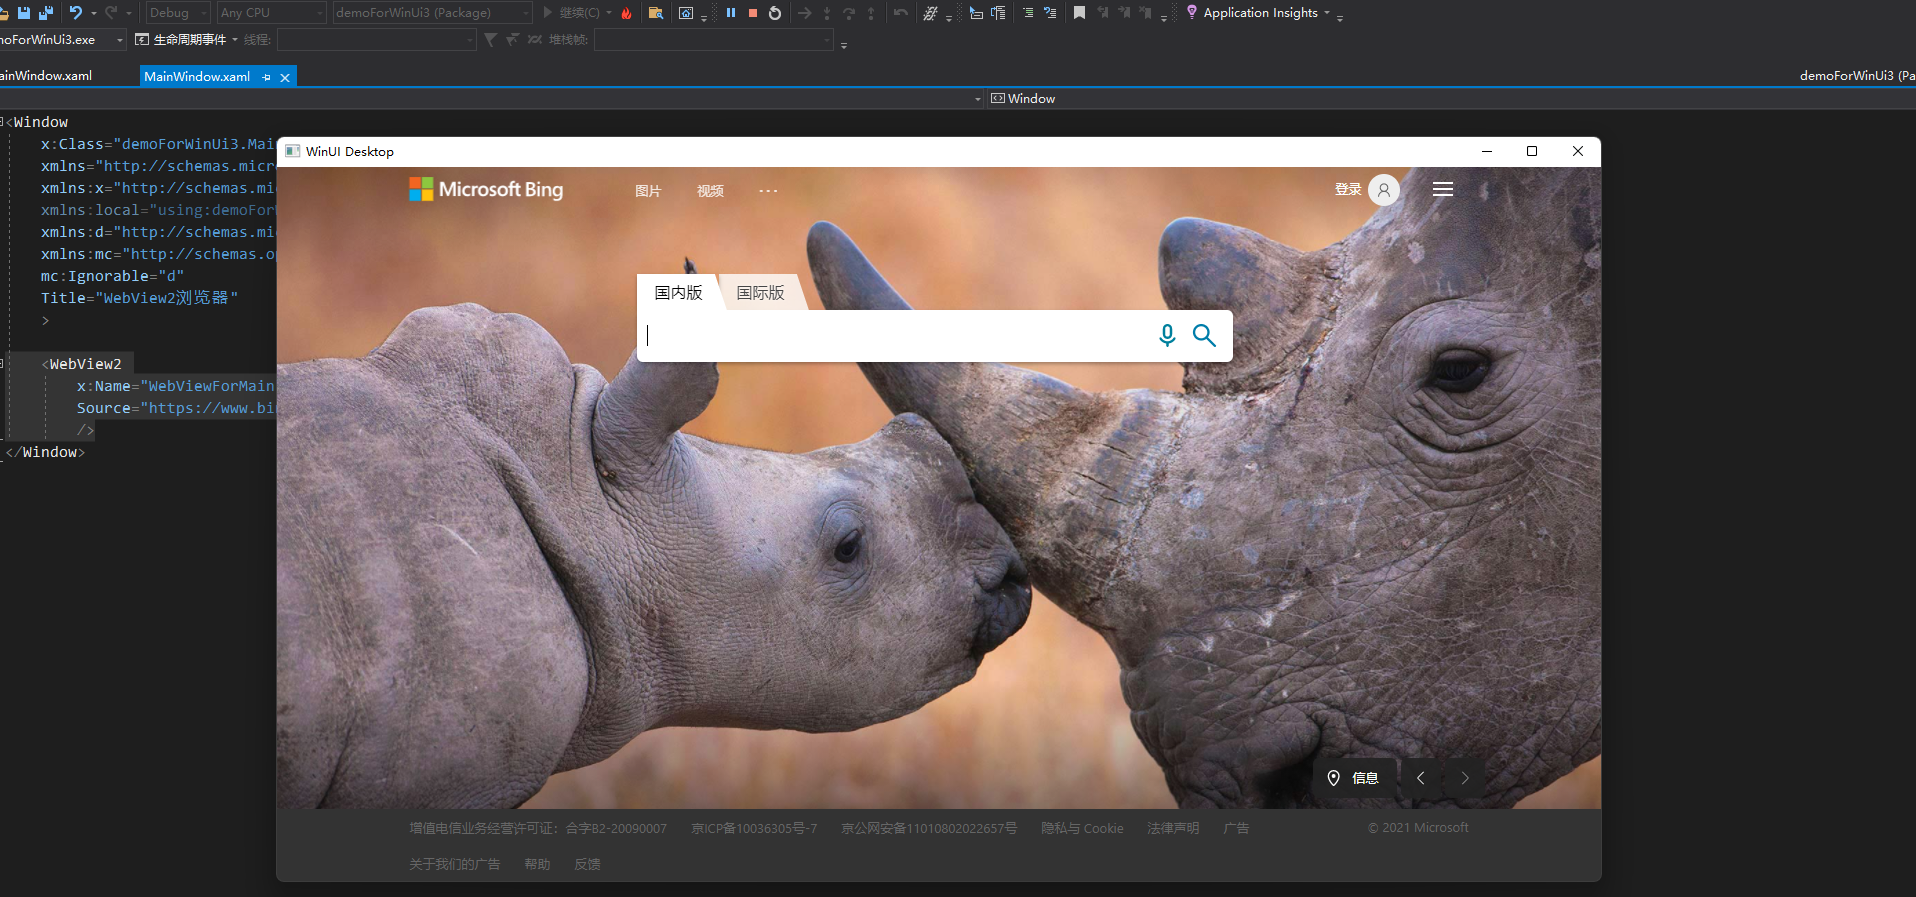
在demoForWpfCore项目的MainWindow.xaml文件中。
1. 新增引用"Microsoft.Web.WebView2.Wpf"的命名空间
xmlns:wpf="clr-namespace:Microsoft.Web.WebView2.Wpf;assembly=Microsoft.Web.WebView2.Wpf"
2. 添加"WebView2"控件即可,其中"Source"便是启动时加载的网址设定
<Window
x:Class="demoForWpfCore.MainWindow"
xmlns="http://schemas.microsoft.com/winfx/2006/xaml/presentation"
xmlns:x="http://schemas.microsoft.com/winfx/2006/xaml"
xmlns:d="http://schemas.microsoft.com/expression/blend/2008"
xmlns:mc="http://schemas.openxmlformats.org/markup-compatibility/2006"
xmlns:local="clr-namespace:demoForWpfCore"
xmlns:wpf="clr-namespace:Microsoft.Web.WebView2.Wpf;assembly=Microsoft.Web.WebView2.Wpf"
mc:Ignorable="d"
Title="MainWindow"
Height="450"
Width="800"
>
<Grid>
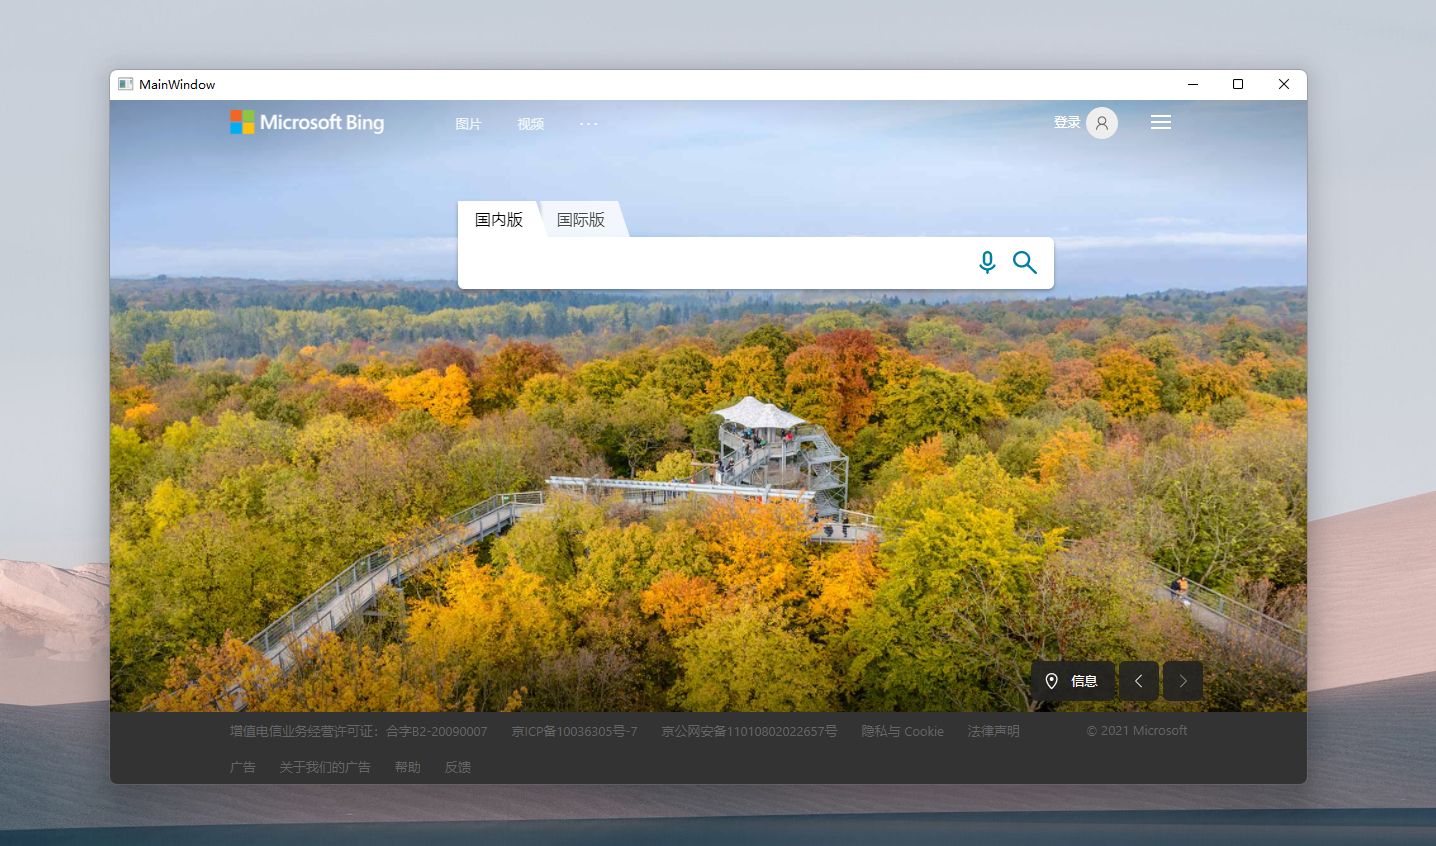
<wpf:WebView2 Source="https://www.bing.com"/>
</Grid>
</Window>
3. 运行着"WebView2"控件的实际效果
给WebView添加导航功能
为了更好的展示WebView2的相关能力,我们当然需要给它插上导航的翅膀,为此我们需要构建一个可输入的面板和导航按钮。
1. 添加Gird布局,将WebView和操作面板上下拆分
<Grid>
    <Grid.RowDefinitions>
        <RowDefinition Height="Auto"/>
        <RowDefinition Height="*"/>
    </Grid.RowDefinitions>
    <Grid
        Grid.Row="0"
        x:Name="GirdForOperate"
        >
    </Grid>
    <wpf:WebView2
        x:Name="WebViewForMain"
        Grid.Row="1"
        Source="https://www.bing.com"
        />
</Grid>
2. 在操作面板添加TextBox地址输入框和导航按钮
这里我们为了美观一点,采用Border包起来,并且设置一定的圆角,而且采用Gird来做左右布局。
<Grid
    Grid.Row="0"
    x:Name="GirdForOperate"
    Margin="8,4"
    >
    <Grid.ColumnDefinitions>
        <ColumnDefinition Width="*"/>
        <ColumnDefinition Width="8"/>
        <ColumnDefinition Width="Auto"/>
    </Grid.ColumnDefinitions>
    <Border
        x:Name="BorderForSource"
        CornerRadius="4"
        Grid.Column="0"
        Height="44"
        BorderBrush="Gray"
        BorderThickness="1"
        Padding="4"
        >
        <TextBox
            x:Name="TextBoxForSource"
            BorderThickness="0"
            TextAlignment="Left"
            TextWrapping="NoWrap"
            Padding="0,6,0,4"
            Text=""
            FontSize="18"
            KeyDown="TextBoxForSource_KeyDown"
            />
    </Border>

    <Border
        x:Name="BorderForNavi"
        CornerRadius="4"
        Grid.Column="2"
        BorderBrush="#0780d8"
        BorderThickness="1"
        Background="#39baf4"
        Padding="4"
        MouseDown="BorderForNavi_MouseDown"
        >
        <TextBlock
            x:Name="TextBlockForNavi"
            Text="导航"
            Width="100"
            FontSize="18"
            Background="Transparent"
            Foreground="White"
            TextAlignment="Center"
            VerticalAlignment="Center"
            />
    </Border>

</Grid>
这里我们给BorderForNavi控件挂载一个BorderForNavi_MouseDown事件,给TextBoxForSource控件挂载一个TextBoxForSource_KeyDown事件。
实际效果如下:

3. 程序启动的时候,自动把当前WebView的网址填写到网址输入框中
public MainWindow()
{
    InitializeComponent();
    Loaded += MainWindow_Loaded;
}

private void MainWindow_Loaded(object sender, RoutedEventArgs e)
{
    TextBoxForSource.Text = WebViewForMain.Source?.ToString();
}
4. 响应导航按钮的BorderForNavi_MouseDown点击事件
private void BorderForNavi_MouseDown(object sender, MouseButtonEventArgs e)
{
    var sourceContext = TextBoxForSource.Text?.Trim();
    WebViewForMain.CoreWebView2.Navigate(sourceContext);
}
这里需要用到WebView控件实例的CoreWebView2对象的Navigate方法。
5. 响应地址输入框的TextBoxForSource_KeyDown回车事件
通常,根据用户的使用习惯,我们输入新的地址后会习惯性的回车,那么我们支持下这个习惯,增加对"地址输入框"的回车事件支持,这里运用控件"按键触发(KeyDown)"事件来做,判断e.Key == Key.Enter的情况即表示触发了回车事件。
private void TextBoxForSource_KeyDown(object sender, KeyEventArgs e)
{
    if(e.Key == Key.Enter)
    {
        BorderForNavi_MouseDown(null, null);
    }
}
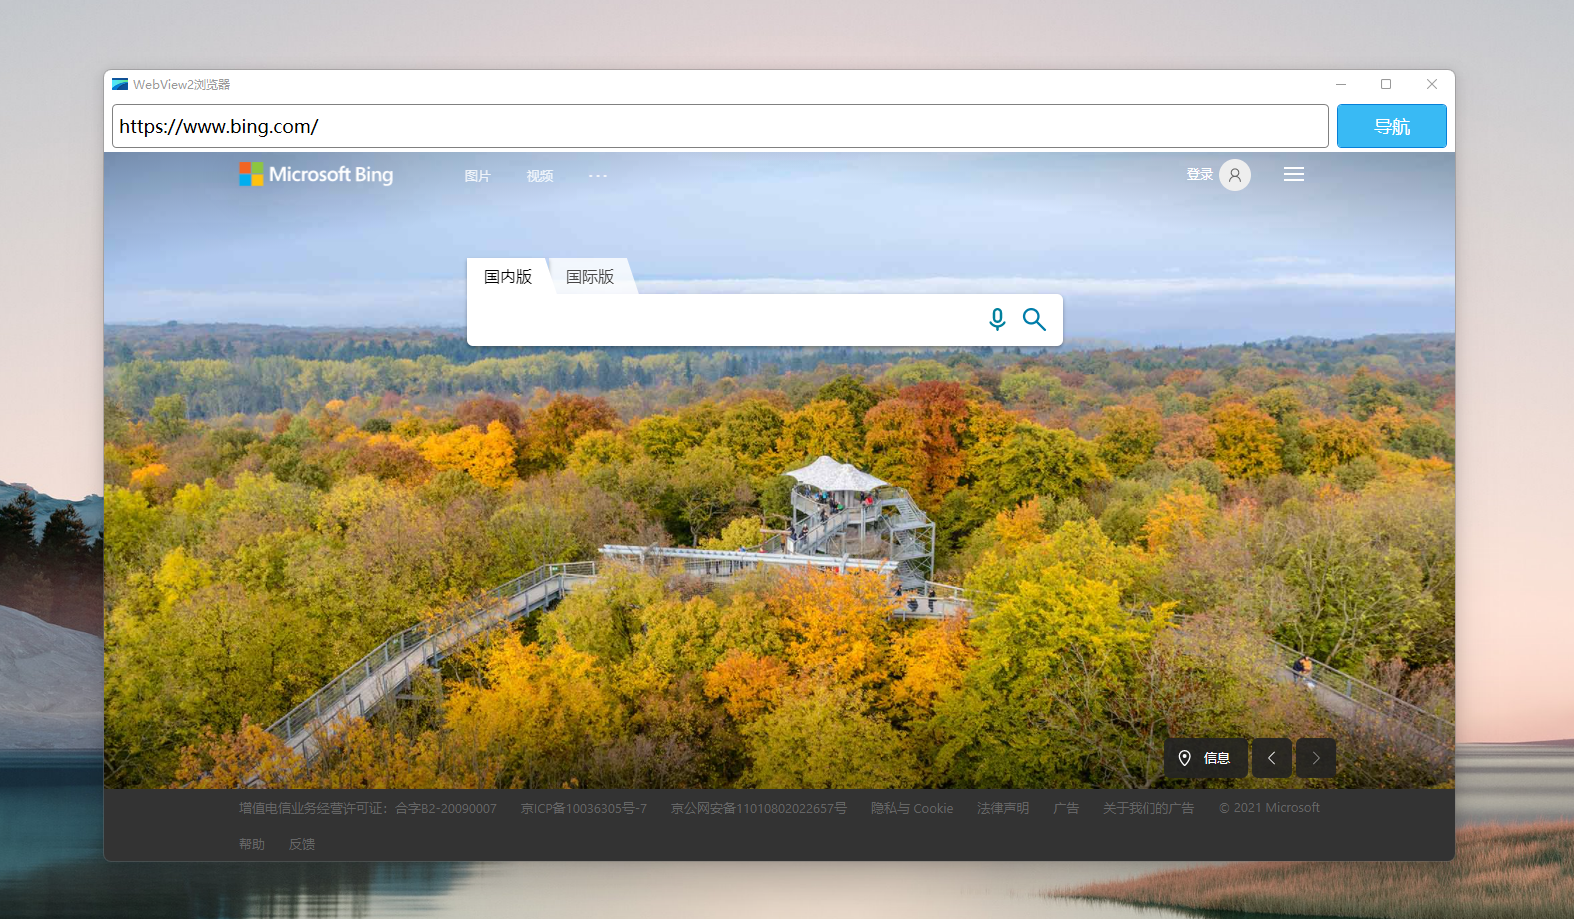
6. 优化窗体启动位置、窗体大小和名称
<Window
    ...
    Title="WebView2浏览器"
    Height="800"
    Width="1367"
    WindowStartupLocation="CenterScreen"
    WindowState="Normal"
    />
最终效果如下图:
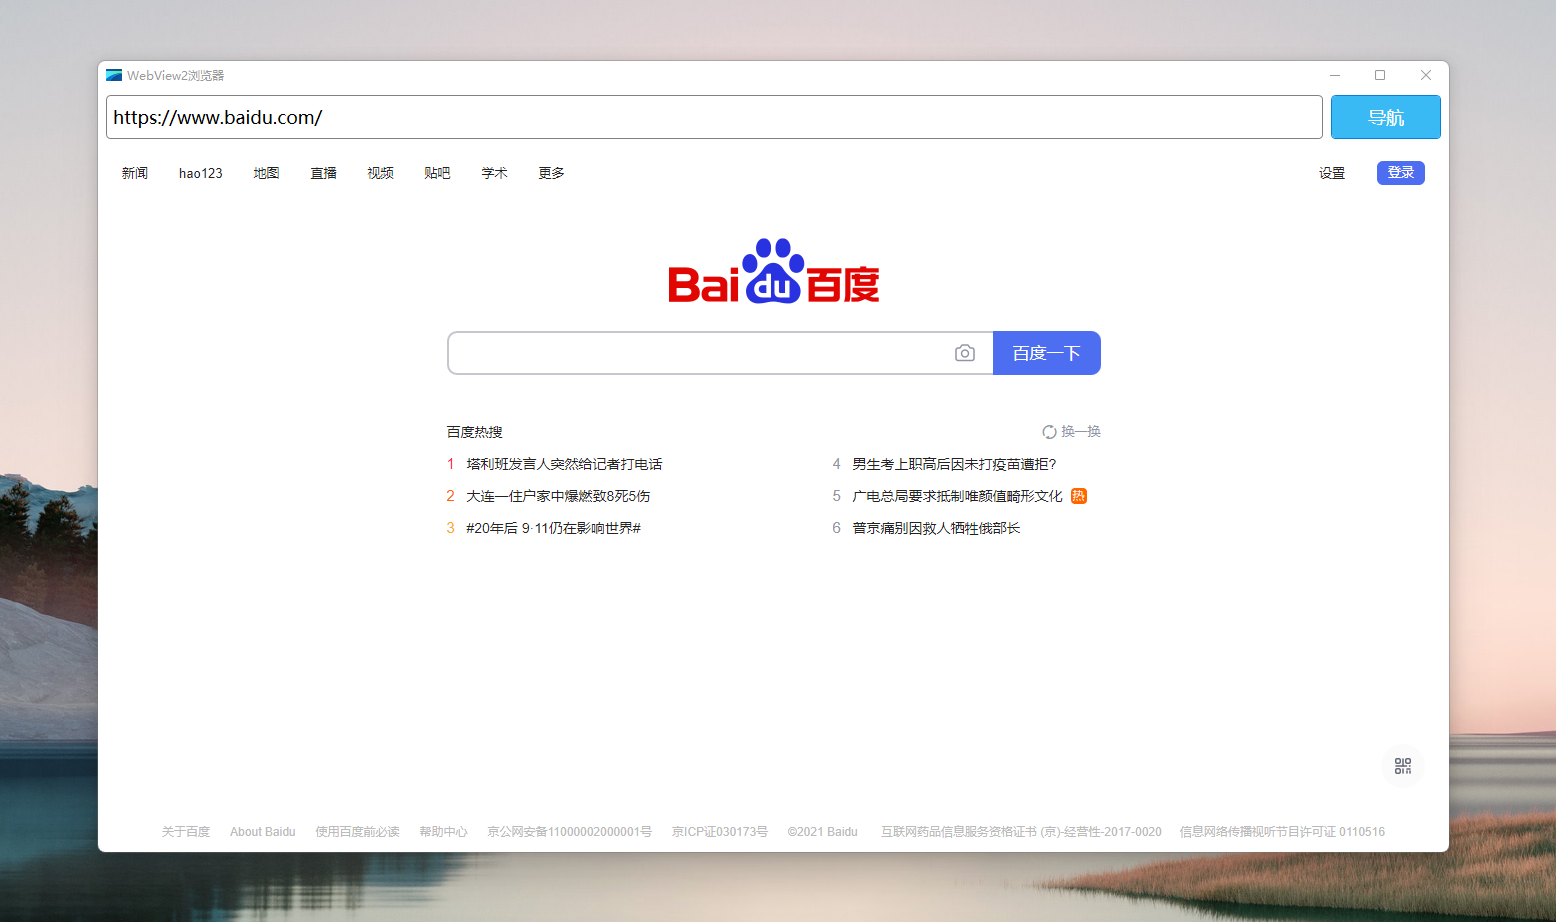
修改地址栏内容并回车
尝试WPF上实现Windows 11的Mica风格
最近朋友分享关于一个在WPF上实现Windows 11的Mica风格的演示项目。
它的文章发布在Apply Mica to a WPF app on Windows 11
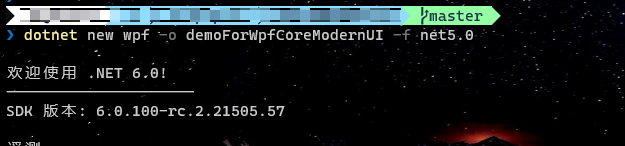
a. 新建名为demoForWpfCoreModernUI的Wpf的.Net Core 5.0的项目
dotnet new wpf -o demoForWpfCoreModernUI -f net5.0
dotnet sln add .\demoForWpfCoreModernUI\demoForWpfCoreModernUI.csproj

b. 修改demoForWpfCoreModernUI项目的目标框架
这里你可能会问,为什么要改这个?嗯,我试过,如果TargetFramework是net5.0-windows的时候,安装ModernWpfUI这个组件会跑不起来。
无法引用ModernWpf.dll,因为它使用了对WinRT的内置支持,而.NET 5和更高版本中不再支持它。需要支持.NET 5的更新版本组件。更多信息查看Built-in support for WinRT is removed from .NET
但是我发现Mica-WPF-Sample项目是可以用的,最终发现它虽然也是使用.Net 5,但是指定了更具体的一个版本,也许是被微软拦截之前的。
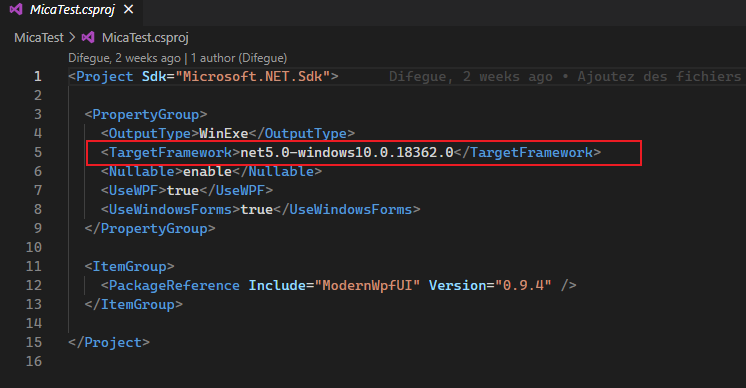
所以,这里我们也将demoForWpfCoreModernUI项目的目标框架修改为这个net5.0-windows10.0.18362.0。
<Project Sdk="Microsoft.NET.Sdk">

  <PropertyGroup>
    <OutputType>WinExe</OutputType>
    <TargetFramework>net5.0-windows10.0.18362.0</TargetFramework>
    <Nullable>enable</Nullable>
    <UseWPF>true</UseWPF>
  </PropertyGroup>

</Project>
c. 安装ModernWpfUI包,引入App资源
实际上,要在Wpf里面开启对Mica的支持是不需要用到它的,但是作者说,要实现对黑暗模式的响应,所以这里用到ModernWpfUI包。
dotnet add package ModernWpfUI

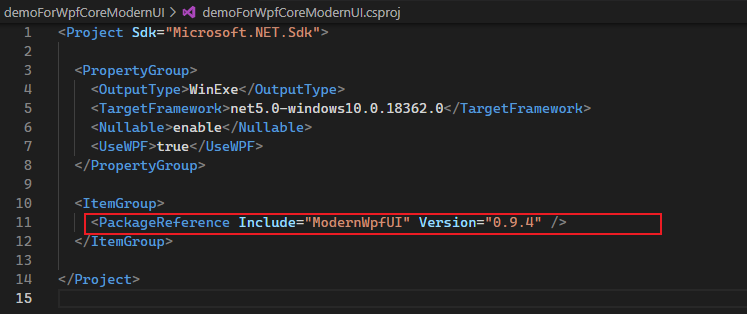
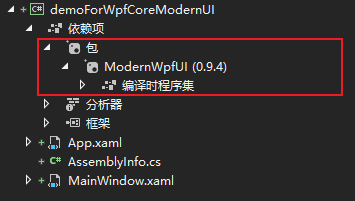
注意,只有改了前面的TargetFramework为net5.0-windows10.0.18362.0,这里的依赖项才是干净的,否则你会看到ModernWpfUI下面还有一个Microsoft.Windows.SDK.Contracts,这也是WinRT不被支持的根源。
接下来,我们需要在App.xaml中引入ModernWpfUI的样式资源。
<Application x:Class="demoForWpfCoreModernUI.App"
             xmlns="http://schemas.microsoft.com/winfx/2006/xaml/presentation"
             xmlns:x="http://schemas.microsoft.com/winfx/2006/xaml"
             xmlns:local="clr-namespace:demoForWpfCoreModernUI"
             StartupUri="MainWindow.xaml"
             xmlns:ui="http://schemas.modernwpf.com/2019">
    <Application.Resources>
        <ResourceDictionary>
            <ResourceDictionary.MergedDictionaries>
                <ui:ThemeResources />
                <ui:XamlControlsResources />
                <!-- Other merged dictionaries here -->
            </ResourceDictionary.MergedDictionaries>
            <!-- Other app resources here -->
        </ResourceDictionary>
    </Application.Resources>
</Application>
d. 在窗体中引入Mica的Dwm支持
据说,微软偷偷的在DWMWINDOWATTRIBUTE加了枚举值,这里面我们主要是利用DWMWA_USE_IMMERSIVE_DARK_MODE和DWMWA_MICA_EFFECT这两个来实现今天的Mica效果。
enum DWMWINDOWATTRIBUTE
{
    DWMWA_NCRENDERING_ENABLED = 1,              // [get] Is non-client rendering enabled/disabled
    [...]
+   DWMWA_USE_HOSTBACKDROPBRUSH,                // [set] BOOL, Allows the use of host backdrop brushes for the window.
+   DWMWA_USE_IMMERSIVE_DARK_MODE = 20,         // [set] BOOL, Allows a window to either use the accent color, or dark, according to the user Color Mode preferences.
+   DWMWA_WINDOW_CORNER_PREFERENCE = 33,        // [set] WINDOW_CORNER_PREFERENCE, Controls the policy that rounds top-level window corners
+   DWMWA_BORDER_COLOR,                         // [set] COLORREF, The color of the thin border around a top-level window
+   DWMWA_CAPTION_COLOR,                        // [set] COLORREF, The color of the caption
+   DWMWA_TEXT_COLOR,                           // [set] COLORREF, The color of the caption text
+   DWMWA_VISIBLE_FRAME_BORDER_THICKNESS,       // [get] UINT, width of the visible border around a thick frame window
[...]
+   DWMWA_MICA_EFFECT = 1029,                   // [set] BOOL, undocumented??
    DWMWA_LAST
};
前往MainWindow.xaml.cs文件,新增如下部分:
namespace demoForWpfCoreModernUI
{
    /// <summary>
    /// Interaction logic for MainWindow.xaml
    /// </summary>
    public partial class MainWindow : Window
    {
        public MainWindow()
        {
            InitializeComponent();
            Loaded += MainWindow_Loaded;
        }

        private async void MainWindow_Loaded(object sender, RoutedEventArgs e)
        {
            // Get PresentationSource
            PresentationSource presentationSource = PresentationSource.FromVisual((Visual)sender);

            // Subscribe to PresentationSource's ContentRendered event
            presentationSource.ContentRendered += Window_ContentRendered;
        }

        [DllImport("dwmapi.dll")]
        public static extern int DwmSetWindowAttribute(IntPtr hwnd, DwmWindowAttribute dwAttribute, ref int pvAttribute, int cbAttribute);

        [Flags]
        public enum DwmWindowAttribute : uint
        {
            DWMWA_USE_IMMERSIVE_DARK_MODE = 20,
            DWMWA_MICA_EFFECT = 1029
        }

        // Enable Mica on the given HWND.
        public static void EnableMica(HwndSource source, bool darkThemeEnabled)
        {
            int trueValue = 0x01;
            int falseValue = 0x00;

            // Set dark mode before applying the material, otherwise you'll get an ugly flash when displaying the window.
            if (darkThemeEnabled)
                DwmSetWindowAttribute(source.Handle, DwmWindowAttribute.DWMWA_USE_IMMERSIVE_DARK_MODE, ref trueValue, Marshal.SizeOf(typeof(int)));
            else
                DwmSetWindowAttribute(source.Handle, DwmWindowAttribute.DWMWA_USE_IMMERSIVE_DARK_MODE, ref falseValue, Marshal.SizeOf(typeof(int)));

            DwmSetWindowAttribute(source.Handle, DwmWindowAttribute.DWMWA_MICA_EFFECT, ref trueValue, Marshal.SizeOf(typeof(int)));
        }

        public static void UpdateStyleAttributes(HwndSource hwnd)
        {
            // You can avoid using ModernWpf here and just rely on Win32 APIs or registry parsing if you want to.
            var darkThemeEnabled = ModernWpf.ThemeManager.Current.ActualApplicationTheme == ModernWpf.ApplicationTheme.Dark;

            EnableMica(hwnd, darkThemeEnabled);
        }

        private void Window_ContentRendered(object sender, System.EventArgs e)
        {
            // Apply Mica brush and ImmersiveDarkMode if needed
            UpdateStyleAttributes((HwndSource)sender);

            // Hook to Windows theme change to reapply the brushes when needed
            ModernWpf.ThemeManager.Current.ActualApplicationThemeChanged += (s, ev) => UpdateStyleAttributes((HwndSource)sender);
        }
    }
}
注意还要添加两个命名空间的引用:
using System.Runtime.InteropServices;
using System.Windows.Interop;
e. 重写Window窗体的WindowChrome
我们需要在MainWindow.xaml文件中,新增对WindowChrome.WindowChrome的重写。
<WindowChrome.WindowChrome>
    <WindowChrome
        CaptionHeight="20"
        ResizeBorderThickness="8"
        CornerRadius="0"
        GlassFrameThickness="-1"
        UseAeroCaptionButtons="True"
        />
</WindowChrome.WindowChrome>
另外为了达到最终效果,我们需要将Window的背景色设置成透明。
<Window
    x:Class="demoForWpfCoreModernUI.MainWindow"
    xmlns="http://schemas.microsoft.com/winfx/2006/xaml/presentation"
    xmlns:x="http://schemas.microsoft.com/winfx/2006/xaml"
    xmlns:d="http://schemas.microsoft.com/expression/blend/2008"
    xmlns:mc="http://schemas.openxmlformats.org/markup-compatibility/2006"
    xmlns:local="clr-namespace:demoForWpfCoreModernUI"
    mc:Ignorable="d"
    Title="MainWindow"
    Height="450"
    Width="800"
    Background="Transparent"
    >

    ...
另外,为了让右侧的那些按钮处于正确的位置,我们还可以自定义
WindowChrome中的NonClientFrameEdges来修复Wpf的这个bug。
<WindowChrome.WindowChrome>
    <WindowChrome
        CaptionHeight="20"
        ResizeBorderThickness="8"
        CornerRadius="0"
        GlassFrameThickness="-1"
        UseAeroCaptionButtons="True"
        NonClientFrameEdges="Bottom,Left,Right"
        />
</WindowChrome.WindowChrome>
f. 运行看看效果
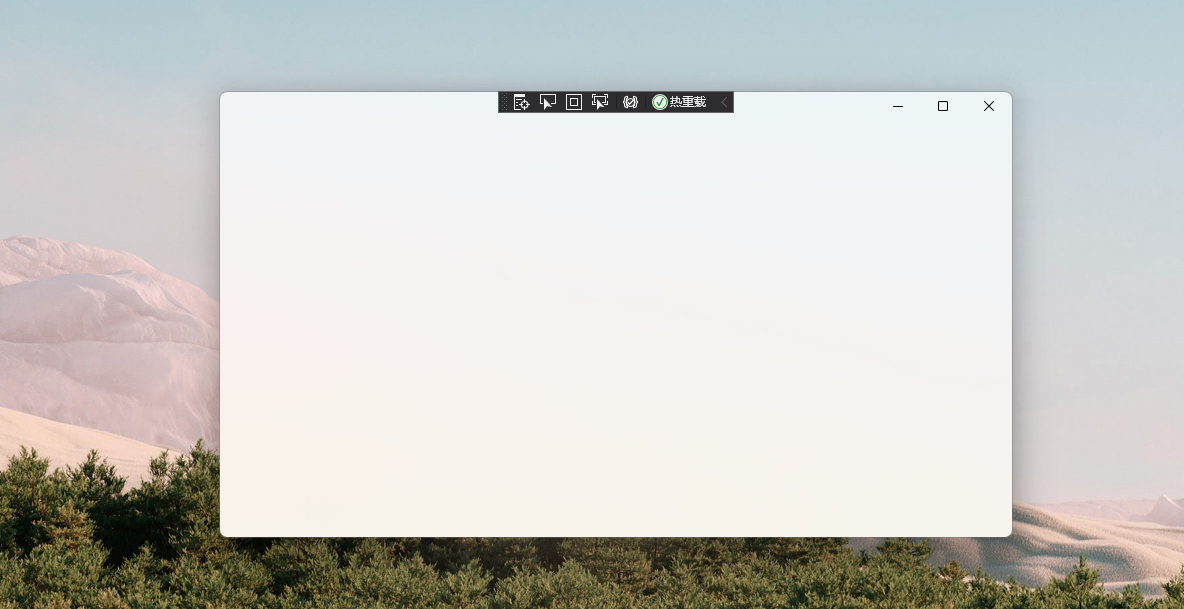
效果还行,其实我验证过,那个黑暗模式的下,效果出不来,具体为啥还没弄清楚,总之就是没透。
g. 结合前面的WebView2导航加持
WinUI项目添加并使用WebView2控件
添加WebView2控件
由于WinUI3中已经内置了WebView2控件了,所以我们不许额外安装任何包就可以直接使用。
我们改造下HelloWinUI3桌面项目的MainWindow.xaml文件。
<WebView2
    x:Name="WebViewForMain"
    Source="https://www.bing.com"
    />

然后先编译一次项目,随后可以启动部署试试,看看运行效果。
使用WebView2控件
为了更好的展示WebView2的能力,我们直接复制Demo4Window的已有能力好了。

目前WinUI控件提供的事件和能力还不够完善,所以部分效果暂时屏蔽和替换了。
其中:
WebView2的CoreWebView2InitializationCompleted事件需要替换成CoreWebView2Initialized。
public MainWindow()
{
    InitializeComponent();
    WebViewForMain.NavigationStarting += WebViewForMain_NavigationStarting;
    WebViewForMain.NavigationCompleted += WebViewForMain_NavigationCompleted;
    //WebViewForMain.KeyDown += WebViewForMain_KeyDown;
    WebViewForMain.CoreWebView2Initialized += WebViewForMain_CoreWebView2Initialized;
}

private void WebViewForMain_CoreWebView2Initialized(object? sender, CoreWebView2InitializedEventArgs e)
{
    if (e.Exception!=null)
    {
        WebViewForMain.CoreWebView2.ProcessFailed += CoreWebView2_ProcessFailed;
    }
    else
    {
        //MessageBox.Show($"WebView2创建失败,发生异常 = {e.InitializationException}");
    }
}
Border的MouseDown事件需要替换成Tapped。
/// <summary>
/// 导航栏-后退按钮-点击事件
/// </summary>
/// <param name="sender"></param>
/// <param name="e"></param>
private void BorderForNaviBack_Tapped(object sender, TappedRoutedEventArgs e)
{
    #region BorderForNaviBack_MouseDown

    if (WebViewForMain.CanGoBack)
    {
        WebViewForMain.GoBack();
    }
    else
    {
        UpdateNaviButtonStatus();
    }

    #endregion
}
Border的MouseEnter和MouseLeave需要替换成PointerEntered、PointerMoved。
private void BorderForButton_PointerEntered(object sender, PointerRoutedEventArgs e)
{
    var border = sender as Border;
    border.Background = new SolidColorBrush(Colors.White);
    border.Focus(FocusState.Pointer);
}

private void BorderForButton_PointerMoved(object sender, PointerRoutedEventArgs e)
{
    var border = sender as Border;
    border.Background = new SolidColorBrush(Colors.Transparent);
    border.Focus(FocusState.Pointer);
}
WebView2的Stop方法需要替换成Close方法
/// <summary>
/// 导航栏-停止按钮-点击事件
/// </summary>
/// <param name="sender"></param>
/// <param name="e"></param>
private void BorderForNaviStop_Tapped(object sender, TappedRoutedEventArgs e)
{
    #region BorderForNaviStop_MouseDown

    WebViewForMain.Close();
    UpdateNaviButtonStatus();

    #endregion
}
设置部署图标
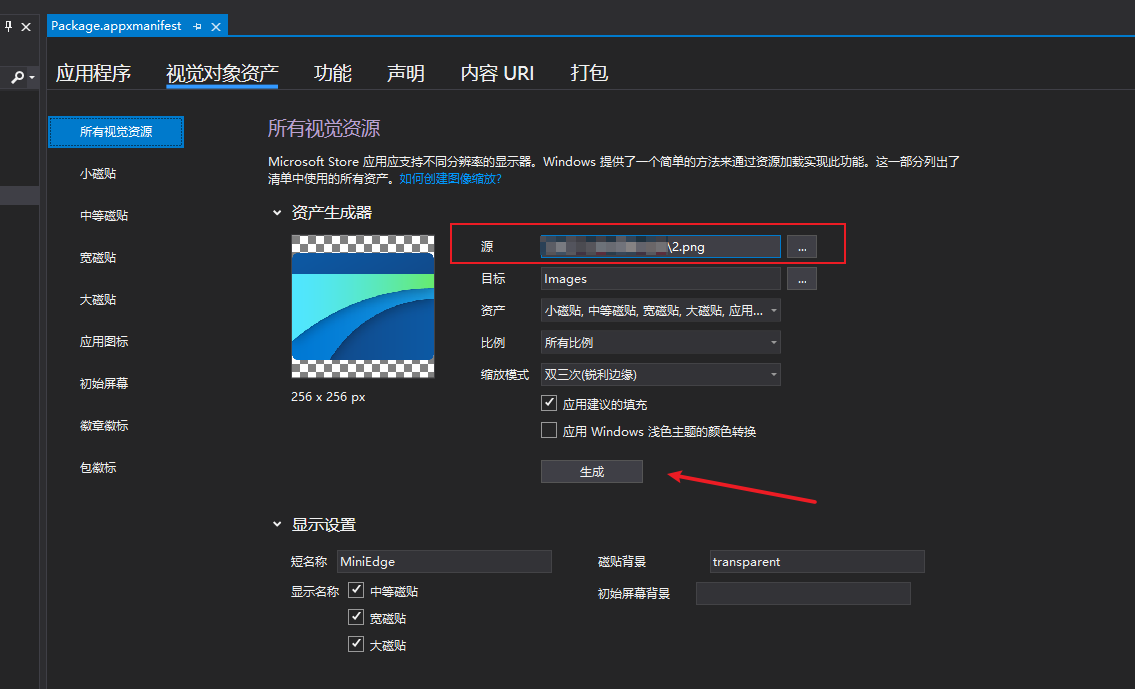
在WinUi的打包项目中,我们可以选中一张高清图作为图标的素材来源,一键生成。
让程序拥有自定义图标
下载安装图标提取工具IconViewer
这里我们去提取一个来用,这里需要用到一个工具,叫IconViewer。
安装地址:IconViewer3.02-Setup-x64.exe
安装之后,啥动静也没有,但是实际已经有用了。
使用图标提取工具IconViewer提取图标
我们找到我们要提取的目标exe,嗯嗯,肯定是带图标的那个,我们就要提取他的图标哈。
选中它,然后右键属性。
如果安装顺利,这里会多出一个Icons的标签,我们切过去,哈哈,惊喜来了,这里显示了它的图标,我们还可以选图标的大小,毫无疑问,选最大的那个,点击那个保存按钮就可以了。
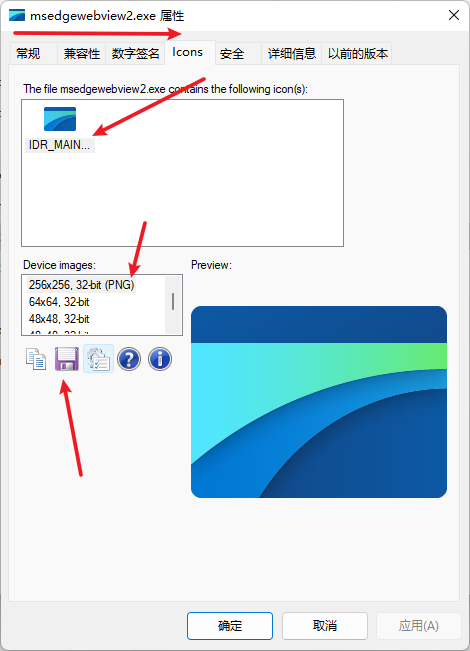
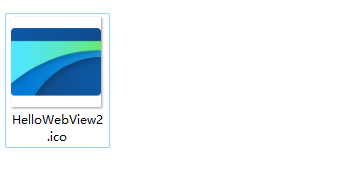
接下来,我们就顺利得到一个超高清的Ico图标了。
给应用程序挂载图标
在项目上右键,打开项目"属性",然后找到"图标和清单"部分,浏览我们刚刚保存那个图标即可。
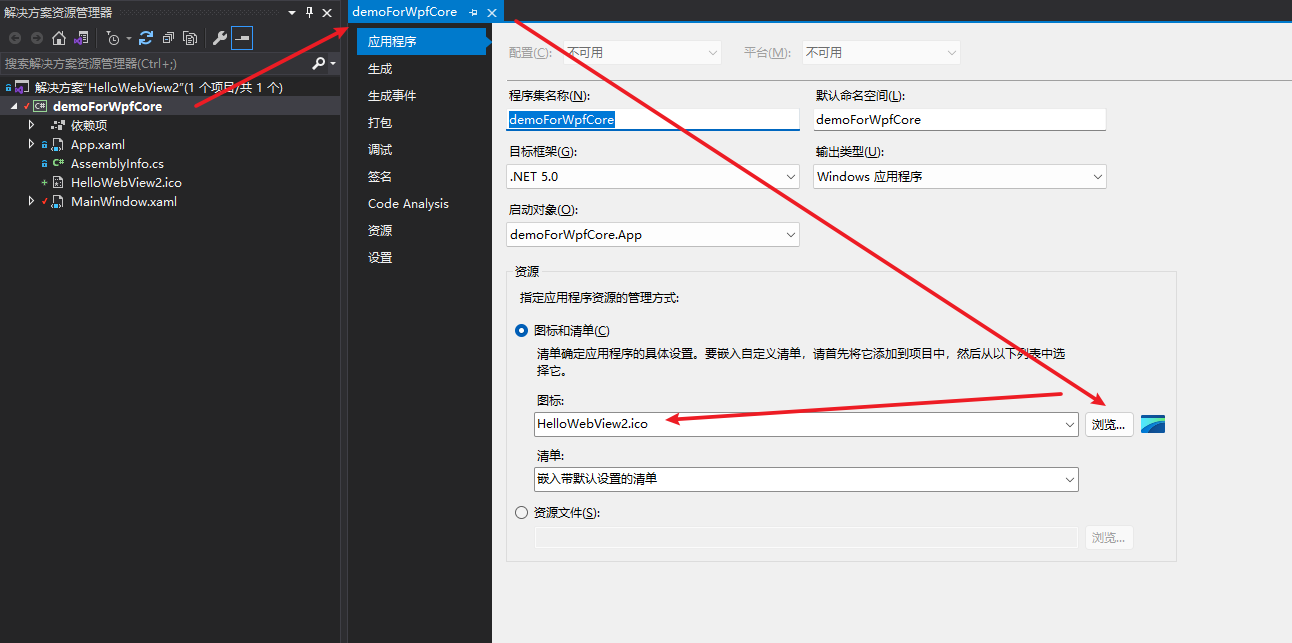
运行一看,哈哈,已经生效了。

很香吧。
理解WebView2的导航事件
https://docs.microsoft.com/zh-cn/microsoft-edge/webview2/concepts/navigation-events
在网页导航期间,WebView2控件将引发事件。承载WebView2控件的应用侦听以下事件。
- NavigationStarting
- SourceChanged
- ContentLoading
- HistoryChanged
- NavigationCompleted
发生错误时,将引发以下事件,并可能依赖于导航到错误网页。
- SourceChanged
- ContentLoading
- HistoryChanged
如果发生HTTP重定向,则一行NavigationStarting中有多个事件。
从NavigationStarting事件切入强制HTTPS
public Demo2Window()
{
    InitializeComponent();
    WebViewForMain.NavigationStarting += WebViewForMain_NavigationStarting;
}

private void WebViewForMain_NavigationStarting(object? sender, Microsoft.Web.WebView2.Core.CoreWebView2NavigationStartingEventArgs e)
{
    if (!e.Uri.ToLower().StartsWith("https://"))
    {
        e.Cancel = true;
    }
}
在Demo2Window窗体构造函数中注册WebViewForMain控件的"导航开始(NavigationStarting)"事件,在WebViewForMain_NavigationStarting事件处理函数中,如果检测到Uri不是以Https开头的,直接取消掉当前导航动作,以达到强制HTTPS的目的。
从NavigationCompleted事件切入更新地址栏
public Demo2Window()
{
    InitializeComponent();
    WebViewForMain.NavigationCompleted += WebViewForMain_NavigationCompleted;
}

private void WebViewForMain_NavigationCompleted(object? sender, Microsoft.Web.WebView2.Core.CoreWebView2NavigationCompletedEventArgs e)
{
    if (e.IsSuccess)
    {
        TextBoxForSource.Text = WebViewForMain.Source?.ToString();
    }
}
在Demo2Window窗体构造函数中注册WebViewForMain控件的"导航完成(NavigationCompleted)"事件,在WebViewForMain_NavigationCompleted事件处理函数中,如果NavigationCompletedEventArgs事件参数是成功状态,那么将当前WebView实例的源地址更新到地址输入框中。

从首页点击页面内的链接,跳转到其他页面之后,地址栏也会同步更新,显示当前地址。
给页面加载过程增加进度提示
有了前面的"导航开始(NavigationStarting)"事件和"导航完成(NavigationCompleted)"事件加持,我们便可以基于它们,提示用户正在加载了。
a. 添加一个进度指示器控件ProgressBar
<Grid>
    <Grid.RowDefinitions>
        <RowDefinition Height="Auto"/>
        <RowDefinition Height="*"/>
    </Grid.RowDefinitions>
    ...
    <ProgressBar
        Grid.Row="0"
        x:Name="GirdForProgress"
        Height="2"
        VerticalAlignment="Bottom"
        IsEnabled="False"
        IsIndeterminate="False"
        />
    ...
</Grid>
b. 引入一个窗体变量控制进度指示器控件
private bool _isNavigationProgress;
public bool IsNavigationProgress
{
    get
    {
        return _isNavigationProgress;
    }
    set
    {
        _isNavigationProgress = value;
        GirdForProgress.IsEnabled = value;
        GirdForProgress.IsIndeterminate = value;
        GirdForProgress.Visibility = value ? Visibility.Visible : Visibility.Collapsed;
    }
}
在IsNavigationProgress变量的Set操作中,我们同步控制GirdForProgress的IsEnabled属性、IsIndeterminate属性、Visibility属性。
c. 基于事件控制IsNavigationProgress变量值
private void WebViewForMain_NavigationCompleted(object? sender, Microsoft.Web.WebView2.Core.CoreWebView2NavigationCompletedEventArgs e)
{
    if (e.IsSuccess)
    {
        TextBoxForSource.Text = WebViewForMain.Source?.ToString();
    }

    IsNavigationProgress = false;
}

private void WebViewForMain_NavigationStarting(object? sender, Microsoft.Web.WebView2.Core.CoreWebView2NavigationStartingEventArgs e)
{
    var uri = e.Uri;
    if (!uri.ToLower().StartsWith("https://"))
    {
        WebViewForMain.CoreWebView2.ExecuteScriptAsync($"alert('{uri} 不安全,请使用HTTPS地址重新访问!')");
        e.Cancel = true;
    }

    IsNavigationProgress = true;
}
在Demo4Window窗体的WebViewForMain_NavigationCompleted事件和WebViewForMain_NavigationStarting事件中分别控制IsNavigationProgress变量值,间接的实现对GirdForProgress展示效果的控制。
d. 运行演示效果

从KeyDown事件切入支持组合快捷键
public Demo4Window()
{
    InitializeComponent();
    WebViewForMain.KeyDown += WebViewForMain_KeyDown;
}

private void WebViewForMain_KeyDown(object sender, KeyEventArgs e)
{
    if (e.IsRepeat) return;
    bool ctrl = e.KeyboardDevice.IsKeyDown(Key.LeftCtrl) || e.KeyboardDevice.IsKeyDown(Key.RightCtrl);
    bool alt = e.KeyboardDevice.IsKeyDown(Key.LeftAlt) || e.KeyboardDevice.IsKeyDown(Key.RightAlt);
    bool shift = e.KeyboardDevice.IsKeyDown(Key.LeftShift) || e.KeyboardDevice.IsKeyDown(Key.RightShift);

    if (e.Key == Key.N && ctrl && !alt && !shift)
    {
        new MainWindow().Show();
        e.Handled = true;
    }
    else if (e.Key == Key.W && ctrl && !alt && !shift)
    {
        Close();
        e.Handled = true;
    }
}
在Demo4Window窗体构造函数中注册WebViewForMain控件的"按键按下(KeyDown)"事件,在WebViewForMain_KeyDown事件处理函数中,如果KeyEventArgs事件参数中是Ctrl+N的组合,那么就新建一个窗口,如果是Ctrl+W的组合,那么就关闭当前窗口,这个快捷键和目前Microsoft Edge是一致的。
从CoreWebView2InitializationCompleted事件切入知晓浏览器控件加载完毕
public Demo4Window()
{
    InitializeComponent();
    WebViewForMain.CoreWebView2InitializationCompleted += WebViewForMain_CoreWebView2InitializationCompleted;
}

private void WebViewForMain_CoreWebView2InitializationCompleted(object? sender, Microsoft.Web.WebView2.Core.CoreWebView2InitializationCompletedEventArgs e)
{
    if (e.IsSuccess)
    {

    }
    else
    {
        MessageBox.Show($"WebView2创建失败,发生异常 = {e.InitializationException}");
    }
}
在Demo4Window窗体构造函数中注册WebViewForMain控件的"核心初始化完成(CoreWebView2InitializationCompleted)"事件,在WebViewForMain_CoreWebView2InitializationCompleted事件处理函数中,如果CoreWebView2InitializationCompletedEventArgs事件参数中IsSuccess为True,说明浏览器核心初始化成功,如果为False,则表示发生异常情况,那么可以弹出相关提示来告知用户,异常信息通过InitializationException获取。
实践WebView2的双向通信
从ExecuteScriptAsync方法运行自定义Javascript代码
public Demo2Window()
{
    InitializeComponent();
    WebViewForMain.NavigationStarting += WebViewForMain_NavigationStarting;
}

private void WebViewForMain_NavigationStarting(object? sender, Microsoft.Web.WebView2.Core.CoreWebView2NavigationStartingEventArgs e)
{
    if (!e.Uri.ToLower().StartsWith("https://"))
    {
        WebViewForMain.CoreWebView2.ExecuteScriptAsync($"alert('{uri} 不安全,请使用HTTPS地址重新访问!')");
        e.Cancel = true;
    }
}
在前面说到的WebViewForMain_NavigationStarting事件处理函数中,我们给强制HTTPS增加一个提示,这里我们需要让WebView替代我们执行一段Javascript代码的警告,以便给用户一个具体的提示,通过WebView实例的ExecuteScriptAsync方法,可以传入自定义的Javascript代码进行执行。
从EnsureCoreWebView2Async方法等待WebView2异步加载完成
public Demo3Window()
{
    InitializeComponent();
    InitializeAsync();
}

async void InitializeAsync()
{
    // 确保WebView对象已经初始化完成
    await WebViewForMain.EnsureCoreWebView2Async(null);
}
如果你曾尝试在Window窗体构建函数或者Windows的Loaded函数去试图绑定WebView2实例的CoreWebView2对象相关的事件,你可能会遇到Null空值错误,原因是WebView2实例的CoreWebView2对象的初始化是异步加载的,如果我们要监听它的事件,那么需要等待它异步加载完成之后才行,所以这里我们在构造函数中,新增了可支持异步等待的InitializeAsync方法,通过EnsureCoreWebView2Async方法,我们可以确保这一句之后执行的代码是CoreWebView2对象已经初始化成功之后的。
从WebMessageReceived方法监听来自WebView的消息
async void InitializeAsync()
{
    // 确保WebView对象已经初始化完成
    await WebViewForMain.EnsureCoreWebView2Async(null);

    // 监听来自WebView的消息
    WebViewForMain.CoreWebView2.WebMessageReceived += CoreWebView2_WebMessageReceived;
}

private void CoreWebView2_WebMessageReceived(object? sender, Microsoft.Web.WebView2.Core.CoreWebView2WebMessageReceivedEventArgs e)
{
    // 试图以String的方式接收消息内容
    var messageContent = e.TryGetWebMessageAsString();

    // 以系统弹窗的方式展示消息内容
    MessageBox.Show(messageContent);
}
在WebView2实例的CoreWebView2对象的EnsureCoreWebView2Async方法之后,我们便可以安全的监听WebMessageReceived事件,在CoreWebView2_WebMessageReceived事件处理函数中,出于安全起见,我们试图以TryGetWebMessageAsString的方法以字符串的格式接收消息内容,并且以系统弹窗MessageBox的方式进行展示,这里只是我们临时的一种方案,用于演示哈。
从AddScriptToExecuteOnDocumentCreatedAsync方法模拟来自WebView的消息
async void InitializeAsync()
{
    // 确保WebView对象已经初始化完成
    await WebViewForMain.EnsureCoreWebView2Async(null);

    // 监听来自WebView的消息
    WebViewForMain.CoreWebView2.WebMessageReceived += CoreWebView2_WebMessageReceived;

    // 模拟WebView的网站发送消息
    await WebViewForMain.CoreWebView2.AddScriptToExecuteOnDocumentCreatedAsync("window.chrome.webview.postMessage(window.document.URL);");
}
有了前面步骤中对WebView2实例的CoreWebView2对象针对WebMessageReceived事件的监听处理之后,我们可能需要模拟一下WebView网站内对客户端的消息动作,以便验证我们的监听处理是否符合预期,通过CoreWebView2对象的AddScriptToExecuteOnDocumentCreatedAsync方法,我们可以在新的网页内容被创建完成后追加一个PostMessage的动作,把当前网页的地址发送给客户端。
从AddScriptToExecuteOnDocumentCreatedAsync方法模拟WebView网站监听消息
async void InitializeAsync()
{
    // 确保WebView对象已经初始化完成
    await WebViewForMain.EnsureCoreWebView2Async(null);

    // 模拟WebView的网站监听消息
    await WebViewForMain.CoreWebView2.AddScriptToExecuteOnDocumentCreatedAsync("window.chrome.webview.addEventListener(\'message\', event => alert(event.data));");
}
前面我们模拟了从WebView网站发送消息,那么反过来,我们也需要模拟下网站监听来自客户端的消息,以便后续响应我们从客户端发送消息给网站。
通过CoreWebView2对象的AddScriptToExecuteOnDocumentCreatedAsync方法,我们可以在新的网页内容被创建完成后追加一个AddEventListener的动作,监听来自客户端的消息,并且以警告弹窗的形式把消息内容展示出来。
具体效果,稍后将进行验证。
从PostWebMessageAsString方法向WebView网站发送消息
a. 新增消息发送面板
<Grid>
    <Grid.RowDefinitions>
        <RowDefinition Height="Auto"/>
        <RowDefinition Height="Auto"/>
        <RowDefinition Height="*"/>
    </Grid.RowDefinitions>
    ...
    <Grid
        Grid.Row="1"
        x:Name="GirdForMessage"
        Margin="8,4"
        >
        <Grid.ColumnDefinitions>
            <ColumnDefinition Width="*"/>
            <ColumnDefinition Width="8"/>
            <ColumnDefinition Width="Auto"/>
        </Grid.ColumnDefinitions>
        <Border
            x:Name="BorderForMessage"
            CornerRadius="4"
            Grid.Column="0"
            Height="44"
            BorderBrush="Gray"
            BorderThickness="1"
            Padding="4"
            >
            <TextBox
                x:Name="TextBoxForMessage"
                BorderThickness="0"
                TextAlignment="Left"
                TextWrapping="NoWrap"
                Padding="0,6,0,4"
                Text=""
                FontSize="18"
                KeyDown="TextBoxForMessage_KeyDown"
                />
        </Border>

        <Border
            x:Name="BorderForPost"
            CornerRadius="4"
            Grid.Column="2"
            BorderBrush="#0780d8"
            BorderThickness="1"
            Background="#39baf4"
            Padding="4"
            MouseDown="BorderForPost_MouseDown"
            >
            <TextBlock
                x:Name="TextBlockForPost"
                Text="发送"
                Width="100"
                FontSize="18"
                Background="Transparent"
                Foreground="White"
                TextAlignment="Center"
                VerticalAlignment="Center"
                />
        </Border>
    </Grid>
    ...
</Grid>
为了更加可视化的模拟向WebView网站发送消息,并定制消息内容,我们引入一个新的发送消息的面板,在原来的导航面板和WebView控件之间,采用Gird布局,引入"消息输入框(TextBoxForMessage)"和"发送按钮(TextBlockForPost)",在风格上就完全参考之间的导航面板了。

b. 响应定制化消息发送
private void BorderForPost_MouseDown(object sender, MouseButtonEventArgs e)
{
    var messageContext = TextBoxForMessage.Text?.Trim();
    WebViewForMain.CoreWebView2.PostWebMessageAsString(messageContext);
}
在"发送按钮(TextBlockForPost)"的响应事件BorderForPost_MouseDown中,通过CoreWebView2对象的PostWebMessageAsString方法,我们可以将界面上的定制化消息发送到网站,如果网站能接收到的话,那么根据前面的监听机制,会弹出包含消息内容的警示弹窗,根据我们的设计,稍作注意是,需要重新加载新网页才能响应。

从AddHostObjectToScript方法公开被Javascript调用的本机方法
为了更方便的实现JS和本机之间的通信,我们还可以把本地方法通过AddHostObjectToScript方法暴漏给Web来实现调用,这等同于传统WebBrower控件的ObjectForScripting方法实现。
a. 对WebView2进行一些安全设置,允许使用注入本机方法
等待CoreWebView2核心初始化完毕之后,我们应该尽快完成一些安全设置,允许使用注入本机方法。
private async void Demo5Window_Loaded(object sender, RoutedEventArgs e)
{
    await WebViewForMain.EnsureCoreWebView2Async();
    WebViewForMain.CoreWebView2.Settings.AreHostObjectsAllowed = true;
    WebViewForMain.CoreWebView2.Settings.AreDefaultScriptDialogsEnabled = true;
    WebViewForMain.CoreWebView2.Settings.IsScriptEnabled = true;
    WebViewForMain.CoreWebView2.Settings.IsWebMessageEnabled = true;
}
b. 定义公开的本机方法类
#pragma warning disable CS0618
[System.Runtime.InteropServices.ClassInterface(System.Runtime.InteropServices.ClassInterfaceType.AutoDual)]
#pragma warning restore CS0618
[System.Runtime.InteropServices.ComVisible(true)]
public class C2WHostObject
{
    public void ClientFunction(string requestInfo)
    {
        Console.WriteLine(requestInfo);
    }

    public string ClientValueBack(string requestInfo)
    {
        return requestInfo;
    }
}
这里对需要公开的本机方法类,需要通过System.Runtime.InteropServices.ComVisible(true)和System.Runtime.InteropServices.ClassInterface(System.Runtime.InteropServices.ClassInterfaceType.AutoDual)来公开它,否则将不可见。
这里由于
ClassInterfaceType.AutoDual即将被废弃,暂时先通过#pragma warning disable CS0618关闭警告,.NET host objects need to use deprecated AutoDual attribute
c. 等待CoreWebView2核心初始化完毕之后,注册本机公开方法
private async void Demo5Window_Loaded(object sender, RoutedEventArgs e)
{
    await WebViewForMain.EnsureCoreWebView2Async();

    WebViewForMain.CoreWebView2.AddHostObjectToScript("webView2Bridge", new C2WHostObject());
}
这里需要给这个公开方法对象取个名称,这里我们暂时叫它:webView2Bridge。
d. 在WebView2中F12进入DevTool尝试调用
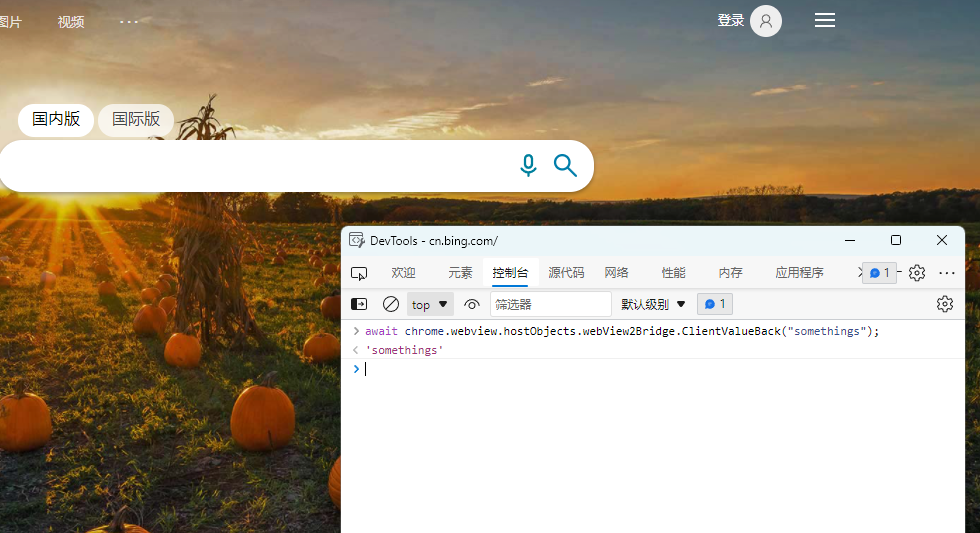
await chrome.webview.hostObjects.webView2Bridge.ClientFunction("somethings");

await chrome.webview.hostObjects.webView2Bridge.ClientValueBack("somethings");
处理WebView2的异常机制
从ProcessFailed事件切入监听浏览器异常
private void WebViewForMain_CoreWebView2InitializationCompleted(object? sender, Microsoft.Web.WebView2.Core.CoreWebView2InitializationCompletedEventArgs e)
{
    if (e.IsSuccess)
    {
        WebViewForMain.CoreWebView2.ProcessFailed += CoreWebView2_ProcessFailed;
    }
}

private void CoreWebView2_ProcessFailed(object? sender, Microsoft.Web.WebView2.Core.CoreWebView2ProcessFailedEventArgs e)
{
    switch (e.ProcessFailedKind)
    {
        // 浏览器进程退出
        case CoreWebView2ProcessFailedKind.BrowserProcessExited:
        {

        }
        break;
            // 浏览器渲染进程未响应
        case CoreWebView2ProcessFailedKind.RenderProcessUnresponsive:
        {

        }
        break;
        // 浏览器渲染进程退出
        case CoreWebView2ProcessFailedKind.RenderProcessExited:
        {

        }
        break;
            // 框架渲染进程退出
        case CoreWebView2ProcessFailedKind.FrameRenderProcessExited:
        {

        }
        break;
        default:
        {
            // Show the process failure details. Apps can collect info for their logging purposes.
            StringBuilder messageBuilder = new StringBuilder();
            messageBuilder.AppendLine($"Process kind: {e.ProcessFailedKind}");
            messageBuilder.AppendLine($"Reason: {e.Reason}");
            messageBuilder.AppendLine($"Exit code: {e.ExitCode}");
            messageBuilder.AppendLine($"Process description: {e.ProcessDescription}");
            System.Threading.SynchronizationContext.Current.Post((_) =>
            {
                MessageBox.Show(messageBuilder.ToString(), "Child process failed", MessageBoxButton.OK);
            }, null);
        }
        break;
    }
}
在在Demo4Window窗体的"核心初始化完成(CoreWebView2InitializationCompleted)"事件响应中,通过注册CoreWebView2对象的"进程失败(ProcessFailed)"事件,在CoreWebView2_ProcessFailed事件处理函数中,可通过e.ProcessFailedKind来根据进程失败的种类分情况灵活处理。
优化WebView2导航控制
引入Segoe Fluent Icons字体图标
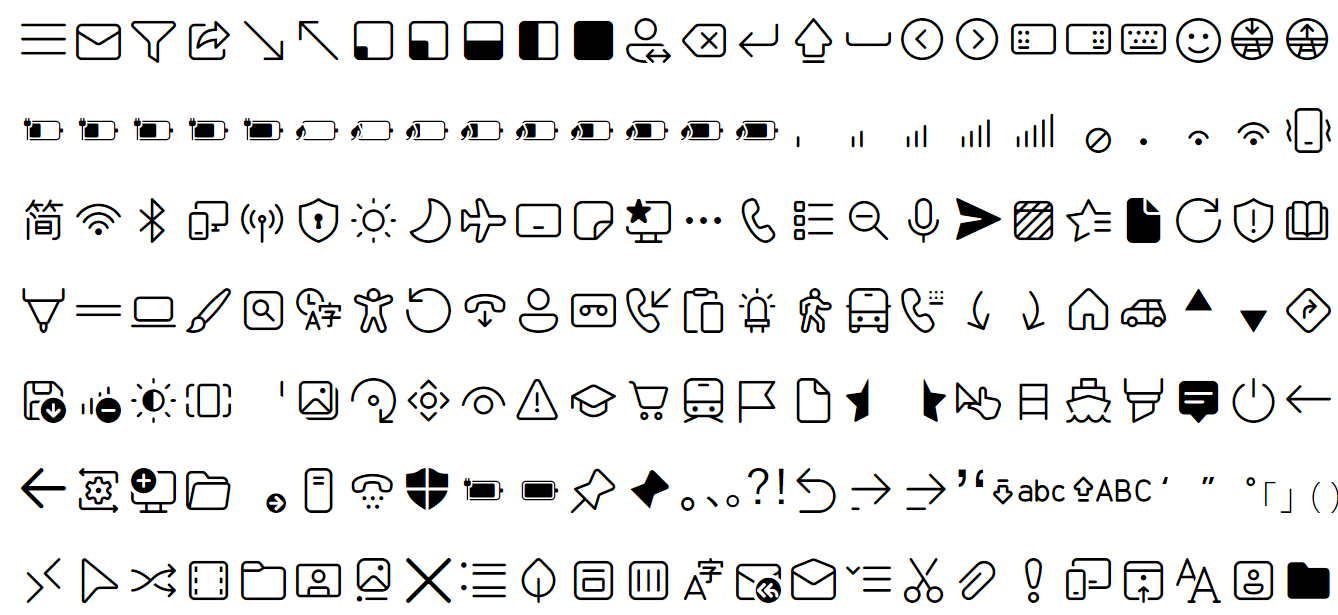
今天我们引入一个Windows 11最新版的图标字体Segoe Fluent Icons,如果想要查看字体内图标清单,可以浏览:https://linrstudio.github.io/win11/SEGOEICONS.html 查阅。
而要在WPF中引入字体,并且使用,我们先把下载好的字体丢进项目下Fonts目录。
记得将字体文件设置成"始终复制"和生成操作为"内容"。
稍后在TextBlock中写FontFamily使用/MiniEdge;component/Fonts/#Segoe Fluent Icons,其中MiniEdge是程序集的命名空间,Fonts是字体文件的路径,而Segoe Fluent Icons是字体名称。
字体名称建议你双击.ttf打开看一下。
而在TextBlock中的Text需要采用&#开头和;结尾的编码,比如:
<TextBlock
x:Name="TextBlockForNaviStop"
FontFamily="/MiniEdge;component/Fonts/#Segoe Fluent Icons"
Text=""
FontSize="26"
VerticalAlignment="Center"
Foreground="Black"
/>
构建更丰富的导航控制面板
a. 引入后退、前进、刷新、停止、主页按钮布局
<Grid Grid.Column="0">
<Grid.ColumnDefinitions>
<ColumnDefinition Width="8"/>
<ColumnDefinition Width="Auto"/>
<ColumnDefinition Width="8"/>
<ColumnDefinition Width="Auto"/>
<ColumnDefinition Width="8"/>
<ColumnDefinition Width="Auto"/>
<ColumnDefinition Width="8"/>
<ColumnDefinition Width="Auto"/>
</Grid.ColumnDefinitions>
<Border
x:Name="BorderForNaviBack"
CornerRadius="4"
Grid.Column="1"
Padding="16,4"
MouseEnter="BorderForButton_MouseEnter"
MouseLeave="BorderForButton_MouseLeave"
MouseDown="BorderForNaviBack_MouseDown"
>
<TextBlock
x:Name="TextBlockForNaviBack"
FontFamily="/MiniEdge;component/Fonts/#Segoe Fluent Icons"
Text=""
FontSize="24"
VerticalAlignment="Center"
Foreground="Black"
/>
</Border>
<Border
x:Name="BorderForNaviForward"
CornerRadius="4"
Grid.Column="3"
Padding="16,4"
MouseEnter="BorderForButton_MouseEnter"
MouseLeave="BorderForButton_MouseLeave"
MouseDown="BorderForNaviForward_MouseDown"
>
<TextBlock
x:Name="TextBlockForNaviForward"
FontFamily="/MiniEdge;component/Fonts/#Segoe Fluent Icons"
Text=""
FontSize="24"
VerticalAlignment="Center"
Foreground="Black"
/>
</Border>
<Grid Grid.Column="5">
<Border
x:Name="BorderForNaviStop"
CornerRadius="4"
Grid.Column="5"
Padding="16,4"
MouseEnter="BorderForButton_MouseEnter"
MouseLeave="BorderForButton_MouseLeave"
MouseDown="BorderForNaviStop_MouseDown"
Visibility="Collapsed"
>
<TextBlock
x:Name="TextBlockForNaviStop"
FontFamily="/MiniEdge;component/Fonts/#Segoe Fluent Icons"
Text=""
FontSize="26"
VerticalAlignment="Center"
Foreground="Black"
/>
</Border>
<Border
x:Name="BorderForNaviRefresh"
CornerRadius="4"
Grid.Column="5"
Padding="16,4"
MouseEnter="BorderForButton_MouseEnter"
MouseLeave="BorderForButton_MouseLeave"
MouseDown="BorderForNaviRefresh_MouseDown"
>
<TextBlock
x:Name="TextBlockForNaviRefresh"
FontFamily="/MiniEdge;component/Fonts/#Segoe Fluent Icons"
Text=""
FontSize="24"
VerticalAlignment="Center"
Foreground="Black"
/>
</Border>
</Grid>
<Border
x:Name="BorderForNaviHome"
CornerRadius="4"
Grid.Column="7"
Padding="16,4"
MouseEnter="BorderForButton_MouseEnter"
MouseLeave="BorderForButton_MouseLeave"
MouseDown="BorderForNaviHome_MouseDown"
>
<TextBlock
x:Name="TextBlockForNaviHome"
FontFamily="/MiniEdge;component/Fonts/#Segoe Fluent Icons"
Text=""
FontSize="24"
VerticalAlignment="Center"
Foreground="Black"
/>
</Border>
</Grid>
b. 响应后退、前进、刷新、停止、主页按钮动作
#region NaviButton

/// <summary>
/// 导航栏-后退按钮-点击事件
/// </summary>
/// <param name="sender"></param>
/// <param name="e"></param>
private void BorderForNaviBack_MouseDown(object sender, MouseButtonEventArgs e)
{
    #region BorderForNaviBack_MouseDown

    if (WebViewForMain.CanGoBack)
    {
        WebViewForMain.GoBack();
    }
    else
    {
        UpdateNaviButtonStatus();
    }

    #endregion
}

/// <summary>
/// 导航栏-前进按钮-点击事件
/// </summary>
/// <param name="sender"></param>
/// <param name="e"></param>
private void BorderForNaviForward_MouseDown(object sender, MouseButtonEventArgs e)
{
    #region BorderForNaviForward_MouseDown

    if (WebViewForMain.CanGoForward)
    {
        WebViewForMain.GoForward();
    }
    else
    {
        UpdateNaviButtonStatus();
    }

    #endregion
}

/// <summary>
/// 导航栏-主页按钮-点击事件
/// </summary>
/// <param name="sender"></param>
/// <param name="e"></param>
private void BorderForNaviHome_MouseDown(object sender, MouseButtonEventArgs e)
{
    #region BorderForNaviHome_MouseDown

    WebViewForMain.CoreWebView2.Navigate("https://www.bing.com");
    UpdateNaviButtonStatus();

    #endregion
}

/// <summary>
/// 导航栏-刷新按钮-点击事件
/// </summary>
/// <param name="sender"></param>
/// <param name="e"></param>
private void BorderForNaviRefresh_MouseDown(object sender, MouseButtonEventArgs e)
{
    #region BorderForNaviRefresh_MouseDown

    WebViewForMain.Reload();
    UpdateNaviButtonStatus();

    #endregion
}

/// <summary>
/// 导航栏-停止按钮-点击事件
/// </summary>
/// <param name="sender"></param>
/// <param name="e"></param>
private void BorderForNaviStop_MouseDown(object sender, MouseButtonEventArgs e)
{
    #region BorderForNaviStop_MouseDown

    WebViewForMain.Stop();
    UpdateNaviButtonStatus();

    #endregion
}

#endregion
这里比较简单,主要是调用WebView2实例的GoBack()、GoForward()、Reload()、Stop()函数来完成对应的功能。
/// <summary>
/// 更新导航栏-按钮-状态
/// </summary>
private void UpdateNaviButtonStatus()
{
    #region UpdateNaviButtonStatus

    var isCanGoBack = WebViewForMain.CanGoBack;
    BorderForNaviBack.IsEnabled = isCanGoBack;
    TextBlockForNaviBack.Foreground = isCanGoBack ? new SolidColorBrush(Colors.Black) : new SolidColorBrush(Colors.Gray);

    var isCanGoForward = WebViewForMain.CanGoForward;
    BorderForNaviForward.IsEnabled = isCanGoForward;
    TextBlockForNaviForward.Foreground = isCanGoForward ? new SolidColorBrush(Colors.Black) : new SolidColorBrush(Colors.Gray);

    #endregion
}
同时,为了当前后导航不可用的时候,能给用户一个明确提示,我们将其禁用并且颜色置灰。
回到主页按钮,暂时用CoreWebView2对象的Navigate方法来实现,其实我理解点击主页之后,应要清空前后导航的,但是还没找到对应的方法来做这件事。
c. 优化后退、前进、刷新、停止、主页按钮交互
private void BorderForButton_MouseEnter(object sender, MouseEventArgs e)
{
    var border = sender as Border;
    if (border.IsEnabled)
    {
        border.Background = new SolidColorBrush(Colors.White);
        border.Focus();
    }
}

private void BorderForButton_MouseLeave(object sender, MouseEventArgs e)
{
    var border = sender as Border;
    if (border.IsEnabled)
    {
        border.Background = new SolidColorBrush(Colors.Transparent);
    }
}
实际上,我们给所有的图标按钮标配了一个效果,就是鼠标移上去就背景变白,移开后恢复,这样交互更加明确。
对于刷新和停止按钮,我们还需要根据是否正在加载来切换他们的显影,那么在之前的IsNavigationProgress中处理就好了。
private bool _isNavigationProgress;
public bool IsNavigationProgress
{
    get
    {
        return _isNavigationProgress;
    }
    set
    {
        _isNavigationProgress = value;
        GirdForProgress.IsEnabled = value;
        GirdForProgress.IsIndeterminate = value;
        GirdForProgress.Visibility = value ? Visibility.Visible : Visibility.Collapsed;

        BorderForNaviRefresh.IsEnabled = !value;
        TextBlockForNaviRefresh.Foreground = !value ? new SolidColorBrush(Colors.Black) : new SolidColorBrush(Colors.Gray);

        BorderForNaviStop.Visibility = value ? Visibility.Visible : Visibility.Collapsed;
        BorderForNaviRefresh.Visibility = !value ? Visibility.Visible : Visibility.Collapsed;
    }
}
d. 优化导航按钮为图标按钮,统一交互和视觉
<Grid Grid.Column="4">
<Grid.ColumnDefinitions>
<ColumnDefinition Width="Auto"/>
<ColumnDefinition Width="8"/>
</Grid.ColumnDefinitions>
<Border
x:Name="BorderForNaviTarget"
CornerRadius="4"
Grid.Column="0"
Padding="16,4"
MouseDown="BorderForNaviTarget_MouseDown"
MouseEnter="BorderForButton_MouseEnter"
MouseLeave="BorderForButton_MouseLeave"
>
<TextBlock
x:Name="TextBlockForNaviTarget"
FontFamily="/MiniEdge;component/Fonts/#Segoe Fluent Icons"
Text=""
FontSize="24"
VerticalAlignment="Center"
Foreground="Black"
/>
</Border>
</Grid>
/// <summary>
/// 导航栏-指定按钮-点击事件
/// </summary>
/// <param name="sender"></param>
/// <param name="e"></param>
private void BorderForNaviTarget_MouseDown(object sender, MouseButtonEventArgs e)
{
    #region BorderForNaviTarget_MouseDown

    #endregion
}


/// <summary>
/// 导航栏-地址输入框-快捷键(回车)
/// </summary>
/// <param name="sender"></param>
/// <param name="e"></param>
private void TextBoxForNaviAddress_KeyDown(object sender, KeyEventArgs e)
{
    #region TextBoxForNaviAddress_KeyDown

    if (e.Key == Key.Enter)
    {
        BorderForNaviTarget_MouseDown(null, null);
    }

    #endregion
}
e. 优化地址输入框交互和视觉体验
<Grid Grid.Column="2">
    <Border
        x:Name="BorderForNaviAddress"
        CornerRadius="4"
        Grid.Column="2"
        Height="44"
        BorderBrush="Gray"
        BorderThickness="1"
        Padding="4"
        Background="White"
        >
    </Border>

    <TextBox
        Margin="4"
        x:Name="TextBoxForNaviAddress"
        BorderThickness="0"
        TextAlignment="Left"
        TextWrapping="NoWrap"
        Padding="0,6,0,4"
        Text=""
        FontSize="18"
        KeyDown="TextBoxForNaviAddress_KeyDown"
        MouseEnter="TextBoxForNaviAddress_MouseEnter"
        MouseLeave="TextBoxForNaviAddress_MouseLeave"
        Background="White"
        Foreground="Black"
        />
</Grid>
我们做了一个布局调整,将Border和TextBox平行放在一个Gird里面,这样布局的好处就是当Border样式改变的时候,不会影响到TextBox。
private void TextBoxForNaviAddress_MouseEnter(object sender, MouseEventArgs e)
{
    BorderForNaviAddress.BorderBrush = new SolidColorBrush(Color.FromRgb(143, 177, 229));
    BorderForNaviAddress.BorderThickness = new Thickness(1.5);
}

private void TextBoxForNaviAddress_MouseLeave(object sender, MouseEventArgs e)
{
    BorderForNaviAddress.BorderBrush = new SolidColorBrush(Colors.Gray);
    BorderForNaviAddress.BorderThickness = new Thickness(1);
}
接下来,当然输入框被鼠标靠近的时候,我们让输入框背后的背景边框变个颜色,并且加粗边框,被鼠标移开的时候,效果还原。
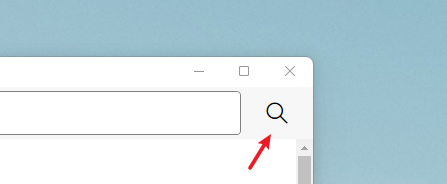
f. 优化地址输入框直达和搜索体验
有时候用户可能输入的是一个网址链接,或者是一个不带HTTP头的链接,亦或只是联想的一些关键词,那么我们分开处理,以确保得到最佳体验。
/// <summary>
/// 导航栏-指定按钮-点击事件
/// </summary>
/// <param name="sender"></param>
/// <param name="e"></param>
private void BorderForNaviTarget_MouseDown(object sender, MouseButtonEventArgs e)
{
    #region BorderForNaviTarget_MouseDown

    var sourceContent = TextBoxForNaviAddress.Text?.Trim() ?? string.Empty;
    if (!string.IsNullOrEmpty(sourceContent))
    {
        Uri? sourceUri;

        // 如果当前地址是格式化合规的地址,那么直接使用
        if (Uri.IsWellFormedUriString(sourceContent, UriKind.Absolute))
        {
            sourceUri = new Uri(sourceContent);
        }
        // 如果当前地址含.符号切不含空格,那么自动追加前缀
        else if (!sourceContent.Contains(" ") && sourceContent.Contains("."))
        {
            sourceUri = new Uri("http://" + sourceContent);
        }
        // 如果当前地址不属于上诉情况,那么通过内置搜索引擎搜索
        else
        {
            var searchKeywords = string.Join("+", Uri.EscapeDataString(sourceContent).Split(new string[] { "%20" }, StringSplitOptions.RemoveEmptyEntries));
            var bingSearchAddress = $"https://bing.com/search?q={searchKeywords}";
            sourceUri = new Uri(bingSearchAddress);
        }

        if (sourceUri != null)
        {
            WebViewForMain.CoreWebView2.Navigate(sourceUri.ToString());
        }
    }

    #endregion
}
g. 不如取个更好的名字吧
之前我们管它叫WebView2浏览器,该给它取个正式的名称了,不如就叫MiniEdge吧,毕竟是借鉴了Edge的交互和视觉,还复用了它的渲染引擎。
需要注意的是,我们同时也把程序集名称一起改了。
这样最终exe就会改名字了。
注意也要把Demo4Window.xaml的Title改了。
WebView2的最佳部署指南
WebView2的最佳开发指南
每个开发团队在构建其应用程序时都遵循不同的做法。生成WebView2生产应用时,建议遵循这些建议和最佳做法。
使用EvergreenRuntime(推荐)
我们通常建议使用"Evergreen WebView2运行时"。固定版本运行时分发仅建议用于具有严格兼容性要求的应用。"Evergreen运行时"在客户端上自动更新,以便你的WebView2应用可以使用最新的功能和安全修补程序。与固定版本运行时相比,"Evergreen运行时"还需要更少的磁盘上的存储空间。
如果使用"Evergreen运行时",在运行WebView2应用之前,测试是否已在客户端上安装"Evergreen WebView2运行时"。
使用Evergreen运行时时定期运行兼容性测试
使用"Evergreen WebView2运行时"时,运行时会自动更新,因此必须定期运行兼容性测试。若要确保WebView2应用继续正常工作,请针对Microsoft Edge Insider(preview)Channels(Beta、Dev或Canary)在WebView2控件中测试Web内容。
本指南类似于我们向Web开发人员提供的指导。
测试安装的WebView2运行时是否支持较新的API
若要运行使用Webview2 SDK的特定版本开发的WebView2应用,客户端必须已安装WebView2运行时的兼容版本。由于API不断添加到WebView2,因此也发布了新版本的运行时以支持新的API。使用功能检测确保安装在客户端上的WebView2运行时支持WebView2应用使用的较新的API。
如果使用"Evergreen WebView2运行时",在某些情况下,客户端上的运行时尚未自动更新到最新版本。例如,如果客户端没有Internet访问权限,则运行时不会自动更新。此外,某些组策略会暂停运行时的更新。将更新推送到WebView2应用时,如果应用尝试调用客户端安装运行时中不可用的较新API,该应用可能无法运行。
若要解决此问题,在代码调用最近添加的WebView2 API之前,测试该API在客户端的安装运行时中是否可用。此较新功能测试与其他Web开发最佳实践类似,这些最佳实践在使用新的WebAPI之前检测支持的功能。若要测试已安装运行时中的API可用性,请使用:
QueryInterface在C/C++中。try/catch.NET或WinUI中的块。
更新固定版本运行时
如果使用固定版本的"WebView2运行时",请确保定期更新与应用打包的"WebView2运行时",以减少安全风险。在Webview2应用中使用第三方内容时,始终考虑不受信任的内容。
管理新版本的EvergreenRuntime
将新版本的"Evergreen WebView2运行时"下载到客户端后,正在运行的任何WebView2应用将继续使用早期版本的运行时,直到发布浏览器进程。此行为允许应用连续运行,并阻止删除以前的运行时。若要使用新版本的运行时,需要释放对以前的WebView2环境对象的所有引用,或重新启动应用。下次应用创建新的WebView2环境时,应用将使用新版本的运行时。
当新版本的运行时可用时,你的应用可以自动采取措施,例如通知用户重新启动该应用。若要检测新版本的运行时是否可用,可以在代码中使用add_NewBrowserVersionAvailable(Win32)或CoreWebView2Environment.NewBrowserVersionAvailable(.NET)事件。如果你的代码处理重新启动应用,请考虑在WebView2应用退出之前保存用户状态。
管理用户数据文件夹的生命周期
https://docs.microsoft.com/zh-cn/microsoft-edge/webview2/concepts/user-data-folder
WebView2应用创建用户数据文件夹来存储Cookie、凭据和权限等数据。创建文件夹后,应用负责管理用户数据文件夹的生命周期。例如,卸载应用时,你的应用必须执行清理操作。
处理运行时进程故障
WebView2应用应侦听和处理事件,以便该应用可以从支持WebView2应用进程的运行时进程故障ProcessFailed中恢复。
与应用进程一起运行的运行时进程集合支持WebView2应用。这些支持运行时进程可能由于各种原因(如内存不足或用户终止)而失败。当支持运行时进程失败时,WebView2将通过引发ProcessFailed事件通知应用。
遵循建议的WebView2安全性最佳做法
https://docs.microsoft.com/zh-cn/microsoft-edge/webview2/concepts/security
对于任何WebView2应用,请确保遵循我们建议的WebView2安全性最佳做法。
WebView2的最佳安全指南
https://docs.microsoft.com/zh-cn/microsoft-edge/webview2/concepts/security
WebView2控件允许开发人员在本机应用程序中承载Web内容。正确使用时,承载Web内容具有多项优势,例如使用基于Web的UI、访问Web平台的功能、跨平台共享代码等。
为了避免承载Web内容时可能出现的漏洞,请确保设计WebView2应用程序以密切监视Web内容和主机应用程序之间的交互:
- 将所有Web内容视为不安全。
- 使用每个参数之前验证Web消息和主机对象参数,因为Web消息和参数可能格式不正确(无意或恶意)并会导致应用意外运行。
- 始终检查在WebView2内运行的文档的来源,并评估内容可信度。
- 设计特定的Web消息和主机对象交互,而不是使用泛型代理。
- 设置以下选项,通过修改
ICoreWebView2Settings(Win32)或CoreWebView2Settings(.NET)来限制Web内容。
https://docs.microsoft.com/zh-cn/microsoft-edge/webview2/reference/win32/icorewebview2settings
https://docs.microsoft.com/zh-cn/dotnet/api/microsoft.web.webview2.core.corewebview2settings
- 如果您不期望Web内容访问主机对象,则设置
AreHostObjectsAllowed为false。 - 如果预计Web内容不会向本机应用程序发布Web消息,则设置
IsWebMessageEnabled为false。 - 如果您不期望Web内容运行脚本,则设置
IsScriptEnabled为false(例如,当显示静态html content)。 - 如果您预计Web内容不会显示或对话框
AreDefaultScriptDialogsEnabled为false。
- 在以下步骤中,使用
NavigationStarting和FrameNavigationStarting事件根据新页面的来源更新设置。
- 若要阻止应用程序导航到特定页面,请使用事件检查然后阻止页面或框架导航。
- 导航到新页面时,你可能需要调整
ICoreWebView2Settings(Win32)或CoreWebView2Settings(.NET)上的属性值,如前面所述。
- 导航到新文档时,使用
ContentLoading事件删除公开的主机对象RemoveHostObjectFromScript。
参考
- WebView2简单试用(七)—— WebMessage
- 基于 Chromium Edge ,微软发布 WebView2 四项更新:Windows App SDK、WinUI2(UWP)、Win11 内置 WebView2 Runtime
- Microsoft EdgeWebView2 和 Microsoft 365 应用版
- WebView2 Windows App SDK, WinUI2, Runtime, and CDP Helper Updates
- .Net桌面端开发使用WebView2,可以放弃CefSharp?
- WebView2 使用及现状
- Microsoft Edge WebView2初体验
- C#使用Microsoft Edge WebView2记录
- 【WPF实用教程1】WPF使用Iconfont图标字体
- https://github.com/MicrosoftEdge/WebView2Samples/blob/master/SampleApps/WebView2WpfBrowser/MainWindow.xaml.cs
- SEGOEICONS
- iconfont-preview
- WebView2 control is missing from Toolbox
- WebView2 doesn't appear in Toolbox; NavigationCompleted does not occur on 2nd Navigation
- iconfont 在线预览工具及其解析
- 使用iconfont图标的unicode编码动态赋值,发现只显示编码,不显示图片
- C# Winform 中使用字体图标
- C#使用Microsoft Edge WebView2记录-C#和JS互相调用
- Setting an object from .NET to JavaScript code through WebView2
- .NET host objects need to use deprecated AutoDual attribute
- Using new WebView2 control and hitting older server with window.external calls... is there any way to capture those?
- Is AddScriptToExecuteOnDocumentCreatedAsync meant to execute on cross origin iframes?
- Setting an object from .NET to JavaScript code through WebView2
- Two way communication between native and JS
- C# WEBBROWSER控件与JS互调
- c#和javascript函数的相互调用(ObjectForScripting 的类必须对 COM 可见。请确认该对象是公共的,或考虑向您的类添加 ComVisible 属性。)
- WebBrowser 类
- WebBrowser.ObjectForScripting 属性
- https://github.com/Difegue/Mica-WPF-Sample
- Apply Mica to a WPF app on Windows 11
- The WindowChrome class needs to be updated & fixed #3887
- ModernWPF UI Library
- Built-in support for WinRT is removed from .NET

 浙公网安备 33010602011771号