
SpringBoot2核心功能--Wed开发(2)
5、视图解析与模板引擎
视图解析:SpringBoot默认不支持 JSP,需要引入第三方模板引擎技术实现页面渲染。
1、视图解析
1、视图解析原理流程
1、目标方法处理的过程中,所有数据都会被放在 ModelAndViewContainer 里面。包括数据和视图地址
2、方法的参数是一个自定义类型对象(从请求参数中确定的),把他重新放在 ModelAndViewContainer
3、任何目标方法执行完成以后都会返回 ModelAndView(数据和视图地址)。
4、processDispatchResult 处理派发结果(页面改如何响应)
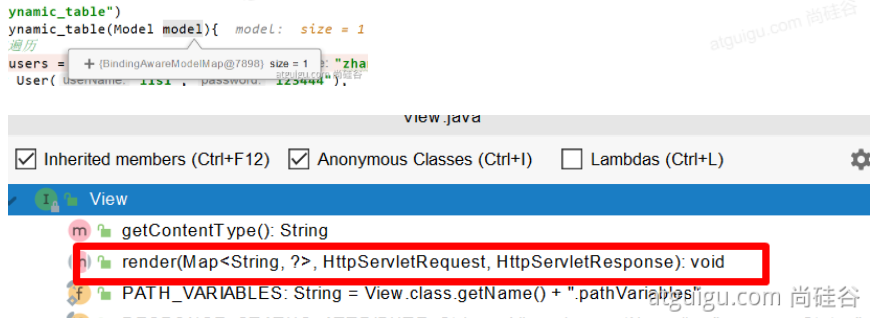
- 1、render(mv, request, response); 进行页面渲染逻辑
- 1、根据方法的String返回值得到 View 对象【定义了页面的渲染逻辑】
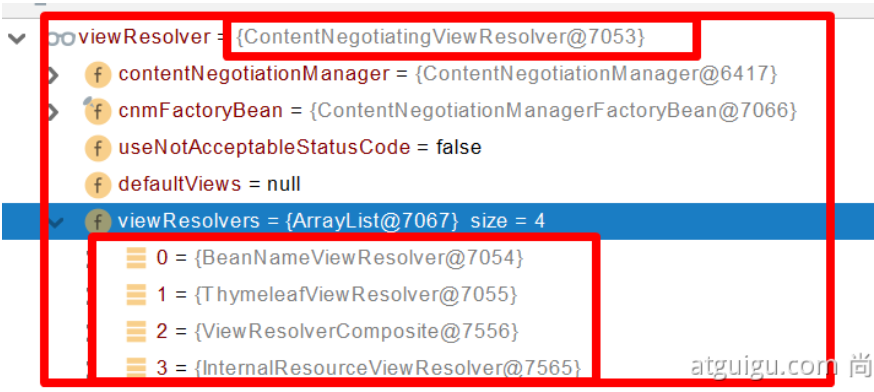
- 1、所有的视图解析器尝试是否能根据当前返回值得到View对象
- 2、得到了 redirect:/main.html --> Thymeleaf new RedirectView()
- 3、ContentNegotiationViewResolver 里面包含了下面所有的视图解析器,内部还是利用下面所有视图解析器得到视图对象。
- 4、view.render(mv.getModelInternal(), request, response); 视图对象调用自定义的render进行页面渲染工作
- RedirectView 如何渲染【重定向到一个页面】
- 1、获取目标url地址
- 2、response.sendRedirect(encodedURL);
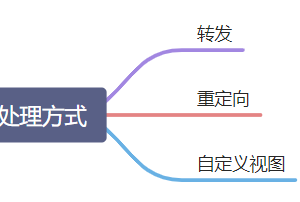
视图解析:
- 返回值以 forward: 开始: new InternalResourceView(forwardUrl); --> 转发request.getRequestDispatcher(path).forward(request, response);
- 返回值以 redirect: 开始: new RedirectView() --》 render就是重定向
- 返回值是普通字符串: new ThymeleafView()--->
自定义视图解析器+自定义视图; 大厂学院。

2、模板引擎-Thymeleaf
1、thymeleaf简介
Thymeleaf is a modern server-side Java template engine for both web and standalone environments, capable of processing HTML, XML, JavaScript, CSS and even plain text.
现代化、服务端Java模板引擎
2、基本语法
1、表达式

2、字面量
文本值: 'one text' , 'Another one!' ,…数字: 0 , 34 , 3.0 , 12.3 ,…布尔值: true , false
空值: null
变量: one,two,.... 变量不能有空格
3、文本操作
字符串拼接: +
变量替换: |The name is ${name}|
4、数学运算
运算符: + , - , * , / , %
5、布尔运算
运算符: and , or
一元运算: ! , not
6、比较运算
比较: > , < , >= , <= ( gt , lt , ge , le )等式: == , != ( eq , ne )
7、条件运算
If-then: (if) ? (then)
If-then-else: (if) ? (then) : (else)
Default: (value) ?: (defaultvalue)
8、特殊操作
无操作: _
3、设置属性值-th:attr
设置单个值
<form action="subscribe.html" th:attr="action=@{/subscribe}">
  <fieldset>
    <input type="text" name="email" />
    <input type="submit" value="Subscribe!" th:attr="value=#{subscribe.submit}"/>
  </fieldset>
</form>
设置多个值
<img src="../../images/gtvglogo.png" th:attr="src=@{/images/gtvglogo.png},title=#{logo},alt=#{logo}" />
以上两个的代替写法 th:xxxx
<input type="submit" value="Subscribe!" th:value="#{subscribe.submit}"/>
<form action="subscribe.html" th:action="@{/subscribe}">
所有h5兼容的标签写法
https://www.thymeleaf.org/doc/tutorials/3.0/usingthymeleaf.html#setting-value-to-specific-attributes
4、迭代
<tr th:each="prod : ${prods}">
        <td th:text="${prod.name}">Onions</td>
        <td th:text="${prod.price}">2.41</td>
        <td th:text="${prod.inStock}? #{true} : #{false}">yes</td>
</tr>
<tr th:each="prod,iterStat : ${prods}" th:class="${iterStat.odd}? 'odd'">
  <td th:text="${prod.name}">Onions</td>
  <td th:text="${prod.price}">2.41</td>
  <td th:text="${prod.inStock}? #{true} : #{false}">yes</td>
</tr>
5、条件运算
<a href="comments.html"
th:href="@{/product/comments(prodId=${prod.id})}"
th:if="${not #lists.isEmpty(prod.comments)}">view</a>
<div th:switch="${user.role}">
  <p th:case="'admin'">User is an administrator</p>
  <p th:case="#{roles.manager}">User is a manager</p>
  <p th:case="*">User is some other thing</p>
</div>
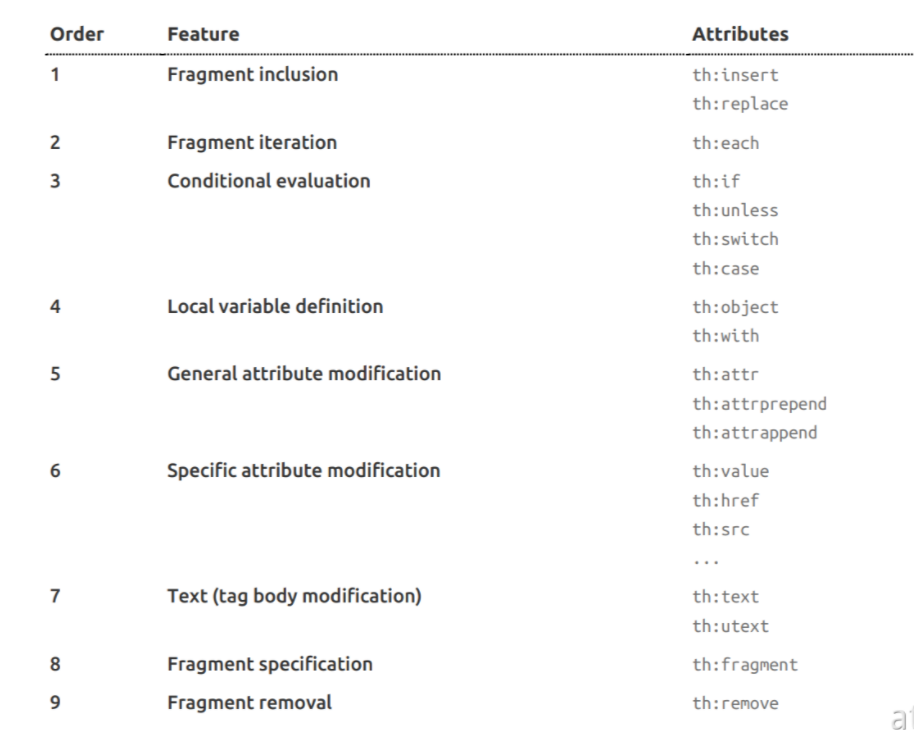
6、属性优先级
3、thymeleaf使用
1、引入Starter
        <dependency>
            <groupId>org.springframework.boot</groupId>
            <artifactId>spring-boot-starter-thymeleaf</artifactId>
        </dependency>
2、自动配置好了thymeleaf
@Configuration(proxyBeanMethods = false)
@EnableConfigurationProperties(ThymeleafProperties.class)
@ConditionalOnClass({ TemplateMode.class, SpringTemplateEngine.class })
@AutoConfigureAfter({ WebMvcAutoConfiguration.class, WebFluxAutoConfiguration.class })
public class ThymeleafAutoConfiguration { }
自动配好的策略
- 1、所有thymeleaf的配置值都在 ThymeleafProperties
- 2、配置好了 SpringTemplateEngine
- 3、配好了 ThymeleafViewResolver
- 4、我们只需要直接开发页面
	public static final String DEFAULT_PREFIX = "classpath:/templates/";

	public static final String DEFAULT_SUFFIX = ".html";  //xxx.html
3、页面开发
<!DOCTYPE html>
<html lang="en" xmlns:th="http://www.thymeleaf.org">
<head>
    <meta charset="UTF-8">
    <title>Title</title>
</head>
<body>
<h1 th:text="${msg}">哈哈</h1>
<h2>
    <a href="www.atguigu.com" th:href="${link}">去百度</a>  <br/>
    <a href="www.atguigu.com" th:href="@{link}">去百度2</a>
</h2>
</body>
</html>
6、拦截器
1、HandlerInterceptor 接口
/**
 * 登录检查
 * 1、配置好拦截器要拦截哪些请求
 * 2、把这些配置放在容器中
 */
@Slf4j
public class LoginInterceptor implements HandlerInterceptor {

    /**
     * 目标方法执行之前
     * @param request
     * @param response
     * @param handler
     * @return
     * @throws Exception
     */
    @Override
    public boolean preHandle(HttpServletRequest request, HttpServletResponse response, Object handler) throws Exception {

        String requestURI = request.getRequestURI();
        log.info("preHandle拦截的请求路径是{}",requestURI);

        //登录检查逻辑
        HttpSession session = request.getSession();

        Object loginUser = session.getAttribute("loginUser");

        if(loginUser != null){
            //放行
            return true;
        }

        //拦截住。未登录。跳转到登录页
        request.setAttribute("msg","请先登录");
//        re.sendRedirect("/");
        request.getRequestDispatcher("/").forward(request,response);
        return false;
    }

    /**
     * 目标方法执行完成以后
     * @param request
     * @param response
     * @param handler
     * @param modelAndView
     * @throws Exception
     */
    @Override
    public void postHandle(HttpServletRequest request, HttpServletResponse response, Object handler, ModelAndView modelAndView) throws Exception {
        log.info("postHandle执行{}",modelAndView);
    }

    /**
     * 页面渲染以后
     * @param request
     * @param response
     * @param handler
     * @param ex
     * @throws Exception
     */
    @Override
    public void afterCompletion(HttpServletRequest request, HttpServletResponse response, Object handler, Exception ex) throws Exception {
        log.info("afterCompletion执行异常{}",ex);
    }
}
2、配置拦截器
/**
 * 1、编写一个拦截器实现HandlerInterceptor接口
 * 2、拦截器注册到容器中(实现WebMvcConfigurer的addInterceptors)
 * 3、指定拦截规则【如果是拦截所有,静态资源也会被拦截】
 */
@Configuration
public class AdminWebConfig implements WebMvcConfigurer {

    @Override
    public void addInterceptors(InterceptorRegistry registry) {
        registry.addInterceptor(new LoginInterceptor())
                .addPathPatterns("/**")  //所有请求都被拦截包括静态资源
                .excludePathPatterns("/","/login","/css/**","/fonts/**","/images/**","/js/**"); //放行的请求
    }
}
3、拦截器原理
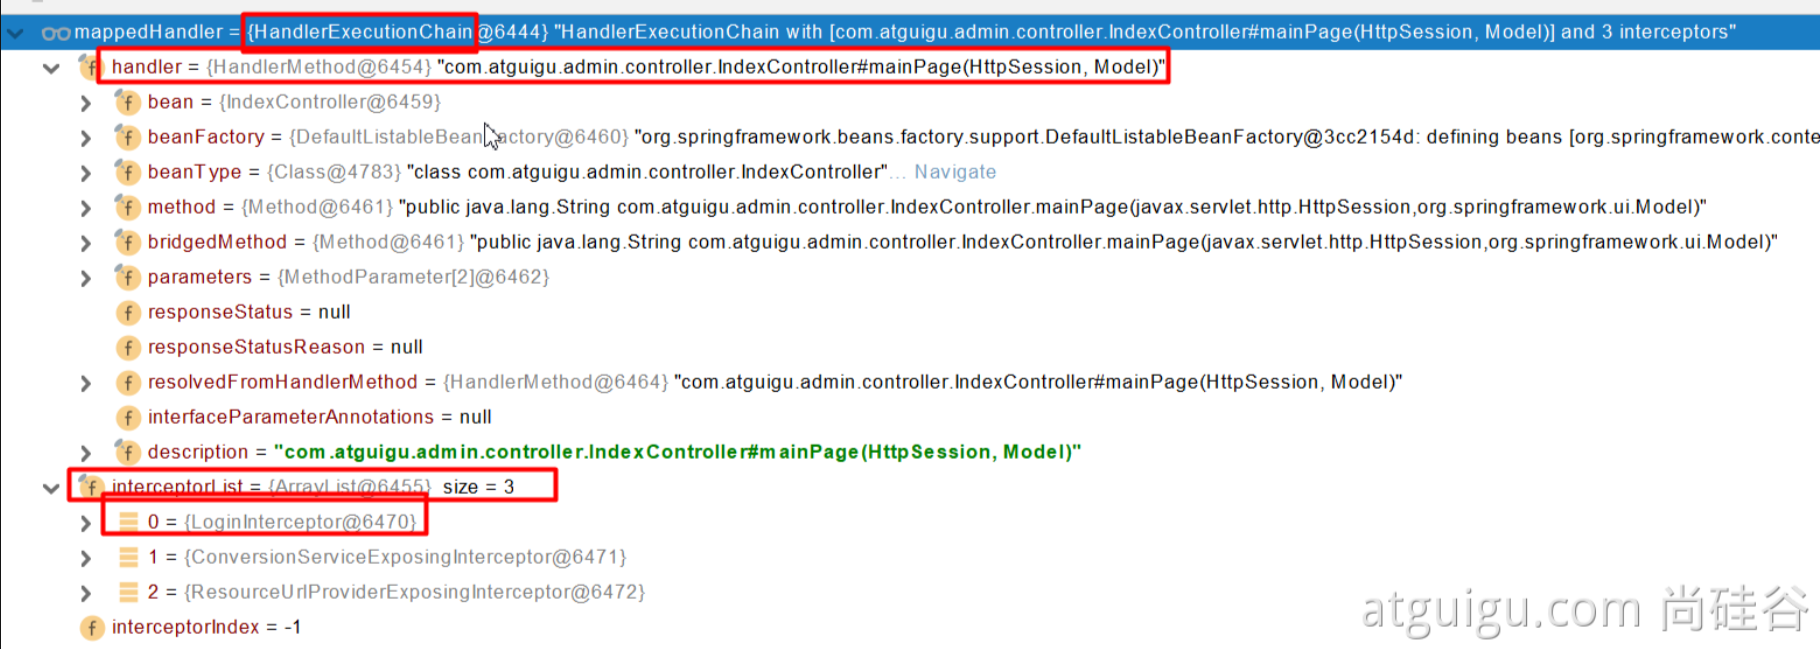
1、根据当前请求,找到HandlerExecutionChain【可以处理请求的handler以及handler的所有 拦截器】
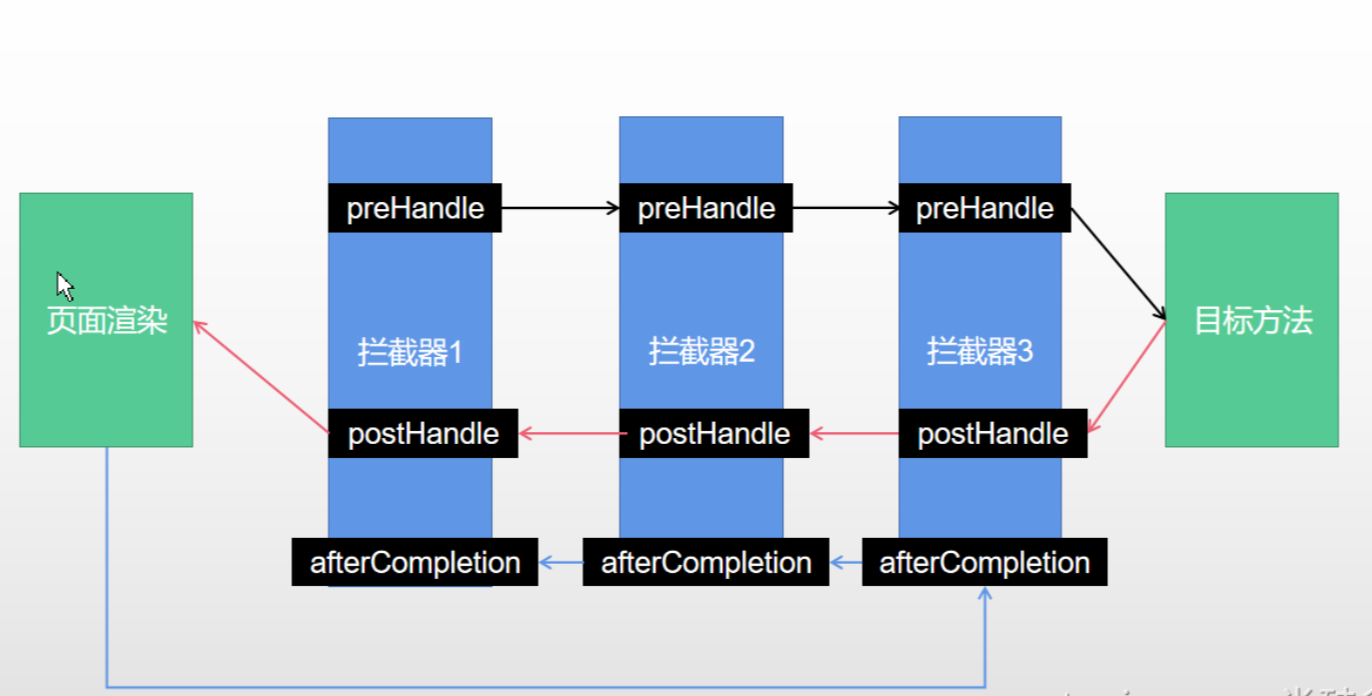
2、先来顺序执行 所有拦截器的 preHandle方法
- 1、如果当前拦截器prehandler返回为true。则执行下一个拦截器的preHandle
- 2、如果当前拦截器返回为false。直接 倒序执行所有已经执行了的拦截器的 afterCompletion;
3、如果任何一个拦截器返回false。直接跳出不执行目标方法
4、所有拦截器都返回True。执行目标方法
5、倒序执行所有拦截器的postHandle方法。
6、前面的步骤有任何异常都会直接倒序触发 afterCompletion
7、页面成功渲染完成以后,也会倒序触发 afterCompletion
7、文件上传
1、页面表单
<form method="post" action="/upload" enctype="multipart/form-data">
    <input type="file" name="file"><br>
    <input type="submit" value="提交">
</form>
2、文件上传代码
/**
* MultipartFile 自动封装上传过来的文件
* @param email
* @param username
* @param headerImg
* @param photos
* @return
*/
3、自动配置原理
文件上传自动配置类-MultipartAutoConfiguration-MultipartProperties
●自动配置好了 StandardServletMultipartResolver 【文件上传解析器】
●原理步骤
○1、请求进来使用文件上传解析器判断(isMultipart)并封装(resolveMultipart,返回MultipartHttpServletRequest)文件上传请求
○2、参数解析器来解析请求中的文件内容封装成MultipartFile
○3、将request中文件信息封装为一个Map;MultiValueMap<String, MultipartFile>
FileCopyUtils。实现文件流的拷贝

8、异常处理
1、错误处理
1、默认规则
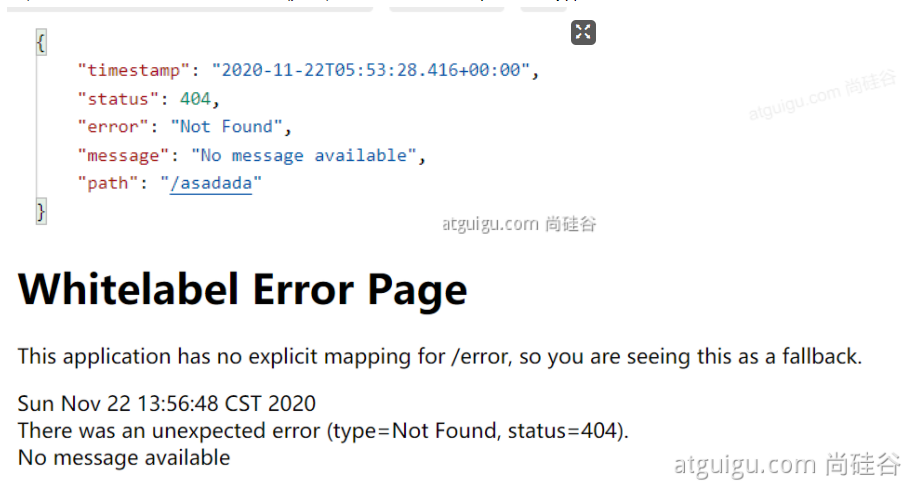
- 默认情况下,Spring Boot提供
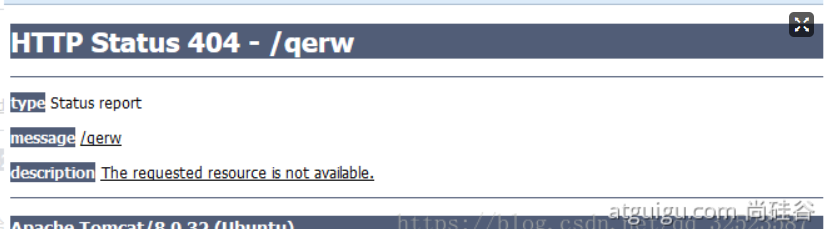
/error处理所有错误的映射 - 对于机器客户端,它将生成JSON响应,其中包含错误,HTTP状态和异常消息的详细信息。对于浏览器客户端,响应一个“ whitelabel”错误视图,以HTML格式呈现相同的数据
- 要对其进行自定义,添加
View解析为error
- 要完全替换默认行为,可以实现
ErrorController并注册该类型的Bean定义,或添加ErrorAttributes类型的组件以使用现有机制但替换其内容。 - error/下的4xx,5xx页面会被自动解析;
2、定制错误处理逻辑
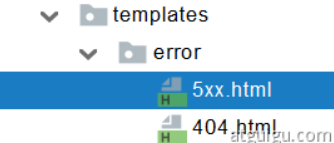
- 自定义错误页
- error/404.html error/5xx.html;有精确的错误状态码页面就匹配精确,没有就找 4xx.html;如果都没有就触发白页
- @ControllerAdvice+@ExceptionHandler处理全局异常;底层是 ExceptionHandlerExceptionResolver 支持的
- @ResponseStatus+自定义异常 ;底层是 ResponseStatusExceptionResolver ,把responsestatus注解的信息底层调用 response.sendError(statusCode, resolvedReason);tomcat发送的/error
- Spring底层的异常,如 参数类型转换异常;DefaultHandlerExceptionResolver 处理框架底层的异常。
- response.sendError(HttpServletResponse.SC_BAD_REQUEST, ex.getMessage());
- 自定义实现 HandlerExceptionResolver 处理异常;可以作为默认的全局异常处理规则
- ErrorViewResolver 实现自定义处理异常;
- response.sendError 。error请求就会转给controller
- 你的异常没有任何人能处理。tomcat底层 response.sendError。error请求就会转给controller
- basicErrorController 要去的页面地址是 ErrorViewResolver ;
3、异常处理自动配置原理
- ErrorMvcAutoConfiguration 自动配置异常处理规则
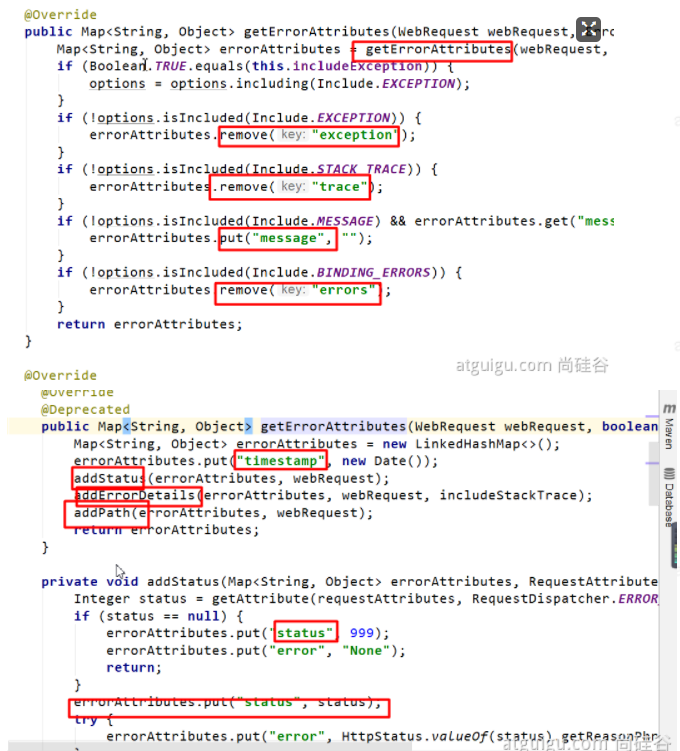
- 容器中的组件:类型:DefaultErrorAttributes -> id:errorAttributes
- public class DefaultErrorAttributes implements ErrorAttributes, HandlerExceptionResolver
- DefaultErrorAttributes:定义错误页面中可以包含哪些数据。
- 容器中的组件:类型:BasicErrorController --> id:basicErrorController(json+白页 适配响应)
- 处理默认 /error 路径的请求;页面响应 new ModelAndView("error", model);
- 容器中有组件 View->id是error;(响应默认错误页)
- 容器中放组件 BeanNameViewResolver(视图解析器);按照返回的视图名作为组件的id去容器中找View对象。
- 容器中的组件:类型:DefaultErrorViewResolver -> id:conventionErrorViewResolver
- 如果发生错误,会以HTTP的状态码 作为视图页地址(viewName),找到真正的页面
- error/404、5xx.html
如果想要返回页面;就会找error视图【StaticView】。(默认是一个白页)

4、异常处理步骤流程
1、执行目标方法,目标方法运行期间有任何异常都会被catch、而且标志当前请求结束;并且用 dispatchException
2、进入视图解析流程(页面渲染?)
processDispatchResult(processedRequest, response, mappedHandler, mv, dispatchException);
3、mv = processHandlerException;处理handler发生的异常,处理完成返回ModelAndView;
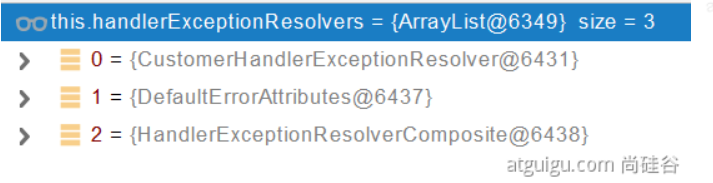
- 1、遍历所有的 handlerExceptionResolvers,看谁能处理当前异常【HandlerExceptionResolver处理器异常解析器】

- 2、系统默认的 异常解析器;
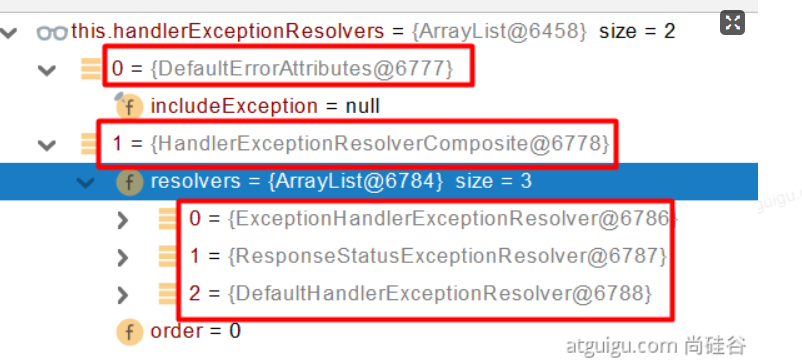
- 1、DefaultErrorAttributes先来处理异常。把异常信息保存到rrequest域,并且返回null;
- 2、默认没有任何人能处理异常,所以异常会被抛出
- 1、如果没有任何人能处理最终底层就会发送 /error 请求。会被底层的BasicErrorController处理
- 2、解析错误视图;遍历所有的 ErrorViewResolver 看谁能解析。

- 3、默认的 DefaultErrorViewResolver ,作用是把响应状态码作为错误页的地址,error/500.html
- 4、模板引擎最终响应这个页面 error/500.html
9、Web原生组件注入(Servlet、Filter、Listener)
1、使用Servlet API
@ServletComponentScan(basePackages = "com.atguigu.admin") :指定原生Servlet组件都放在那里
@WebServlet(urlPatterns = "/my"):效果:直接响应,没有经过Spring的拦截器?
@WebFilter(urlPatterns={"/css/*","/images/*"})
@WebListener
推荐可以这种方式;
扩展:DispatchServlet 如何注册进来
- 容器中自动配置了 DispatcherServlet 属性绑定到 WebMvcProperties;对应的配置文件配置项是 spring.mvc。
- 通过 ServletRegistrationBean<DispatcherServlet> 把 DispatcherServlet 配置进来。
- 默认映射的是 / 路径。
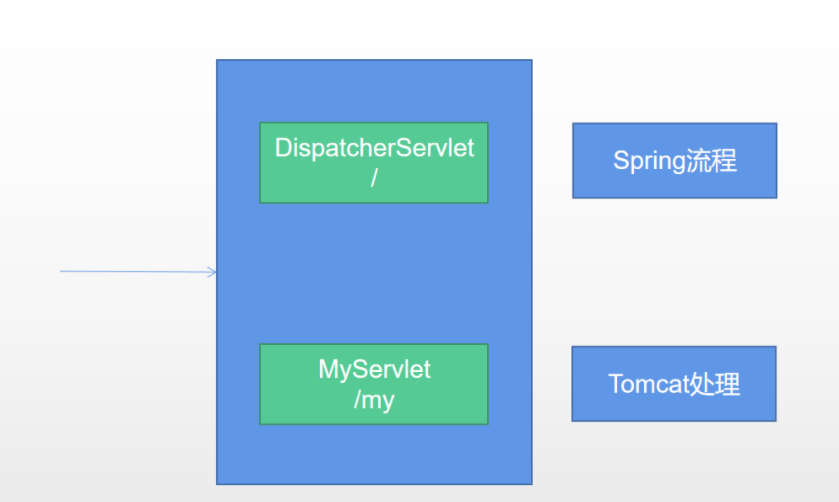
Tomcat-Servlet;
多个Servlet都能处理到同一层路径,精确优选原则
A: /my/
B: /my/1
2、使用RegistrationBean
ServletRegistrationBean, FilterRegistrationBean, and ServletListenerRegistrationBean
@Configuration
public class MyRegistConfig {

    @Bean
    public ServletRegistrationBean myServlet(){
        MyServlet myServlet = new MyServlet();

        return new ServletRegistrationBean(myServlet,"/my","/my02");
    }


    @Bean
    public FilterRegistrationBean myFilter(){

        MyFilter myFilter = new MyFilter();
//        return new FilterRegistrationBean(myFilter,myServlet());
        FilterRegistrationBean filterRegistrationBean = new FilterRegistrationBean(myFilter);
        filterRegistrationBean.setUrlPatterns(Arrays.asList("/my","/css/*"));
        return filterRegistrationBean;
    }

    @Bean
    public ServletListenerRegistrationBean myListener(){
        MySwervletContextListener mySwervletContextListener = new MySwervletContextListener();
        return new ServletListenerRegistrationBean(mySwervletContextListener);
    }
}
10、嵌入式Servlet容器
1、切换嵌入式Servlet容器
- 默认支持的webServer
Tomcat,Jetty, orUndertowServletWebServerApplicationContext 容器启动寻找ServletWebServerFactory 并引导创建服务器
- 切换服务器

<dependency>
    <groupId>org.springframework.boot</groupId>
    <artifactId>spring-boot-starter-web</artifactId>
    <exclusions>
        <exclusion>
            <groupId>org.springframework.boot</groupId>
            <artifactId>spring-boot-starter-tomcat</artifactId>
        </exclusion>
    </exclusions>
</dependency>
- 原理
- SpringBoot应用启动发现当前是Web应用。web场景包-导入tomcat
- web应用会创建一个web版的ioc容器
ServletWebServerApplicationContext
ServletWebServerApplicationContext启动的时候寻找ServletWebServerFactory(Servlet 的web服务器工厂---> Servlet 的web服务器)- SpringBoot底层默认有很多的WebServer工厂;
TomcatServletWebServerFactory,JettyServletWebServerFactory, orUndertowServletWebServerFactory
底层直接会有一个自动配置类。ServletWebServerFactoryAutoConfigurationServletWebServerFactoryAutoConfiguration导入了ServletWebServerFactoryConfiguration(配置类)
ServletWebServerFactoryConfiguration 配置类 根据动态判断系统中到底导入了那个Web服务器的包。(默认是web-starter导入tomcat包),容器中就有 TomcatServletWebServerFactoryTomcatServletWebServerFactory 创建出Tomcat服务器并启动;TomcatWebServer 的构造器拥有初始化方法initialize---this.tomcat.start();
内嵌服务器,就是手动把启动服务器的代码调用(tomcat核心jar包存在)
2、定制Servlet容器
- 实现 WebServerFactoryCustomizer<ConfigurableServletWebServerFactory>
- 把配置文件的值和
ServletWebServerFactory 进行绑定
- 修改配置文件 server.xxx
- 直接自定义 ConfigurableServletWebServerFactory
xxxxxCustomizer:定制化器,可以改变xxxx的默认规则
import org.springframework.boot.web.server.WebServerFactoryCustomizer;
import org.springframework.boot.web.servlet.server.ConfigurableServletWebServerFactory;
import org.springframework.stereotype.Component;

@Component
public class CustomizationBean implements WebServerFactoryCustomizer<ConfigurableServletWebServerFactory> {

    @Override
    public void customize(ConfigurableServletWebServerFactory server) {
        server.setPort(9000);
    }

}
11、定制化原理
1、定制化的常见方式
- 修改配置文件;
- xxxxxCustomizer;
- 编写自定义的配置类 xxxConfiguration;+ @Bean替换、增加容器中默认组件;视图解析器
- Web应用 编写一个配置类实现 WebMvcConfigurer 即可定制化web功能;+ @Bean给容器中再扩展一些组件
@Configuration
public class AdminWebConfig implements WebMvcConfigurer
- @EnableWebMvc + WebMvcConfigurer —— @Bean 可以全面接管SpringMVC,所有规则全部自己重新配置; 实现定制和扩展功能
- 原理
- 1、WebMvcAutoConfiguration 默认的SpringMVC的自动配置功能类。静态资源、欢迎页.....
- 2、一旦使用 @EnableWebMvc 、。会 @Import(DelegatingWebMvcConfiguration.class)
- 3、DelegatingWebMvcConfiguration 的 作用,只保证SpringMVC最基本的使用
- 把所有系统中的 WebMvcConfigurer 拿过来。所有功能的定制都是这些 WebMvcConfigurer 合起来一起生效
- 自动配置了一些非常底层的组件。RequestMappingHandlerMapping、这些组件依赖的组件都是从容器中获取
- public class DelegatingWebMvcConfiguration extends WebMvcConfigurationSupport
- 4、WebMvcAutoConfiguration 里面的配置要能生效 必须 @ConditionalOnMissingBean(WebMvcConfigurationSupport.class)
- 5、@EnableWebMvc 导致了 WebMvcAutoConfiguration 没有生效。
- ... ...
2、原理分析套路
场景starter - xxxxAutoConfiguration - 导入xxx组件 - 绑定xxxProperties -- 绑定配置文件项

 浙公网安备 33010602011771号