
Swagger基本使用快速上手
Swagger简介
1、是一款让你更好的书写API文档规范且完整的框架。
2、提供描述、生产、消费和可视化RESTful Web Service。
3、是由庞大工具集合支撑的形式化规范。这个集合涵盖了从终端用户接口、底层代码库到商业API管理的方方面面。
Springboot集成Swagger
1.创建SpringBoot项目 引入Swagger坐标
需要引入两个Swagger坐标 分别是springfox-swagger2 springfox-swagger-ui
<!-- https://mvnrepository.com/artifact/io.springfox/springfox-swagger2 -->
<dependency>
    <groupId>io.springfox</groupId>
    <artifactId>springfox-swagger2</artifactId>
    <version>3.0.0</version>
</dependency>
<!-- https://mvnrepository.com/artifact/io.springfox/springfox-swagger-ui -->
<dependency>
<groupId>io.springfox</groupId>
<artifactId>springfox-swagger-ui</artifactId>
<version>3.0.0</version>
</dependency>2.编写Swagger配置类
@Configuration 声明SwaggerConfiguration为配置类
@EnableSwagger2注解开启Swagger2
先配置Swagger信息
再配置Swagger的Docket的bean实例
@Configuration
@EnableSwagger2
public class SwaggerConfig {
    //配置Swagger的Docket的bean实例
    @Bean
    public Docket docket() {
        return new Docket(DocumentationType.SWAGGER_2)
                .apiInfo(apiInfo())  //配置Swagger信息
                .select()
                /**
                 * apis():指定扫描的接口
                 *  RequestHandlerSelectors:配置要扫描接口的方式
                 *       basePackage:指定要扫描的包
                 *       any:扫面全部
                 *       none:不扫描
                 *       withClassAnnotation:扫描类上的注解(参数是类上注解的class对象)
                 *       withMethodAnnotation:扫描方法上的注解(参数是方法上的注解的class对象)
                 */
                .apis(RequestHandlerSelectors.basePackage("com.czxy"))
                /**
                 * paths():过滤路径
                 *  PathSelectors:配置过滤的路径
                 *      any:过滤全部路径
                 *      none:不过滤路径
                 *      ant:过滤指定路径:按照按照Spring的AntPathMatcher提供的match方法进行匹配
                 *      regex:过滤指定路径:按照String的matches方法进行匹配
                 */
                .paths(PathSelectors.any())
                .build();
    }

    //配置Swagger信息
    private ApiInfo apiInfo(){
        return new ApiInfo(
                "陶然同学。",
                "我的Swagger API文档",
                "1.0",
                "https://blog.csdn.net/weixin_45481821?spm=1018.2226.3001.5343",
                new Contact("陶然同学。","https://blog.csdn.net/weixin_45481821?spm=1018.2226.3001.5343","71829230@qq.com"),
                "Apache 2.0",
                "https://blog.csdn.net/weixin_45481821?spm=1018.2226.3001.5343",
                new ArrayList<VendorExtension>()
        );
    }
}
3.编写Controller
@RestController
public class HelloController {

    @RequestMapping("/hello")
    public String hello(){
        return "hello";
    }
}
4.测试进入Swagger页面
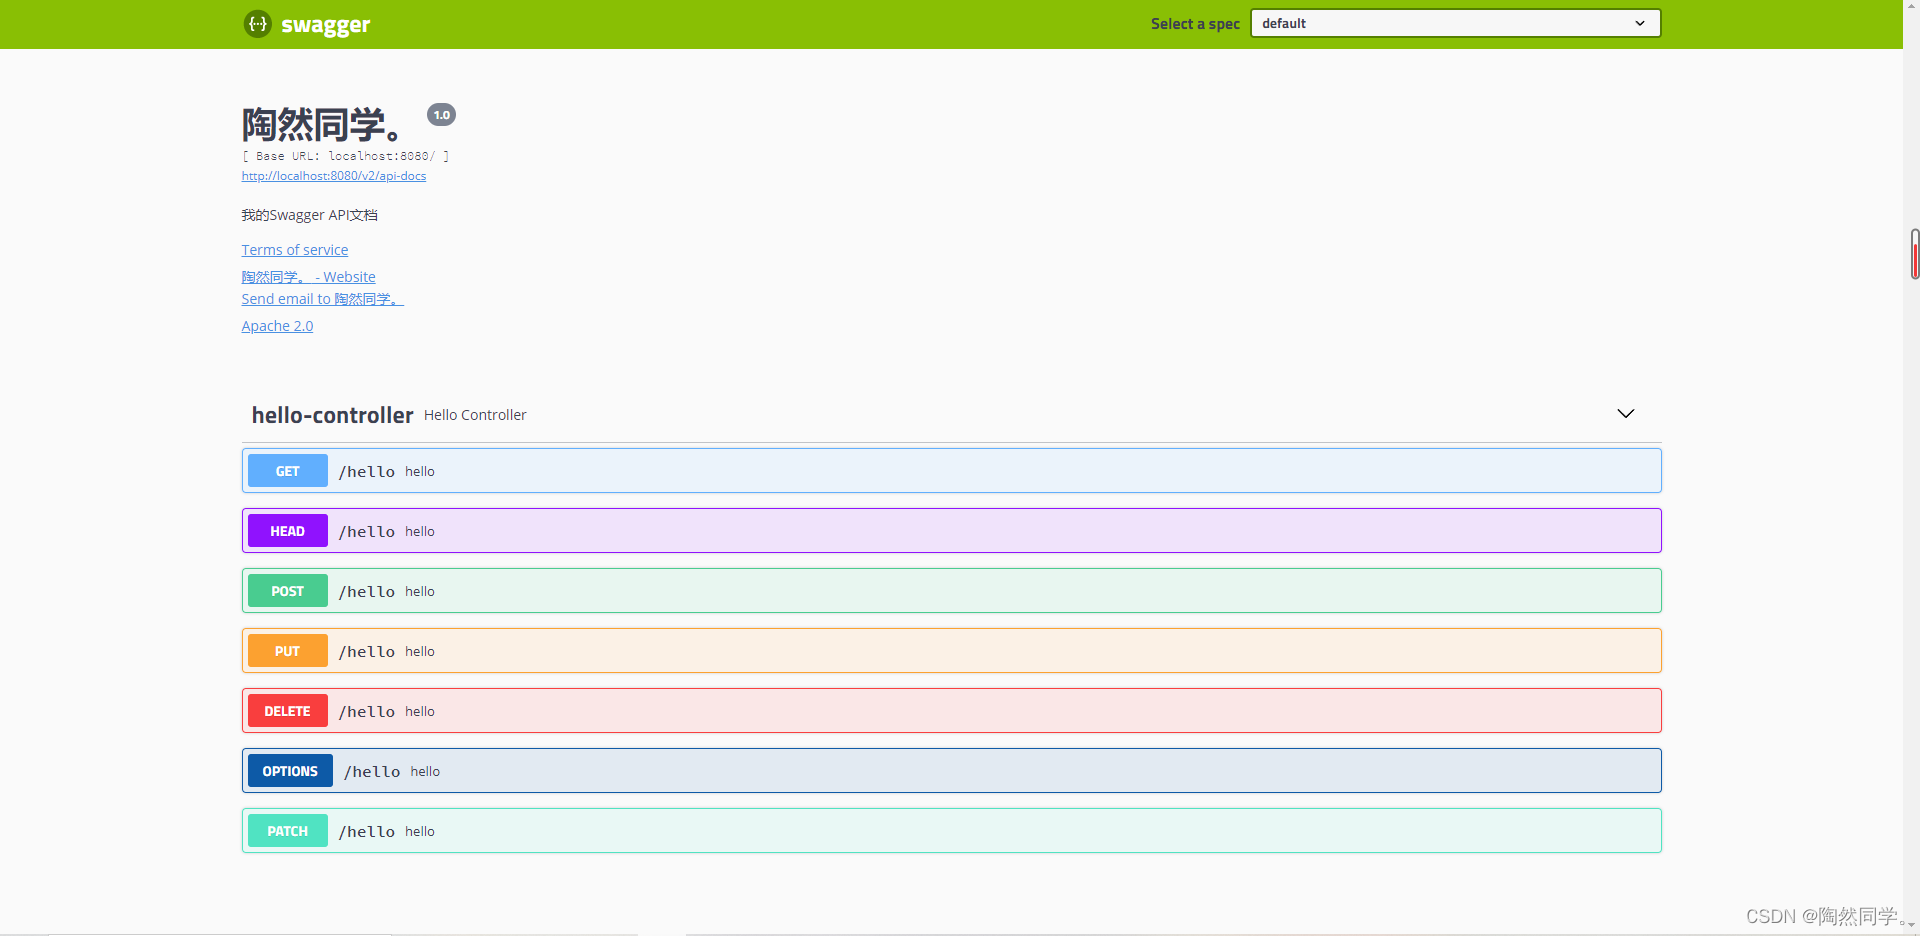
常用注解
@ApiModel:为类添加注释
@ApiModelProperty:为类属性添加注释
@Api:为Controller添加注释
@ApiOperation:为Controller方法添加注释
@ApiParam:为Controller方法参数添加注释
测试Swagger
编写Controller测试传参
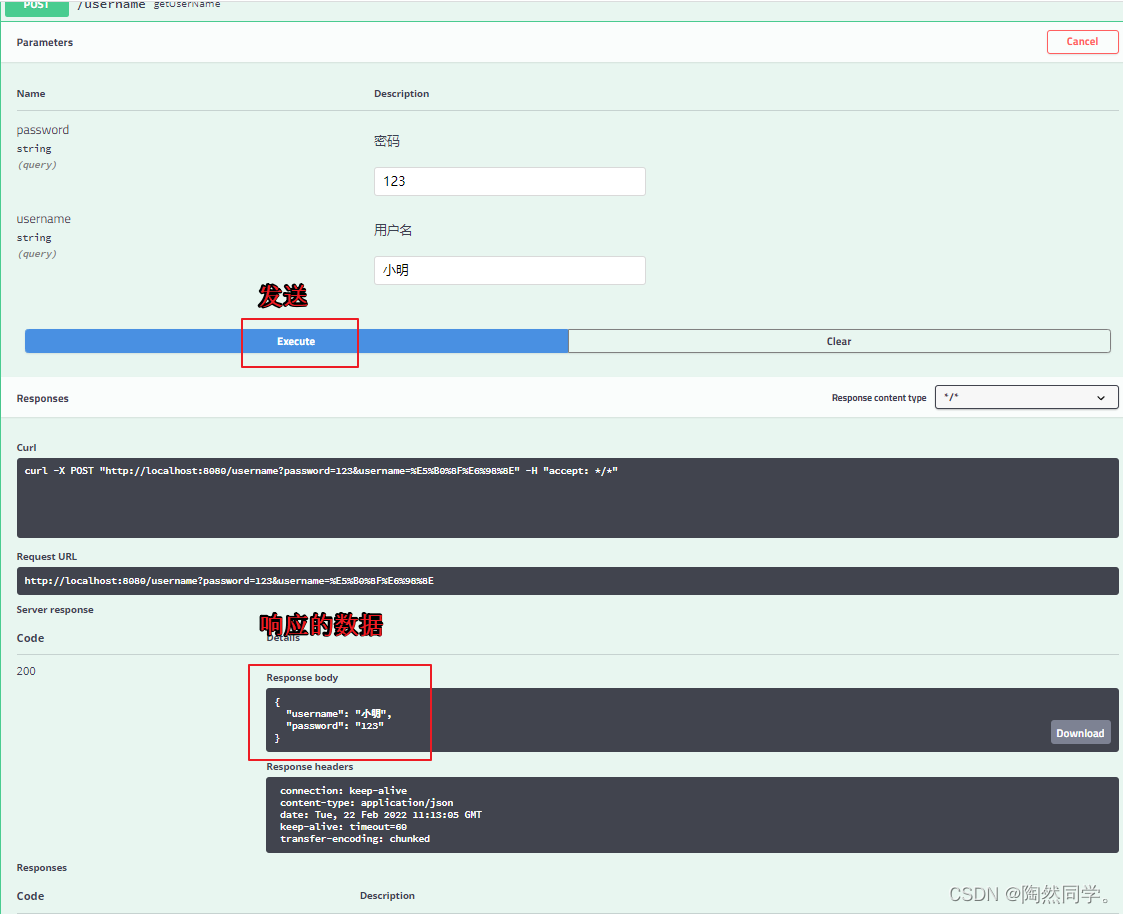
    @PostMapping("/username")
    public User getUserName(User user){
        return user;
    }
点击try it out 填写用户名 和 密码 再点击Execute发送 下面就能看到返回的结果
参考文档
 https://swagger.io/
总结
Swagger不用深入学习 会基本的使用就可以了 配置类不懂也没关系 粘贴复制就行

 浙公网安备 33010602011771号