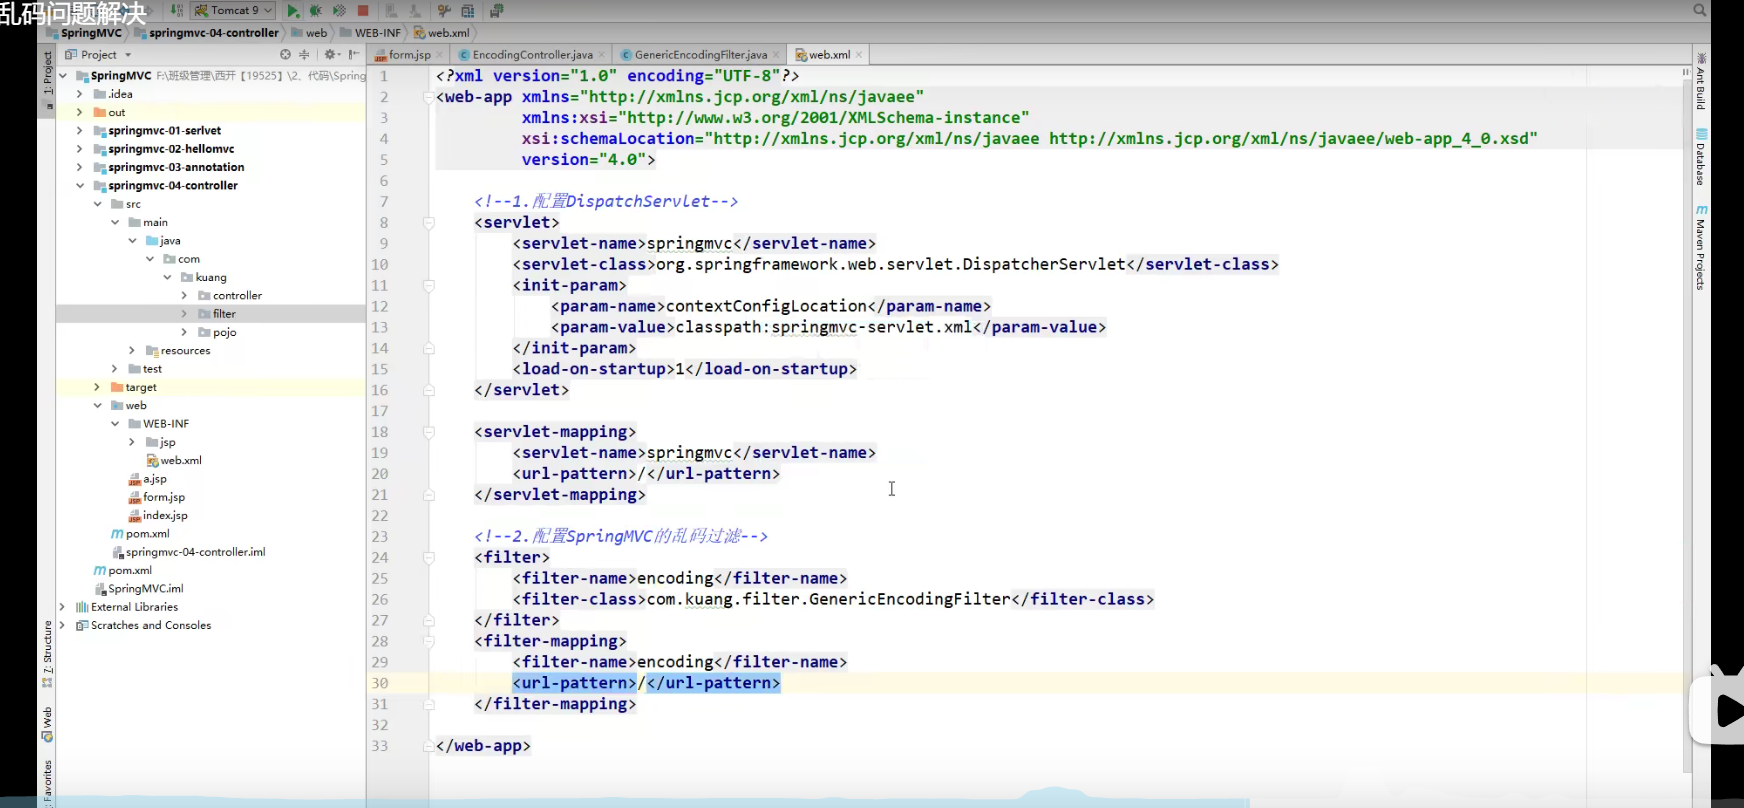
SpringMVC
一、SpringMVC
1.1maven依赖
- mybatis-spring
<dependencies>
    <!-- https://mvnrepository.com/artifact/org.mybatis/mybatis -->
    <dependency>
        <groupId>org.mybatis</groupId>
        <artifactId>mybatis</artifactId>
        <version>3.5.7</version>
    </dependency>
    <!-- https://mvnrepository.com/artifact/mysql/mysql-connector-java -->
    <dependency>
        <groupId>mysql</groupId>
        <artifactId>mysql-connector-java</artifactId>
        <version>8.0.26</version>
    </dependency>
    <!-- https://mvnrepository.com/artifact/junit/junit -->
    <dependency>
        <groupId>junit</groupId>
        <artifactId>junit</artifactId>
        <version>4.13.2</version>
        <!--<scope>test</scope>-->
    </dependency>
    <!-- https://mvnrepository.com/artifact/org.springframework/spring-webmvc -->
    <dependency>
        <groupId>org.springframework</groupId>
        <artifactId>spring-webmvc</artifactId>
        <version>5.3.13</version>
    </dependency>
    <!-- https://mvnrepository.com/artifact/org.aspectj/aspectjrt -->
    <dependency>
        <groupId>org.aspectj</groupId>
        <artifactId>aspectjrt</artifactId>
        <version>1.9.7</version>
    </dependency>
    <!-- https://mvnrepository.com/artifact/org.springframework/spring-jdbc -->
    <!--负责数据库资源管理和错误处理-->
    <dependency>
        <groupId>org.springframework</groupId>
        <artifactId>spring-jdbc</artifactId>
        <version>5.3.13</version>
    </dependency>
    <!--记录程序运行时的活动的日志记录-->
    <dependency>
        <groupId>commons-logging</groupId>
        <artifactId>commons-logging</artifactId>
        <version>1.2</version>
    </dependency>
    <dependency>
        <groupId>log4j</groupId>
        <artifactId>log4j</artifactId>
        <version>1.2.17</version>
        <scope>compile</scope>
    </dependency>
    <!--aop切面-->
    <dependency>
        <groupId>org.aspectj</groupId>
        <artifactId>aspectjweaver</artifactId>
        <version>1.9.7</version>
        <!-- <scope>runtime</scope>-->
    </dependency>
    <!-- https://mvnrepository.com/artifact/org.mybatis/mybatis-spring -->
    <!--帮助你将 MyBatis 代码无缝地整合到 Spring 中-->
    <dependency>
        <groupId>org.mybatis</groupId>
        <artifactId>mybatis-spring</artifactId>
        <version>2.0.6</version>
    </dependency>
</dependencies>
<!--在build中配置resources,来防止我们资源导出失败的问题-->
<build>
    <resources>
        <resource>
            <directory>src/main/resources</directory>
            <includes>
                <include>**/*.properties</include>
                <include>**/*.xml</include>
            </includes>
            <filtering>true</filtering>
        </resource>
        <resource>
            <directory>src/main/java</directory>
            <includes>
                <include>**/*.properties</include>
                <include>**/*.xml</include>
            </includes>
            <filtering>true</filtering>
        </resource>
    </resources>
</build>
SSM整合(配置文件)
<dependencies>
<!--mybatis-Spring-->
<!-- https://mvnrepository.com/artifact/org.mybatis/mybatis -->
<dependency>
<groupId>org.mybatis</groupId>
<artifactId>mybatis</artifactId>
<version>3.5.7</version>
</dependency>
<!-- https://mvnrepository.com/artifact/mysql/mysql-connector-java -->
<dependency>
<groupId>mysql</groupId>
<artifactId>mysql-connector-java</artifactId>
<version>8.0.26</version>
</dependency>
<!-- https://mvnrepository.com/artifact/junit/junit -->
<!--<dependency>
<groupId>junit</groupId>
<artifactId>junit</artifactId>
<version>4.13.2</version>
<!–<scope>test</scope>–>
</dependency>-->
<!-- https://mvnrepository.com/artifact/org.springframework/spring-webmvc -->
<!-- <dependency>-->
<!-- <groupId>org.springframework</groupId>-->
<!-- <artifactId>spring-webmvc</artifactId>-->
<!-- <version>5.3.13</version>-->
<!-- </dependency>-->
<!-- https://mvnrepository.com/artifact/org.aspectj/aspectjrt -->
<dependency>
<groupId>org.aspectj</groupId>
<artifactId>aspectjrt</artifactId>
<version>1.9.7</version>
</dependency>
<!-- https://mvnrepository.com/artifact/org.springframework/spring-jdbc -->
<!--负责数据库资源管理和错误处理-->
<dependency>
<groupId>org.springframework</groupId>
<artifactId>spring-jdbc</artifactId>
<version>5.3.13</version>
</dependency>
<!--记录程序运行时的活动的日志记录-->
<dependency>
<groupId>commons-logging</groupId>
<artifactId>commons-logging</artifactId>
<version>1.2</version>
</dependency>
<dependency>
<groupId>log4j</groupId>
<artifactId>log4j</artifactId>
<version>1.2.17</version>
<scope>compile</scope>
</dependency>
<!--aop切面-->
<dependency>
<groupId>org.aspectj</groupId>
<artifactId>aspectjweaver</artifactId>
<version>1.9.7</version>
<!-- <scope>runtime</scope>-->
</dependency>
<!-- https://mvnrepository.com/artifact/org.mybatis/mybatis-spring -->
<!--帮助你将 MyBatis 代码无缝地整合到 Spring 中-->
<dependency>
<groupId>org.mybatis</groupId>
<artifactId>mybatis-spring</artifactId>
<version>2.0.6</version>
</dependency>
<!--连接池-->
<!-- https://mvnrepository.com/artifact/commons-dbcp/commons-dbcp -->
<dependency>
<groupId>commons-dbcp</groupId>
<artifactId>commons-dbcp</artifactId>
<version>1.4</version>
</dependency>
<!--springmvc-->
<!-- https://mvnrepository.com/artifact/org.springframework/spring-webmvc -->
<dependency>
<groupId>org.springframework</groupId>
<artifactId>spring-webmvc</artifactId>
<version>5.3.13</version>
</dependency>
<!-- https://mvnrepository.com/artifact/junit/junit -->
<dependency>
<groupId>junit</groupId>
<artifactId>junit</artifactId>
<version>4.13.2</version>
<!--<scope>test</scope>-->
</dependency>
<!-- https://mvnrepository.com/artifact/javax.servlet/servlet-api -->
<dependency>
<groupId>javax.servlet</groupId>
<artifactId>servlet-api</artifactId>
<version>2.5</version>
<!-- <scope>provided</scope>-->
</dependency>
<!-- https://mvnrepository.com/artifact/javax.servlet.jsp/jsp-api -->
<dependency>
<groupId>javax.servlet.jsp</groupId>
<artifactId>jsp-api</artifactId>
<version>2.2</version>
<!-- <scope>provided</scope>-->
</dependency>
<!-- https://mvnrepository.com/artifact/javax.servlet/jstl -->
<dependency>
<groupId>javax.servlet</groupId>
<artifactId>jstl</artifactId>
<version>1.2</version>
</dependency>
<!--阿里巴巴的json-->
<!-- https://mvnrepository.com/artifact/com.alibaba/fastjson -->
<dependency>
<groupId>com.alibaba</groupId>
<artifactId>fastjson</artifactId>
<version>1.2.79</version>
</dependency>
</dependencies>
<!--在build中配置resources,来防止我们资源导出失败的问题-->
<build>
<resources>
<resource>
<directory>src/main/resources</directory>
<includes>
<include>**/*.properties</include>
<include>**/*.xml</include>
</includes>
<filtering>true</filtering>
</resource>
<resource>
<directory>src/main/java</directory>
<includes>
<include>**/*.properties</include>
<include>**/*.xml</include>
</includes>
<filtering>true</filtering>
</resource>
</resources>
</build>
- springMVC
<dependencies>
    <!-- https://mvnrepository.com/artifact/org.springframework/spring-webmvc -->
    <dependency>
        <groupId>org.springframework</groupId>
        <artifactId>spring-webmvc</artifactId>
        <version>5.3.13</version>
    </dependency>
    <!-- https://mvnrepository.com/artifact/junit/junit -->
    <dependency>
        <groupId>junit</groupId>
        <artifactId>junit</artifactId>
        <version>4.13.2</version>
        <!--<scope>test</scope>-->
    </dependency>
</dependencies>
<!--在build中配置resources,来防止我们资源导出失败的问题-->
<build>
    <resources>
        <resource>
            <directory>src/main/resources</directory>
            <includes>
                <include>**/*.properties</include>
                <include>**/*.xml</include>
            </includes>
            <filtering>true</filtering>
        </resource>
        <resource>
            <directory>src/main/java</directory>
            <includes>
                <include>**/*.properties</include>
                <include>**/*.xml</include>
            </includes>
            <filtering>true</filtering>
        </resource>
    </resources>
</build>
1.2、什么是MVC
- MVC是模型(Model)、视图(View)、控制器(Controller)的简写,是一种软件设计规范。
- 是将业务逻辑、数据、显示分离的方法来组织代码。
- MVC主要作用是降低了视图与业务逻辑间的双向偶合。
- MVC不是一种设计模式,MVC是一种架构模式。当然不同的MVC存在差异。
Model(模型):数据模型,提供要展示的数据,因此包含数据和行为,可以认为是领域模型或JavaBean组件(包含数据和行为),不过现在一般都分离开来:Value Object(数据Dao) 和 服务层(行为Service)。也就是模型提供了模型数据查询和模型数据的状态更新等功能,包括数据和业务。
View(视图):负责进行模型的展示,一般就是我们见到的用户界面,客户想看到的东西。
Controller(控制器):接收用户请求,委托给模型进行处理(状态改变),处理完毕后把返回的模型数据返回给视图,由视图负责展示。也就是说控制器做了个调度员的工作。
最典型的MVC就是JSP + servlet + javabean的模式
职责分析:
Controller:控制器
- 取得表单数据
- 调用业务逻辑
- 转向指定的页面
Model:模型
- 业务逻辑
- 保存数据的状态
View:视图
- 显示页面
Model2这样不仅提高的代码的复用率与项目的扩展性,且大大降低了项目的维护成本。Model 1模式的实现比较简单,适用于快速开发小规模项目,Model1中JSP页面身兼View和Controller两种角色,将控制逻辑和表现逻辑混杂在一起,从而导致代码的重用性非常低,增加了应用的扩展性和维护的难度。Model2消除了Model1的缺点。
1.3、回顾Servlet
- 新建一个Maven工程当做父工程!pom依赖!
<dependencies>
   <dependency>
       <groupId>junit</groupId>
       <artifactId>junit</artifactId>
       <version>4.12</version>
   </dependency>
   <dependency>
       <groupId>org.springframework</groupId>
       <artifactId>spring-webmvc</artifactId>
       <version>5.1.9.RELEASE</version>
   </dependency>
   <dependency>
       <groupId>javax.servlet</groupId>
       <artifactId>servlet-api</artifactId>
       <version>2.5</version>
   </dependency>
   <dependency>
       <groupId>javax.servlet.jsp</groupId>
       <artifactId>jsp-api</artifactId>
       <version>2.2</version>
   </dependency>
   <dependency>
       <groupId>javax.servlet</groupId>
       <artifactId>jstl</artifactId>
       <version>1.2</version>
   </dependency>
</dependencies>
- 建立一个Moudle:springmvc-01-servlet , 添加Web app的支持!
- 导入servlet 和 jsp 的 jar 依赖
<dependency>
   <groupId>javax.servlet</groupId>
   <artifactId>servlet-api</artifactId>
   <version>2.5</version>
</dependency>
<dependency>
   <groupId>javax.servlet.jsp</groupId>
   <artifactId>jsp-api</artifactId>
   <version>2.2</version>
</dependency>
- 编写一个Servlet类,用来处理用户的请求
package com.kuang.servlet;

//实现Servlet接口
public class HelloServlet extends HttpServlet {
   @Override
   protected void doGet(HttpServletRequest req, HttpServletResponse resp) throws ServletException, IOException {
       //取得参数
       String method = req.getParameter("method");
       if (method.equals("add")){
           req.getSession().setAttribute("msg","执行了add方法");
      }
       if (method.equals("delete")){
           req.getSession().setAttribute("msg","执行了delete方法");
      }
       //业务逻辑
       //视图跳转
       req.getRequestDispatcher("/WEB-INF/jsp/hello.jsp").forward(req,resp);
  }

   @Override
   protected void doPost(HttpServletRequest req, HttpServletResponse resp) throws ServletException, IOException {
       doGet(req,resp);
  }
}
- 编写Hello.jsp,在WEB-INF目录下新建一个jsp的文件夹,新建hello.jsp
<%@ page contentType="text/html;charset=UTF-8" language="java" %>
<html>
<head>
   <title>Kuangshen</title>
</head>
<body>
${msg}
</body>
</html>
- 在web.xml中注册Servlet
<?xml version="1.0" encoding="UTF-8"?>
<web-app xmlns="http://xmlns.jcp.org/xml/ns/javaee"
        xmlns:xsi="http://www.w3.org/2001/XMLSchema-instance"
        xsi:schemaLocation="http://xmlns.jcp.org/xml/ns/javaee http://xmlns.jcp.org/xml/ns/javaee/web-app_4_0.xsd"
        version="4.0">
   <servlet>
       <servlet-name>HelloServlet</servlet-name>
       <servlet-class>com.kuang.servlet.HelloServlet</servlet-class>
   </servlet>
   <servlet-mapping>
       <servlet-name>HelloServlet</servlet-name>
       <url-pattern>/user</url-pattern>
   </servlet-mapping>

</web-app>
-
配置Tomcat,并启动测试
-
- localhost:8080/user?method=add
- localhost:8080/user?method=delete
二、第一个MVC程序
配置版
1、新建一个Moudle , springmvc-02-hello , 添加web的支持!
2、确定导入了SpringMVC 的依赖!
3、配置web.xml , 注册DispatcherServlet
<?xml version="1.0" encoding="UTF-8"?>
<web-app xmlns="http://xmlns.jcp.org/xml/ns/javaee"
        xmlns:xsi="http://www.w3.org/2001/XMLSchema-instance"
        xsi:schemaLocation="http://xmlns.jcp.org/xml/ns/javaee http://xmlns.jcp.org/xml/ns/javaee/web-app_4_0.xsd"
        version="4.0">

   <!--1.注册DispatcherServlet-->
   <servlet>
       <servlet-name>springmvc</servlet-name>
       <servlet-class>org.springframework.web.servlet.DispatcherServlet</servlet-class>
       <!--关联一个springmvc的配置文件:【servlet-name】-servlet.xml-->
       <init-param>
           <param-name>contextConfigLocation</param-name>
           <param-value>classpath:springmvc-servlet.xml</param-value>
       </init-param>
       <!--启动级别-1-->
       <load-on-startup>1</load-on-startup>
   </servlet>

   <!--/ 匹配所有的请求;(不包括.jsp)-->
   <!--/* 匹配所有的请求;(包括.jsp)-->
   <servlet-mapping>
       <servlet-name>springmvc</servlet-name>
       <url-pattern>/</url-pattern>
   </servlet-mapping>

</web-app>
4、编写SpringMVC 的 配置文件!名称:springmvc-servlet.xml : [servletname]-servlet.xml
说明,这里的名称要求是按照官方来的
<?xml version="1.0" encoding="UTF-8"?>
<beans xmlns="http://www.springframework.org/schema/beans"
       xmlns:xsi="http://www.w3.org/2001/XMLSchema-instance"
       xsi:schemaLocation="http://www.springframework.org/schema/beans
                           http://www.springframework.org/schema/beans/spring-beans.xsd">
    5、添加 处理映射器

    <bean class="org.springframework.web.servlet.handler.BeanNameUrlHandlerMapping"/>
    6、添加 处理器适配器
    <bean class="org.springframework.web.servlet.mvc.SimpleControllerHandlerAdapter"/>
    7、添加 视图解析器
    <!--视图解析器:DispatcherServlet给他的ModelAndView-->
    <bean class="org.springframework.web.servlet.view.InternalResourceViewResolver" id="InternalResourceViewResolver">
        <!--前缀-->
        <property name="prefix" value="/WEB-INF/jsp/"/>
        <!--后缀-->
        <property name="suffix" value=".jsp"/>
    </bean>

</beans>
8、编写我们要操作业务Controller ,要么实现Controller接口,要么增加注解;需要返回一个ModelAndView,装数据,封视图;
package com.kuang.controller;

import org.springframework.web.servlet.ModelAndView;
import org.springframework.web.servlet.mvc.Controller;

import javax.servlet.http.HttpServletRequest;
import javax.servlet.http.HttpServletResponse;

//注意:这里我们先导入Controller接口
public class HelloController implements Controller {

   public ModelAndView handleRequest(HttpServletRequest request, HttpServletResponse response) throws Exception {
       //ModelAndView 模型和视图
       ModelAndView mv = new ModelAndView();

       //封装对象,放在ModelAndView中。Model
       mv.addObject("msg","HelloSpringMVC!");
       //封装要跳转的视图,放在ModelAndView中
       mv.setViewName("hello"); //: /WEB-INF/jsp/hello.jsp
       return mv;
  }

}
9、将自己的类交给SpringIOC容器,注册bean
<!--Handler-->
<bean id="/hello" class="com.kuang.controller.HelloController"/>
10、写要跳转的jsp页面,显示ModelandView存放的数据,以及我们的正常页面;
<%@ page contentType="text/html;charset=UTF-8" language="java" %>
<html>
<head>
   <title>Kuangshen</title>
</head>
<body>
${msg}
</body>
</html>
可能遇到的问题:访问出现404,排查步骤:
- 查看控制台输出,看一下是不是缺少了什么jar包。
- 如果jar包存在,显示无法输出,就在IDEA的项目发布中,添加lib依赖!
- 重启Tomcat 即可解决!
注解版
1、新建一个Moudle,springmvc-03-hello-annotation 。添加web支持!
2、由于Maven可能存在资源过滤的问题,我们将配置完善
<!--Maven pom.xml-->
<build>
   <resources>
       <resource>
           <directory>src/main/java</directory>
           <includes>
               <include>**/*.properties</include>
               <include>**/*.xml</include>
           </includes>
           <filtering>false</filtering>
       </resource>
       <resource>
           <directory>src/main/resources</directory>
           <includes>
               <include>**/*.properties</include>
               <include>**/*.xml</include>
           </includes>
           <filtering>false</filtering>
       </resource>
   </resources>
</build>
3、在pom.xml文件引入相关的依赖:主要有Spring框架核心库、Spring MVC、servlet , JSTL等。我们在父依赖中已经引入了!
4、配置web.xml
注意点:
<?xml version="1.0" encoding="UTF-8"?>
<web-app xmlns="http://xmlns.jcp.org/xml/ns/javaee"
        xmlns:xsi="http://www.w3.org/2001/XMLSchema-instance"
        xsi:schemaLocation="http://xmlns.jcp.org/xml/ns/javaee http://xmlns.jcp.org/xml/ns/javaee/web-app_4_0.xsd"
        version="4.0">

   <!--1.注册servlet-->
   <servlet>
       <servlet-name>SpringMVC</servlet-name>
       <servlet-class>org.springframework.web.servlet.DispatcherServlet</servlet-class>
       <!--通过初始化参数指定SpringMVC配置文件的位置,进行关联-->
       <init-param>
           <param-name>contextConfigLocation</param-name>
           <param-value>classpath:springmvc-servlet.xml</param-value>
       </init-param>
       <!-- 启动顺序,数字越小,启动越早 -->
       <load-on-startup>1</load-on-startup>
   </servlet>

   <!--所有请求都会被springmvc拦截 -->
   <servlet-mapping>
       <servlet-name>SpringMVC</servlet-name>
       <url-pattern>/</url-pattern>
   </servlet-mapping>

</web-app>
/ 和 /* 的区别:< url-pattern > / </ url-pattern > 不会匹配到.jsp, 只针对我们编写的请求;即:.jsp 不会进入spring的 DispatcherServlet类 。< url-pattern > /* </ url-pattern > 会匹配 *.jsp,会出现返回 jsp视图 时再次进入spring的DispatcherServlet 类,导致找不到对应的controller所以报404错。
-
- 注意web.xml版本问题,要最新版!
- 注册DispatcherServlet
- 关联SpringMVC的配置文件
- 启动级别为1
- 映射路径为 / 【不要用/*,会404】
-
5、添加Spring MVC配置文件
-
在resource目录下添加springmvc-servlet.xml配置文件,配置的形式与Spring容器配置基本类似,为了支持基于注解的IOC,设置了自动扫描包的功能,具体配置信息如下:
<?xml version="1.0" encoding="UTF-8"?>
<beans xmlns="http://www.springframework.org/schema/beans"
      xmlns:xsi="http://www.w3.org/2001/XMLSchema-instance"
      xmlns:context="http://www.springframework.org/schema/context"
      xmlns:mvc="http://www.springframework.org/schema/mvc"
      xsi:schemaLocation="http://www.springframework.org/schema/beans
       http://www.springframework.org/schema/beans/spring-beans.xsd
       http://www.springframework.org/schema/context
       https://www.springframework.org/schema/context/spring-context.xsd
       http://www.springframework.org/schema/mvc
       https://www.springframework.org/schema/mvc/spring-mvc.xsd">

   <!-- 自动扫描包,让指定包下的注解生效,由IOC容器统一管理 -->
   <context:component-scan base-package="com.kuang.controller"/>
   <!-- 让Spring MVC不处理静态资源 -->
   <mvc:default-servlet-handler />
   <!--
   支持mvc注解驱动
       在spring中一般采用@RequestMapping注解来完成映射关系
       要想使@RequestMapping注解生效
       必须向上下文中注册DefaultAnnotationHandlerMapping
       和一个AnnotationMethodHandlerAdapter实例
       这两个实例分别在类级别和方法级别处理。
       而annotation-driven配置帮助我们自动完成上述两个实例的注入。
    -->
   <mvc:annotation-driven />

   <!-- 视图解析器 -->
   <bean class="org.springframework.web.servlet.view.InternalResourceViewResolver"
         id="internalResourceViewResolver">
       <!-- 前缀 -->
       <property name="prefix" value="/WEB-INF/jsp/" />
       <!-- 后缀 -->
       <property name="suffix" value=".jsp" />
   </bean>

</beans>
-
在视图解析器中我们把所有的视图都存放在/WEB-INF/目录下,这样可以保证视图安全,因为这个目录下的文件,客户端不能直接访问。
-
- 让IOC的注解生效
- 静态资源过滤 :HTML . JS . CSS . 图片 , 视频 .....
- MVC的注解驱动
- 配置视图解析器
-
6、创建Controller
-
编写一个Java控制类:com.kuang.controller.HelloController , 注意编码规范
package com.kuang.controller;

import org.springframework.stereotype.Controller;
import org.springframework.ui.Model;
import org.springframework.web.bind.annotation.RequestMapping;

@Controller
@RequestMapping("/HelloController")
public class HelloController {

   //真实访问地址 : 项目名/HelloController/hello
   @RequestMapping("/hello")
   public String sayHello(Model model){
       //向模型中添加属性msg与值,可以在JSP页面中取出并渲染
       model.addAttribute("msg","hello,SpringMVC");
       //web-inf/jsp/hello.jsp
       return "hello";
  }
}
- @Controller是为了让Spring IOC容器初始化时自动扫描到;
- @RequestMapping是为了映射请求路径,这里因为类与方法上都有映射所以访问时应该是/HelloController/hello;
- 方法中声明Model类型的参数是为了把Action中的数据带到视图中;
- 方法返回的结果是视图的名称hello,加上配置文件中的前后缀变成WEB-INF/jsp/hello.jsp。
-
7、创建视图层
-
在WEB-INF/ jsp目录中创建hello.jsp , 视图可以直接取出并展示从Controller带回的信息;
-
可以通过EL表示取出Model中存放的值,或者对象;
<%@ page contentType="text/html;charset=UTF-8" language="java" %>
<html>
<head>
   <title>SpringMVC</title>
</head>
<body>
${msg}
</body>
</html>
小结
实现步骤其实非常的简单:
- 新建一个web项目
- 导入相关jar包
- 编写web.xml , 注册DispatcherServlet
- 编写springmvc配置文件
- 接下来就是去创建对应的控制类 , controller
- 最后完善前端视图和controller之间的对应
- 测试运行调试.
使用springMVC必须配置的三大件:
处理器映射器、处理器适配器、视图解析器
通常,我们只需要手动配置视图解析器,而处理器映射器和处理器适配器只需要开启注解驱动即可,而省去了大段的xml配置


 浙公网安备 33010602011771号