第3章 ansible命令
ansible命令相当于shell命令,ansible-playbook相当于shell脚本。
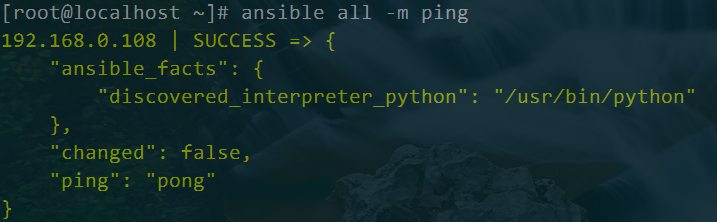
192.168.0.108是指命令执行的主机
SUCCESS表示命令执行成功
"changed": false表示没有对主机做变更
"ping": "pong"表示执行了ping命令,返回了结果pong
ansible all -m command -a 'hostname' -vvv
打印详细信息
调用command模块的hostname命令
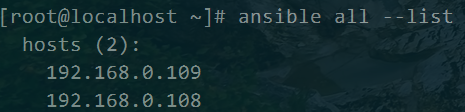
列出所有主机
ansible all -a "df -h"(不指定模块,默认就使用command模块)
ansible all -m command -a "df -h"
ansible all -m shell -a "df -h"
三个命令的结果一样,这是为何?
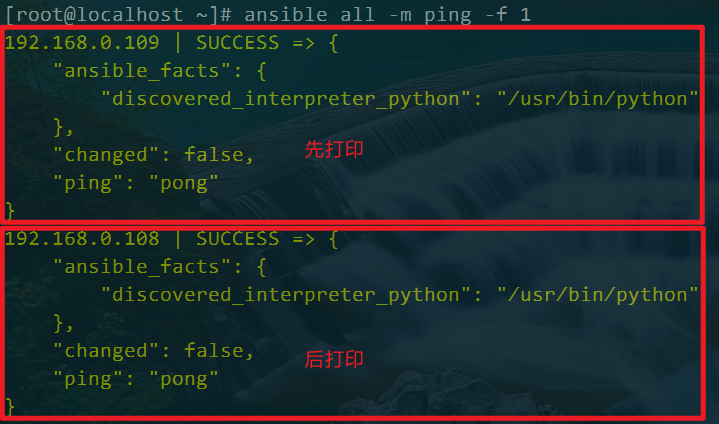
Ansible 和 Ansible-playbook默认会 fork 5个线程并发执行命令。
实际工作中,如果主机数量众多,Ansible并发5个线程是远不能满足企业所需的。
ansible all -m ping -f 1
ansible all -m ping -f 2
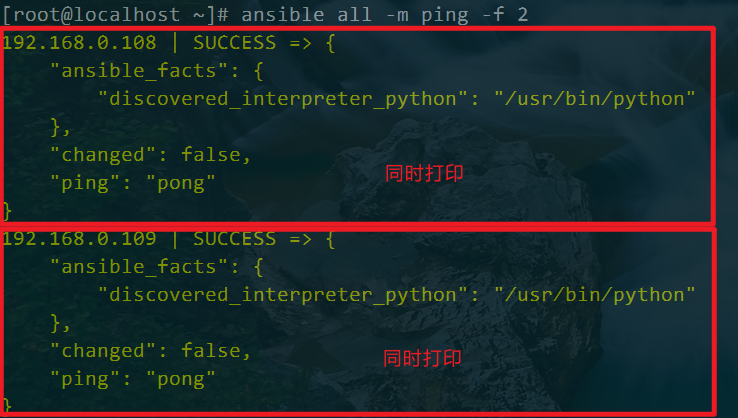
建议并发数配置的CPU核数的偶数倍就好。如 4C8G的服务器,建议最多并发 20个线程。
显示所有可用模块
ansible-doc -l
显示某个模块的使用说明
ansible-doc yum
使用yum模块安装redhat-lsb
ansible all -m yum -a "name=redhat-lsb state=present"
使用yum模块时,-a后指定要安装的包,以及安装之后包的状态。present状态表示安装上了。
使用lsb_release命令查看系统版本号
ansible all -m command -a "lsb_release -a"
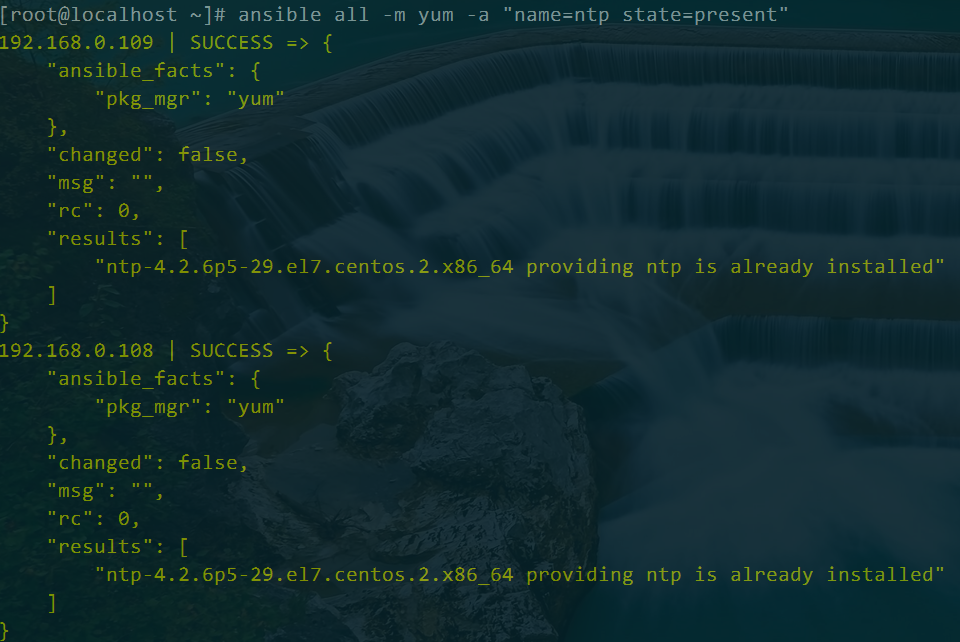
为所有服务器安装ntp服务
ansible all -m yum -a "name=ntp state=present"
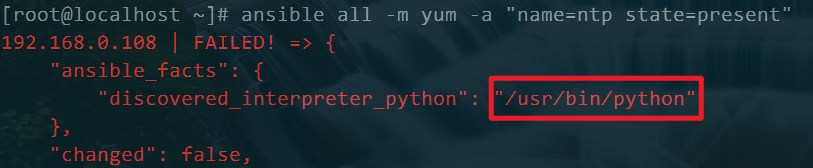
在测试这一步时,我遇到了一个错误,错误如下:(本质原因就是安装了其他版本的python)
[root@localhost ~]# ansible all -m yum -a "name=ntp state=present"
192.168.0.108 | FAILED! => {
    "ansible_facts": {
        "discovered_interpreter_python": "/usr/bin/python"
    },
    "changed": false,
    "msg": "The Python 2 bindings for rpm are needed for this module. If you require Python 3 support use the `dnf` Ansible module instead.. The Python 2 yum module is needed for this module. If you require Python 3 support use the `dnf` Ansible module instead."
}
原因是因为我的机器上安装了其他版本的python,而且我将其他版本的python作为了主版本。

我们看ansible使用的python解释器为:(指向的是我们安装的python275)
然后看yum使用的python解释器:
cat /usr/bin/yum
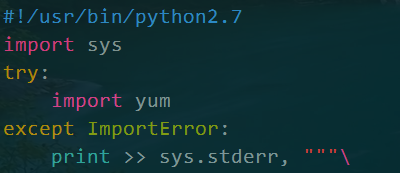
可以看到yum使用的是系统默认的python解释器。
由于python解释器对不上,所以使用yum安装ntp失败。
解决方法:(2种)
(方法1)删除你所安装的其他python版本
(方法2)在资产文件中指定python解释器
ansible_python_interpreter=/usr/bin/python2.7

此时再进行安装即可。
启动ntp服务,并设置为开机启动
ansible all -m service -a "name=ntpd state=started enabled=yes"
所有的服务都是通过service模块来控制的。name指定服务名称,state指定服务的状态,enabled指定是否开机启动。
搭建架构
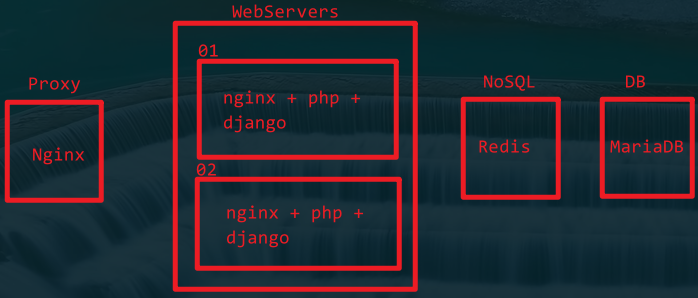
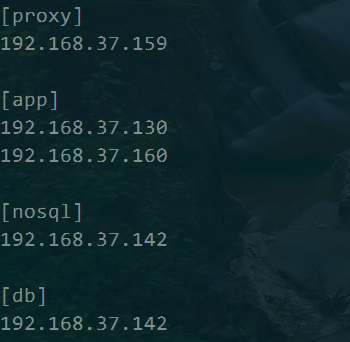
首先处理proxy:
安装最新版nginx
(1)ansible proxy -m yum -a "name=nginx state=present"
从网络安装指定版本nginx
ansible proxy -m yum -a "name=http:/nginx.org/packages/centos/6/noarch/RPMS/
nginx-release-cento8-6-0.el6.ngx.noarch.rpm state=present"
从本地安装指定版本nginx
ansible proxy -m yum -a "name=/usr/local/src/nginx-release-centos-6-0.el6.ngx.
noarch.pm state=present"
然后处理webservers:
安装nginx、php
(2)ansible app -m yum -a "name=nginx state=present"
(3)ansible app -m yum -a "name=php state=present"
安装django
需要先安装依赖包
(4)ansible app -m yum -a "name=MySQL-python state=present"
(5)ansible app -m yum -a "name=python-setuptools state=present"
(6)ansible app -m pip -a "name=django state=present" (安装)
检查django是否安装正常
ansible app -m command -a "python -c 'import django; print django.get_version()'" (验证)
django 依赖Python2.7+版本,如执行报错,请检查 Python版本。
通过上面(1)-(6)的步骤,就完成了proxy和app角色的部署。
然后处理nosql:
(7)ansible nosql -m yum -a "name=redis state=present" (安装)
(8)ansible nosql -m command -a "redis-cli --version" (验证)
然后处理db:
首先在目标主机添加yum源:
/etc/yum.repos.d/mariadb.repo
mariadb]
name = MariaDB
baseurl = http;/yum.mariadb.org/10.17cento86-x86
gpgkey=https:// yum.mariadb.org/RPM-GPG-KEY-MariaDB
gpgcheck=1
(9)ansible db -m yum -a "name=MariaDB-server state=present"
(10)ansible db -m yum -a "name=MariaDB-client state=present"
(11)ansible db -m command -a "iptables -A INPUT -s 192.168.37.0/24 -p tcp -m tcp --dport 3306 -j ACCEPT"
至此,架构搭建完毕。
针对特定主机做变更
ansible app -m command -a "service ntpd status" --limit "192.168.37.158"
如果不加--limit,就是对app组内的所有机器执行命令,如果加了,就只对后面的一台机器执行。
指定IP
ansible "192.168.37.158" -m command -a "service ntpd start"
指定多个IP
ansible "192.168.37.158:192.168.37.159" -m command -a "service ntpd start"
用户管理(模糊)
ansible "192.168.0.108" -m user -a "name=dba shell=/bin/bash groups=rabbitmq,mysql append=yes home=/home/dba state=present"
用户名:dba
shell:/bin/bash
所属组:rabbitmq和mysql,结合了append,表示追加,dba用户除了有自己的独立组dba之外,另外还属于rabbitmq和mysql组
修改用户,这里是修改组,主要是覆盖组,而非增加组
ansible "192.168.0.108" -m user -a "name=dba groups=mysql append=no"
修改用户的过期时间
ansible "192.168.0.108" -m user -a "name=dba expires=1464775200"
删除用户
ansible "192.168.0.108" -m user -a "name=dba state=absent remove=yes"

变更用户密码
假设实际密码为test123,加密后为jfoadjhlfgjagjaljdfla,那么下面的语句就要变为:
ansible "192.168.0.108" -m user -a "name=dba shell=/bin/bash password=加密后的密码 update_password=always"
ansible "192.168.0.108" -m user -a "name=dba shell=/bin/bash password=jfoadjhlfgjagjaljdfla update_password=always"
应用层用户管理
比如,管理mysql数据库的用户。
ansible db -m mysql_user -a 'login_host=localhost login_password=echoyang login_user=root
name=aaa password=bbb priv=zabbix.*:ALL state=present'
以root用户登录mysql,然后添加用户aaa,权限为整个zabbix数据库。
验证
mysql -uaaa -pbbb
如果不想在命令行输入root密码,则可以在远端服务器上将root密码写到文件中。
cat ~/.my.cnf
[client]
user=root
password=echoyang
此时,命令可以简化为:
ansible db -m mysql_user -a 'name=aaa password=bbb priv=zabbix.*:ALL state=present'

 浙公网安备 33010602011771号