
前言
qiankun框架的编写基于两个十分重要框架,一个是single-spa,另外一个是import-html-entry。在学习qiankun的原理之前,需要知道single-spa的原理,了解它是如何调度子应用,可以看看我上一篇文章。https://www.cnblogs.com/synY/p/13958963.html。
这里重新提及一下,在上一篇我对于single-spa中提及了,single-spa帮住我们解决了子应用之间的调度问题,但是它留下了一个十分大的缺口。就是加载函数,下面官方文档的加载函数写法的截图:
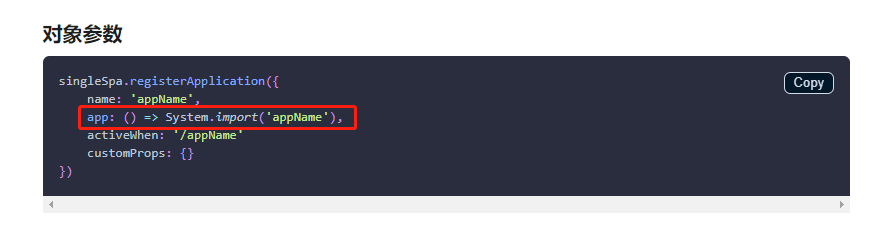
官方文档中只是给出了一个简单的写法,但是光光靠这么写,是不够的。为什么不够:
1.这样写,无法避免全局变量window的污染。
2.css之间也会存在污染。
3.如果你有若干个子应用,你就要重复的去写这句话若干次,代码难看无法维护。
那么qiankun的出现,就是提供了一种方案帮住用户解决了这些问题,让用户做到开箱即用。不需要思考过多的问题。
这篇文章我们关注几个问题:
1. qiankun是如何完善single-spa中留下的巨大缺口,加载函数的缺口
2. qiankun通过什么策略去加载子应用资源
3. qiankun如何隔离子应用的js的全局环境
4. 沙箱的隔离原理是什么
5. qiankun如何隔离css环境
6. qiankun如何获得子应用生命周期函数
7. qiankun如何该改变子应用的window环境
同理qiankun我们也从两个函数去入手qiankun,registerMicroApps和start函数。
registerMicroApps
下面是registerMicroApps代码:
export function registerMicroApps<T extends object = {}>( apps: Array<RegistrableApp<T>>, lifeCycles?: FrameworkLifeCycles<T>, ) { // Each app only needs to be registered once //let microApps: RegistrableApp[] = [];
//apps是本文件定义的一个全局数组,装着你在qiankun中注册的子应用信息。
// const unregisteredApps = apps.filter((app) => !microApps.some((registeredApp) => registeredApp.name === app.name));
//这里就把未注册的应用和已经注册的应用进行合并 microApps = [...microApps, ...unregisteredApps]; unregisteredApps.forEach((app) => {
//解构出子应用的名字,激活的url匹配规规则,实际上activeRule就是用在single-spa的activeWhen,loader是一个空函数它是loadsh里面的东西,props传入子应用的值。 const { name, activeRule, loader = noop, props, ...appConfig } = app; //这里调用的是single-spa构建应用的api //name app activeRule props都是交给single-spa用的 registerApplication({ name,
//这里可以看出我开始说的问题,qiankun帮主我们定制了一套加载子应用的方案。整个加载函数核心的逻辑就是loadApp
//最后返回出一个经过处理的装载着生命周期函数的对象,和我上篇分析single-spa说到的加载函数的写法的理解是一致的 app: async () => { loader(true); await frameworkStartedDefer.promise; const { mount, ...otherMicroAppConfigs } = ( await loadApp({ name, props, ...appConfig }, frameworkConfiguration, lifeCycles) )(); return { mount: [async () => loader(true), ...toArray(mount), async () => loader(false)], ...otherMicroAppConfigs, }; }, activeWhen: activeRule, customProps: props, }); }); }
registerMicroApps其实只做了一件事情,根据用户传入的参数forEach遍历子应用注册数组,调用single-spa的registerApplication方法去注册子应用。
start函数
qiankun的start函数在single-spa的start函数的基础上增加了一些东西
export function start(opts: FrameworkConfiguration = {}) {
  //let frameworkConfiguration: FrameworkConfiguration = {};它是本文件开头的全局变量记录着,框架的配置。

  frameworkConfiguration = { prefetch: true, singular: true, sandbox: true, ...opts };
  const { prefetch, sandbox, singular, urlRerouteOnly, ...importEntryOpts } = frameworkConfiguration;

  if (prefetch) {
    //子应用预加载的策略,自行在官方文档查看作用
    doPrefetchStrategy(microApps, prefetch, importEntryOpts);
  }

  //检查当前环境是否支持proxy。因为后面沙箱环境中需要用到这个东西
  if (sandbox) {
    if (!window.Proxy) {
      console.warn('[qiankun] Miss window.Proxy, proxySandbox will degenerate into snapshotSandbox');
      frameworkConfiguration.sandbox = typeof sandbox === 'object' ? { ...sandbox, loose: true } : { loose: true };
      if (!singular) {
        console.warn(
          '[qiankun] Setting singular as false may cause unexpected behavior while your browser not support window.Proxy',
        );
      }
    }
  }

  //startSingleSpa是single-spa的start方法的别名。这里本质就是执行single-spa的start方法启动应用。
  startSingleSpa({ urlRerouteOnly });

  frameworkStartedDefer.resolve();
}
总结:qiankun的start方法做了两件事情:
1.根据用户传入start的参数,判断预加载资源的时机。
2.执行single-spa的start方法启动应用。
加载函数
从我上一篇对single-spa的分析知道了。在start启动应用之后不久,就会进入到加载函数。准备加载子应用。下面看看qiankun加载函数的源码。
app: async () => {
        loader(true);
        await frameworkStartedDefer.promise;

        const { mount, ...otherMicroAppConfigs } = (
          //这里loadApp就是qiankun加载子应用的应对方案
          await loadApp({ name, props, ...appConfig }, frameworkConfiguration, lifeCycles)
        )();

        return {
          mount: [async () => loader(true), ...toArray(mount), async () => loader(false)],
          ...otherMicroAppConfigs,
        };
},
loadApp源码
export async function loadApp<T extends object>(
  app: LoadableApp<T>,
  configuration: FrameworkConfiguration = {},
  lifeCycles?: FrameworkLifeCycles<T>,
): Promise<ParcelConfigObjectGetter> {

  //从app参数中解构出子应用的入口entry,和子应用的名称。
  const { entry, name: appName } = app;
  //定义了子应用实例的id
  const appInstanceId = `${appName}_${+new Date()}_${Math.floor(Math.random() * 1000)}`;

  const markName = `[qiankun] App ${appInstanceId} Loading`;
  if (process.env.NODE_ENV === 'development') {
    //进行性能统计
    performanceMark(markName);
  }

  const { singular = false, sandbox = true, excludeAssetFilter, ...importEntryOpts } = configuration;

  //importEntry是import-html-entry库中的方法,这里就是qiankun对于加载子应用资源的策略
  const { template, execScripts, assetPublicPath } = await importEntry(entry, importEntryOpts);

  ...省略
}
下面看看importEntry的源码,它来自import-html-entry库。
export function importEntry(entry, opts = {}) {
    //第一个参数entry是你子应用的入口地址
    //第二个参数{prefetch: true}

    //defaultFetch是默认的资源请求方法,其实就是window.fecth。在qiankun的start函数中,可以允许你传入自定义的fetch方法去请求资源。
    //defaultGetTemplate是一个函数,传入一个字符串,原封不动的返回出来
    const { fetch = defaultFetch, getTemplate = defaultGetTemplate } = opts;
    //getPublicPath是一个函数,用来解析用户entry,转变为正确的格式,因为用户可能写入口地址写得奇形怪状,框架把不同的写法统一一下。
    const getPublicPath = opts.getPublicPath || opts.getDomain || defaultGetPublicPath;

    //没有写子应用加载入口直接报错
    if (!entry) {
        throw new SyntaxError('entry should not be empty!');
    }

    // html entry
    if (typeof entry === 'string') {
        //加载代码核心函数
        return importHTML(entry, {
            fetch,
            getPublicPath,
            getTemplate,
        });
    }

    ...省略
}
importHTML源码。
export default function importHTML(url, opts = {}) {
    // 传入参数
    //  entry, {
    //     fetch,
    //     getPublicPath,
    //     getTemplate,
    // }
    let fetch = defaultFetch;
    let getPublicPath = defaultGetPublicPath;
    let getTemplate = defaultGetTemplate;

    // compatible with the legacy importHTML api
    if (typeof opts === 'function') {
        fetch = opts;
    } else {
        fetch = opts.fetch || defaultFetch;
        getPublicPath = opts.getPublicPath || opts.getDomain || defaultGetPublicPath;
        getTemplate = opts.getTemplate || defaultGetTemplate;
    }

    //embedHTMCache是本文件开头定义的全局对象,用来缓存请求的资源的结果,下一次如果想要获取资源直接从缓存获取,不需要再次请求。
  //如果在缓存中找不到的话就去通过window.fetch去请求子应用的资源。但是这里需要注意,你从主应用中去请求子应用的资源是会存在跨域的。所以你在子应用中必须要进行跨域放行。配置下webpack的devServer的headers就可以
   //从这里可以看出来qiankun是如何获取子应用的资源的,默认是通过window.fetch去请求子应用的资源。而不是简单的注入srcipt标签,通过fetch去获得了子应用的html资源信息,然后通过response.text把信息转变为字符串的形式。
    //然后把得到的html字符串传入processTpl里面进行html的模板解析
    return embedHTMLCache[url] || (embedHTMLCache[url] = fetch(url)
        //response.text()下面的data就会变成一大串html response.json()就是变成json对象
        .then(response => response.text())
        .then(html => {
            const assetPublicPath = getPublicPath(url);
            //processTpl这个拿到了子应用html的模板之后对微应用所有的资源引入做处理。
            const { template, scripts, entry, styles } = processTpl(getTemplate(html), assetPublicPath);

            return getEmbedHTML(template, styles, { fetch }).then(embedHTML => ({
                //getEmbedHTML通过它的处理,就把外部引用的样式文件转变为了style标签,embedHTML就是处理后的html模板字符串
                //embedHTML就是新生成style标签里面的内容
                template: embedHTML,
                assetPublicPath,
                getExternalScripts: () => getExternalScripts(scripts, fetch),
                getExternalStyleSheets: () => getExternalStyleSheets(styles, fetch),
                //下面这个函数就是用来解析脚本的。从这里看来它并不是简单的插入script标签就完事了。而是
                //通过在代码内部去请求资源,然后再去运行了别人的脚本内容
                execScripts: (proxy, strictGlobal, execScriptsHooks = {}) => {
                    //proxy sandboxInstance.proxy
                    if (!scripts.length) {
                        return Promise.resolve();
                    }
                    return execScripts(entry, scripts, proxy, {
                        fetch,
                        strictGlobal,
                        beforeExec: execScriptsHooks.beforeExec,
                        afterExec: execScriptsHooks.afterExec,
                    });
                },
            }));
        }));
}
HTML模板解析
processTpl源码:
const ALL_SCRIPT_REGEX = /(<script[\s\S]*?>)[\s\S]*?<\/script>/gi;
const SCRIPT_TAG_REGEX = /<(script)\s+((?!type=('|')text\/ng-template\3).)*?>.*?<\/\1>/is;
const SCRIPT_SRC_REGEX = /.*\ssrc=('|")?([^>'"\s]+)/;
const SCRIPT_TYPE_REGEX = /.*\stype=('|")?([^>'"\s]+)/;
const SCRIPT_ENTRY_REGEX = /.*\sentry\s*.*/;
const SCRIPT_ASYNC_REGEX = /.*\sasync\s*.*/;
const SCRIPT_NO_MODULE_REGEX = /.*\snomodule\s*.*/;
const SCRIPT_MODULE_REGEX = /.*\stype=('|")?module('|")?\s*.*/;
const LINK_TAG_REGEX = /<(link)\s+.*?>/isg;
const LINK_PRELOAD_OR_PREFETCH_REGEX = /\srel=('|")?(preload|prefetch)\1/;
const LINK_HREF_REGEX = /.*\shref=('|")?([^>'"\s]+)/;
const LINK_AS_FONT = /.*\sas=('|")?font\1.*/;
const STYLE_TAG_REGEX = /<style[^>]*>[\s\S]*?<\/style>/gi;
const STYLE_TYPE_REGEX = /\s+rel=('|")?stylesheet\1.*/;
const STYLE_HREF_REGEX = /.*\shref=('|")?([^>'"\s]+)/;
const HTML_COMMENT_REGEX = /<!--([\s\S]*?)-->/g;
const LINK_IGNORE_REGEX = /<link(\s+|\s+.+\s+)ignore(\s*|\s+.*|=.*)>/is;
const STYLE_IGNORE_REGEX = /<style(\s+|\s+.+\s+)ignore(\s*|\s+.*|=.*)>/is;
const SCRIPT_IGNORE_REGEX = /<script(\s+|\s+.+\s+)ignore(\s*|\s+.*|=.*)>/is;
//在函数所定义的文件开头有很多的正则表达式,它们主要是用来匹配得到的html的一些标签,分别有style标签,link标签,script标签。总之就是和样式,js有关的标签。同时它会特别的关注那些有外部引用的标签。
export default function processTpl(tpl, baseURI) {
    //tpl就是我们的html模板, baseURI == http://localhost:8080
    //这个script数组是用来存放在html上解析得到含有外部资源引用的script标签的资源引用地址
   let scripts = [];
    //这个是用来存放外部引用的css标签引用路径地址
    const styles = [];
    let entry = null;
    // Detect whether browser supports `<script type=module>` or not
    const moduleSupport = isModuleScriptSupported();

    //下面有若干个replace函数,开始对html字符串模板进行匹配修改
    const template = tpl

        /*
        remove html comment first
        */
        //匹配所有的注释直接移除
        .replace(HTML_COMMENT_REGEX, '')
        //匹配link
        .replace(LINK_TAG_REGEX, match => {
            /*
            change the css link
            */
       //检查link里面的type是不是写着stylesheet,就是找样式表
            const styleType = !!match.match(STYLE_TYPE_REGEX);
            if (styleType) {
                //匹配href,找你引用的外部css的路径
                const styleHref = match.match(STYLE_HREF_REGEX);
                const styleIgnore = match.match(LINK_IGNORE_REGEX);
          //进入if语句说明你的link css含有外部引用
                if (styleHref) {
                    //这里就是提取出了css的路径
                    const href = styleHref && styleHref[2];
                    let newHref = href;
              //我们在单个项目的时候,我们的css或者js的引用路径很有可能是个相对路径,但是相对路径放在微前端的是不适用的,因为你的主项目中根本不存在你子项目的资源文件,相对路径无法获取得到你的子应用的资源,只有通过绝对路径去引用资源
            //所以这里需要把你所有的相对路径都提取出来,然后根据你最开始注册子应用时候传入的entry,资源访问的入口去把你的相对路径和绝对路径进行拼接,最后得到子应用资源的路径
                  //hasProtocol这里是用来检验你写的href是不是一个绝对路径
                    //如果不是的话,他就帮你拼接上变为绝对路径+相对路径的形式。
                    if (href && !hasProtocol(href)) {
                        newHref = getEntirePath(href, baseURI);
                    }
                    if (styleIgnore) {
                        return genIgnoreAssetReplaceSymbol(newHref);
                    }
            //把css外部资源的引用路径存入styles数组。供后面正式访问css资源提供入口
                    styles.push(newHref);
                    //这个genLinkReplaceSymbol函数就把你的link注释掉,并且写明你的css已经被import-html-entry工具注释掉了
                    //并且直接去掉你你自己的css。因为接入微前端。里面原本存在的一些资源引入是不需要的,因为它们的路径都是错误的。后面会有统一的资源引入的入口
                    return genLinkReplaceSymbol(newHref);
                }
            }

            const preloadOrPrefetchType = match.match(LINK_PRELOAD_OR_PREFETCH_REGEX) && match.match(LINK_HREF_REGEX) && !match.match(LINK_AS_FONT);
            if (preloadOrPrefetchType) {
                const [, , linkHref] = match.match(LINK_HREF_REGEX);
                return genLinkReplaceSymbol(linkHref, true);
            }

            return match;
        })

        //这里匹配style标签
        .replace(STYLE_TAG_REGEX, match => {
            if (STYLE_IGNORE_REGEX.test(match)) {
                return genIgnoreAssetReplaceSymbol('style file');
            }
            return match;
        })
        //这里匹配script标签,处理和css标签类似,也是存放外部js引用的路径到scripts数组,然后把你的script标签注释掉
        //const ALL_SCRIPT_REGEX = /(<script[\s\S]*?>)[\s\S]*?<\/script>/gi;
        .replace(ALL_SCRIPT_REGEX, (match, scriptTag) => {
            const scriptIgnore = scriptTag.match(SCRIPT_IGNORE_REGEX);
            const moduleScriptIgnore =
                (moduleSupport && !!scriptTag.match(SCRIPT_NO_MODULE_REGEX)) ||
                (!moduleSupport && !!scriptTag.match(SCRIPT_MODULE_REGEX));
            // in order to keep the exec order of all javascripts

            const matchedScriptTypeMatch = scriptTag.match(SCRIPT_TYPE_REGEX);
            //获取type里面的值,如果里面的值是无效的就不需要处理,原封不动的返回
            const matchedScriptType = matchedScriptTypeMatch && matchedScriptTypeMatch[2];
            if (!isValidJavaScriptType(matchedScriptType)) {
                return match;
            }

            // if it is a external script
            if (SCRIPT_TAG_REGEX.test(match) && scriptTag.match(SCRIPT_SRC_REGEX)) {
                /*
                collect scripts and replace the ref
                */
                //获得entry字段
                const matchedScriptEntry = scriptTag.match(SCRIPT_ENTRY_REGEX);
                //获得src里面的内容
                //const SCRIPT_SRC_REGEX = /.*\ssrc=('|")?([^>'"\s]+)/;
                const matchedScriptSrcMatch = scriptTag.match(SCRIPT_SRC_REGEX);
                let matchedScriptSrc = matchedScriptSrcMatch && matchedScriptSrcMatch[2];

                if (entry && matchedScriptEntry) {
                    throw new SyntaxError('You should not set multiply entry script!');
                } else {

                    // append the domain while the script not have an protocol prefix
                    //这里把src改为绝对路径
                    if (matchedScriptSrc && !hasProtocol(matchedScriptSrc)) {
                        matchedScriptSrc = getEntirePath(matchedScriptSrc, baseURI);
                    }

                    entry = entry || matchedScriptEntry && matchedScriptSrc;
                }

                if (scriptIgnore) {
                    return genIgnoreAssetReplaceSymbol(matchedScriptSrc || 'js file');
                }

                if (moduleScriptIgnore) {
                    return genModuleScriptReplaceSymbol(matchedScriptSrc || 'js file', moduleSupport);
                }

                //把这些script存入数组中,然后注释掉他们
                if (matchedScriptSrc) {
                    //const SCRIPT_ASYNC_REGEX = /.*\sasync\s*.*/;
                    const asyncScript = !!scriptTag.match(SCRIPT_ASYNC_REGEX);
                    scripts.push(asyncScript ? { async: true, src: matchedScriptSrc } : matchedScriptSrc);
                    return genScriptReplaceSymbol(matchedScriptSrc, asyncScript);
                }

                return match;
            } else {
                if (scriptIgnore) {
                    return genIgnoreAssetReplaceSymbol('js file');
                }

                if (moduleScriptIgnore) {
                    return genModuleScriptReplaceSymbol('js file', moduleSupport);
                }

                // if it is an inline script
                const code = getInlineCode(match);

                // remove script blocks when all of these lines are comments.
                const isPureCommentBlock = code.split(/[\r\n]+/).every(line => !line.trim() || line.trim().startsWith('//'));

                if (!isPureCommentBlock) {
                    scripts.push(match);
                }

                return inlineScriptReplaceSymbol;
            }
        });
    //过滤掉一些空标签
    scripts = scripts.filter(function (script) {
        // filter empty script
        return !!script;
    });

    return {
        template,
        scripts,
        styles,
        // set the last script as entry if have not set
        entry: entry || scripts[scripts.length - 1],
    };
}
模板解析的过程稍微长一些,总结一下它做的核心事情:
1. 删除html上的注释。
2. 找到link标签中有效的外部css引用的路径,并且把他变为绝对路径存入styles数组,提供给后面资源统一引入作为入口
3. 找到script标签处理和link css类似。
4. 最后把处理过后的模板,css引用的入口数组,js引用的入口数组进行返回
现在回到importHTML函数中看看处理完模板后面做了什么事情。
export default function importHTML(url, opts = {}) {
   。。。省略

    return embedHTMLCache[url] || (embedHTMLCache[url] = fetch(url)
        //response.text()下面的data就会变成一大串html response.json()就是变成json对象,自行了解window.fetch用法
        .then(response => response.text())
        .then(html => {
            const assetPublicPath = getPublicPath(url);
            //processTpl这个拿到了html的模板之后对微应用所有的资源引入做处理
            const { template, scripts, entry, styles } = processTpl(getTemplate(html), assetPublicPath);
       //这里执行getEmbedHTML的作用就是根据刚刚模板解析得到的styles路径数组,正式通过fetch去请求获得css资源。
            return getEmbedHTML(template, styles, { fetch }).then(embedHTML => ({
               ...省略
            }));
        }));
}
getEmbedHTML源码:function getEmbedHTML(template, styles, opts = {}) {
//template, styles, { fetch }
    const { fetch = defaultFetch } = opts;
    let embedHTML = template;
    //getExternalStyleSheets这个函数的作用是什么?就是如果在缓存中有了style的样式的话。就直接从缓存获取,没有的话就正式去请求获取资源
    return getExternalStyleSheets(styles, fetch)
        //getExternalStyleSheets返回了一个处理样式文件的promise
        .then(styleSheets => {
            //styleSheets就是整个样式文件的字符串 这里就是开始注入style标签,生成子应用的样式
            embedHTML = styles.reduce((html, styleSrc, i) => {
          //这里genLinkReplaceSymbol的作用就是根据上面在处理html模板的时候把link css注释掉了,然后现在匹配回这个注释,就是找到这个注释的位置,然后替换成为style标签
          //说明对于外部的样式引用最后通过拿到它的css字符串,然后把全部的外部引用都变成style标签的引用形式。
                html = html.replace(genLinkReplaceSymbol(styleSrc), `<style>/* ${styleSrc} */${styleSheets[i]}</style>`);
                return html;
            }, embedHTML);
            return embedHTML;
        });
}

// for prefetch
export function getExternalStyleSheets(styles, fetch = defaultFetch) {
  //第一个参数就是存放着有css路径的数组,第二个是fetch请求方法
    return Promise.all(styles.map(styleLink => {
            if (isInlineCode(styleLink)) {
                // if it is inline style
                return getInlineCode(styleLink);
            } else {
                // external styles
          //先从缓存中寻找,有的话直接从缓存中获取使用,没有的话就通过fetch去请求,最后把请求的到的css资源装变为字符串的形式返回
            return styleCache[styleLink] ||
                    (styleCache[styleLink] = fetch(styleLink).then(response => response.text()));
            }
        },
    ));
}
继续回到importHTML中。
export default function importHTML(url, opts = {}) {
    ...
    return embedHTMLCache[url] || (embedHTMLCache[url] = fetch(url)
        .then(response => response.text())
        .then(html => {
            const assetPublicPath = getPublicPath(url);
            const { template, scripts, entry, styles } = processTpl(getTemplate(html), assetPublicPath);
       //最后通过getEmbedHTML请求到了css资源并且把这些css资源通过style标签的形式注入到了html,重新把新的html返回回来
       //最后then中return了一个对象,但是注意现在并没有真正的去引用js的资源,js资源在loadApp后面进行引入
            return getEmbedHTML(template, styles, { fetch }).then(embedHTML => ({
          //经过注释处理和样式注入的html模板
                template: embedHTML,
                assetPublicPath,
          //获取js资源的方法
                getExternalScripts: () => getExternalScripts(scripts, fetch),
                getExternalStyleSheets: () => getExternalStyleSheets(styles, fetch),
                //下面这个函数就是用来解析脚本的。后面分析这段代码的作用
                execScripts: (proxy, strictGlobal, execScriptsHooks = {}) => {
                    //proxy sandboxInstance.proxy
                    if (!scripts.length) {
                        return Promise.resolve();
                    }
                    return execScripts(entry, scripts, proxy, {
                        fetch,
                        strictGlobal,
                        beforeExec: execScriptsHooks.beforeExec,
                        afterExec: execScriptsHooks.afterExec,
                    });
                },
            }));
        }));
}
这里总结一下整个importEntry做了什么:
1. 请求html模板,进行修改处理
2. 请求css资源注入到html中
3. 返回一个对象,对象的内容含有处理过后的html模板,通过提供获取js资源的方法getExternalScripts,和执行获取到的js脚本的方法execScripts。
回到loadApp方法继续解析后面的内容
export async function loadApp<T extends object>(
  app: LoadableApp<T>,
  configuration: FrameworkConfiguration = {},
  lifeCycles?: FrameworkLifeCycles<T>,
): Promise<ParcelConfigObjectGetter> {
  ...省略
  const { template, execScripts, assetPublicPath } = await importEntry(entry, importEntryOpts);

  // as single-spa load and bootstrap new app parallel with other apps unmounting
  // (see https://github.com/CanopyTax/single-spa/blob/master/src/navigation/reroute.js#L74)
  // we need wait to load the app until all apps are finishing unmount in singular mode
  if (await validateSingularMode(singular, app)) {
    await (prevAppUnmountedDeferred && prevAppUnmountedDeferred.promise);
  }
  //getDefaultTplWrapper这个函数的作用就是为上面解析得到的HTML添加一个div,包裹子应用所有的html代码,然后把包裹之后的新的html模板进行返回
  const appContent = getDefaultTplWrapper(appInstanceId, appName)(template);

  //默认情况下sandbox框架会帮我们配置为true, 在官方文档上你可以为它配置为一个对象{ strictStyleIsolation?: boolean, experimentalStyleIsolation?: boolean }
 //默认情况下沙箱可以保证子应用之间的样式隔离,但是无法保证主应用和子应用之间的样式隔离。 当strictStyleIsolation: true,框架会帮住每一个子应用包裹上一个shadowDOM。
  //从而保证微应用的样式不会对全局造成污染。当 experimentalStyleIsolation 被设置为 true 时, qiankun会改写子应用的样式,在它上面增加特殊的选择器,从而实现隔离。这个后面详细讲
  //所以这个typeof判断就是你项目所需要的隔离程度。
  const strictStyleIsolation = typeof sandbox === 'object' && !!sandbox.strictStyleIsolation;
  //如果你没有配置sandbox那么这里就返回false。如果你写成了对象配置成了对象,另外判断。
  const scopedCSS = isEnableScopedCSS(sandbox);
  //这个东西就是根据对沙箱环境的不同配置进入css的样式隔离处理
  let initialAppWrapperElement: HTMLElement | null = createElement(
    appContent,
    strictStyleIsolation,
    scopedCSS,
    appName,
  );

  ...省略
}
样式隔离处理
createElement源码:
function createElement(
  appContent: string,
  strictStyleIsolation: boolean,
  scopedCSS: boolean,
  appName: string,
): HTMLElement {
  const containerElement = document.createElement('div');
  containerElement.innerHTML = appContent;
  // appContent always wrapped with a singular div

  const appElement = containerElement.firstChild as HTMLElement;

  //这里就说明了严格样式隔离采用shadow dom隔离,如果不知道shadowDOM的需要去自行了解一下
  if (strictStyleIsolation) {
    if (!supportShadowDOM) {
      console.warn(
        '[qiankun]: As current browser not support shadow dom, your strictStyleIsolation configuration will be ignored!',
      );
    } else {
      //保存之前的内容,然后在下面清空
      const { innerHTML } = appElement;
      appElement.innerHTML = '';
      let shadow: ShadowRoot;

      if (appElement.attachShadow) {
        //在appElement下创建shadowDom
        shadow = appElement.attachShadow({ mode: 'open' });
      } else {
        // createShadowRoot was proposed in initial spec, which has then been deprecated
        shadow = (appElement as any).createShadowRoot();
      }
      //把子应用的东西放在shadowDOM下
      shadow.innerHTML = innerHTML;
    }
  }

  //这里当experimentalStyleIsolation为true的时候,scopedCSS才会为true
  //todo 这里我还没有搞懂,不解析了
  if (scopedCSS) {
   //css.QiankunCSSRewriteAttr是一个字符串'data-qiankun',在之前的分析中,执行这个函数执行,就给子应用
    const attr = appElement.getAttribute(css.QiankunCSSRewriteAttr);
    if (!attr) {
      appElement.setAttribute(css.QiankunCSSRewriteAttr, appName);
    }

    //这里获取所有style标签的内容, 为什么要获得style标签的内容?因为之前在解析css的时候说过,qiankun在获取外部的css样式的时候,最终都是通过fetch获得样式文件字符串之后,然后再转为style标签。
    const styleNodes = appElement.querySelectorAll('style') || [];
    //遍历所有的样式。
    forEach(styleNodes, (stylesheetElement: HTMLStyleElement) => {
      css.process(appElement!, stylesheetElement, appName);
    });
  }

  return appElement;
}
看完了css处理,我们重新回到loadApp中
export async function loadApp<T extends object>(
  app: LoadableApp<T>,
  configuration: FrameworkConfiguration = {},
  lifeCycles?: FrameworkLifeCycles<T>,
): Promise<ParcelConfigObjectGetter> {
  ...省略

  //这个东西就是根据对沙箱环境的不同配置进入css的样式隔离处理,最后返回经过处理过后的子应用的根节点信息。注意返回的不是一个字符串,而是根节点的信息json对象。
  let initialAppWrapperElement: HTMLElement | null = createElement(
    appContent,
    strictStyleIsolation,
    scopedCSS,
    appName,
  );

  //判断用户在开始调用registerMicroApps的时候有没有传入container选项,它是微应用容器的节点选择器,或者是Element实例。
  const initialContainer = 'container' in app ? app.container : undefined;
  //获取参数中用户自己写的render,这里有点奇怪,不知道为什么官方文档上没有看到对这个字段的使用说明,但是你确实可以使用它
  const legacyRender = 'render' in app ? app.render : undefined;

  //创建一个render函数并且返回,这个render的作用下面解析
  const render = getRender(appName, appContent, legacyRender);

  //这句话执行render函数就是开始真正渲染我们主应用的地方,因为我们有可能在自定义render中去new Vue,创建我们的主应用的vue实例
  render({ element: initialAppWrapperElement, loading: true, container: initialContainer }, 'loading');

  //这个getAppWrapperGetter方法返回一个函数,貌似是一个提供给你访问dom的一个方法
  const initialAppWrapperGetter = getAppWrapperGetter(
    appName,
    appInstanceId,
    !!legacyRender,
    strictStyleIsolation,
    scopedCSS,
    () => initialAppWrapperElement,
  );


  ...省略
}
getRender函数源码:
function getRender(appName: string, appContent: string, legacyRender?: HTMLContentRender) {
  //第一个参数是子应用的名称,第二个是子应用的html字符串,第三个是用户在registerMicroApps时候传入的render函数
  const render: ElementRender = ({ element, loading, container }, phase) => {
    //如果我们在registerMicroApps中传入的render函数。那么这里就是执行我们的render函数
    if (legacyRender) {
       //如果真的传入的render函数就给你发一个小小的警告,不明白既然开放给你了,为什么要给你警告。
      if (process.env.NODE_ENV === 'development') {
        console.warn(
          '[qiankun] Custom rendering function is deprecated, you can use the container element setting instead!',
        );
      }
    //最后执行你自己的自定义render函数,传入的参数是loading,appContent,appContent是子应用的html模板,但是这个时候,子应用没有渲染出来,因为子应用要渲染出来的话,需要js的配合
      //但是这个时候子应用的js并没有加载到主应用中,更加没有执行,这里就是给子应用准备好了一个html的容器而已
      return legacyRender({ loading, appContent: element ? appContent : '' });
    }

    // export function getContainer(container: string | HTMLElement): HTMLElement | null {
    //   return typeof container === 'string' ? document.querySelector(container) : container;
    // }
     //如果没有写render函数的话那么就会去校验在registerMicroApps中有没有传入container参数
   const containerElement = getContainer(container!);

    // The container might have be removed after micro app unmounted.
    // Such as the micro app unmount lifecycle called by a react componentWillUnmount lifecycle, after micro app unmounted, the react component might also be removed
    if (phase !== 'unmounted') {
      const errorMsg = (() => {
        switch (phase) {
          case 'loading':
          case 'mounting':
            return `[qiankun] Target container with ${container} not existed while ${appName} ${phase}!`;

          case 'mounted':
            return `[qiankun] Target container with ${container} not existed after ${appName} ${phase}!`;

          default:
            return `[qiankun] Target container with ${container} not existed while ${appName} rendering!`;
        }
      })();
      assertElementExist(containerElement, errorMsg);
    }

    if (containerElement && !containerElement.contains(element)) {
      // clear the container
      while (containerElement!.firstChild) {
        rawRemoveChild.call(containerElement, containerElement!.firstChild);
      }

      // append the element to container if it exist
      if (element) {
        rawAppendChild.call(containerElement, element);
      }
    }

    return undefined;
  };

  return render;
}
从上面的render函数的情况,我们看到我们是可以传入render函数的,为了帮住大家理解,给出一个render函数使用的样例。
registerMicroApps(
    [
      {
        name: "sub-app-1",
        entry: "//localhost:8091/",
        render,
        activeRule: genActiveRule("/app1"),
        props: ""
      },
    ],
    {
      beforeLoad: [
        app => {
          console.log("before load", app);
        }
      ], // 挂载前回调
      beforeMount: [
        app => {
          console.log("before mount", app);
        }
      ], // 挂载后回调
      afterUnmount: [
        app => {
          console.log("after unload", app);
        }
      ] // 卸载后回调
    }
);
let app = null
function render({ appContent, loading } = {}) {
  if (!app) {
    app = new Vue({
      el: "#container",
      router,
      data() {
        return {
          content: appContent,
          loading
        };
      },
      render(h) {
        return h(App, {
          props: {
            content: this.content,
            loading: this.loading
          }
        });
      }
    });
  } else {
    app.content = appContent;
    app.loading = loading;
  }
}
沙箱环境
上面讲完了css隔离,我们继续看看loadApp后面的代码,后面接下来进入沙箱环境。在开篇的时候我们讲过,如果我们传入single-spa的加载函数编写随意的话,那么会有一个全局环境的污染问题所在。下面来看看qiankun是如何解决这个问题
export async function loadApp<T extends object>(
  app: LoadableApp<T>,
  configuration: FrameworkConfiguration = {},
  lifeCycles?: FrameworkLifeCycles<T>,
): Promise<ParcelConfigObjectGetter> {
  ...省略
  //默认全局环境是window,下面创建完沙箱环境之后就会被替换
  let global = window;
  let mountSandbox = () => Promise.resolve();
  let unmountSandbox = () => Promise.resolve();
  //校验用户在start中传入的sandbox,不传的话默认为true。如果你写成了对象,则校验有没有loose这个属性。这个loose属性我好像没有在官方文档上看到对于它的使用说明
  const useLooseSandbox = typeof sandbox === 'object' && !!sandbox.loose;

  //这段代码和沙箱环境有关系
  if (sandbox) {
    //创建沙箱环境实例
    const sandboxInstance = createSandbox(
      appName,
      // FIXME should use a strict sandbox logic while remount, see https://github.com/umijs/qiankun/issues/518
      initialAppWrapperGetter,
      scopedCSS,
      useLooseSandbox,
      excludeAssetFilter,
    );
    // 用沙箱的代理对象作为接下来使用的全局对象
    global = sandboxInstance.proxy as typeof window;
    //这个mountSandbox将会被当作子应用生命周期之一,返回到single-spa中,说明当执行子应用挂载的时候,沙箱就会启动
    mountSandbox = sandboxInstance.mount;
    unmountSandbox = sandboxInstance.unmount;
  }

  //这里就是合并钩子函数
  const { beforeUnmount = [], afterUnmount = [], afterMount = [], beforeMount = [], beforeLoad = [] } = mergeWith(
    {},
    //getAddOns注入一些内置地生命钩子。主要是在子应用的全局变量上加一些变量,让你的子应用识别出来
    //你目前的环境是在微应用下,让用户能够正确处理publicPath或者其他东西
    getAddOns(global, assetPublicPath),
    lifeCycles,
    (v1, v2) => concat(v1 ?? [], v2 ?? []),
  );
  //这里执行beforeLoad生命钩子
  await execHooksChain(toArray(beforeLoad), app, global);

  ...省略
}
createSandbox函数:
export function createSandbox(
  appName: string,
  elementGetter: () => HTMLElement | ShadowRoot,
  scopedCSS: boolean,
  useLooseSandbox?: boolean,
  excludeAssetFilter?: (url: string) => boolean,
) {
  let sandbox: SandBox;
  //这里根据浏览器的兼容和用户传入参数的情况分别有三个创建沙箱的实例。
  if (window.Proxy) {
    sandbox = useLooseSandbox ? new LegacySandbox(appName) : new ProxySandbox(appName);
  } else {
    //在不支持ES6 Proxy的沙箱中sandbox.proxy = window
    sandbox = new SnapshotSandbox(appName);
  }

  // some side effect could be be invoked while bootstrapping, such as dynamic stylesheet injection with style-loader, especially during the development phase
  const bootstrappingFreers = patchAtBootstrapping(appName, elementGetter, sandbox, scopedCSS, excludeAssetFilter);
  // mounting freers are one-off and should be re-init at every mounting time
  let mountingFreers: Freer[] = [];

  let sideEffectsRebuilders: Rebuilder[] = [];

  return {
    proxy: sandbox.proxy,

    /**
     * 沙箱被 mount
     * 可能是从 bootstrap 状态进入的 mount
     * 也可能是从 unmount 之后再次唤醒进入 mount
     */
    async mount() {
      ...
    },

    /**
     * 恢复 global 状态,使其能回到应用加载之前的状态
     */
    async unmount() {
     ...
    },
  };
}
先从简单分析,先看看在浏览器不支持Proxy创建的沙箱。
SnapShotSandbox
export default class SnapshotSandbox implements SandBox {
  proxy: WindowProxy;

  name: string;

  type: SandBoxType;

  sandboxRunning = true;

  private windowSnapshot!: Window;

  private modifyPropsMap: Record<any, any> = {};

  constructor(name: string) {
    //绑定沙箱名字为子应用的名字
    this.name = name;
    //沙箱proxy指向window
    this.proxy = window;
    //'Snapshot'
    this.type = SandBoxType.Snapshot;
  }

  active() {
    ...
  }

  inactive() {
    ...
  }
}
SnapshotSandbox 的沙箱环境主要是通过激活时记录 window 状态快照,在关闭时通过快照还原 window 对象来实现的。
active() {
    // 记录当前快照
    //假如我们在子应用使用了一些window【xxx】那么就会改变了全局环境的window,造成了全局环境的污染。那么我们可以在启动我们沙箱环境的时候,预先记录下来,我们在没有执行子应用代码,即window没有被改变
    //前的现状。最后在执行完子应用代码的时候,我们再去根据我们记录的状态去还原回window。那么就巧妙地避开了window污染的问题。
    this.windowSnapshot = {} as Window;
    //逐个遍历window的属性。把window不在原型链上的属性和对应的值都存放进入windowSnapshot中记录下来。
    iter(window, (prop) => {
      this.windowSnapshot[prop] = window[prop];
    });

    // 恢复之前的变更
    Object.keys(this.modifyPropsMap).forEach((p: any) => {
      window[p] = this.modifyPropsMap[p];
    });

    this.sandboxRunning = true;
  }
inactive() {
  //定义一个对象,记录修改过的属性
  this.modifyPropsMap = {};

  //遍历window
  iter(window, (prop) => {
    //this.windowSnapshot记录了修改前,window[prop]是被修改后,如果两个值不相等的话就说明window这个属性的值被人修改了。
    if (window[prop] !== this.windowSnapshot[prop]) {
      // 发现了被人修改过,记录变更,恢复环境,这里相当于把子应用期间造成的window污染全部清除。
      this.modifyPropsMap[prop] = window[prop];
      //这里就是还原回去
      window[prop] = this.windowSnapshot[prop];
    }
  });

  if (process.env.NODE_ENV === 'development') {
    console.info(`[qiankun:sandbox] ${this.name} origin window restore...`, Object.keys(this.modifyPropsMap));
  }

  this.sandboxRunning = false;
}
function iter(obj: object, callbackFn: (prop: any) => void) {
  for (const prop in obj) {
    if (obj.hasOwnProperty(prop)) {
      callbackFn(prop);
    }
 }
}
总结下这个snapshotSandbox原理就是,启动之前记录环境。并且还原回你inactive之前的window环境。在inactive时记录你修改过的记录,当在active的时候还原你在inactive时候环境。
上面这个snapshotSandbox的修改来,修改去。可能会让读者觉得十分混乱,我们我可以假想一下一个顺序。在最开始的时候,我们需要启动我们的沙箱环境。此时先对window的值做一次记录备份。
但是我们还没有进行过inactive。所以此时this.modifyPropsMap是没有记录的。
当我们这次沙箱环境结束了,执行了inactive。我们把active-到inactive期间修改过的window的值记录下来,此时this.modifyPropsMap有了记录。并且还原回acitve之前的值。
当我们下次再次想启动我们沙箱的时候就是acitve,此时再次记录下来在inactive之后window的值,因为这个时候this.modifyPropsMap有记录了,那么通过记录我们就可以还原了我们在inactive之前window状态,那么子应用沙箱环境的window的值就会被还原回到了inactive前,完美复原环境。从而不会造成window值的混乱。
ProxySandbox
在支持proxy环境下,并且你的sanbox没有配置loose,就会启用ProxySandbox。
export default class ProxySandbox implements SandBox {
  /** window 值变更记录,记录的是变更过的属性值 */
  private updatedValueSet = new Set<PropertyKey>();

  name: string;

  type: SandBoxType;

  proxy: WindowProxy;

  sandboxRunning = true;

  active() {
   ...
  }

  inactive() {
    ...
  }

  constructor(name: string) {
    //我们在沙箱中传入的是appName
    this.name = name;
    //'Proxy'
    this.type = SandBoxType.Proxy;
    const { updatedValueSet } = this;

    const self = this;
    const rawWindow = window;
    //最后我们要proxy代理的就是fakeWindow。这个fakeWindow是一个{}对象。
    const { fakeWindow, propertiesWithGetter } = createFakeWindow(rawWindow);

    const descriptorTargetMap = new Map<PropertyKey, SymbolTarget>();

    const hasOwnProperty = (key: PropertyKey) => fakeWindow.hasOwnProperty(key) || rawWindow.hasOwnProperty(key);

    //这里的Proxy就是整个代理的关键,这个proxy最终就是会被作为子应用的window,后面在加载和执行js代码的时候就知道是怎么把这个环境进行绑定。现在我们从get和set就能够知道它是如何应对全局的环境和子应用的环境
    const proxy = new Proxy(fakeWindow, {
      set(target: FakeWindow, p: PropertyKey, value: any): boolean {
        //当对它进行赋值操作的时候。首先改变在target上对应的属性值,然后在updatedValueSet添加这个属性
        //最后返回一个true
        if (self.sandboxRunning) {
          // target指的就是fakeWindow,如果你在子应用环境中有修改window的值,那么就会落入这个set陷阱中,那么其实你本质就是在修改fakeWindow的值
          //然后在updateValueSet中增加你在这个修改的属性。
          target[p] = value;
          updatedValueSet.add(p);

          //这里是对于某些属性的特殊处理,修改子应用的值,如果命中了同时也会修改的主应用的,rawWindow就是window
          if (variableWhiteList.indexOf(p) !== -1) {
            // @ts-ignore
            rawWindow[p] = value;
          }

          return true;
        }

        if (process.env.NODE_ENV === 'development') {
          console.warn(`[qiankun] Set window.${p.toString()} while sandbox destroyed or inactive in ${name}!`);
        }

        // 在 strict-mode 下,Proxy 的 handler.set 返回 false 会抛出 TypeError,在沙箱卸载的情况下应该忽略错误
        return true;
      },

      get(target: FakeWindow, p: PropertyKey): any {
        if (p === Symbol.unscopables) return unscopables;

        // avoid who using window.window or window.self to escape the sandbox environment to touch the really window
        // see https://github.com/eligrey/FileSaver.js/blob/master/src/FileSaver.js#L13
        if (p === 'window' || p === 'self') {
          return proxy;
        }

        if (
          p === 'top' ||
          p === 'parent' ||
          (process.env.NODE_ENV === 'test' && (p === 'mockTop' || p === 'mockSafariTop'))
        ) {
          ...
        }

        // proxy.hasOwnProperty would invoke getter firstly, then its value represented as rawWindow.hasOwnProperty
        if (p === 'hasOwnProperty') {
          ...
        }

        // mark the symbol to document while accessing as document.createElement could know is invoked by which sandbox for dynamic append patcher
        if (p === 'document') {
          ...
        }

        // 这里就可以看出,如果我们尝试在子应用中去读取window上的值。如果满足了某些条件,就会直接从window上返回给你,但是对于大多数情况下,框架先从fakeWindow上找一找有没有这个东西,有的话就直接返回给你,如果fakeWindow没有的话再从window上找给你。
        const value = propertiesWithGetter.has(p) ? (rawWindow as any)[p] : (target as any)[p] || (rawWindow as any)[p];
        return getTargetValue(rawWindow, value);
      },

      ...省略
    });

    this.proxy = proxy;
  }
}
大致的简单分析了下这个proxySandbox的原理:
就是就是定义一个对象fakeWindow,把它绑定在了子应用的window上,然后如果你取值,那么就先从fakeWindow这里拿,没有的话再从window上找给你。
如果你要修改值,那么大多数情况下,其实你都是在修改fakeWindow,不会直接修改到window。这里就是通过这种方式去避免子应用污染全局环境。
但是这里就有问题,就是它是如何把这个proxy绑定进入子应用环境中,这个在解析执行js脚本时分析。
分析完了如何创建沙箱,我们重新回到loadApp代码中。
export async function loadApp<T extends object>(
  app: LoadableApp<T>,
  configuration: FrameworkConfiguration = {},
  lifeCycles?: FrameworkLifeCycles<T>,
): Promise<ParcelConfigObjectGetter> {
  ...省略
  //默认全局环境是window,下面创建完沙箱环境之后就会被替换
  let global = window;
  let mountSandbox = () => Promise.resolve();
  let unmountSandbox = () => Promise.resolve();
  //校验用户在start中传入的sandbox,不传的话默认为true。如果你写成了对象,则校验有没有loose这个属性。这个loose属性我好像没有在官方文档上看到对于它的使用说明
  const useLooseSandbox = typeof sandbox === 'object' && !!sandbox.loose;

  //这段代码和沙箱环境有关系
  if (sandbox) {
    //创建沙箱环境实例
    const sandboxInstance = createSandbox(
      appName,
      // FIXME should use a strict sandbox logic while remount, see https://github.com/umijs/qiankun/issues/518
      initialAppWrapperGetter,
      scopedCSS,
      useLooseSandbox,
      excludeAssetFilter,
    );
    // 用沙箱的代理对象作为接下来使用的全局对象
    global = sandboxInstance.proxy as typeof window;
    mountSandbox = sandboxInstance.mount;
    unmountSandbox = sandboxInstance.unmount;
  }

  //我们在qiankun registerMicroApps方法中,它允许我们传入一些生命钩子函数。这里就是合并生命钩子函数的地方。
  const { beforeUnmount = [], afterUnmount = [], afterMount = [], beforeMount = [], beforeLoad = [] } = mergeWith(
    {},
    //getAddOns注入一些内置地生命钩子。主要是在子应用的全局变量上加一些变量,让你的子应用识别出来你现在处于微前端环境,从这里也说明了window某些属性我们直接能够从子应用中获得,子应用并不是一个完全封闭,无法去读主应用window属性的环境
    getAddOns(global, assetPublicPath),
    lifeCycles,
    (v1, v2) => concat(v1 ?? [], v2 ?? []),
  );
  //这里执行beforeLoad生命钩子,就不分析了。
  await execHooksChain(toArray(beforeLoad), app, global);

  ...省略
}
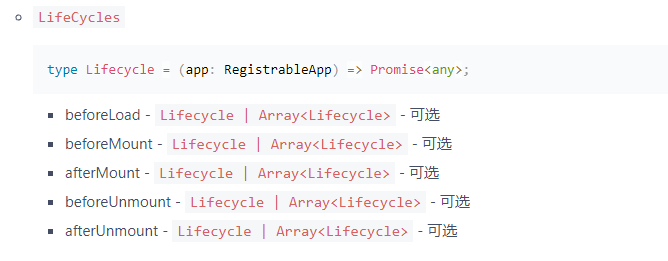
生命钩子,官方文档:
getAddOns函数
export default function getAddOns<T extends object>(global: Window, publicPath: string): FrameworkLifeCycles<T> {
  return mergeWith({}, getEngineFlagAddon(global), getRuntimePublicPathAddOn(global, publicPath), (v1, v2) =>
    concat(v1 ?? [], v2 ?? []),
  );
}
//这个getEnginFlagAddon就是下面这个函数,文件中给他取了别名,其实就是增加除了用户的自定义生命钩子以外的内置生命钩子,框架还需要添加一些内置的生命钩子
export default function getAddOn(global: Window): FrameworkLifeCycles<any> {
  return {
    async beforeLoad() {
      // eslint-disable-next-line no-param-reassign
      //在子应用环境中添加__POWERED_BT_QIANKUN_。属性,这让用户知道,你子应用目前的环境是在微前端中,而不是单独启动
      global.__POWERED_BY_QIANKUN__ = true;
    },

    async beforeMount() {
      // eslint-disable-next-line no-param-reassign
      global.__POWERED_BY_QIANKUN__ = true;
    },

    async beforeUnmount() {
      // eslint-disable-next-line no-param-reassign
      delete global.__POWERED_BY_QIANKUN__;
    },
  };
}
//getRuntimePublicPathAddOn就是下面的方法
export default function getAddOn(global: Window, publicPath = '/'): FrameworkLifeCycles<any> {
  let hasMountedOnce = false;

  return {
    async beforeLoad() {
      // eslint-disable-next-line no-param-reassign
      //添加项目的共有路径
      global.__INJECTED_PUBLIC_PATH_BY_QIANKUN__ = publicPath;
    },

    async beforeMount() {
      if (hasMountedOnce) {
        // eslint-disable-next-line no-param-reassign
        global.__INJECTED_PUBLIC_PATH_BY_QIANKUN__ = publicPath;
      }
    },

    async beforeUnmount() {
      if (rawPublicPath === undefined) {
        // eslint-disable-next-line no-param-reassign
        delete global.__INJECTED_PUBLIC_PATH_BY_QIANKUN__;
      } else {
        // eslint-disable-next-line no-param-reassign
        global.__INJECTED_PUBLIC_PATH_BY_QIANKUN__ = rawPublicPath;
      }

      hasMountedOnce = true;
    },
  };
}
通过上面的分析我们可以得出一个结论,我们可以在子应用中获取该环境变量,将其设置为 __webpack_public_path__ 的值,从而使子应用在主应用中运行时,可以匹配正确的资源路径。
if (window.__POWERED_BY_QIANKUN__) {
    // eslint-disable-next-line no-undef
    __webpack_public_path__ = window.__INJECTED_PUBLIC_PATH_BY_QIANKUN__
}
继续loadApp下面的代码,进入了最重要的地方,加载并且执行js,绑定js的执行window环境。
子应用js的加载和执行,子应用生命周期函数的获取。
接下来这段代码做了几件事情:
1. 获取子应用js,并且执行。
2. 帮住子应用绑定js window环境。
3. 得到子应用的生命周期函数。
export async function loadApp<T extends object>(
  app: LoadableApp<T>,
  configuration: FrameworkConfiguration = {},
  lifeCycles?: FrameworkLifeCycles<T>,
): Promise<ParcelConfigObjectGetter> {
  ...省略
  const { template, execScripts, assetPublicPath } = await importEntry(entry, importEntryOpts);

  ...省略// get the lifecycle hooks from module exports
  const scriptExports: any = await execScripts(global, !useLooseSandbox);
  //子应用的生命钩子都在这里
  const { bootstrap, mount, unmount, update } = getLifecyclesFromExports(scriptExports, appName, global);

  ...省略
}
在loadApp开头处调用了import-html-entry库中importEntry函数。这个函数最终返回了一个解析之后的子应用的html模板。
还有一个加载子应用和执行子应用js的方法execScripts,下面看看这个方法,这个方法在库import-html-entry中。
execScripts: (proxy, strictGlobal, execScriptsHooks = {}) => {
     //proxy sandboxInstance.proxy
   //这里的第一个参数就是proxy,这个porxy就是在沙箱代码中创建的子应用的沙箱环境。

     if (!scripts.length) {
         return Promise.resolve();
     }
     return execScripts(entry, scripts, proxy, {
          fetch,
          strictGlobal,
          beforeExec: execScriptsHooks.beforeExec,
          afterExec: execScriptsHooks.afterExec,
     });
},
execScripts源码:
export function execScripts(entry, scripts, proxy = window, opts = {}) {
    // 第一个参数子应用入口,第二个参数就是在子应用html模板解析的时候收集到的从外部引用的js资源的路径。,第三个参数就是沙箱环境
    const {
        //定义fetch准备通过这个方法去获取js资源
        fetch = defaultFetch, strictGlobal = false, success, error = () => {
        }, beforeExec = () => {
        }, afterExec = () => {
        },
    } = opts;

    //这里就是根据绝对地址去读取script的文件资源
    return getExternalScripts(scripts, fetch, error)
        .then(scriptsText => {
            //scripts就是解析得到的js字符串。
            ...

     }
    });
}
getExternalScripts源码:
export function getExternalScripts(scripts, fetch = defaultFetch, errorCallback = () => {
}) {
    //这里和后去css资源的手段是类似的
    //这里也是先从缓存获取,如果没有的话就通过fetch去请求资源
    //这里就是正式的去获取js资源
    const fetchScript = scriptUrl => scriptCache[scriptUrl] ||
        (scriptCache[scriptUrl] = fetch(scriptUrl).then(response => {
            // usually browser treats 4xx and 5xx response of script loading as an error and will fire a script error event
            // https://stackoverflow.com/questions/5625420/what-http-headers-responses-trigger-the-onerror-handler-on-a-script-tag/5625603
            if (response.status >= 400) {
                errorCallback();
                throw new Error(`${scriptUrl} load failed with status ${response.status}`);
            }

            return response.text();
        }));

    return Promise.all(scripts.map(script => {

            if (typeof script === 'string') {
                if (isInlineCode(script)) {
                    // if it is inline script
                    return getInlineCode(script);
                } else {
                    // external script
                    return fetchScript(script);
                }
            } else {
                // use idle time to load async script
                const { src, async } = script;
                if (async) {
                    return {
                        src,
                        async: true,
                        content: new Promise((resolve, reject) => requestIdleCallback(() => fetchScript(src).then(resolve, reject))),
                    };
                }

                return fetchScript(src);
            }
        },
    ));
}
回到execScripts函数中,当解析完js代码,得到了js代码字符串,看看then后面做了什么。
function getExecutableScript(scriptSrc, scriptText, proxy, strictGlobal) {
 const sourceUrl = isInlineCode(scriptSrc) ? '' : `//# sourceURL=${scriptSrc}\n`;
 const globalWindow = (0, eval)('window');
 //这里直接把window.proxy对象改为了沙箱环境proxy,然后下面就传入的代码中,当作是别人的window环境。
 globalWindow.proxy = proxy;
 //这句话就是绑定作用域 然后同时也是立即执行函数顺便把js脚本也运行了
 //这里返回一个立即执行函数的字符串,可以看到传入的参数就是window.proxy,就是沙箱环境,然后把整个子应用的js代码包裹在这个立即执行函数的环境中,把window,当前参数。所以就是通过这中参数传入的
 //window.proxy环境的手段修改了子应用js代码的window环境,让它变成了沙箱环境。
 return strictGlobal
  ? `;(function(window, self){with(window){;${scriptText}\n${sourceUrl}}}).bind(window.proxy)(window.proxy, window.proxy);`
  : `;(function(window, self){;${scriptText}\n${sourceUrl}}).bind(window.proxy)(window.proxy, window.proxy);`;
}


export function execScripts(entry, scripts, proxy = window, opts = {}) {
    ...省略//这里就是根据绝对地址去读取script的文件资源
    return getExternalScripts(scripts, fetch, error)
        .then(scriptsText => {
            //scriptsText就是解析的到的js资源的字符串
            const geval = (scriptSrc, inlineScript) => {
                //第一个参数是解析js脚本的绝对路径 第二参数是解析js脚本的js字符串代码
                const rawCode = beforeExec(inlineScript, scriptSrc) || inlineScript;
                //这里这个code存放着执行脚本js代码的字符串
                const code = getExecutableScript(scriptSrc, rawCode, proxy, strictGlobal);
                //这里就是正式执行js脚本,这里含有我们的子应用的js代码,但是被包裹在了一个立即执行函数的环境中。
                (0, eval)(code);

                afterExec(inlineScript, scriptSrc);
            };

            function exec(scriptSrc, inlineScript, resolve) {
                //第一个参数是解析js脚本的路径 第二参数是解析js脚本的js字符串代码
                const markName = `Evaluating script ${scriptSrc}`;
                const measureName = `Evaluating Time Consuming: ${scriptSrc}`;

                if (process.env.NODE_ENV === 'development' && supportsUserTiming) {
                    performance.mark(markName);
                }

                if (scriptSrc === entry) {
                    noteGlobalProps(strictGlobal ? proxy : window);

                    try {
                        // bind window.proxy to change `this` reference in script
                        //这个geval会对的得到的js字符串代码做一下包装,这个包装就是改变它的window环境。
                        geval(scriptSrc, inlineScript);
                        const exports = proxy[getGlobalProp(strictGlobal ? proxy : window)] || {};
                        //这里的resolve是从上层函数通过参数传递过来的,这里resolve相当于上层函数resolve返回给qiankun的调用await
                        resolve(exports);
                    } catch (e) {
                        // entry error must be thrown to make the promise settled
                        console.error(`[import-html-entry]: error occurs while executing entry script ${scriptSrc}`);
                        throw e;
                    }
                } else {
                    if (typeof inlineScript === 'string') {
                        try {
                            // bind window.proxy to change `this` reference in script
                            geval(scriptSrc, inlineScript);
                        } catch (e) {
                            // consistent with browser behavior, any independent script evaluation error should not block the others
                            throwNonBlockingError(e, `[import-html-entry]: error occurs while executing normal script ${scriptSrc}`);
                        }
                    } else {
                        // external script marked with async
                        inlineScript.async && inlineScript?.content
                            .then(downloadedScriptText => geval(inlineScript.src, downloadedScriptText))
                            .catch(e => {
                                throwNonBlockingError(e, `[import-html-entry]: error occurs while executing async script ${inlineScript.src}`);
                            });
                    }
                }

                if (process.env.NODE_ENV === 'development' && supportsUserTiming) {
                    performance.measure(measureName, markName);
                    performance.clearMarks(markName);
                    performance.clearMeasures(measureName);
                }
            }

            function schedule(i, resolvePromise) {

                if (i < scripts.length) {
                    //递归去进行js的脚本解析。
            //得到脚本获取的路径
                    const scriptSrc = scripts[i];
                    //得到对应的js脚本代码字符串
                    const inlineScript = scriptsText[i];

                    //这个是执行js脚本的入口
                    exec(scriptSrc, inlineScript, resolvePromise);
                    // resolve the promise while the last script executed and entry not provided
                    if (!entry && i === scripts.length - 1) {
                        resolvePromise();
                    } else {
                        schedule(i + 1, resolvePromise);
                    }
                }
            }
            //这个schedule的作用就是开始解析script脚本
            return new Promise(resolve => schedule(0, success || resolve));
        });
}
总结一下:
1. 框架其实是通过window.fetch去获取子应用的js代码。
2. 拿到了子应用的js代码字符串之后,把它进行包装处理。把代码包裹在了一个立即执行函数中,通过参数的形式改变了它的window环境,变成了沙箱环境。
function(window, self) {
    子应用js代码
}(window,proxy, window.proxy)
3. 最后通过eval()去执行立即执行函数,正式去执行我们的子应用的js代码,去渲染出整个子应用。
到这里,js代码的讲解就说完了。
来看看最后一个问题:如何获取子应用的生命钩子函数。
重新回到loadApp中。
我们先来看看,假如我们使用了qiankun框架,并且子应用使用vue,我们子应用main.js是怎么定义这些生命钩子函数。其实就是通过简单的export导出就好了
export async function bootstrap() {
  console.log('vue app bootstraped');
}

export async function mount(props) {
  console.log('props from main app', props);
  render();
}

export async function unmount() {
  instance.$destroy();
  instance = null;
  // router = null;
}
function getLifecyclesFromExports(scriptExports: LifeCycles<any>, appName: string, global: WindowProxy) {
  //校验你的子应用的导出的生命钩子函数是否合法,合法的话直接返回
  if (validateExportLifecycle(scriptExports)) {
    return scriptExports;
  }
  ...
}


export async function loadApp<T extends object>(
  app: LoadableApp<T>,
  configuration: FrameworkConfiguration = {},
  lifeCycles?: FrameworkLifeCycles<T>,
): Promise<ParcelConfigObjectGetter> {
  ...省略
  const { template, execScripts, assetPublicPath } = await importEntry(entry, importEntryOpts);

  ...省略

  // get the lifecycle hooks from module exports
  const scriptExports: any = await execScripts(global, !useLooseSandbox);
  //子应用的生命钩子都在这里
  //在上面执行完了子应用的js代码,假设我们的子应用使用vue写的。那么vue应用的入口的地方是main.js。我们在main,js通过export导出声明周期函数。这些export的东西其实本质上都是被存放在一个对象中。
  //最后通过解构出来就好了
  const { bootstrap, mount, unmount, update } = getLifecyclesFromExports(scriptExports, appName, global);

  ...省略
}
到了这里。qiankun整个核心的部分应该算是讲解完了。
看看最后的代码,最后在loadApp中返回了一系列的生命周期函数到加载函数中,在加载函数中把它们返回。这个和我们在single-spa中分析的没有出入,加载函数需要以对象的形式返回出生命周期函数
export async function loadApp<T extends object>(
  app: LoadableApp<T>,
  configuration: FrameworkConfiguration = {},
  lifeCycles?: FrameworkLifeCycles<T>,
): Promise<ParcelConfigObjectGetter> {

...省略
const parcelConfig: ParcelConfigObject = {
  name: appInstanceId,
  bootstrap,
  mount: [
   ...
  ],
  unmount: [
    ...
  ],
};

if (typeof update === 'function') {
  parcelConfig.update = update;
}

return parcelConfig;
}

export function registerMicroApps<T extends object = {}>(
  apps: Array<RegistrableApp<T>>,
  lifeCycles?: FrameworkLifeCycles<T>,
) {
 ...省略
  unregisteredApps.forEach((app) => {
    const { name, activeRule, loader = noop, props, ...appConfig } = app;

    registerApplication({
      name,
      app: async () => {
        ...

        const { mount, ...otherMicroAppConfigs } = (
          await loadApp({ name, props, ...appConfig }, frameworkConfiguration, lifeCycles)
        )();

        return {
          mount: [async () => loader(true), ...toArray(mount), async () => loader(false)],
          ...otherMicroAppConfigs,
        };
      },
      activeWhen: activeRule,
      customProps: props,
    });
  });
}
总结
整个qiankun框架中我们知道了什么东西:
1. qiankun是如何完善single-spa中留下的巨大缺口-————加载函数。
2. qiankun通过什么策略去加载子应用资源————window.fetch。
3. qiankun如何隔离子应用的js的全局环境————通过沙箱。
4. 沙箱的隔离原理是什么————在支持proxy中有一个代理对象,子应用优先访问到了代理对象,如果代理对象没有的值再从window中获取。如果不支持proxy,那么通过快照,缓存,复原的形式解决污染问题。
5. qiankun如何隔离css环境————shadowDOM隔离;加上选择器隔离。
6. qiankun如何获得子应用生命周期函数————export 存储在对象中,然后解构出来。
7. qiankun如何该改变子应用的window环境————通过立即执行函数,传入window.proxy为参数,改变window环境。

 浙公网安备 33010602011771号