
201871010117--石欣钰--《面向对象程序设计(java)》第十六周学习总结
|
项目 |
内容 |
|
这个作业属于哪个课程 |
https://www.cnblogs.com/nwnu-daizh |
|
这个作业的要求在哪里 |
https://www.cnblogs.com/nwnu-daizh/p/12031970.html |
|
作业学习目标 |
(1) 掌握Java应用程序的打包操作; (2) 掌握线程概念; (3) 掌握线程创建的两种技术。 (4)学习应用程序的GUI |
14.1什么是线程
1.进程--概念
要解释线程,就必须明白什么是进程。
什么是进程呢?
进程是指运行中的应用程序,每个进程都有自己独立的地址空间(内存空间),比如用户点击桌面的IE浏览器,就启动了一个进程,操作系统就会为该进程分配独立的地址空间。当用户再次点击左面的IE浏览器,又启动了一个进程,操作系统将为新的进程分配新的独立的地址空间。目前操作系统都支持多进程。
要点:用户每启动一个进程,操作系统就会为该进程分配一个独立的内存空间。
2.线程--概念
在明白进程后,就比较容易理解线程的概念。
什么是线程呢?
是进程中的一个实体,是被系统独立调度和分派的基本单位,线程自己不拥有系统资源,只拥有一点在运行中必不可少的资源,但它可与同属一个进程的其它线程共享进程所拥有的全部资源。一个线程可以创建和撤消另一个线程,同一进程中的多个线程之间可以并发执行。线程有就绪、阻塞和运行三种基本状态。
3.线程
1、线程是轻量级的进程
2、线程没有独立的地址空间(内存空间)
3、线程是由进程创建的(寄生在进程)
4、一个进程可以拥有多个线程-->这就是我们常说的多线程编程
5、线程有几种状态:
a、新建状态(new)
b、就绪状态(Runnable)
c、运行状态(Running)
d、阻塞状态(Blocked)
e、死亡状态(Dead)
4.线程有什么用处
java程序中流传一句话,不会使用线程就别跟别人说自己学过java。目前绝大部分应用程序都会涉及到多并发的问题。只要应用程序涉及到并发,就离不开多线程编程。
5.线程--如何使用
在java中一个类要当作线程来使用有两种方法。
1、继承Thread类,并重写run函数
2、实现Runnable接口,并重写run函数
因为java是单继承的,在某些情况下一个类可能已经继承了某个父类,这时在用继承Thread类方法来创建线程显然不可能java设计者们提供了另外一个方式创建线程,就是通过实现Runnable接口来创建线程。
14.2中断线程
Terminated (被终止) 线程被终止的原因有二:
(1)一是run()方法中最后一个语句执行完毕而自 然死亡。
(2)二是因为一个没有捕获的异常终止了run方法 而意外死亡。
可以调用线程的stop 方 法 杀 死 一 个 线 程 (thread.stop();),但是,stop方法已过时, 不要在自己的代码中调用它。
其他判断和影响线程状态的方法:
(1)join():等待指定线程的终止。
(2)join(long millis):经过指定时间等待终止指定 的线程。
(3)isAlive():测试当前线程是否在活动。
(4)yield():让当前线程由“运行状态”进入到“就 绪状态”,从而让其它具有相同优先级的等待线程 获取执行权。
14.3线程状态
Java中线程的状态分为6种。
1. 初始(NEW):新创建了一个线程对象,但还没有调用start()方法。
2. 运行(RUNNABLE):Java线程中将就绪(ready)和运行中(running)两种状态笼统的称为“运行”。
线程对象创建后,其他线程(比如main线程)调用了该对象的start()方法。该状态的线程位于可运行线程池中,等待被线程调度选中,获取CPU的使用权,此时处于就绪状态(ready)。就绪状态的线程在获得CPU时间片后变为运行中状态(running)。
3. 阻塞(BLOCKED):表示线程阻塞于锁。
4. 等待(WAITING):进入该状态的线程需要等待其他线程做出一些特定动作(通知或中断)。
5. 超时等待(TIMED_WAITING):该状态不同于WAITING,它可以在指定的时间后自行返回。
6. 终止(TERMINATED):表示该线程已经执行完毕。
这6种状态定义在Thread类的State枚举中,可查看源码进行一一对应。
线程的状态图 
第二部分:实验部分
1、实验目的与要求
(1) 掌握Java应用程序的打包操作;
(2) 掌握线程概念;
(3) 掌握线程创建的两种技术。
2、实验内容和步骤
实验1: 导入第13章示例程序,测试程序并进行代码注释。
测试程序1
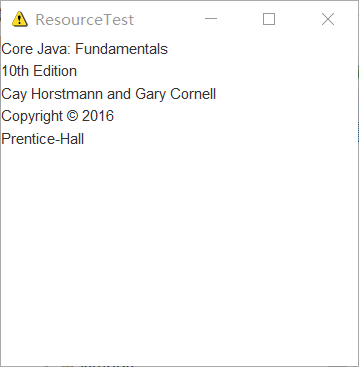
l 在elipse IDE中调试运行教材585页程序13-1,结合程序运行结果理解程序;
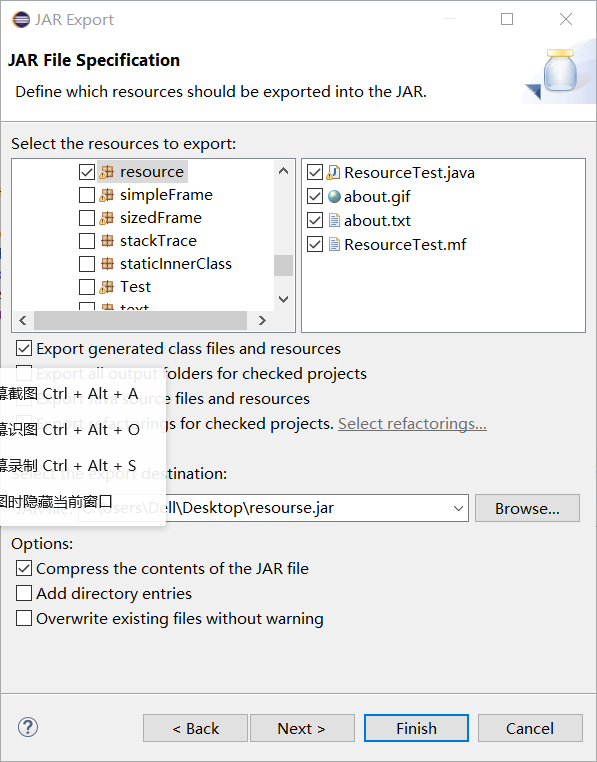
l 将所生成的JAR文件移到另外一个不同的目录中,再运行该归档文件,以便确认程序是从JAR文件中,而不是从当前目录中读取的资源。
l 掌握创建JAR文件的方法;
程序代码如下:
package resource;

import java.awt.*;
import java.io.*;
import java.net.*;
import java.util.*;
import javax.swing.*;

/**
 * @version 1.41 2015-06-12
 * @author Cay Horstmann
 */
public class ResourceTest
{
   public static void main(String[] args)
   {
      EventQueue.invokeLater(() -> {
         JFrame frame = new ResourceTestFrame();
         frame.setTitle("ResourceTest");
         frame.setDefaultCloseOperation(JFrame.EXIT_ON_CLOSE);
         frame.setVisible(true);
      });
   }
}

/**
 * A frame that loads image and text resources.
 */
class ResourceTestFrame extends JFrame
{
   private static final int DEFAULT_WIDTH = 300;
   private static final int DEFAULT_HEIGHT = 300;

   public ResourceTestFrame()
   {
      setSize(DEFAULT_WIDTH, DEFAULT_HEIGHT);
      URL aboutURL = getClass().getResource("about.gif");//找到指定位置的图像文件,返回一个可以加载资源的URL
      Image img = new ImageIcon(aboutURL).getImage();//将加载的about.gif图像设置为图标
      setIconImage(img);

      JTextArea textArea = new JTextArea();
      InputStream stream = getClass().getResourceAsStream("about.txt");//读取about.txt文本文件内容
      try (Scanner in = new Scanner(stream, "UTF-8"))//将读取到的about.txt文本文件里内容显示到文本区
      {
         while (in.hasNext())//读取文本文件
            textArea.append(in.nextLine() + "\n");
      }
      add(textArea);
   }
}
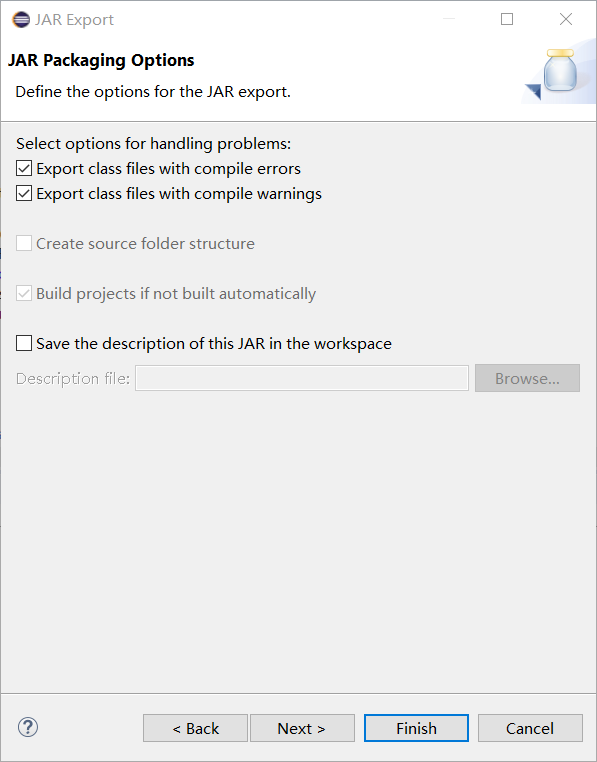
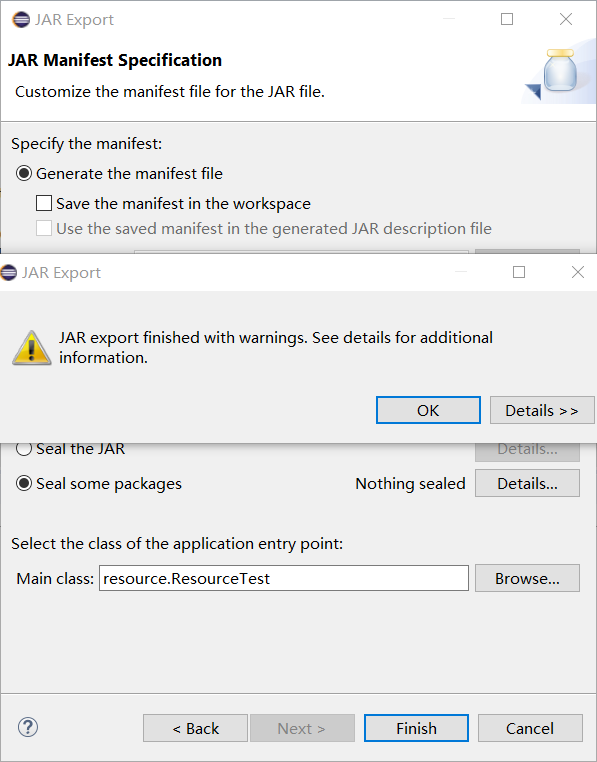
归档:


实验1:测试程序2(10分)
在elipse IDE中调试运行ThreadTest,结合程序运行结果理解程序;
掌握线程概念;
掌握用Thread的扩展类实现线程的方法;
利用Runnable接口改造程序,掌握用Runnable接口创建线程的方法。
代码如下:
class Lefthand extends Thread {
   public void run()
   {
       for(int i=0;i<=5;i++)
       {  System.out.println("You are Students!");
           try{   sleep(500);   }
           catch(InterruptedException e)
           { System.out.println("Lefthand error.");}
       }
  }
}
class Righthand extends Thread {
    public void run()
    {
         for(int i=0;i<=5;i++)
         {   System.out.println("I am a Teacher!");
             try{  sleep(300);  }
             catch(InterruptedException e)
             { System.out.println("Righthand error.");}
         }
    }
}
public class ThreadTest
{
     static Lefthand left;
     static Righthand right;
     public static void main(String[] args)
     {     left=new Lefthand();
           right=new Righthand();
           left.start();
           right.start();
     }
}
实验输出结果截图为:

利用Runnable接口改造后的程序代码为:
package Thread;

 class Lefthands  implements Runnable{
      public void run() {
          for(int i=0;i<=5;i++)
             {  System.out.println("You are Students!");
                 try{   Thread.sleep(500);   }     //休眠时间为500ms
                 catch(InterruptedException e)     //中断异常
                 { System.out.println("Lefthand error.");}
            }
       }
  }
 class Righthands  implements Runnable{
     public void run() {
         for(int i=0;i<=5;i++)
            {  System.out.println("I am a Teacher!");
                try{   Thread.sleep(300);   }
                catch(InterruptedException e)
                { System.out.println("Righthand error.");}
            }
       }
  }
    public class TheadTest01 {
         public static void main(String args[]) {
             Lefthands L=new Lefthands();
             Righthands R=new Righthands();

             new Thread(L).start();//启动线程
             new Thread(R).start();
     }
}
实验输出结果截图为:

可以通过两种方法实现多线程,分别为:(1)利用Thread类的子类(2)用Runnable()接口实现线程
(1)——定义Thread类的子类并实现用户线程操作,即 run()方法的实现。
——在适当的时候启动线程。
(2)——首先设计一个实现Runnable接口的类;
——然后在类中根据需要重写run方法;
——再创建该类对象,以此对象为参数建立Thread 类的对象;
——调用Thread类对象的start方法启动线程,将 CPU执行权转交到run方法。
测试程序3:
l 在Elipse环境下调试教材625页程序14-1、14-2 、14-3,结合程序运行结果理解程序;
l 在Elipse环境下调试教材631页程序14-4,结合程序运行结果理解程序;
l 对比两个程序,理解线程的概念和用途;
l 掌握线程创建的两种技术。
package bounce;

import java.awt.geom.*;

/**
 * A ball that moves and bounces off the edges of a rectangle
 * @version 1.33 2007-05-17
 * @author Cay Horstmann
 */
public class Ball
{
   private static final int XSIZE = 15;
   private static final int YSIZE = 15;
   private double x = 0;
   private double y = 0;
   private double dx = 1;
   private double dy = 1;

   /**
    * Moves the ball to the next position, reversing direction if it hits one of the edges
    */
   public void move(Rectangle2D bounds)
   {
      x += dx;
      y += dy;
      if (x < bounds.getMinX())
      {
         x = bounds.getMinX();
         dx = -dx;//当球碰壁时回调球的位置
      }
      if (x + XSIZE >= bounds.getMaxX())
      {
         x = bounds.getMaxX() - XSIZE;
         dx = -dx;
      }
      if (y < bounds.getMinY())
      {
         y = bounds.getMinY();
         dy = -dy;
      }
      if (y + YSIZE >= bounds.getMaxY())
      {
         y = bounds.getMaxY() - YSIZE;
         dy = -dy;
      }
   }

   /**
    * Gets the shape of the ball at its current position.
    */
   public Ellipse2D getShape()
   {
      return new Ellipse2D.Double(x, y, XSIZE, YSIZE);
   }
}
package bounce;

import java.awt.*;
import java.util.*;
import javax.swing.*;

/**
 * The component that draws the balls.
 * @version 1.34 2012-01-26
 * @author Cay Horstmann
 */
public class BallComponent extends JPanel
{
   private static final int DEFAULT_WIDTH = 450;
   private static final int DEFAULT_HEIGHT = 350;

   private java.util.List<Ball> balls = new ArrayList<>();

   /**
    * Add a ball to the component.
    * @param b the ball to add
    */
   public void add(Ball b)
   {
      balls.add(b);
   }

   public void paintComponent(Graphics g)
   {
      super.paintComponent(g); // erase background
      Graphics2D g2 = (Graphics2D) g;
      for (Ball b : balls)
      {
         g2.fill(b.getShape());
      }
   }

   public Dimension getPreferredSize() { return new Dimension(DEFAULT_WIDTH, DEFAULT_HEIGHT); }
}
package bounce;

import java.awt.*;
import java.awt.event.*;
import javax.swing.*;

/**
 * Shows an animated bouncing ball.
 * @version 1.34 2015-06-21
 * @author Cay Horstmann
 */
public class Bounce
{
   public static void main(String[] args)
   {
      EventQueue.invokeLater(() -> {
         JFrame frame = new BounceFrame();
         frame.setDefaultCloseOperation(JFrame.EXIT_ON_CLOSE);
         frame.setVisible(true);
      });
   }
}

/**
 * The frame with ball component and buttons.
 */
class BounceFrame extends JFrame
{
   private BallComponent comp;
   public static final int STEPS = 1000;
   public static final int DELAY = 3;

   /**
    * Constructs the frame with the component for showing the bouncing ball and
    * Start and Close buttons
    */
   public BounceFrame()
   {
      setTitle("Bounce");
      comp = new BallComponent();
      add(comp, BorderLayout.CENTER);
      JPanel buttonPanel = new JPanel();
      addButton(buttonPanel, "Start", event -> addBall()); //start表示加入一个球
      addButton(buttonPanel, "Close", event -> System.exit(0));//系统退出
      add(buttonPanel, BorderLayout.SOUTH);
      pack();
   }

   /**
    * Adds a button to a container.
    * @param c the container
    * @param title the button title
    * @param listener the action listener for the button
    */
   public void addButton(Container c, String title, ActionListener listener)
   {
      JButton button = new JButton(title);
      c.add(button);
      button.addActionListener(listener);
   }

   /**
    * Adds a bouncing ball to the panel and makes it bounce 1,000 times.
    */
   public void addBall()
   {
      try
      {
         Ball ball = new Ball();
         comp.add(ball);

         for (int i = 1; i <= STEPS; i++)
         {
            ball.move(comp.getBounds());
            comp.paint(comp.getGraphics());
            Thread.sleep(DELAY);
         }
      }
      catch (InterruptedException e)//中断异常
      {
      }
   }
}
实验输出结果截图为:
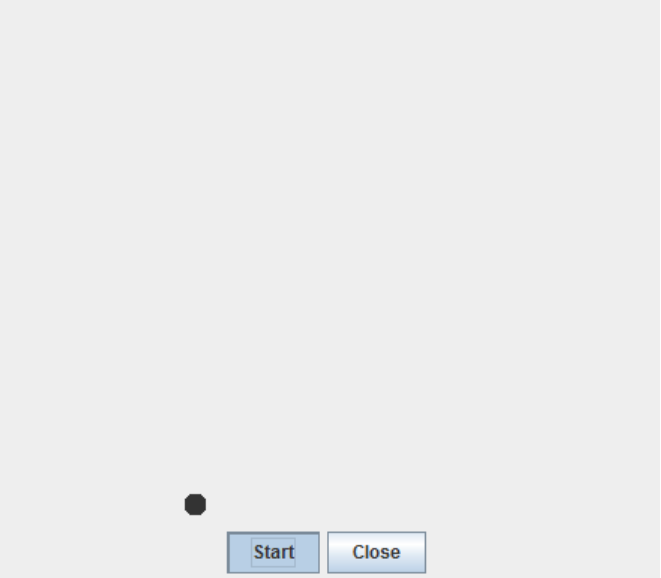
bounceThread
package bounceThread;

import java.awt.geom.*;

/**
   A ball that moves and bounces off the edges of a
   rectangle
 * @version 1.33 2007-05-17
 * @author Cay Horstmann
*/
public class Ball
{
   private static final int XSIZE = 15;
   private static final int YSIZE = 15;
   private double x = 0;
   private double y = 0;
   private double dx = 1;
   private double dy = 1;

   /**
      Moves the ball to the next position, reversing direction
      if it hits one of the edges
   */
   public void move(Rectangle2D bounds)
   {
      x += dx;
      y += dy;
      if (x < bounds.getMinX())
      {
         x = bounds.getMinX();
         dx = -dx;
      }
      if (x + XSIZE >= bounds.getMaxX())
      {
         x = bounds.getMaxX() - XSIZE;
         dx = -dx;
      }
      if (y < bounds.getMinY())
      {
         y = bounds.getMinY();
         dy = -dy;
      }
      if (y + YSIZE >= bounds.getMaxY())
      {
         y = bounds.getMaxY() - YSIZE;
         dy = -dy;
      }
   }

   /**
      Gets the shape of the ball at its current position.
   */
   public Ellipse2D getShape()
   {
      return new Ellipse2D.Double(x, y, XSIZE, YSIZE);
   }
}
package bounceThread;

import java.awt.*;
import java.util.*;
import javax.swing.*;

/**
 * The component that draws the balls.
 * @version 1.34 2012-01-26
 * @author Cay Horstmann
 */
public class BallComponent extends JComponent
{
   private static final int DEFAULT_WIDTH = 450;
   private static final int DEFAULT_HEIGHT = 350;

   private java.util.List<Ball> balls = new ArrayList<>();

   /**
    * Add a ball to the panel.
    * @param b the ball to add
    */
   public void add(Ball b)
   {
      balls.add(b);
   }

   public void paintComponent(Graphics g)
   {
      Graphics2D g2 = (Graphics2D) g;
      for (Ball b : balls)
      {
         g2.fill(b.getShape());
      }
   }

   public Dimension getPreferredSize() { return new Dimension(DEFAULT_WIDTH, DEFAULT_HEIGHT); }
}
package bounceThread;

import java.awt.*;
import java.awt.event.*;

import javax.swing.*;

/**
 * Shows animated bouncing balls.
 * @version 1.34 2015-06-21
 * @author Cay Horstmann
 */
public class BounceThread
{
   public static void main(String[] args)
   {
      EventQueue.invokeLater(() -> {
         JFrame frame = new BounceFrame();
         frame.setTitle("BounceThread");
         frame.setDefaultCloseOperation(JFrame.EXIT_ON_CLOSE);
         frame.setVisible(true);
      });
   }
}

/**
 * The frame with panel and buttons.
 */
class BounceFrame extends JFrame
{
   private BallComponent comp;
   public static final int STEPS = 1000;
   public static final int DELAY = 5;


   /**
    * Constructs the frame with the component for showing the bouncing ball and
    * Start and Close buttons
    */
   public BounceFrame()
   {
      comp = new BallComponent();
      add(comp, BorderLayout.CENTER);
      JPanel buttonPanel = new JPanel();
      addButton(buttonPanel, "Start", event -> addBall());
      addButton(buttonPanel, "Close", event -> System.exit(0));
      add(buttonPanel, BorderLayout.SOUTH);
      pack();
   }

   /**
    * Adds a button to a container.
    * @param c the container
    * @param title the button title
    * @param listener the action listener for the button
    */
   public void addButton(Container c, String title, ActionListener listener)
   {
      JButton button = new JButton(title);
      c.add(button);
      button.addActionListener(listener);
   }

   /**
    * Adds a bouncing ball to the canvas and starts a thread to make it bounce
    */
   public void addBall()
   {
      Ball ball = new Ball();
      comp.add(ball);
      Runnable r = () -> {
         try
         {
            for (int i = 1; i <= STEPS; i++)
            {
               ball.move(comp.getBounds());
               comp.repaint();
               Thread.sleep(DELAY);
            }
         }
         catch (InterruptedException e)
         {
         }
      };
      Thread t = new Thread(r);
      t.start();
   }
}
实验输出结果截图为:


 浙公网安备 33010602011771号