(翻译) V Rising's Animation Layering in Unity
https://80.lv/articles/v-rising-s-animation-layering-in-unity/
Stunlock Studios' Technical Animator Albin Thunström showed the character animation workflow used in V Rising, discussed how the layers were made, and mentioned different approaches to animating.
Stunlock Studios 的技术动画师 Albin Thunström 展示了《V Rising》中角色动画的制作流程,讲解了动画层是如何构建的,并提到了多种不同的动画实现方

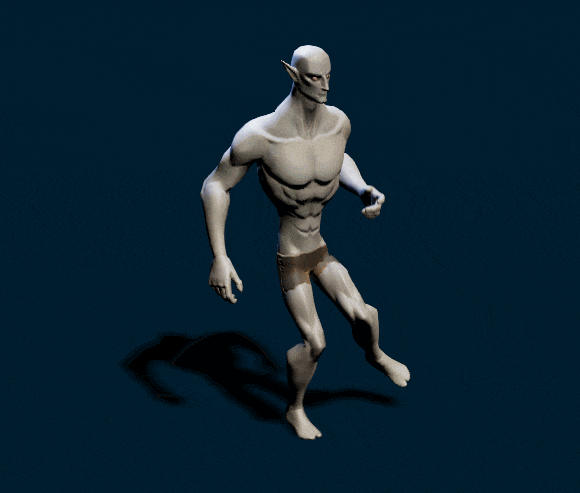
Animation Layering is when you want your Call of Duty soldier running around and reloading at the same time without skipping a step. You play your running animation on the pelvis and down and your gun-related animations on the torso and up. Easy-peasy, right? Well, it’s not always that simple. What happens when you want to combine running with swinging a sword? And what if you want to be able to use the same animations for when your character is running and for when they’re standing still?
动画分层是指:当你希望《使命召唤》里的士兵一边奔跑一边换弹而不会跳帧时所用的技术。你可以在骨盆及以下部位播放奔跑动画,同时在上半身播放与武器相关的动画。听起来很简单,对吧?但实际操作并不总是那么容易。那如果你想把奔跑和挥剑动作结合起来呢?又或者你希望角色在奔跑和站立状态下都能使用同一套动画,又该怎么办?
I’ll show you how we handled these problems in V Rising. While our game is made in Unity, our solution was actually inspired by an Unreal Engine live training video, which goes to show how sharing an idea or a concept can have an impact that you never anticipated and how beneficial doing so is for our industry. So this is me paying it forward. While Unreal solved this issue with special Unreal-specific animation nodes, we solved it in Unity through the clever use of character rigs, real-time IK, and nested blend trees.
我来展示一下我们在《V Rising》中是如何处理这些问题的。虽然我们的游戏是用 Unity 制作的,但我们的解决方案实际上是受一个 Unreal Engine 实时培训视频启发的,这也说明了分享一个想法或概念可能带来的意想不到的影响,以及这种分享对我们行业有多么有益。所以这也是我回馈行业的一种方式。虽然 Unreal 是通过一些特定于 Unreal 的动画节点来解决这个问题的,而我们则是在 Unity 中巧妙地利用角色骨架、实时 IK 和嵌套混合树来实现的。
Let’s get started!
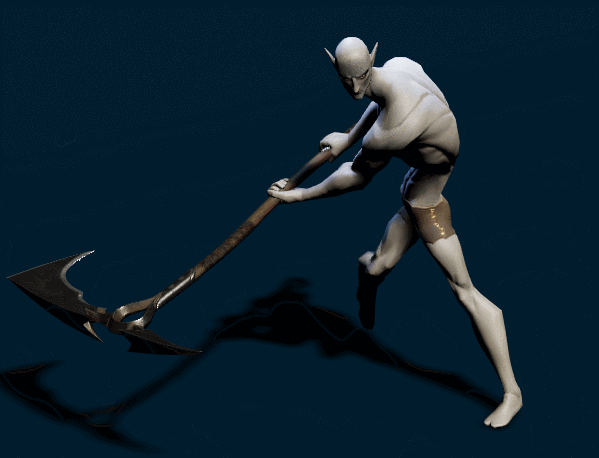
To illustrate our problem, we start off by creating an Animator with two layers: one for the legs and one for the upper body animations. The leg layer usually has a blend tree that handles strafing in multiple directions, so we’ll add that. We add an Avatar Mask to the upper body layer that masks out the legs and then play a melee animation on it. You can find countless tutorials doing exactly this and leaving it there, but this is where we start to see the problem with doing so.
为了说明我们的问题,我们首先创建一个 Animator,并设置两个图层:一个用于腿部动画,另一个用于上半身动画。腿部图层通常包含一个用于处理多方向移动的混合树,所以我们会加入这个部分。
接着,我们在上半身图层添加一个 Avatar Mask,用来屏蔽腿部,然后在该图层播放一个近战攻击动画。网上有无数教程都是这么做,并且就到此为止,但问题也正是从这里开始显现的。

Just using Avatar Masks gives the chest the incorrect rotations.
仅仅使用 Avatar Mask 会导致胸部的旋转不正确。
Straightening out the spine 拉直脊柱
First off the torso animation will have incorrect rotations because the pelvis rotation, which by being higher up in the hierarchy influences the torso, doesn’t match the ability animation anymore since it’s masked out and only influenced by the running animations.
We fix that by using a reference/proxy joint. This joint is parented directly underneath the character's root, but in Maya (or Blender, whatever you prefer) it’s constrained to the chest joint.
That way, when we export our animations from Maya/Blender, this joint will receive the exact same position and rotation data as the chest without being influenced by the pelvis.
首先,躯干动画的旋转会出现错误,因为骨骼层级中位置更高的骨盆旋转不再与技能动画匹配。由于骨盆在 Avatar Mask 中被屏蔽,只受到奔跑动画的影响,因此会影响上层的躯干。
为了解决这个问题,我们使用一个参考关节(proxy joint)。这个关节直接作为角色 Root 的子节点,但在 Maya(或 Blender,任选你喜欢的工具)中,它是通过约束绑定到胸部关节上的。
这样,在我们从 Maya 或 Blender 导出动画时,这个参考关节会接收到与胸部完全一致的位置和旋转数据,但不会受到骨盆的影响。
Now in our upper body Avatar Mask in Unity, we make sure to include this joint, which will leave us a perfect reference for exactly what the chest should look like.
We then use IK to force the chest to match this reference joint. This can be used with a Chain IK Constraint from Unity's Animation Rigging package or with something like FinalIK’s CCD IK and Aim IK components.
How you want to do it is up to you as long as you get the chest to match the rotation on every axis.
Rotating the hips 旋转臀部
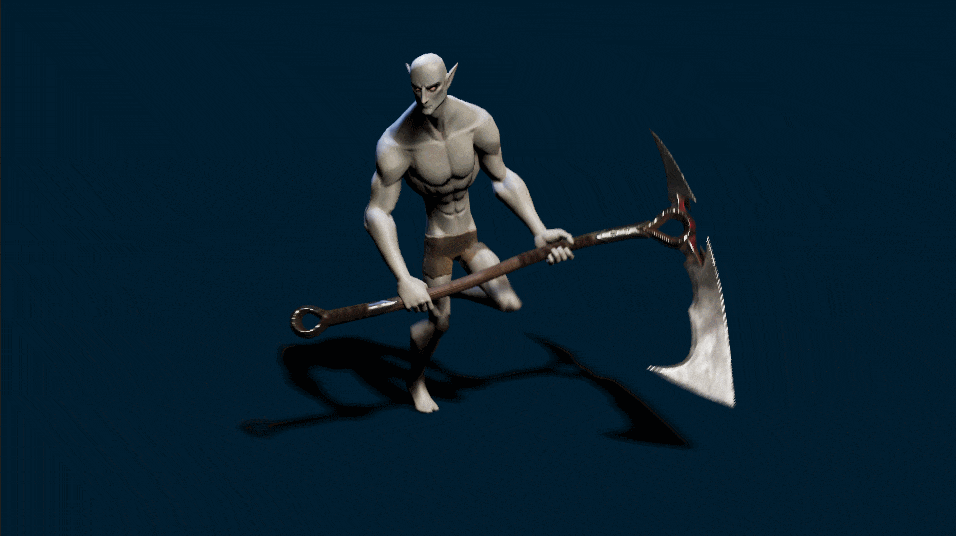
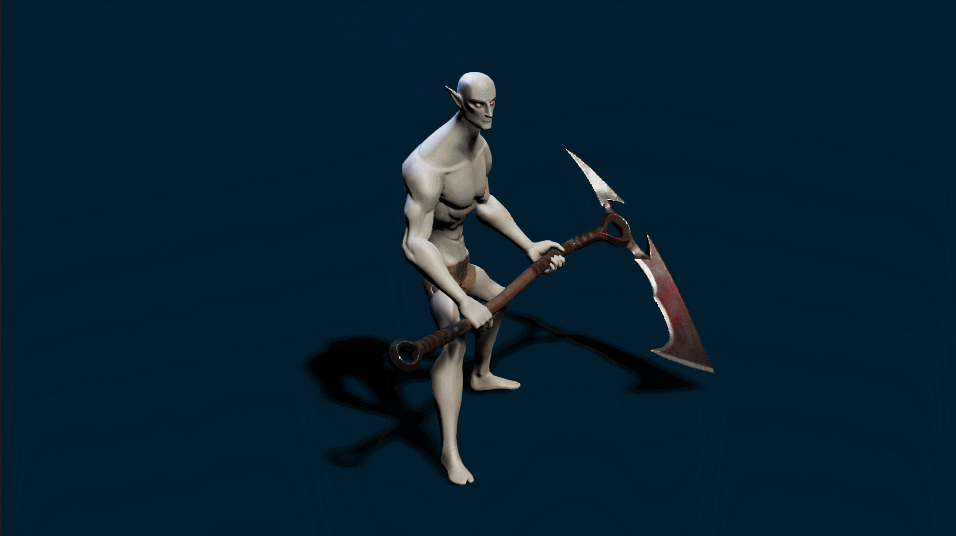
The next problem is that when you play your melee attack, you might end up breaking your character’s back. A sword swing needs to convey power and force, but if you apply the necessary rotation to your torso while keeping your hips straight, you’ll get an unnatural (and for your character, probably painful) twist of the spine.
下一个问题是,当你播放近战攻击动画时,可能会让角色的脊柱看起来像是被“扭断”了。一次挥剑攻击需要传达出力量与冲击感,但如果你在上半身施加了所需的旋转,而臀部却保持不动,就会导致一个非常不自然(对角色来说可能也很“痛苦”)的脊柱扭曲
What we want to do is have the lower half of the body twist along with the torso without messing with the foot placements. How do we do that? Let’s try to visualize what that would look like. I would even encourage you to run around and try it for yourself! Imagine this: your character is running forward and their swing has twisted their chest so that it is facing to their right, along with their pelvis to support it, but the feet still need to run forward. Now, that would probably look like they are strafing to their left, but that left being forward (see GIF). Okay, cool, so how do we achieve this?
我们真正想要的效果是:下半身在不影响双脚落点的前提下,也随着上半身一起进行一定程度的扭转。那我们该怎么做呢?我们可以试着想象一下这种动作会是什么样子——甚至我鼓励你亲自试着跑起来做个动作体会一下!
想象一下:你的角色正在向前跑,同时进行一次挥砍,动作中胸部已经扭向了右侧,为了支撑这个动作,骨盆也需要向右旋转,但双脚仍然要保持向前奔跑。看起来,这个姿态可能就像是在向左侧移动,但实际上那个“左”就是角色当前的正前方(参考 GIF)。好,理解了这个姿态之后,我们来看看该怎么实现它。
A pelvis twist results in strafing. 骨盆的扭转会导致角色呈现出侧移(strafing)的姿态。
Imagine a normal two-dimensional blend tree for strafing (you can find it in any YouTube tutorial). In its simplest form, it contains 4 animations: run forward, run backward, strafe left, and strafe right. However, in all of these animations, the character is facing forward. Let’s instead replace all of these animations with blend trees of their own that support running in their designated direction, but that can also face every other direction. We’re pretty much reversing the setup, where a normal blend tree for strafing would run in all directions but only face one (being forward), these nested blend trees run in one direction but can face all directions. With this tree, we can now, without actually turning the character, run in all directions and face all directions.
想象一下一个普通的二维侧移(strafing)混合树(Blend Tree),你可以在任何一个 YouTube 教程中看到它。最简单的形式包含四个动画:向前跑、向后跑、向左侧移和向右侧移。然而,在这些动画中,角色的朝向始终是正前方。
现在我们来改变思路,把这些动画都替换成各自的混合树,这些新的混合树不仅支持角色朝指定方向移动,还能让角色朝任意方向面向。
我们基本上是将传统设置“反过来”使用:通常的 strafing 混合树是角色可以向任意方向移动,但始终面朝前方;而我们的嵌套混合树是角色朝一个方向移动,但可以面向所有方向。
通过这种树结构,我们现在就可以在不真正旋转角色的前提下,实现角色既能向所有方向移动,也能朝任意方向面向。

All nested blend trees, running in their own direction but facing any direction. 所有嵌套混合树,角色在各自的方向上奔跑,但可以面向任意方向。
We use four variables to control the Blend Trees: inputX, inputY, twistX, and twistY. The first two are the normal ones you need for a normal strafing blend tree – the dot products of the character's movement direction and the character’s right/forward direction. Here’s some pseudo-code for the sake of explanation:
我们使用四个变量来控制混合树:inputX、inputY、twistX 和 twistY。前两个是用在普通 strafing 混合树中的常规变量——它们分别是角色移动方向与角色自身右方向和前方向的点积。下面是为了说明用的一段伪代码:
inputX = Vector3.Dot(transform.right, velocity);
inputY = Vector3.Dot(transform.forward, velocity);
The other two variables control the nested blend trees and are the dot product of the character’s proxy chest joint’s forward direction (which we created earlier) and the character’s right/forward direction.
另外两个变量用于控制嵌套混合树,它们是角色的代理胸部关节(之前我们创建的那个)的前方向与角色自身右方向和前方向的点积。
twistX = Vector3.Dot(transform.right, chestReference.forward);
twistY = Vector3.Dot(transform.forward, chestReference.forward);
In case you are wondering what a dot product is, it’s math magic. The simple explanation is: it takes two vectors and returns a float value. When the two vectors face the same direction, you get 1, when they face the exact opposite direction to one another, you get -1, and if they are perpendicular to one another, you get 0. This is exactly what we want for our blend tree! It might be a good idea however to remove the y-axis in these calculations since we’re only working in the two other axes anyway.
如果你在想“点积”到底是什么,其实就是一种数学魔法。简单来说,它接收两个向量并返回一个浮点值:
-
当两个向量朝同一个方向时,结果是 1;
-
当它们方向完全相反时,结果是 -1;
-
如果它们互相垂直,则结果是 0。
这正是我们在混合树中所需要的!不过,建议在计算时去除 Y 轴的影响,因为我们只关心另外两个轴上的变化。
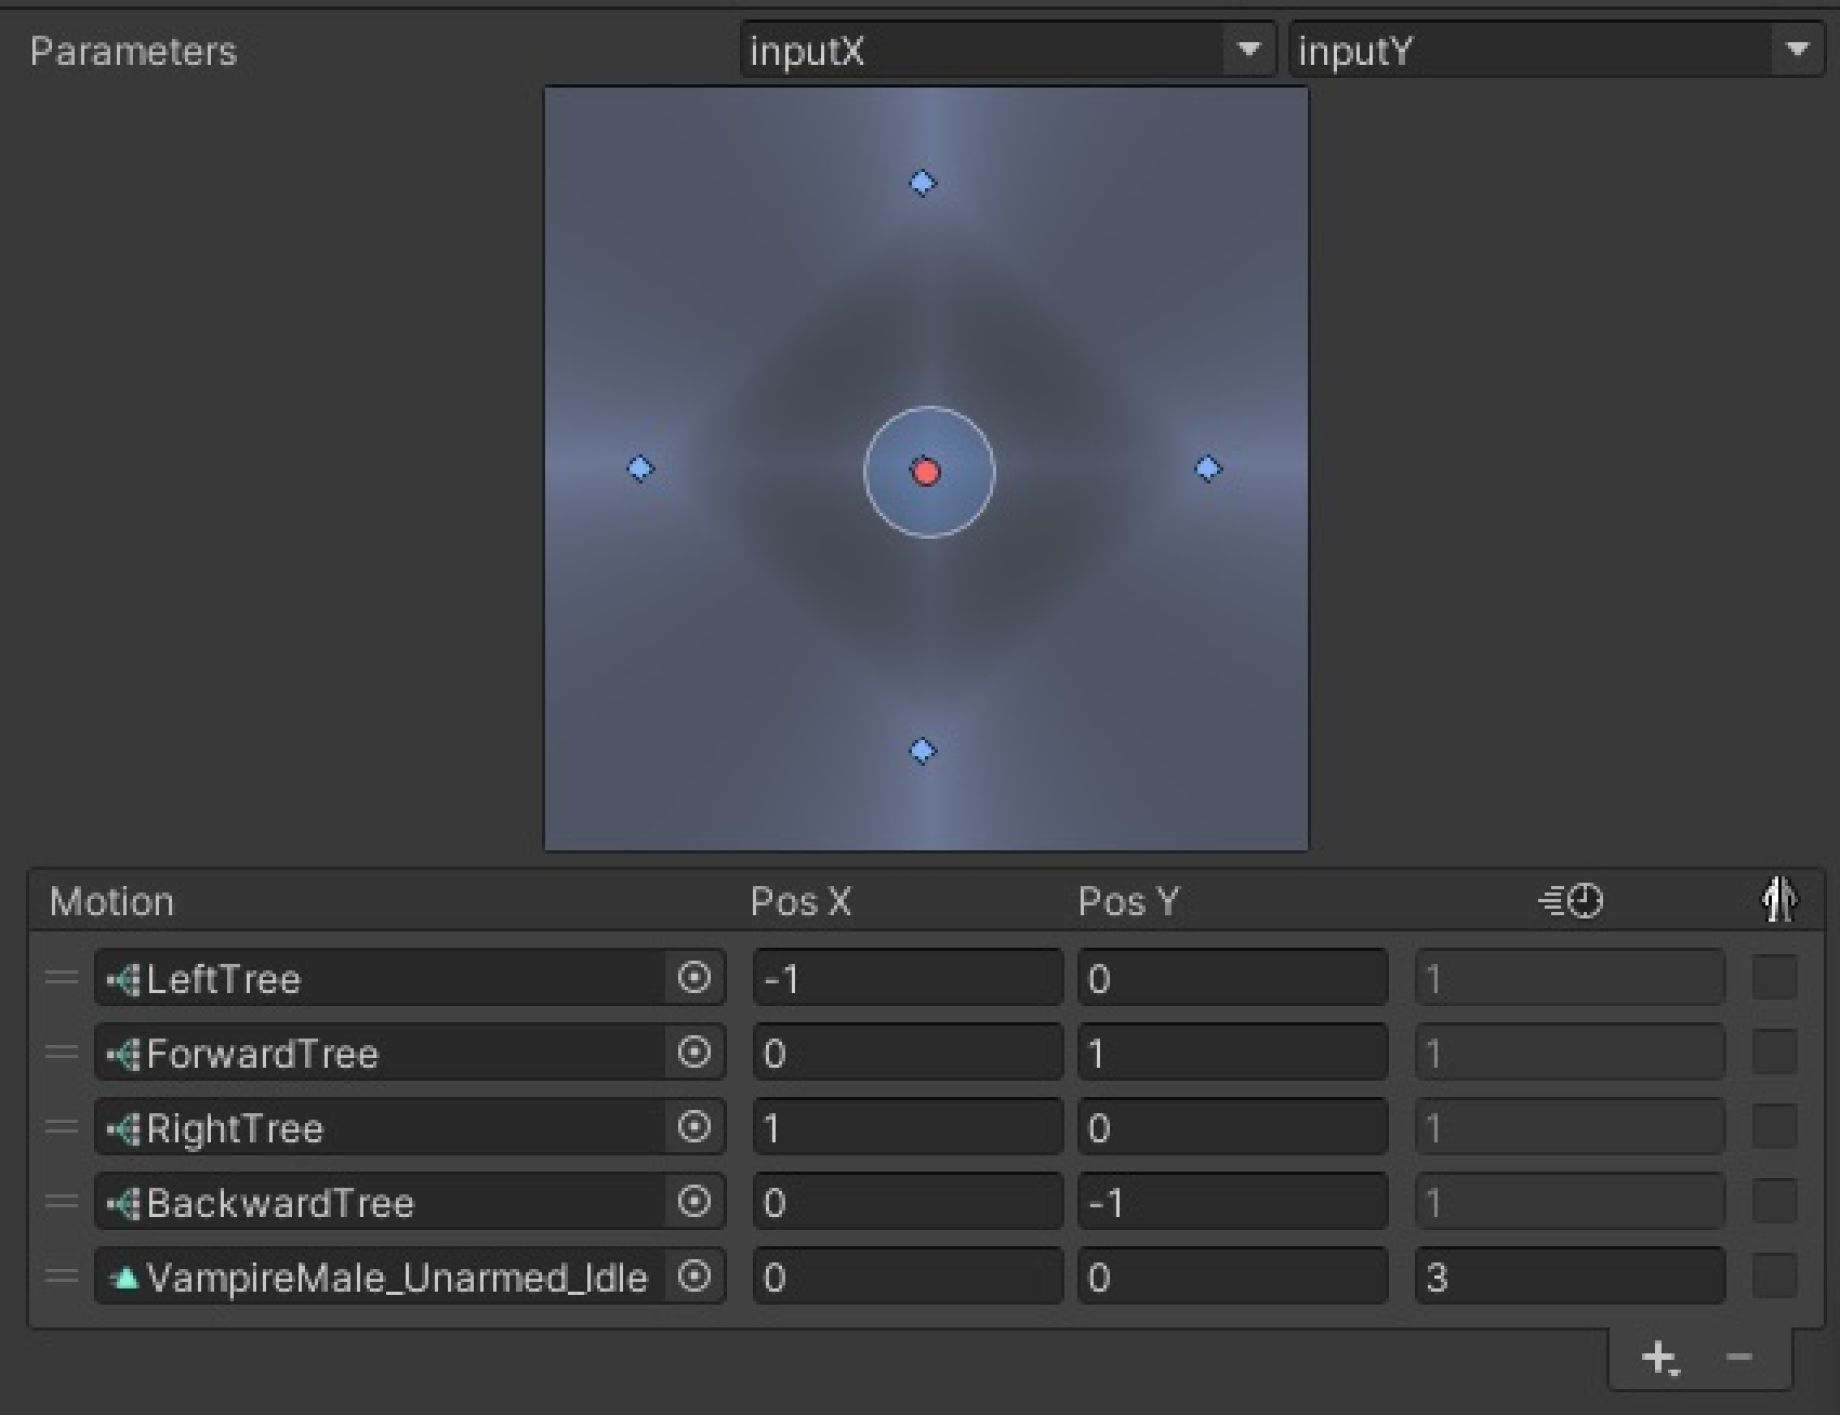
Basic Unity blend tree for strafing, but with nested blend trees. 这是一个基础的 Unity strafing 混合树结构,但内部嵌套了多个混合树
-
主混合树(2D Blend Tree)使用
inputX和inputY控制角色移动方向(如前、后、左、右)。 -
每个方向节点(如“向前跑”、“向左跑”等)不再是单一动画,而是一个嵌套的 2D 混合树。
-
每个嵌套混合树使用
twistX和twistY控制角色朝向(面向前、后、左、右等)。
这样角色可以在奔跑时不仅朝任意方向移动,还可以面向任意方向,实现完全自由的动作表现。
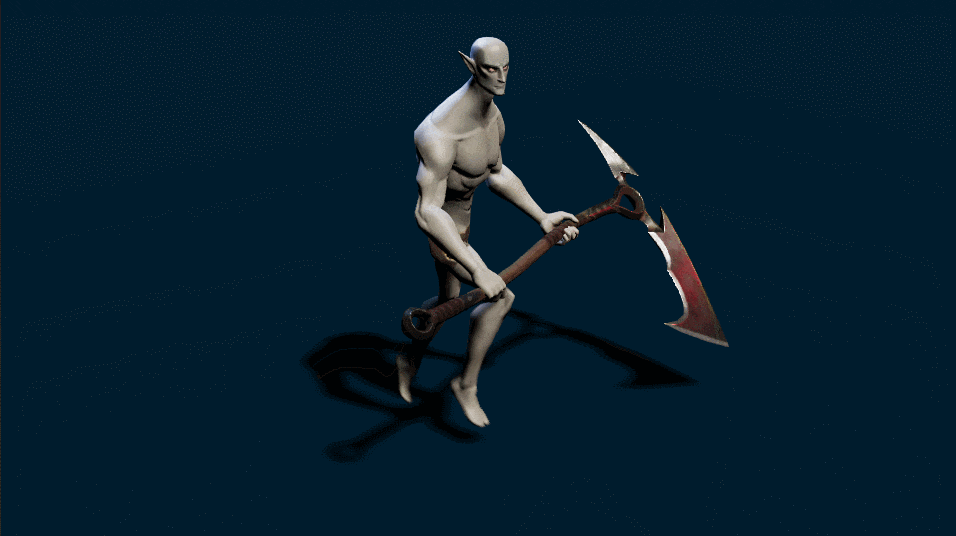
Final Result
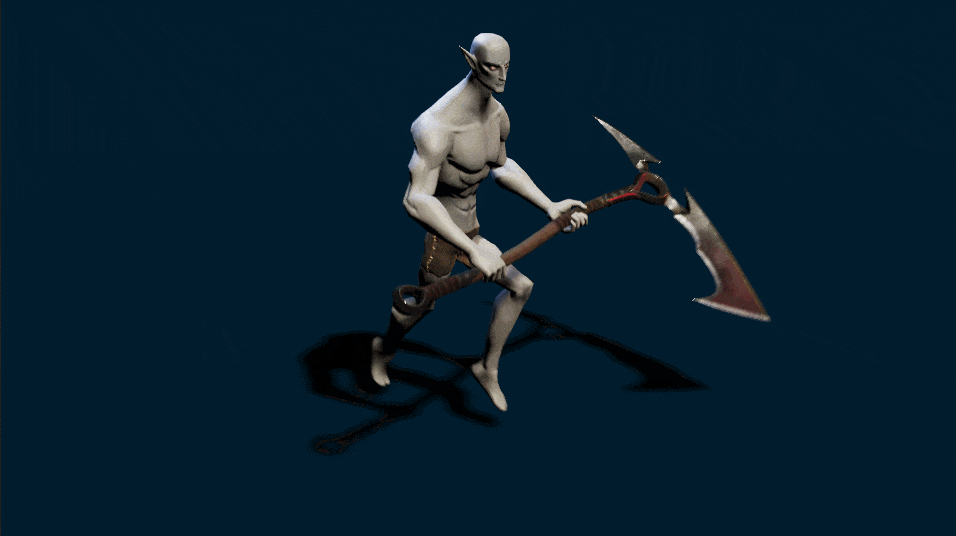
And there we have our final result! Our chest is doing the exact same motion as the original animation intended. And even though the character could be running in any direction, the feet will always keep running in that direction while still allowing the pelvis to support the twist rotation in the chest. A nice bonus we got from this solution was that even in animations where the character is doing a spin, they could still do it while running since the feet and pelvis can support any direction.
最终效果就这样实现了!现在我们的胸部能够完全按照原始动画的动作来运动。即使角色在任意方向奔跑,双脚依然会保持正确的奔跑方向,同时骨盆也可以很好地支撑胸部的扭转旋转。
这个方案带来的一个额外好处是:即使在角色做旋转动作的动画中,也能边跑边旋转,因为脚步和骨盆都能灵活适应任何方向的变化。
Twists are automatically supported. (Santa hats are not automatically included.) 扭转动作会被自动支持。(圣诞帽则不会自动包含。)
Extra and alternative approaches
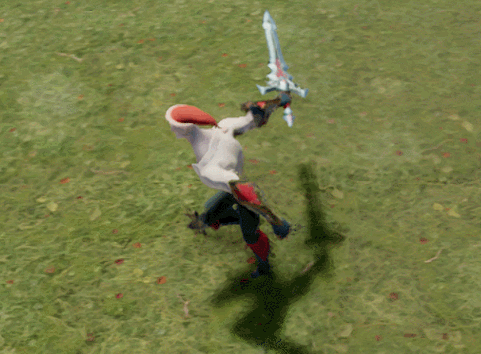
On V Rising, we actually didn’t use the chest direction when calculating the nested blend tree variables. Instead, we used another proxy joint, just like the one for the chest but for the pelvis. This way we didn’t overdo the twisting and also kept the rotation closer to the animator’s intentions. That is also what you’re seeing in these GIFs. Try it out for yourself to see whichever works best for you.
Another thing we did, which I also recommend, is switching out the melee animation when running to one that is keeping the spine much straighter. This way you can put the character in a position where they look less likely to fall over.
You could also do it the Unreal Training Video way, by not using nested blend trees (or blend spaces in “Unrealian”) but by actually rotating the character’s root instead. That way you don’t have to re-export rotated versions of the same animations in every direction – the normal strafe animations will do fine. However, you would also need to consider how you’d rotate your character’s root without altering the proxy joints.
在《V Rising》中,我们实际上在计算嵌套混合树变量时并没有使用胸部的朝向,而是使用了另一个代理关节,类似于胸部的那个,但这次是用于骨盆的。这样做的好处是避免了过度扭转,同时让旋转更接近动画师原本的设计意图。你在这些 GIF 中看到的也是这种方式的效果。建议你亲自试试看哪种方式更适合你的项目。
我们还做了另一项优化,也推荐你尝试:在角色奔跑时替换掉普通的近战攻击动画,使用一个保持脊柱更直的版本。这样角色看起来会更稳定,更不容易失衡。
你也可以采用 Unreal 培训视频中的做法——不是使用嵌套混合树(或者在 Unreal 中叫做 Blend Spaces),而是直接旋转角色的 Root 节点。这样你就无需为每个方向重新导出带旋转的动画,普通的 strafing 动画就足够用了。但这样做也需要你思考如何在不影响代理关节的情况下对角色 Root 进行旋转


 浙公网安备 33010602011771号