
Web项目搭建&集成Spring框架
Web项目搭建
1.新建Maven项目:springmvc-mybatisdemo
2.配置Maven仓库文件
3.Maven项目创建,添加Web文件夹:点击参考岁岁博客
集成Spring框架
1.添加spring相关依赖:pop.xml
 1 <?xml version="1.0" encoding="UTF-8"?>
 2 <project xmlns="http://maven.apache.org/POM/4.0.0"
 3          xmlns:xsi="http://www.w3.org/2001/XMLSchema-instance"
 4          xsi:schemaLocation="http://maven.apache.org/POM/4.0.0 http://maven.apache.org/xsd/maven-4.0.0.xsd">
 5     <modelVersion>4.0.0</modelVersion>
 6
 7     <groupId>org.example</groupId>
 8     <artifactId>springmvc-mybatisdemo-zhuangshuhui</artifactId>
 9     <version>1.0-SNAPSHOT<ersion>
10
11     <dependencies>
12     <!-- https://mvnrepository.com/artifact/org.springframework/spring-core -->
13     <dependency>
14         <groupId>org.springframework</groupId>
15         <artifactId>spring-core</artifactId>
16         <version>5.2.13.RELEASE<ersion>
17     </dependency>
18     <!-- https://mvnrepository.com/artifact/org.springframework/spring-beans -->
19     <dependency>
20         <groupId>org.springframework</groupId>
21         <artifactId>spring-beans</artifactId>
22         <version>5.2.13.RELEASE<ersion>
23     </dependency>
24     <!-- https://mvnrepository.com/artifact/org.springframework/spring-context -->
25     <dependency>
26         <groupId>org.springframework</groupId>
27         <artifactId>spring-context</artifactId>
28         <version>5.2.13.RELEASE<ersion>
29     </dependency>
30         <!-- https://mvnrepository.com/artifact/org.springframework/spring-aspects -->
31         <dependency>
32             <groupId>org.springframework</groupId>
33             <artifactId>spring-aspects</artifactId>
34             <version>5.2.13.RELEASE<ersion>
35         </dependency>
36         <!-- https://mvnrepository.com/artifact/org.springframework/spring-aop -->
37         <dependency>
38             <groupId>org.springframework</groupId>
39             <artifactId>spring-aop</artifactId>
40             <version>5.2.13.RELEASE<ersion>
41         </dependency>
42         <!-- https://mvnrepository.com/artifact/org.springframework/spring-context-support -->
43         <dependency>
44             <groupId>org.springframework</groupId>
45             <artifactId>spring-context-support</artifactId>
46             <version>5.2.13.RELEASE<ersion>
47         </dependency>
48
49         <!-- https://mvnrepository.com/artifact/org.springframework/spring-expression -->
50         <dependency>
51             <groupId>org.springframework</groupId>
52             <artifactId>spring-expression</artifactId>
53             <version>5.2.13.RELEASE<ersion>
54         </dependency>
55         <!-- https://mvnrepository.com/artifact/org.springframework/spring-tx -->
56         <dependency>
57             <groupId>org.springframework</groupId>
58             <artifactId>spring-tx</artifactId>
59             <version>5.2.13.RELEASE<ersion>
60         </dependency>
61         <!-- https://mvnrepository.com/artifact/org.springframework/spring-test -->
62         <dependency>
63             <groupId>org.springframework</groupId>
64             <artifactId>spring-test</artifactId>
65             <version>5.2.13.RELEASE<ersion>
66             <scope>test</scope>
67         </dependency>
68         <!-- https://mvnrepository.com/artifact/org.springframework/spring-web -->
69         <dependency>
70             <groupId>org.springframework</groupId>
71             <artifactId>spring-web</artifactId>
72             <version>5.2.13.RELEASE<ersion>
73         </dependency>
74
75         <!-- https://mvnrepository.com/artifact/junit/junit -->
76         <dependency>
77             <groupId>junit</groupId>
78             <artifactId>junit</artifactId>
79             <version>4.13.2<ersion>
80             <scope>test</scope>
81         </dependency>
82         <dependency>
83             <groupId>org.junit.jupiter</groupId>
84             <artifactId>junit-jupiter</artifactId>
85             <version>RELEASE<ersion>
86             <scope>compile</scope>
87         </dependency>
88     </dependencies>
89 </project>
2.在resources文件下新建配置文件:applicationContext.xml
 1 <?xml version="1.0" encoding="UTF-8"?>
 2 <beans xmlns="http://www.springframework.org/schema/beans"
 3        xmlns:xsi="http://www.w3.org/2001/XMLSchema-instance"
 4        xmlns:context="http://www.springframework.org/schema/context"
 5        xmlns:tx="http://www.springframework.org/schema/tx"
 6        xsi:schemaLocation="http://www.springframework.org/schema/beans
 7        http://www.springframework.org/schema/beans/spring-beans.xsd
 8         http://www.springframework.org/schema/tx
 9         http://www.springframework.org/schema/tx/spring-tx.xsd
10         http://www.springframework.org/schema/context
11         http://www.springframework.org/schema/context/spring-context.xsd">
12     <context:component-scan base-package="com"/>
13 </beans>
3.在web文件夹中添加配置文件:web.xml
 1 <?xml version="1.0" encoding="UTF-8"?>
 2 <web-app xmlns="http://xmlns.jcp.org/xml/ns/javaee"
 3          xmlns:xsi="http://www.w3.org/2001/XMLSchema-instance"
 4          xsi:schemaLocation="http://xmlns.jcp.org/xml/ns/javaee http://xmlns.jcp.org/xml/ns/javaee/web-app_4_0.xsd"
 5          version="4.0">
 6     <display-name>
 7         Archetype Created Web Application
 8     </display-name>
 9     <context-param>
10         <param-name>contextConfigLocation</param-name>
11         <param-value>classpath:applicationContext.xml</param-value>
12     </context-param>
13     <listener>
14         <listener-class>
15             org.springframework.web.context.ContextLoaderListener
16         <stener-class>
17     <stener>
18 </web-app>
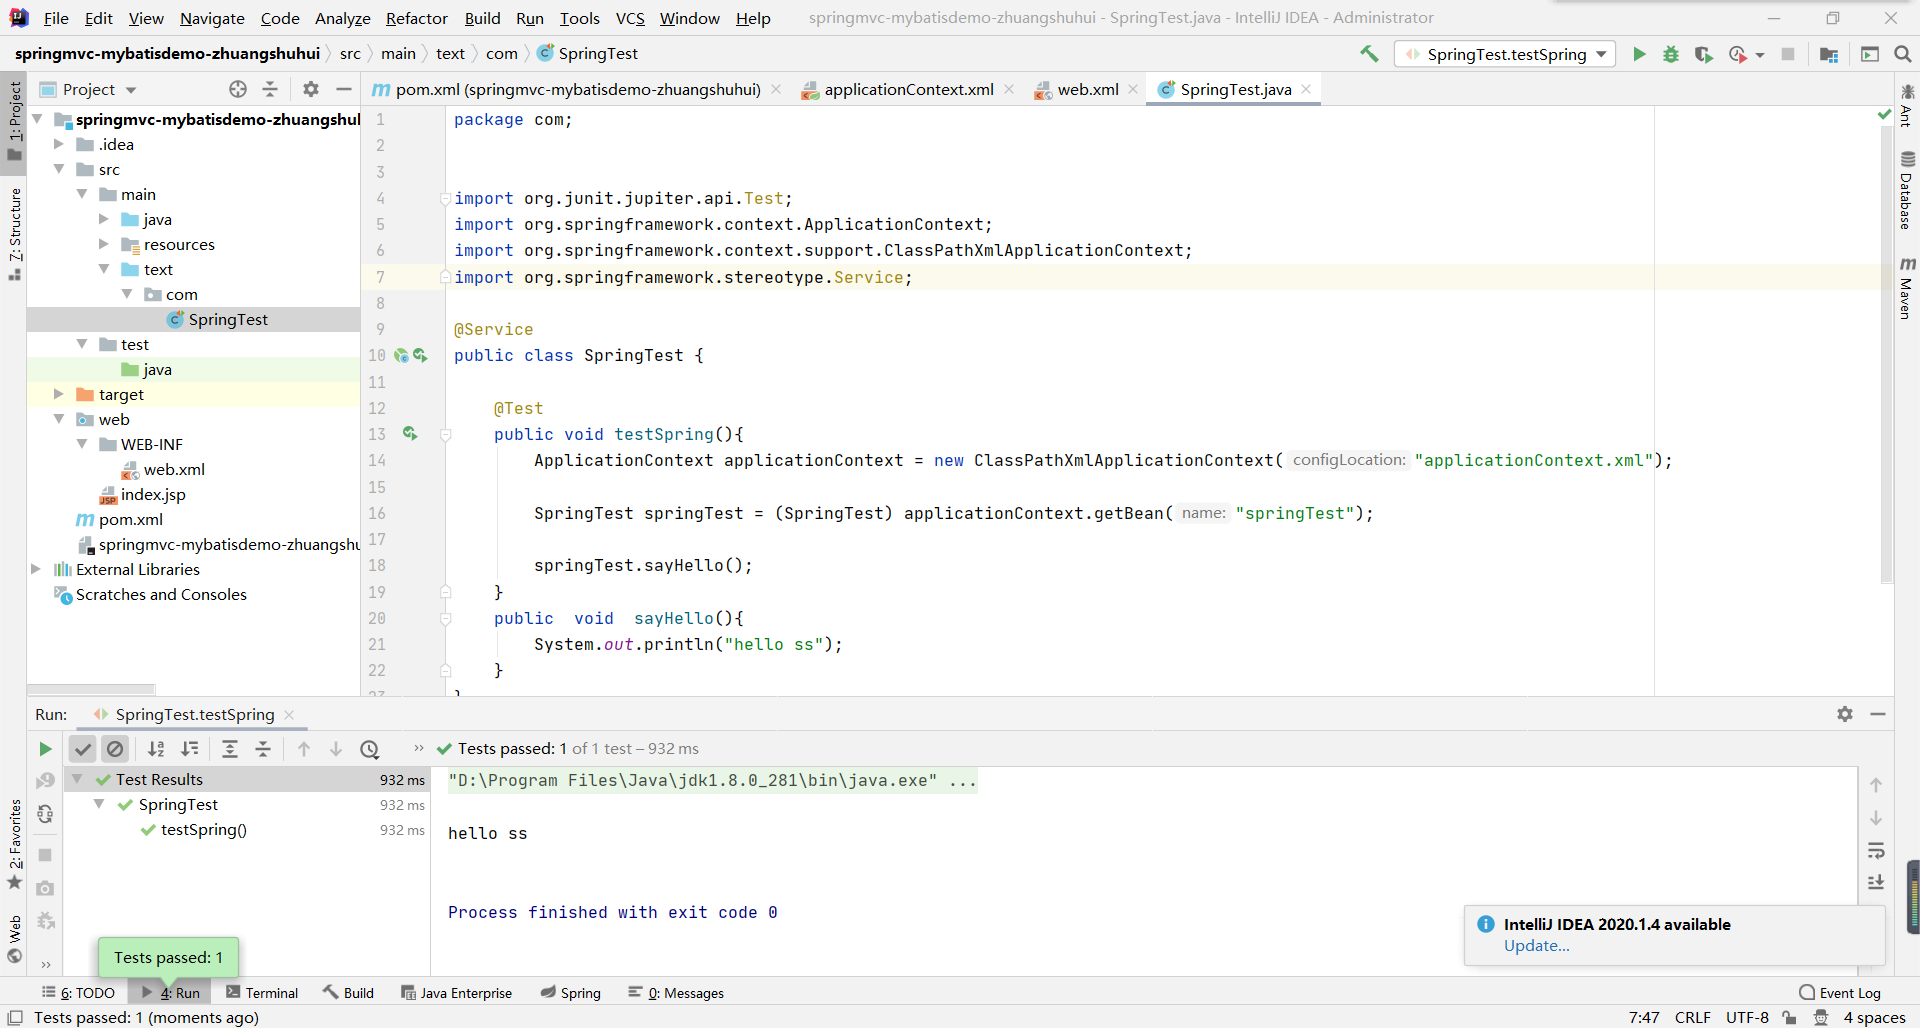
4.在src/main/test目录下创建一个包"com",在包里新建一个类:SpringTest.java
 1 package com;
 2
 3
 4 import org.junit.jupiter.api.Test;
 5 import org.springframework.context.ApplicationContext;
 6 import org.springframework.context.support.ClassPathXmlApplicationContext;
 7 import org.springframework.stereotype.Service;
 8
 9 @Service
10 public class SpringTest {
11
12     @Test
13     public void testSpring(){
14         ApplicationContext applicationContext = new ClassPathXmlApplicationContext("applicationContext.xml");
15
16         SpringTest springTest = (SpringTest) applicationContext.getBean("springTest");
17
18         springTest.sayHello();
19     }
20     public  void  sayHello(){
21         System.out.println("hello ss");
22     }
23 }
执行结果:
总结:
@Service: Spring会自动扫描到@Service注解的类,并把这些类放入Spring容器中管理。
<context:component-scan>注解:扫描base-package包或者子包下的所有Java类,并把匹配的Java类注册成Bean。

 浙公网安备 33010602011771号