
基于 Netty 的 Websocket 实现
Netty 是一个广泛使用的 Java 网络编程框架,它提供了一个易于使用的 API 客户端和服务器,具有并发高、传输快、封装好等优点。
Netty的传输快其实也是依赖了 NIO 的零拷贝特性,当他需要接收数据的时候,他会在堆内存之外开辟一块内存,数据就直接从 IO 读到了那块内存中去,在 netty 里面通过 ByteBuf 可以直接对这些数据进行直接操作,从而加快了传输速度。Netty 对 NIO 进行了封装,代码简洁,远远优于传统Socket编程。
本篇博客基于上一篇博客的 demo 代码进行改造,所实现的功能一摸一样,看不出显著的效果。由于采用 netty 的 api 实现比较复杂,因此我们采用第三方开源依赖包 netty-websocket-spring-boot-starter 实现 websocket 和 netty 的集成,大大简化了代码的实现。
一、代码实现细节
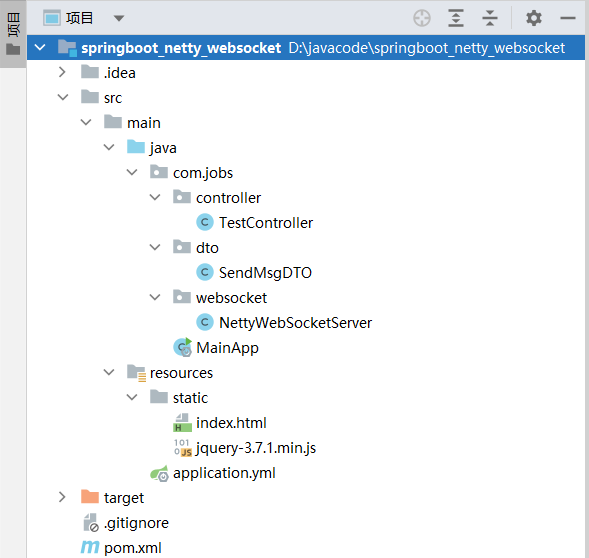
新建一个名称为 springboot_netty_websocket 的 springboot 工程,结构如下:
在 pom 文件中引入 netty-websocket-spring-boot-starter 依赖包,具体如下所示:
<?xml version="1.0" encoding="UTF-8"?>
<project xmlns="http://maven.apache.org/POM/4.0.0"
         xmlns:xsi="http://www.w3.org/2001/XMLSchema-instance"
         xsi:schemaLocation="http://maven.apache.org/POM/4.0.0 http://maven.apache.org/xsd/maven-4.0.0.xsd">
    <modelVersion>4.0.0</modelVersion>

    <groupId>com.jobs</groupId>
    <artifactId>springboot_netty_websocket</artifactId>
    <version>1.0-SNAPSHOT</version>

    <properties>
        <maven.compiler.source>8</maven.compiler.source>
        <maven.compiler.target>8</maven.compiler.target>
        <project.build.sourceEncoding>UTF-8</project.build.sourceEncoding>
    </properties>

    <parent>
        <groupId>org.springframework.boot</groupId>
        <artifactId>spring-boot-starter-parent</artifactId>
        <version>2.4.5</version>
    </parent>

    <dependencies>
        <dependency>
            <groupId>org.springframework.boot</groupId>
            <artifactId>spring-boot-starter-web</artifactId>
        </dependency>
        <dependency>
            <groupId>org.projectlombok</groupId>
            <artifactId>lombok</artifactId>
            <version>1.18.20</version>
        </dependency>
        <!--引入第三方提供的 netty WebSocket 依赖包-->
        <dependency>
            <groupId>org.yeauty</groupId>
            <artifactId>netty-websocket-spring-boot-starter</artifactId>
            <version>0.12.0</version>
        </dependency>
    </dependencies>
    <build>
        <plugins>
            <plugin>
                <groupId>org.springframework.boot</groupId>
                <artifactId>spring-boot-maven-plugin</artifactId>
                <version>2.4.5</version>
            </plugin>
        </plugins>
    </build>
</project>
由于 netty 服务需要额外的启动端口,因此在 application.yml 中配置了 netty 的启动端口,整体内容如下:
server:
  port: 8086

# 集成了 netty 的 websocket 需要使用额外的端口
ws-netty:
  port: 18086
前端页面连接与 netty 集成的 websocket 服务,需要连接 netty 的端口(即上面配置的 18086 端口),整体前端内容如下所示:
<!DOCTYPE html>
<html>
<head>
    <meta charset="utf-8">
    <title>websocket</title>
    <script src="./jquery-3.7.1.min.js"></script>
    <script>
        //获取浏览器地址栏 get 请求参数
        function GetQueryString(name) {
            var reg = new RegExp("(^|&)" + name + "=([^&]*)(&|$)");
            var r = window.location.search.substr(1).match(reg);
            if (r != null) return unescape(r[2]);
            return null;
        }

        var socket;
        if (typeof (WebSocket) == "undefined") {
            console.log("您的浏览器不支持WebSocket");
        } else {
            var host = window.location.hostname;
            var username = GetQueryString("username");
            //实现化 WebSocket 对象,与服务器建立连接
            //这里连接的是在 application.yml 中配置的 netty 的端口
            socket = new WebSocket("ws://" + host + ":18086/socket/" + username);
            //打开事件
            socket.onopen = function () {
                console.log("Socket 已连接");
            };
            //获得消息事件
            socket.onmessage = function (msg) {
                console.log(msg.data);
                $("#msg").append("接收到消息:" + msg.data + "</br>");
            };
            //关闭事件
            socket.onclose = function () {
                console.log("Socket已关闭");
            };
            //发生了错误事件
            socket.onerror = function () {
                alert("Socket发生了错误");
            }

            //关闭连接
            function closeWebSocket() {
                socket.close();
            }

            //发送消息
            function send() {
                var message = $('#text').val();
                socket.send(message);
            }
        }
    </script>
</head>
<body>
<div id="msg"></div>
<input id="text" type="text"/>
<button type="button" onclick="send()">发送消息测试</button>
</body>
</html>
springboot 的启动内中,需要添加 websocket 的支持,需要注意的是:ServerEndpointExporter 对象实例是第三方依赖包下面的对象。
package com.jobs;

import lombok.extern.slf4j.Slf4j;
import org.springframework.boot.SpringApplication;
import org.springframework.boot.autoconfigure.SpringBootApplication;
import org.springframework.context.annotation.Bean;

// 注意这里的 ServerEndpointExporter 是第三方包下面的
import org.yeauty.standard.ServerEndpointExporter;

@Slf4j
@SpringBootApplication
public class MainApp {
    public static void main(String[] args) {
        SpringApplication.run(MainApp.class, args);
        log.info("项目已经启动...");
    }

    //让 spring 容器管理 WebSocket,将服务服务暴露出去
    @Bean
    public ServerEndpointExporter serverEndpointExporter() {
        return new ServerEndpointExporter();
    }
}
然后编写基于 netty 的 websocket 服务类 NettyWebSocketServer
需要注意的是:这些注解 @ServerEndpoint、@OnOpen、@OnClose、@OnError、@OnMessage 以及 Session 对象都是使用的是第三方依赖包的。
package com.jobs.websocket;

import lombok.extern.slf4j.Slf4j;

import java.io.IOException;
import java.util.HashMap;
import java.util.Map;

import org.springframework.stereotype.Component;
import org.yeauty.annotation.*;
import org.yeauty.pojo.Session;

//注意:
//这里的 @ServerEndpoint、@OnOpen、@OnClose、@OnError、@OnMessage,使用的是 org.yeauty.annotation 包
//Session 也是 org.yeauty.annotation 包
//集成了 netty 的 websocket 服务,需要使用额外的端口,这里从 application.yml 中的配置读取端口

//配置 WebSocket 服务的连接地址,每次连接都会实例化一个对象
@ServerEndpoint(value = "/socket/{username}", port = "${ws-netty.port}")
@Slf4j
@Component
public class NettyWebSocketServer {

    //存储 username 与 Session 的对应关系,key 是 username
    private static Map<String, Session> sessionMap = new HashMap<String, Session>();

    //存储 Session 的 id 和 username 的对应关系
    private static Map<String, String> idnameMap = new HashMap<String, String>();

    //WebSocket 连接建立后调用该方法
    //注意:当前 Socket Session 属于长连接类型(有状态),因此不能持久化对象到数据库中
    @OnOpen
    public void onOpen(@PathVariable("username") String username, Session session) {
        //根据 username 获取 Socket Session,如果一个用户重复连接,只保留该用户最后连接的 Socket Session
        Session userSession = sessionMap.get(username);
        if (userSession != null) {
            idnameMap.remove(userSession.channel().id().toString());
            sessionMap.remove(username);
        }

        //存储 username 和 Socket Session 的对应关系
        sessionMap.put(username, session);
        //存储 Socket Session 的 ID 和 username 的对应关系
        idnameMap.put(session.channel().id().toString(), username);
    }

    //关闭链接
    @OnClose
    public void onClose(Session session) {
        //根据 Scocket Session 的 ID 获取 username
        String username = idnameMap.get(session.channel().id().toString());
        //移除用户信息
        sessionMap.remove(username);
        idnameMap.remove(session.channel().id().toString());
    }

    //异常处理
    @OnError
    public void onError(Session session, Throwable throwable) {
        String username = idnameMap.get(session.channel().id().toString());
        log.error("用户 " + username + " 的 WebSocket 通信发生了异常:" + throwable.getMessage());
    }

    //接收客户端发送过来的消息
    @OnMessage
    public void onMessage(Session session, String message) throws IOException {
        String username = idnameMap.get(session.channel().id().toString());
        log.info("用户 " + username + " 接收到客户端发来的消息是:" + message);
        //同步给客户端发送消息
        session.sendText("服务端收到消息:" + message);
    }

    //封住的消息发送方法,用于其它地方的服务端代码进行调用,给客户端发送消息
    public void sendMessage(String username, String message) throws IOException {
        //获取用户的 Socket Session 对象
        Session session = sessionMap.get(username);

        if (session != null) {
            //给指定会话发送消息
            session.sendText(message);
        }
    }
}
为了便于通过后端服务,向前端发送消息,需要在后端编写一个接口,内容如下:
package com.jobs.controller;

import com.jobs.dto.SendMsgDTO;
import com.jobs.websocket.NettyWebSocketServer;
import org.springframework.beans.factory.annotation.Autowired;
import org.springframework.web.bind.annotation.PostMapping;
import org.springframework.web.bind.annotation.RequestBody;
import org.springframework.web.bind.annotation.RequestMapping;
import org.springframework.web.bind.annotation.RestController;

import java.io.IOException;

@RestController
@RequestMapping("/test")
public class TestController {

    @Autowired
    private NettyWebSocketServer nettyWebSocketServer;

    //通过后端代码,向指定用户发送信息,测试指定用户的前端页面是否可以收到信息
    @PostMapping("/sendmsg")
    public String send(@RequestBody SendMsgDTO sendMsgDTO) throws IOException {
        nettyWebSocketServer.sendMessage(sendMsgDTO.getUsername(), sendMsgDTO.getMsg());
        return "send success";
    }
}
接口传入的参数 SendMsgDTO 内容如下:
package com.jobs.dto;

import lombok.Data;

@Data
public class SendMsgDTO {

    //用户名
    private String username;

    //发送的消息内容
    private String msg;
}
二、测试验证效果
启动 springboot 项目,由于我是本地启动,所以访问的域名地址是 localhost,使用 2 个不同的浏览器访问,代表 2 个不同的用户:
使用谷歌浏览器访问 http://localhost:8086?username=lisi 表示用户李四
使用 Edge 浏览器访问 http://localhost:8086?username=zhangsan表示用户张三

浏览器打开后,其实已经跟服务器建立了 websocket 建立了连接,此时通过文本框想服务器发送消息,能够得到服务器的实时响应:

我们使用 apipost 工具,通过 http://localhost:8086/test/sendmsg接口向 lisi 发送消息,lisi 的前端页面能够实时接收到数据,zhangsan 的前端页码则不会收到发给 lisi 的数据,如下图:

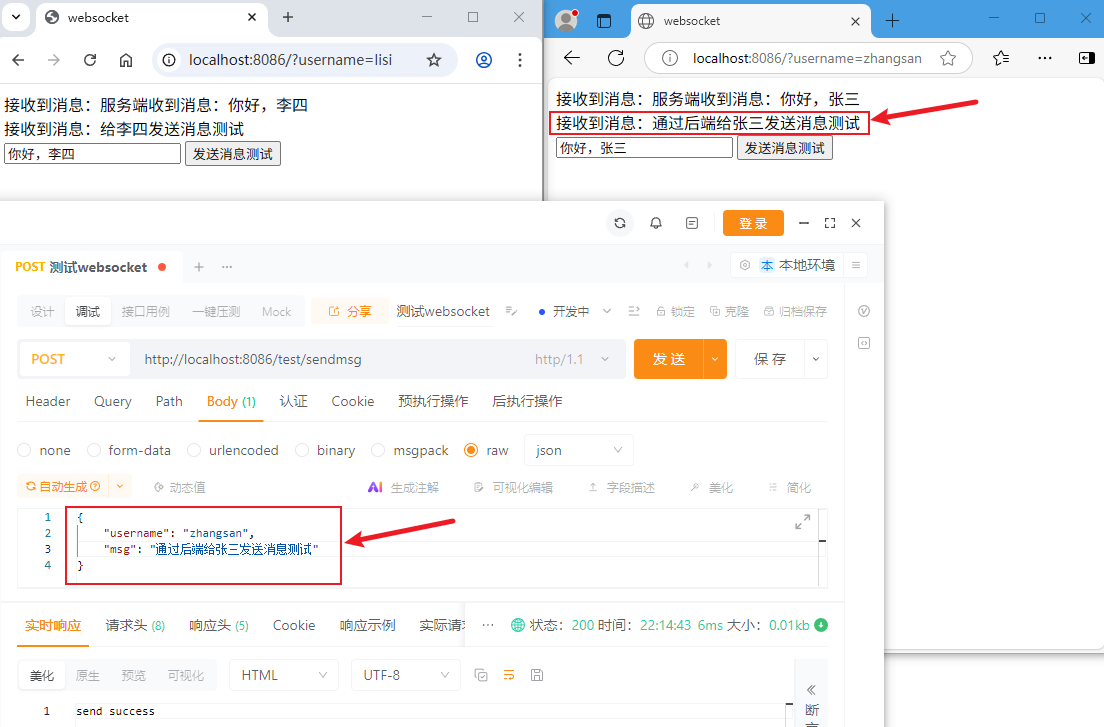
然后我们再使用 apipost 工具,通过 http://localhost:8086/test/sendmsg接口向 zhangsan 发送消息,zhangsan 的前端页面能够实时接收到数据,lisi 的前端页码则不会收到发给 zhangsan 的数据,如下图:
本篇博客的源代码下载地址为:https://files.cnblogs.com/files/blogs/699532/springboot_netty_websocket.zip

 浙公网安备 33010602011771号