[SwiftUI教程]5、绘制路径和形状
★★★★★★★★★★★★★★★★★★★★★★★★★★★★★★★★★★★★★★★★
➤微信公众号:山青咏芝(shanqingyongzhi)
➤博客园地址:山青咏芝(www.zengqiang.org)
➤GitHub地址:https://github.com/strengthen/LeetCode
➤原文地址:https://www.cnblogs.com/strengthen/p/11398891.html
➤如果链接不是山青咏芝的博客园地址,则可能是爬取作者的文章。
➤原文已修改更新!强烈建议点击原文地址阅读!支持作者!支持原创!
★★★★★★★★★★★★★★★★★★★★★★★★★★★★★★★★★★★★★★★★
用户在访问列表中的地标时会收到徽章。当然,要让用户收到徽章,您需要创建徽章。本教程将指导您通过组合路径和形状来创建徽章的过程,然后将其与另一个表示位置的形状重叠。
如果要为不同类型的地标创建多个徽章,请尝试使用重叠符号进行试验,改变重复次数或更改各种角度和比例。
按照步骤构建此项目,或者下载完成的项目以自行探索。
一、创建徽章视图
要创建徽章,首先要创建一个Badge使用SwiftUI中的矢量绘图API的视图。
第1步
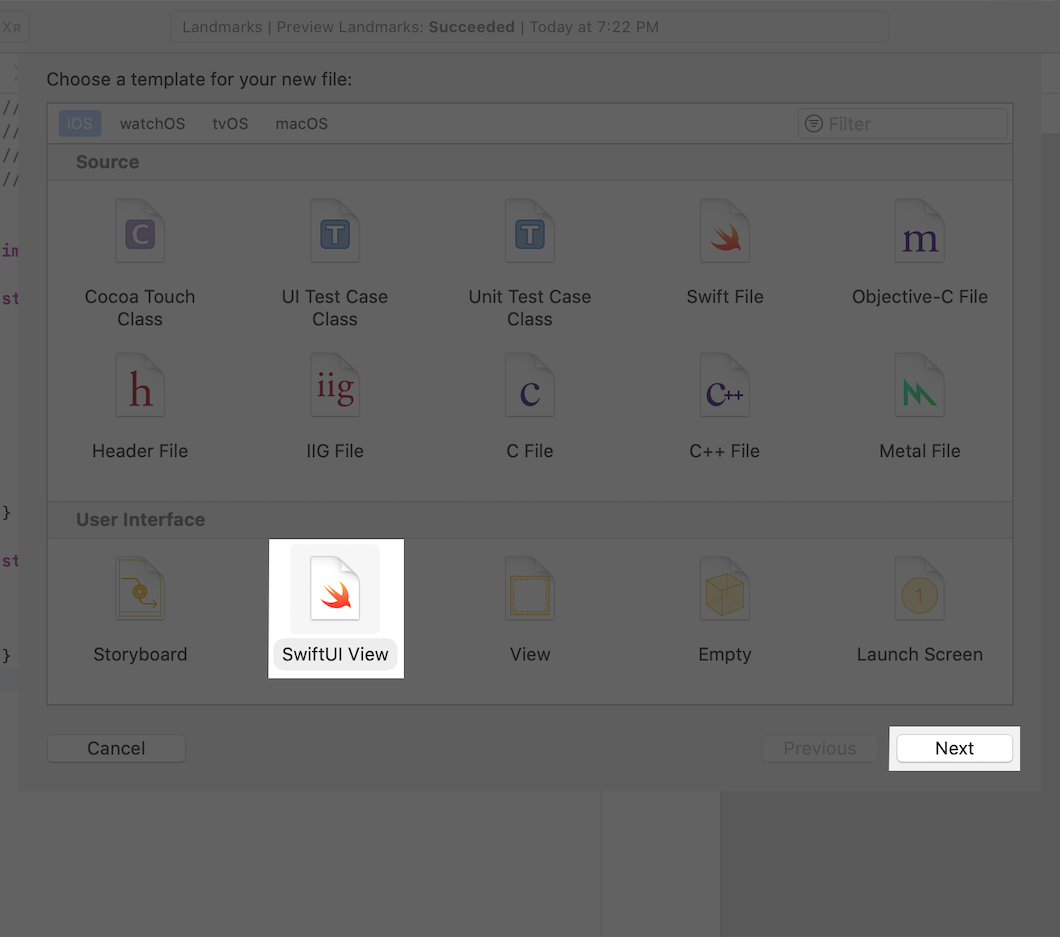
选择“ 文件”>“新建”>“文件”,然后从“iOS模板”表中选择“ SwiftUI视图 ”。单击“ 下一步”继续,然后在“另存为”字段中输入“ 徽章”,并单击“ 创建”。
第2步
调整Badge视图以显示文本,"Badge"直到您开始定义徽章形状。
 1 import SwiftUI
 2
 3 struct Badge: View {
 4     var body: some View {
 5         Text("Badge")
 6     }
 7 }
 8
 9 struct Badge_Previews: PreviewProvider {
10     static var previews: some View {
11         Badge()
12     }
13 }
二、绘制徽章背景
使用SwiftUI中的图形API绘制自定义徽章形状。
第1步
检查文件中的代码。HexagonParameters.swift
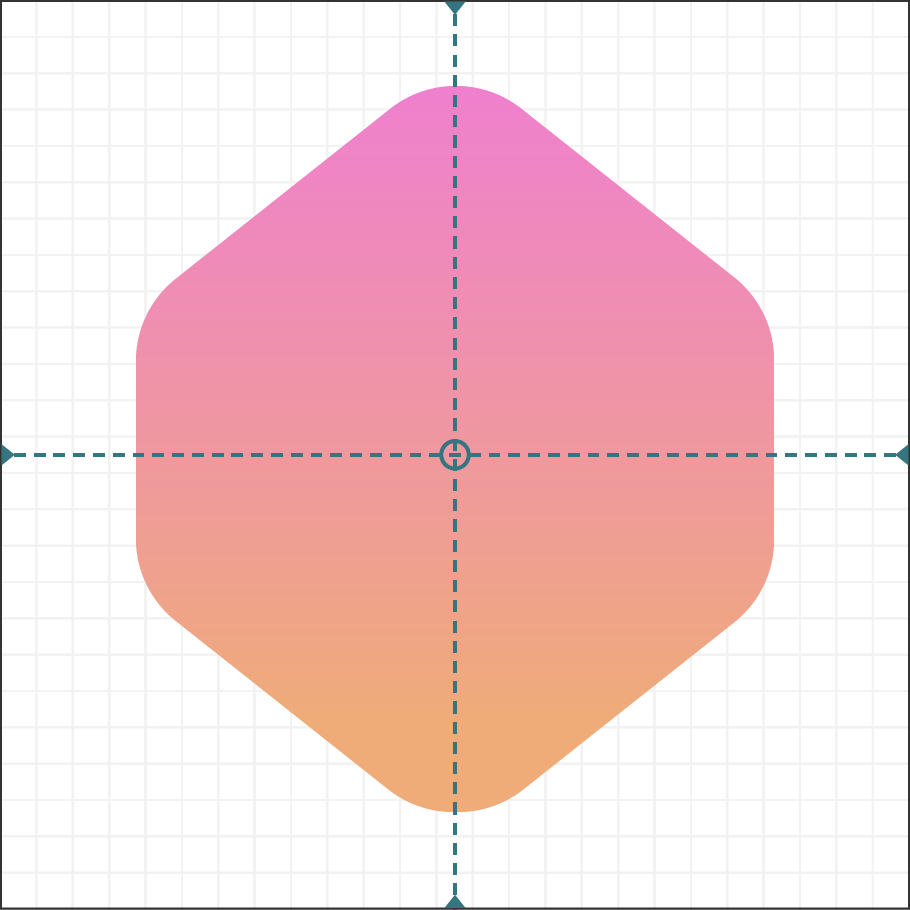
该结构定义了用于绘制徽章的六边形形状的细节。您不会修改此数据; 相反,您将使用它来指定用于绘制徽章的线条和曲线的控件。HexagonParameterspoints
 1 import SwiftUI
 2
 3 struct HexagonParameters {
 4     struct Segment {
 5         let useWidth: (CGFloat, CGFloat, CGFloat)
 6         let xFactors: (CGFloat, CGFloat, CGFloat)
 7         let useHeight: (CGFloat, CGFloat, CGFloat)
 8         let yFactors: (CGFloat, CGFloat, CGFloat)
 9     }
10
11     static let adjustment: CGFloat = 0.085
12
13     static let points = [
14         Segment(
15             useWidth:  (1.00, 1.00, 1.00),
16             xFactors:  (0.60, 0.40, 0.50),
17             useHeight: (1.00, 1.00, 0.00),
18             yFactors:  (0.05, 0.05, 0.00)
19         ),
20         Segment(
21             useWidth:  (1.00, 1.00, 0.00),
22             xFactors:  (0.05, 0.00, 0.00),
23             useHeight: (1.00, 1.00, 1.00),
24             yFactors:  (0.20 + adjustment, 0.30 + adjustment, 0.25 + adjustment)
25         ),
26         Segment(
27             useWidth:  (1.00, 1.00, 0.00),
28             xFactors:  (0.00, 0.05, 0.00),
29             useHeight: (1.00, 1.00, 1.00),
30             yFactors:  (0.70 - adjustment, 0.80 - adjustment, 0.75 - adjustment)
31         ),
32         Segment(
33             useWidth:  (1.00, 1.00, 1.00),
34             xFactors:  (0.40, 0.60, 0.50),
35             useHeight: (1.00, 1.00, 1.00),
36             yFactors:  (0.95, 0.95, 1.00)
37         ),
38         Segment(
39             useWidth:  (1.00, 1.00, 1.00),
40             xFactors:  (0.95, 1.00, 1.00),
41             useHeight: (1.00, 1.00, 1.00),
42             yFactors:  (0.80 - adjustment, 0.70 - adjustment, 0.75 - adjustment)
43         ),
44         Segment(
45             useWidth:  (1.00, 1.00, 1.00),
46             xFactors:  (1.00, 0.95, 1.00),
47             useHeight: (1.00, 1.00, 1.00),
48             yFactors:  (0.30 + adjustment, 0.20 + adjustment, 0.25 + adjustment)
49         )
50     ]
51 }
第2步
在中,为徽章添加形状并应用修改器将形状转换为视图。Badge.swiftPathfill()
您可以使用路径组合线条,曲线和其他绘图基元,以形成更复杂的形状,如徽章的六边形背景。
 1 import SwiftUI
 2
 3 struct Badge: View {
 4     var body: some View {
 5         Path { path in
 6
 7         }
 8         .fill(Color.black)
 9     }
10 }
11
12 struct Badge_Previews: PreviewProvider {
13     static var previews: some View {
14         Badge()
15     }
16 }
第3步
在路径中添加起点。
该move(to:)方法将绘图光标移动到形状的边界内,就好像假想的钢笔或铅笔悬停在该区域上,等待开始绘制。
 1 import SwiftUI
 2
 3 struct Badge: View {
 4     var body: some View {
 5         Path { path in
 6             var width: CGFloat = 100.0
 7             let height = width
 8             path.move(to: CGPoint(x: width * 0.95, y: height * 0.20))
 9         }
10         .fill(Color.black)
11     }
12 }
13
14 struct Badge_Previews: PreviewProvider {
15     static var previews: some View {
16         Badge()
17     }
18 }
第4步
绘制形状数据的每个点的线条以创建粗糙的六边形形状。
该方法需要一个点并绘制它。连续调用在前一点开始一行并继续到新点。addLine(to:)addLine(to:)
不要担心你的六角形看起来有点不寻常; 那是现在的预期行为。在接下来的几个步骤中,您将努力使六边形看起来更像本节开头所示的徽章形状
 1 import SwiftUI
 2
 3 struct Badge: View {
 4     var body: some View {
 5         Path { path in
 6             var width: CGFloat = 100.0
 7             let height = width
 8             path.move(to: CGPoint(x: width * 0.95, y: height * 0.20))
 9
10             HexagonParameters.points.forEach {
11                 path.addLine(
12                     to: .init(
13                         x: width * $0.useWidth.0 * $0.xFactors.0,
14                         y: height * $0.useHeight.0 * $0.yFactors.0
15                     )
16                 )
17             }
18         }
19         .fill(Color.black)
20     }
21 }
22
23 struct Badge_Previews: PreviewProvider {
24     static var previews: some View {
25         Badge()
26     }
27 }
第5步
使用该方法绘制徽章角的Bézier曲线。addQuadCurve(to:control:)
 1 import SwiftUI
 2
 3 struct Badge: View {
 4     var body: some View {
 5         Path { path in
 6             var width: CGFloat = 100.0
 7             let height = width
 8             path.move(
 9                 to: CGPoint(
10                     x: width * 0.95,
11                     y: height * (0.20 + HexagonParameters.adjustment)
12                 )
13             )
14
15             HexagonParameters.points.forEach {
16                 path.addLine(
17                     to: .init(
18                         x: width * $0.useWidth.0 * $0.xFactors.0,
19                         y: height * $0.useHeight.0 * $0.yFactors.0
20                     )
21                 )
22
23                 path.addQuadCurve(
24                     to: .init(
25                         x: width * $0.useWidth.1 * $0.xFactors.1,
26                         y: height * $0.useHeight.1 * $0.yFactors.1
27                     ),
28                     control: .init(
29                         x: width * $0.useWidth.2 * $0.xFactors.2,
30                         y: height * $0.useHeight.2 * $0.yFactors.2
31                     )
32                 )
33             }
34         }
35         .fill(Color.black)
36     }
37 }
38
39 struct Badge_Previews: PreviewProvider {
40     static var previews: some View {
41         Badge()
42     }
43 }
第6步
将徽章路径包裹在一起,以便徽章可以使用其包含视图的大小,该视图定义大小而不是硬编码值()。GeometryReader100
使用最小的几何体的两个维度可以在徽章的包含视图不是正方形时保留纵横比。
 1 import SwiftUI
 2
 3 struct Badge: View {
 4     var body: some View {
 5         GeometryReader { geometry in
 6             Path { path in
 7                 var width: CGFloat = min(geometry.size.width, geometry.size.height)
 8                 let height = width
 9                 path.move(
10                     to: CGPoint(
11                         x: width * 0.95,
12                         y: height * (0.20 + HexagonParameters.adjustment)
13                     )
14                 )
15
16                 HexagonParameters.points.forEach {
17                     path.addLine(
18                         to: .init(
19                             x: width * $0.useWidth.0 * $0.xFactors.0,
20                             y: height * $0.useHeight.0 * $0.yFactors.0
21                         )
22                     )
23
24                     path.addQuadCurve(
25                         to: .init(
26                             x: width * $0.useWidth.1 * $0.xFactors.1,
27                             y: height * $0.useHeight.1 * $0.yFactors.1
28                         ),
29                         control: .init(
30                             x: width * $0.useWidth.2 * $0.xFactors.2,
31                             y: height * $0.useHeight.2 * $0.yFactors.2
32                         )
33                     )
34                 }
35             }
36             .fill(Color.black)
37         }
38     }
39 }
40
41 struct Badge_Previews: PreviewProvider {
42     static var previews: some View {
43         Badge()
44     }
45 }
第7步
使用和调整变量将徽章置于其几何体中心。xScalexOffset
 1 import SwiftUI
 2
 3 struct Badge: View {
 4     var body: some View {
 5         GeometryReader { geometry in
 6             Path { path in
 7                 var width: CGFloat = min(geometry.size.width, geometry.size.height)
 8                 let height = width
 9                 let xScale: CGFloat = 0.832
10                 let xOffset = (width * (1.0 - xScale)) / 2.0
11                 width *= xScale
12                 path.move(
13                     to: CGPoint(
14                         x: xOffset + width * 0.95,
15                         y: height * (0.20 + HexagonParameters.adjustment)
16                     )
17                 )
18
19                 HexagonParameters.points.forEach {
20                     path.addLine(
21                         to: .init(
22                             x: xOffset + width * $0.useWidth.0 * $0.xFactors.0,
23                             y: height * $0.useHeight.0 * $0.yFactors.0
24                         )
25                     )
26
27                     path.addQuadCurve(
28                         to: .init(
29                             x: xOffset + width * $0.useWidth.1 * $0.xFactors.1,
30                             y: height * $0.useHeight.1 * $0.yFactors.1
31                         ),
32                         control: .init(
33                             x: xOffset + width * $0.useWidth.2 * $0.xFactors.2,
34                             y: height * $0.useHeight.2 * $0.yFactors.2
35                         )
36                     )
37                 }
38             }
39             .fill(Color.black)
40         }
41     }
42 }
43
44 struct Badge_Previews: PreviewProvider {
第8步
使用渐变替换徽章的纯黑色背景以匹配设计。
 1 import SwiftUI
 2
 3 struct Badge: View {
 4     var body: some View {
 5         GeometryReader { geometry in
 6             Path { path in
 7                 var width: CGFloat = min(geometry.size.width, geometry.size.height)
 8                 let height = width
 9                 let xScale: CGFloat = 0.832
10                 let xOffset = (width * (1.0 - xScale)) / 2.0
11                 width *= xScale
12                 path.move(
13                     to: CGPoint(
14                         x: xOffset + width * 0.95,
15                         y: height * (0.20 + HexagonParameters.adjustment)
16                     )
17                 )
18
19                 HexagonParameters.points.forEach {
20                     path.addLine(
21                         to: .init(
22                             x: xOffset + width * $0.useWidth.0 * $0.xFactors.0,
23                             y: height * $0.useHeight.0 * $0.yFactors.0
24                         )
25                     )
26
27                     path.addQuadCurve(
28                         to: .init(
29                             x: xOffset + width * $0.useWidth.1 * $0.xFactors.1,
30                             y: height * $0.useHeight.1 * $0.yFactors.1
31                         ),
32                         control: .init(
33                             x: xOffset + width * $0.useWidth.2 * $0.xFactors.2,
34                             y: height * $0.useHeight.2 * $0.yFactors.2
35                         )
36                     )
37                 }
38             }
39             .fill(LinearGradient(
40                 gradient: .init(colors: [Self.gradientStart, Self.gradientEnd]),
41                 startPoint: .init(x: 0.5, y: 0),
42                 endPoint: .init(x: 0.5, y: 0.6)
43             ))
44         }
45     }
46     static let gradientStart = Color(red: 239.0 / 255, green: 120.0 / 255, blue: 221.0 / 255)
47     static let gradientEnd = Color(red: 239.0 / 255, green: 172.0 / 255, blue: 120.0 / 255)
48 }
49
50 struct Badge_Previews: PreviewProvider {
51     static var previews: some View {
52         Badge()
53     }
54 }
第9步
将修改器应用于渐变填充。aspectRatio(_:contentMode:)
通过保持1:1的宽高比,徽章保持其位于视图中心的位置,即使其祖先视图不是正方形。
 1 import SwiftUI
 2
 3 struct Badge: View {
 4     var body: some View {
 5         GeometryReader { geometry in
 6             Path { path in
 7                 var width: CGFloat = min(geometry.size.width, geometry.size.height)
 8                 let height = width
 9                 let xScale: CGFloat = 0.832
10                 let xOffset = (width * (1.0 - xScale)) / 2.0
11                 width *= xScale
12                 path.move(
13                     to: CGPoint(
14                         x: xOffset + width * 0.95,
15                         y: height * (0.20 + HexagonParameters.adjustment)
16                     )
17                 )
18
19                 HexagonParameters.points.forEach {
20                     path.addLine(
21                         to: .init(
22                             x: xOffset + width * $0.useWidth.0 * $0.xFactors.0,
23                             y: height * $0.useHeight.0 * $0.yFactors.0
24                         )
25                     )
26
27                     path.addQuadCurve(
28                         to: .init(
29                             x: xOffset + width * $0.useWidth.1 * $0.xFactors.1,
30                             y: height * $0.useHeight.1 * $0.yFactors.1
31                         ),
32                         control: .init(
33                             x: xOffset + width * $0.useWidth.2 * $0.xFactors.2,
34                             y: height * $0.useHeight.2 * $0.yFactors.2
35                         )
36                     )
37                 }
38             }
39             .fill(LinearGradient(
40                 gradient: .init(colors: [Self.gradientStart, Self.gradientEnd]),
41                 startPoint: .init(x: 0.5, y: 0),
42                 endPoint: .init(x: 0.5, y: 0.6)
43             ))
44             .aspectRatio(1, contentMode: .fit)
45         }
46     }
47     static let gradientStart = Color(red: 239.0 / 255, green: 120.0 / 255, blue: 221.0 / 255)
48     static let gradientEnd = Color(red: 239.0 / 255, green: 172.0 / 255, blue: 120.0 / 255)
49 }
50
51 struct Badge_Previews: PreviewProvider {
52     static var previews: some View {
53         Badge()
54     }
55 }
三、绘制徽章符号
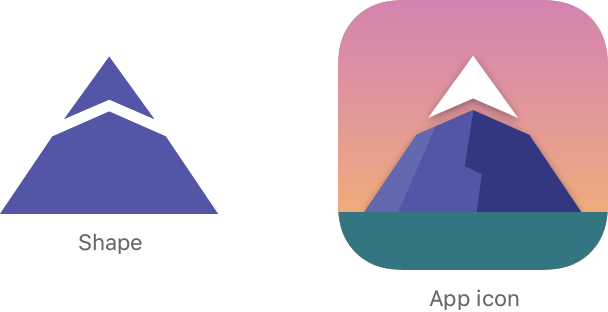
地标徽章的中心有一个自定义徽章,它基于出现在地标应用图标中的山峰。
山脉符号由两个形状组成:一个代表峰顶的雪盖,另一个代表沿着进近的植被。你将使用两个部分三角形的形状绘制它们,这些形状由一个小间隙分开。
第1步
将Badge视图主体分解为新文件中的新视图,该文件名为为其他视图准备视图的方法。BadgeBackgroundBadgeBackground.swiftBadge
 1 import SwiftUI
 2
 3 struct BadgeBackground: View {
 4     var body: some View {
 5         GeometryReader { geometry in
 6             Path { path in
 7                 var width: CGFloat = min(geometry.size.width, geometry.size.height)
 8                 let height = width
 9                 let xScale: CGFloat = 0.832
10                 let xOffset = (width * (1.0 - xScale)) / 2.0
11                 width *= xScale
12                 path.move(
13                     to: CGPoint(
14                         x: xOffset + width * 0.95,
15                         y: height * (0.20 + HexagonParameters.adjustment)
16                     )
17                 )
18
19                 HexagonParameters.points.forEach {
20                     path.addLine(
21                         to: .init(
22                             x: xOffset + width * $0.useWidth.0 * $0.xFactors.0,
23                             y: height * $0.useHeight.0 * $0.yFactors.0
24                         )
25                     )
26
27                     path.addQuadCurve(
28                         to: .init(
29                             x: xOffset + width * $0.useWidth.1 * $0.xFactors.1,
30                             y: height * $0.useHeight.1 * $0.yFactors.1
31                         ),
32                         control: .init(
33                             x: xOffset + width * $0.useWidth.2 * $0.xFactors.2,
34                             y: height * $0.useHeight.2 * $0.yFactors.2
35                         )
36                     )
37                 }
38             }
39             .fill(LinearGradient(
40                 gradient: .init(colors: [Self.gradientStart, Self.gradientEnd]),
41                 startPoint: .init(x: 0.5, y: 0),
42                 endPoint: .init(x: 0.5, y: 0.6)
43             ))
44             .aspectRatio(1, contentMode: .fit)
45         }
46     }
47     static let gradientStart = Color(red: 239.0 / 255, green: 120.0 / 255, blue: 221.0 / 255)
48     static let gradientEnd = Color(red: 239.0 / 255, green: 172.0 / 255, blue: 120.0 / 255)
49 }
50
51 struct BadgeBackground_Previews: PreviewProvider {
52     static var previews: some View {
53         BadgeBackground()
54     }
55 }
第2步
放置在体内以恢复徽章。BadgeBackgroundBadge
 1 import SwiftUI
 2
 3 struct Badge: View {
 4     var body: some View {
 5         BadgeBackground()
 6     }
 7 }
 8
 9 struct Badge_Previews: PreviewProvider {
10     static var previews: some View {
11         Badge()
12     }
13 }
第3步
创建一个新的自定义视图,该视图调用在徽章设计中以旋转图案标记的山形。BadgeSymbol
 1 import SwiftUI
 2
 3 struct BadgeSymbol: View {
 4     var body: some View {
 5         Text("Badge Symbol")
 6     }
 7 }
 8
 9 struct BadgeSymbol_Previews: PreviewProvider {
10     static var previews: some View {
11         BadgeSymbol()
12     }
13 }
第4步
使用路径API绘制符号的顶部。
实验
尝试调整与间距和常数关联的数字乘数,以了解它们如何影响整体形状。topWidthtopHeight
 1 import SwiftUI
 2
 3 struct BadgeSymbol: View {
 4     var body: some View {
 5         GeometryReader { geometry in
 6             Path { path in
 7                 let width = min(geometry.size.width, geometry.size.height)
 8                 let height = width * 0.75
 9                 let spacing = width * 0.030
10                 let middle = width / 2
11                 let topWidth = 0.226 * width
12                 let topHeight = 0.488 * height
13
14                 path.addLines([
15                     CGPoint(x: middle, y: spacing),
16                     CGPoint(x: middle - topWidth, y: topHeight - spacing),
17                     CGPoint(x: middle, y: topHeight / 2 + spacing),
18                     CGPoint(x: middle + topWidth, y: topHeight - spacing),
19                     CGPoint(x: middle, y: spacing)
20                 ])
21             }
22         }
23     }
24 }
25
26 struct BadgeSymbol_Previews: PreviewProvider {
27     static var previews: some View {
28         BadgeSymbol()
29     }
30 }
第5步
绘制符号的底部。
使用move(to:)修改器在同一路径中的多个形状之间插入间隙。
 1 import SwiftUI
 2
 3 struct BadgeSymbol: View {
 4     var body: some View {
 5         GeometryReader { geometry in
 6             Path { path in
 7                 let width = min(geometry.size.width, geometry.size.height)
 8                 let height = width * 0.75
 9                 let spacing = width * 0.030
10                 let middle = width / 2
11                 let topWidth = 0.226 * width
12                 let topHeight = 0.488 * height
13
14                 path.addLines([
15                     CGPoint(x: middle, y: spacing),
16                     CGPoint(x: middle - topWidth, y: topHeight - spacing),
17                     CGPoint(x: middle, y: topHeight / 2 + spacing),
18                     CGPoint(x: middle + topWidth, y: topHeight - spacing),
19                     CGPoint(x: middle, y: spacing)
20                 ])
21
22                 path.move(to: CGPoint(x: middle, y: topHeight / 2 + spacing * 3))
23                 path.addLines([
24                     CGPoint(x: middle - topWidth, y: topHeight + spacing),
25                     CGPoint(x: spacing, y: height - spacing),
26                     CGPoint(x: width - spacing, y: height - spacing),
27                     CGPoint(x: middle + topWidth, y: topHeight + spacing),
28                     CGPoint(x: middle, y: topHeight / 2 + spacing * 3)
29                 ])
30             }
31         }
32     }
33 }
34
35 struct BadgeSymbol_Previews: PreviewProvider {
36     static var previews: some View {
37         BadgeSymbol()
38     }
39 }
第6步
使用设计中的紫色填充符号。
 1 import SwiftUI
 2
 3 struct BadgeSymbol: View {
 4     static let symbolColor = Color(red: 79.0 / 255, green: 79.0 / 255, blue: 191.0 / 255)
 5
 6     var body: some View {
 7         GeometryReader { geometry in
 8             Path { path in
 9                 let width = min(geometry.size.width, geometry.size.height)
10                 let height = width * 0.75
11                 let spacing = width * 0.030
12                 let middle = width / 2
13                 let topWidth = 0.226 * width
14                 let topHeight = 0.488 * height
15
16                 path.addLines([
17                     CGPoint(x: middle, y: spacing),
18                     CGPoint(x: middle - topWidth, y: topHeight - spacing),
19                     CGPoint(x: middle, y: topHeight / 2 + spacing),
20                     CGPoint(x: middle + topWidth, y: topHeight - spacing),
21                     CGPoint(x: middle, y: spacing)
22                 ])
23
24                 path.move(to: CGPoint(x: middle, y: topHeight / 2 + spacing * 3))
25                 path.addLines([
26                     CGPoint(x: middle - topWidth, y: topHeight + spacing),
27                     CGPoint(x: spacing, y: height - spacing),
28                     CGPoint(x: width - spacing, y: height - spacing),
29                     CGPoint(x: middle + topWidth, y: topHeight + spacing),
30                     CGPoint(x: middle, y: topHeight / 2 + spacing * 3)
31                 ])
32             }
33             .fill(Self.symbolColor)
34         }
35     }
36 }
37
38 struct BadgeSymbol_Previews: PreviewProvider {
39     static var previews: some View {
40         BadgeSymbol()
41     }
42 }
四、结合徽章前景和背景
徽章设计要求在徽章背景上旋转并重复多次山形。
定义一种新的旋转类型,并利用视图将相同的调整应用于山形的多个副本。ForEach
第1步
创建一个新视图以封装旋转符号的概念。RotatedBadgeSymbol
实验
在预览中调整角度以测试旋转的效果。
 1 import SwiftUI
 2
 3 struct RotatedBadgeSymbol: View {
 4     let angle: Angle
 5
 6     var body: some View {
 7         BadgeSymbol()
 8             .padding(-60)
 9             .rotationEffect(angle, anchor: .bottom)
10     }
11 }
12
13 struct RotatedBadgeSymbol_Previews: PreviewProvider {
14     static var previews: some View {
15         RotatedBadgeSymbol(angle: .init(degrees: 5))
16     }
17 }
第2步
在,将徽章的符号放在徽章背景上,将其放置在徽章背景中。Badge.swiftZStack
 1 import SwiftUI
 2
 3 struct Badge: View {
 4     var badgeSymbols: some View {
 5         RotatedBadgeSymbol(angle: .init(degrees: 0))
 6             .opacity(0.5)
 7     }
 8
 9     var body: some View {
10         ZStack {
11             BadgeBackground()
12
13             self.badgeSymbols
14         }
15     }
16 }
17
18 struct Badge_Previews: PreviewProvider {
19     static var previews: some View {
20         Badge()
21     }
22 }
第3步
通过读取周围的几何图形并缩放符号来更正徽章符号的大小。
现在看来,徽章符号与预期的设计和背景的相对大小相比太大。
 1 import SwiftUI
 2
 3 struct Badge: View {
 4     var badgeSymbols: some View {
 5         RotatedBadgeSymbol(angle: .init(degrees: 0))
 6             .opacity(0.5)
 7     }
 8
 9     var body: some View {
10         ZStack {
11             BadgeBackground()
12
13             GeometryReader { geometry in
14                 self.badgeSymbols
15                     .scaleEffect(1.0 / 4.0, anchor: .top)
16                     .position(x: geometry.size.width / 2.0, y: (3.0 / 4.0) * geometry.size.height)
17             }
18         }
19     }
20 }
21
22 struct Badge_Previews: PreviewProvider {
23     static var previews: some View {
24         Badge()
25     }
26 }
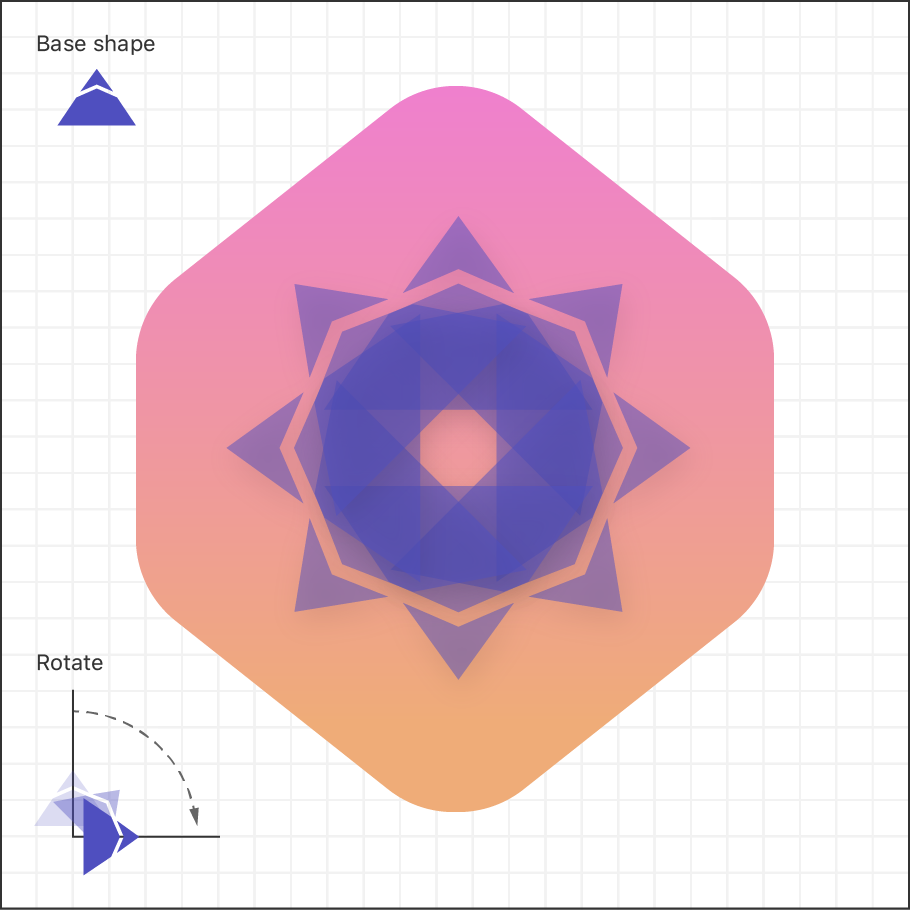
第4步
添加视图以旋转并显示徽章符号的副本。ForEach
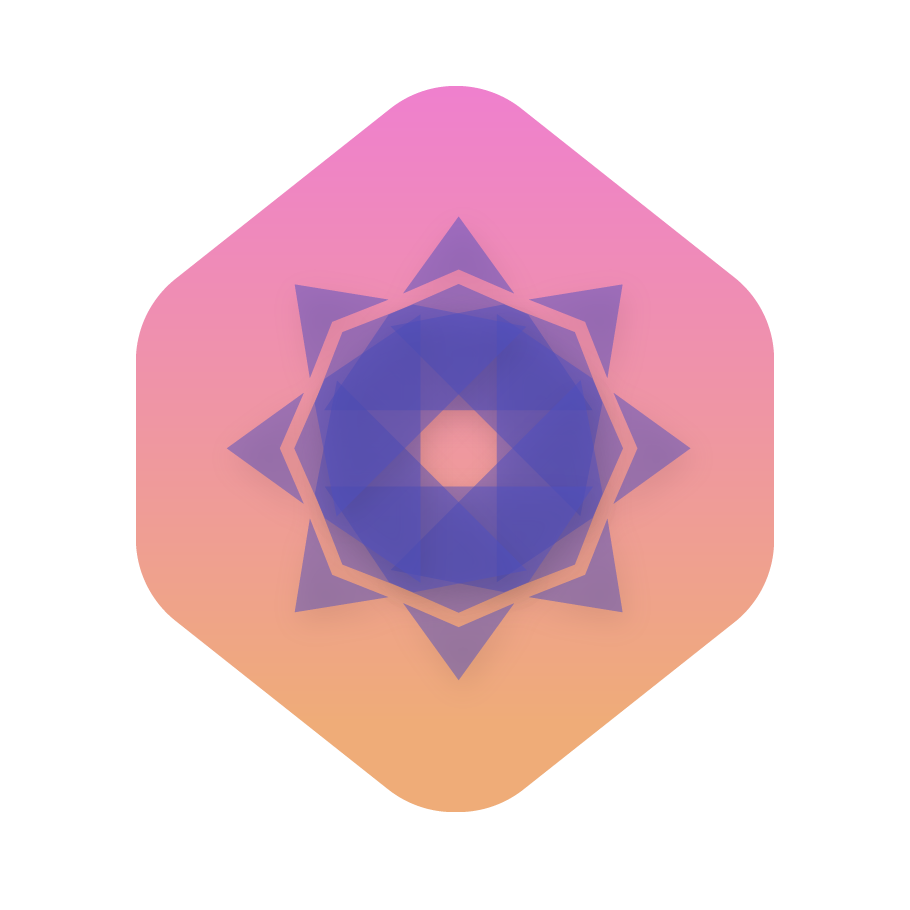
完整的360°旋转分为八个部分,通过重复山脉符号创建一个类似太阳的模式。
 1 import SwiftUI
 2
 3 struct Badge: View {
 4     static let rotationCount = 8
 5
 6     var badgeSymbols: some View {
 7         ForEach(0..<Badge.rotationCount) { i in
 8             RotatedBadgeSymbol(
 9                 angle: .degrees(Double(i) / Double(Badge.rotationCount)) * 360.0
10             )
11         }
12         .opacity(0.5)
13     }
14
15     var body: some View {
16         ZStack {
17             BadgeBackground()
18
19             GeometryReader { geometry in
20                 self.badgeSymbols
21                     .scaleEffect(1.0 / 4.0, anchor: .top)
22                     .position(x: geometry.size.width / 2.0, y: (3.0 / 4.0) * geometry.size.height)
23             }
24         }
25         .scaledToFit()
26     }
27 }
28
29 struct Badge_Previews: PreviewProvider {
30     static var previews: some View {
31         Badge()
32     }
33 }

 浙公网安备 33010602011771号