
Halcon实例转OpenCV:计算回形针方向
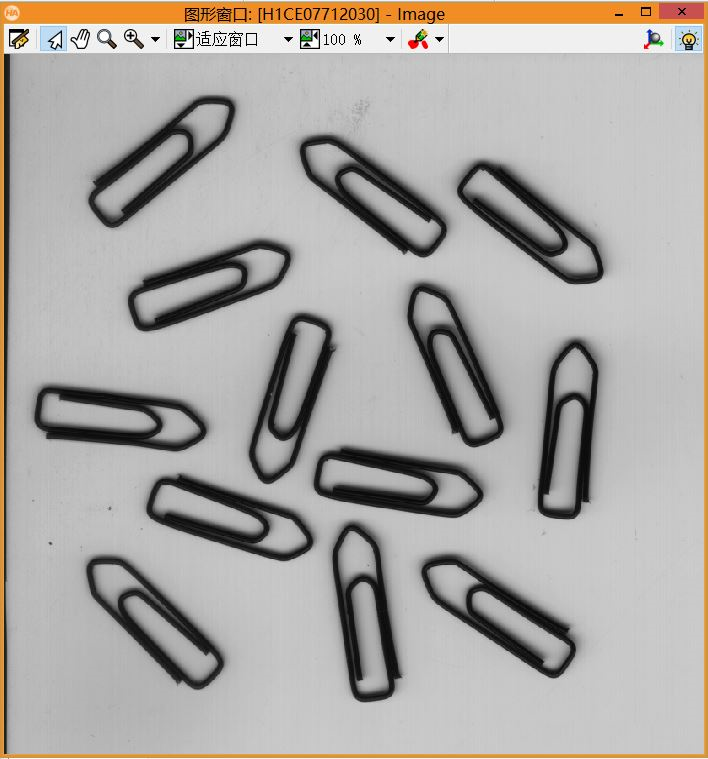
Halcon中有一个计算回形针方向的实例clip.hdev,可以在例程中找到。原图如下:
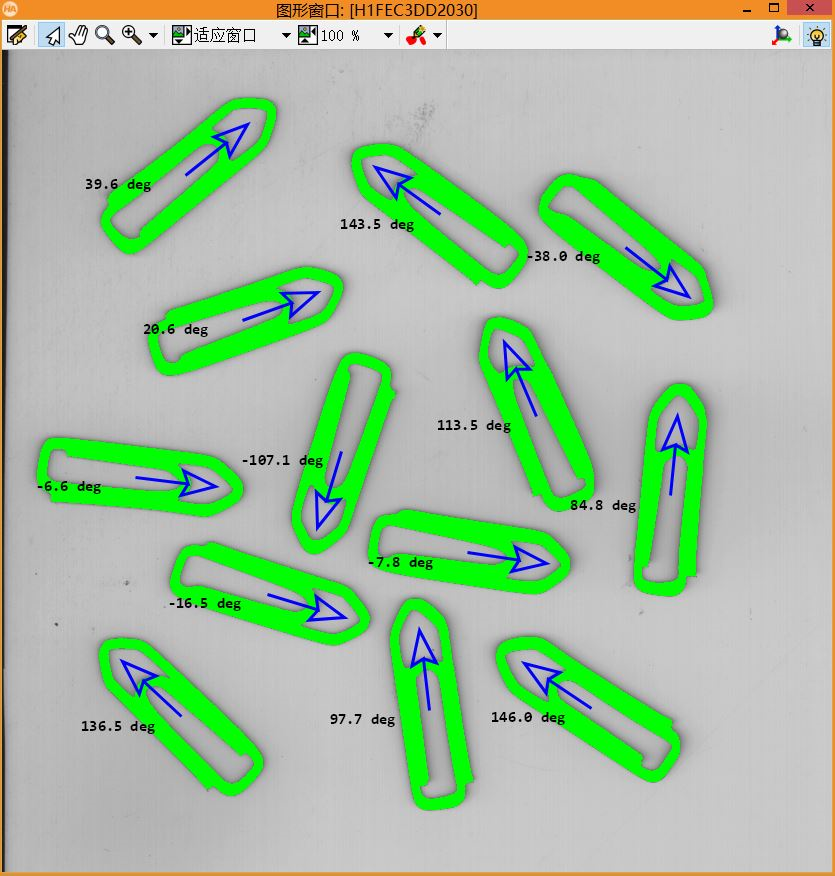
处理后的结果图:
代码整理之后,核心部分如下:
dev_close_window ()
dev_open_window (0, 0, 700, 700, 'black', WindowHandle)
dev_clear_window ()
dev_set_color ('green')
read_image(Image, 'clip')
threshold(Image, Region, 0, 56)
connection(Region, ConnectedRegions)
select_shape (ConnectedRegions, SelectedRegions, 'area', 'and', 3161.4, 6315.4)
orientation_region(SelectedRegions, Phi)
area_center(SelectedRegions, Area, Row, Column)

query_font (WindowHandle, Font)
*FontWithSize := Font[0]+'-18'
*set_font(WindowHandle, FontWithSize)
set_display_font (WindowHandle, 15, 'mono', 'true', 'true')

Length := 80
for index := 0 to |Phi|-1 by 1
    set_tposition(WindowHandle, Row[index], Column[index])
    dev_set_color ('black')
    write_string(WindowHandle, deg(Phi[index])$'3.1f' + 'deg')
    dev_set_color ('blue')
    dev_set_line_width(3)
    disp_arrow(WindowHandle, Row[index], Column[index],Row[index]-Length*sin(Phi[index]), Column[index]+Length*cos(Phi[index]), 4)
endfor
思路步骤:
① 读取图像
② 二值化
③ 根据面积剔除非回形针的region
④ 计算每个region的方向和中心
⑤ 结果输出
转到OpenCV时,主要有几个小问题需要理清:
① 轮廓的方向怎么计算?直线拟合?还是计算轮廓中心和回形针端点来算角度?
② 回形针的端点坐标如何计算?
③ 绘制箭头?
如下是OpenCV实现的部分代码和效果图 :
void drawArrow(cv::Mat& img, cv::Point pStart, cv::Point pEnd, int len, int alpha, cv::Scalar& color, int thickness, int lineType)
{
//const double PI = 3.1415926;
Point arrow;
//计算 θ 角(最简单的一种情况在下面图示中已经展示,关键在于 atan2 函数,详情见下面)
double angle = atan2((double)(pStart.y - pEnd.y), (double)(pStart.x - pEnd.x));
line(img, pStart, pEnd, color, thickness, lineType);
//计算箭角边的另一端的端点位置(上面的还是下面的要看箭头的指向,也就是pStart和pEnd的位置)
arrow.x = pEnd.x + len * cos(angle + PI * alpha / 180);
arrow.y = pEnd.y + len * sin(angle + PI * alpha / 180);
line(img, pEnd, arrow, color, thickness, lineType);
arrow.x = pEnd.x + len * cos(angle - PI * alpha / 180);
arrow.y = pEnd.y + len * sin(angle - PI * alpha / 180);
line(img, pEnd, arrow, color, thickness, lineType);
}
double CalLineAngle(Point &ptStart, Point &ptEnd)
{
double angle = 0.0;
if (ptStart.x == ptEnd.x)
angle = 90;
else if (ptStart.y == ptEnd.y)
angle = 0;
else
{
angle = atan(double(ptEnd.y - ptStart.y) / (ptEnd.x - ptStart.x)) * (180 / PI);
if (angle < 0)
angle = abs(angle);
else if (angle > 0)
angle = 180 - angle;
if (ptEnd.y - ptStart.y > 0 && ptEnd.x - ptStart.x)
angle = angle - 180;
}
return angle;
}
int main()
{
Mat img = imread("./clip.png");
if (img.empty())
{
cout << "Read image error, please check again!" << endl;
return 1;
}
imshow("src", img);
Mat gray;
cvtColor(img, gray, CV_BGR2GRAY);
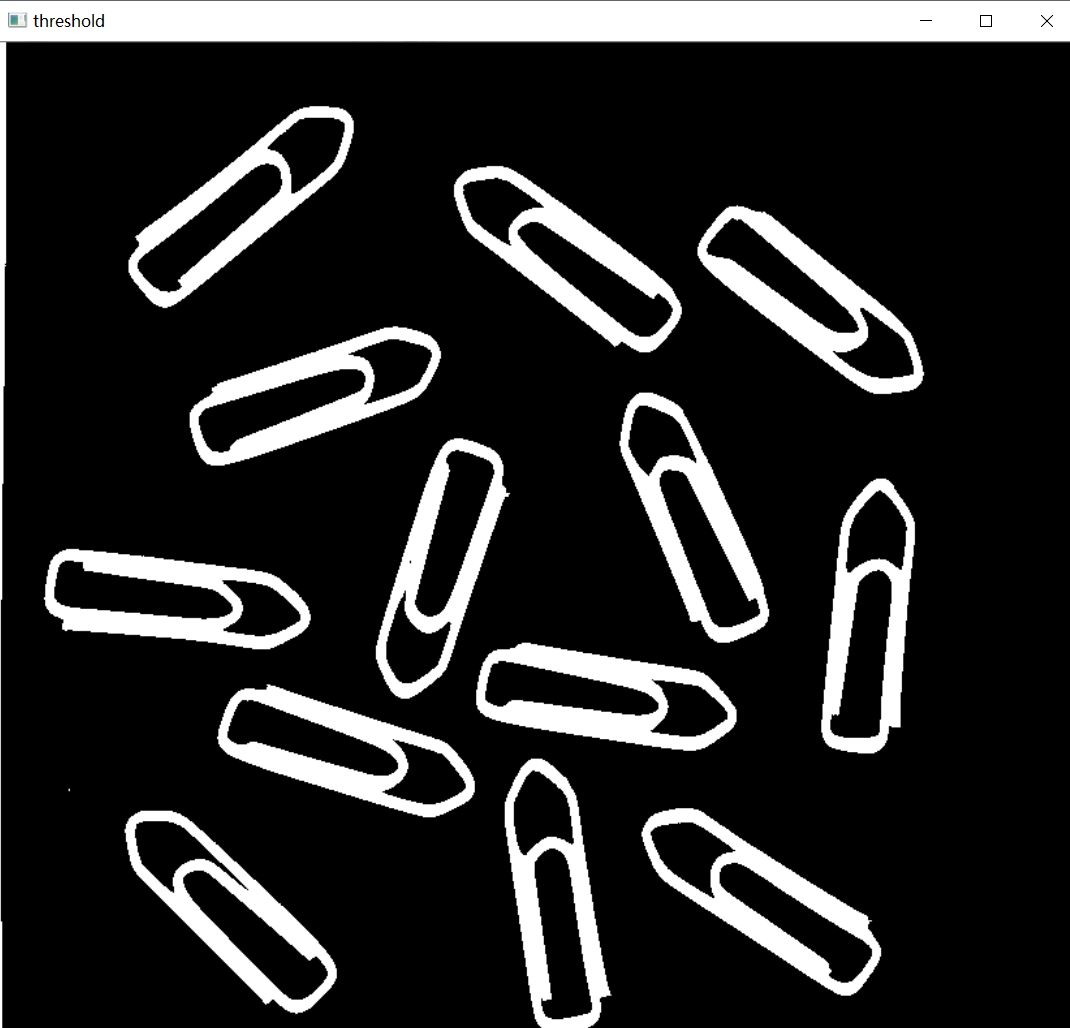
threshold(gray, gray, 85, 255, CV_THRESH_BINARY_INV); //二值化
imshow("threshold", gray);
vector<vector<Point>> contours;
vector<Vec4i> hierarcy;
findContours(gray, contours, hierarcy, CV_RETR_EXTERNAL, CV_CHAIN_APPROX_NONE);
cout << "num=" << contours.size() << endl;
vector<Rect> boundRect(contours.size()); //定义外接矩形集合
vector<RotatedRect> box(contours.size()); //定义最小外接矩形集合
Point2f rect[4];
for (int i = 0; i<contours.size(); i++)
{
box[i] = minAreaRect(Mat(contours[i])); //计算每个轮廓最小外接矩形
//boundRect[i] = boundingRect(Mat(contours[i]));
if (box[i].size.width < 50 || box[i].size.height < 50)
continue;
......
}
二值化效果:
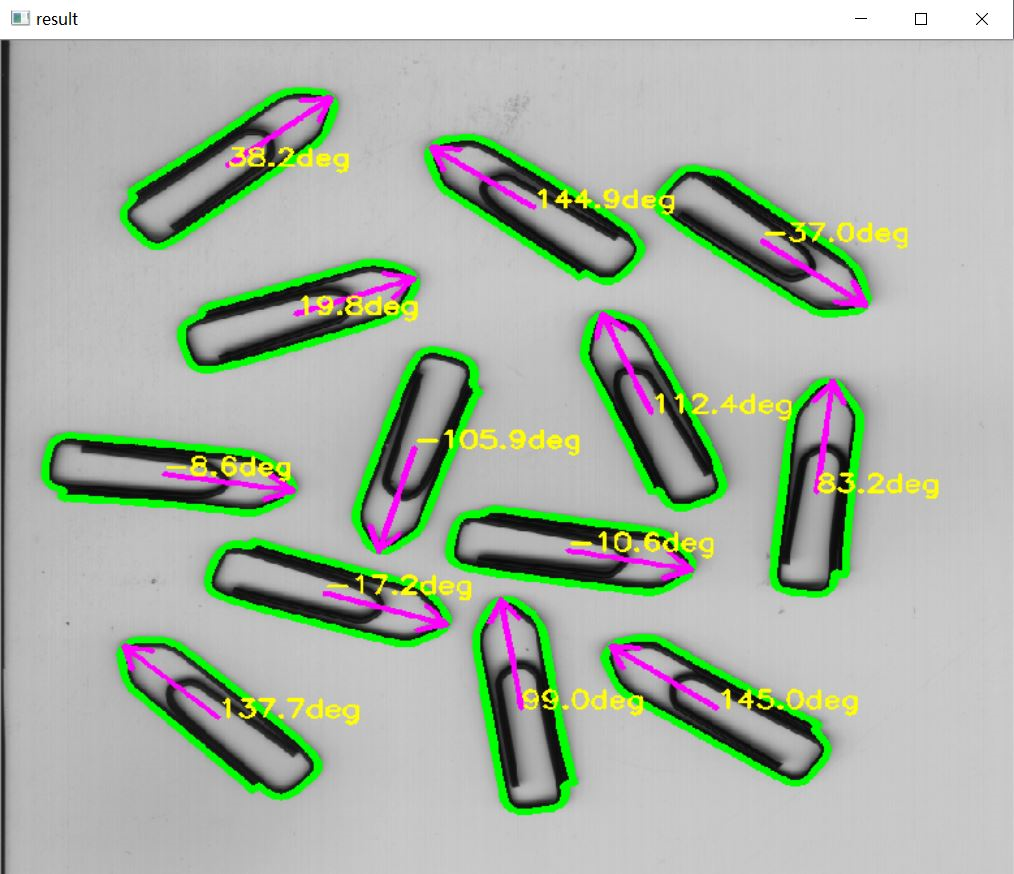
结果图:
完整代码与素材将发布在知识星球主题中,欢迎关注公众号:OpenCV与AI深度学习


 浙公网安备 33010602011771号