Angular Taskmgr 登录
一、登录module
1、先创建domain文件夹,在里面建一个user.model.ts的user领域对象。
export interface User{
    id?:string;
    email:string;
    password:string;
    name:string;
    avatar:string;
}
2、ng g m login创建一个login module.
在login下创建一个login组件。
3、在login下建立一个login-routing.module.ts子路由。
【最好为每个模块建立自己的路由】
建立路由的快捷方式。装插件Angulae7 Snippets,用ng-router-featuremodule.


import { NgModule } from '@angular/core';
import { RouterModule, Routes } from '@angular/router';
import { CommonModule } from '@angular/common';
import { LoginComponent } from './login/login.component';
import { RegisterComponent } from './register/register.component';

const routes: Routes = [
    { path: '', component: LoginComponent },
    { path: 'register', component: RegisterComponent }
];

@NgModule({
    imports: [CommonModule, RouterModule.forChild(routes)],

exports: [RouterModule]
})
export class LoginRoutingModule {}
4、配置根路由
import { NgModule } from '@angular/core';
import { Routes, RouterModule } from '@angular/router';

const routes: Routes = [
  {
    path: '', redirectTo: '/login', pathMatch: 'full'
  },
  {
    path:'login',loadChildren:'./login/login.module#LoginModule'
  }
];

@NgModule({
  imports: [RouterModule.forRoot(routes)],

  exports: [RouterModule]
})
export class AppRoutingModule { }
确保根模块中引入根路由。
import { BrowserModule } from '@angular/platform-browser';
import { NgModule } from '@angular/core';

import { AppRoutingModule } from './app-routing.module';
import { AppComponent } from './app.component';
import { CoreModule } from './core/core.module';
import { BrowserAnimationsModule } from '@angular/platform-browser/animations';
import { MatSidenavModule} from '@angular/material';

@NgModule({
  declarations: [
    AppComponent
  ],
  imports: [
    BrowserModule,
    BrowserAnimationsModule,
    AppRoutingModule,
    CoreModule,
    MatSidenavModule
  ],
  providers: [],
  bootstrap: [AppComponent]
})
export class AppModule { }
子模块导入子路由。
import { NgModule } from '@angular/core';
import { LoginComponent } from './login/login.component';
import { SharedModule } from '../shared/shared.module';
import { LoginRoutingModule } from './login-routing.module';

@NgModule({
  declarations: [LoginComponent],
  imports: [
    SharedModule,
    LoginRoutingModule
  ]
})
export class LoginModule { }
5、安装animation动画依赖
npm install --save @angular/animations
6、布局
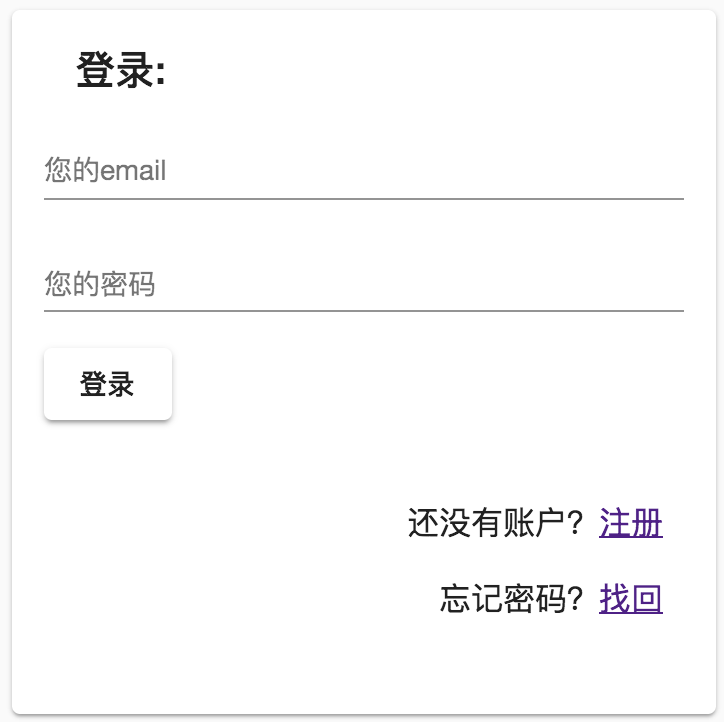
<form>
  <mat-card class="example-card">
    <mat-card-header>
      <mat-card-title>登录:</mat-card-title>
    </mat-card-header>
    <mat-card-content>
      <mat-form-field class="example-full-width" class="full-width">
        <input type="text" matInput placeholder="您的email" style="text-align: right">
      </mat-form-field>
      <mat-form-field class="example-full-width" class="full-width">
        <input type="password" matInput placeholder="您的密码" style="text-align: right">
      </mat-form-field>
      <button mat-raised-button type="button">登录</button>

    </mat-card-content>
    <mat-card-actions class="text-right">
      <p>还没有账户?<a href="">注册</a></p>
      <p>忘记密码?<a href="">找回</a></p>
    </mat-card-actions>
  </mat-card>
</form>
form {
  display: flex;
  flex-direction: column;
  justify-content: center;
  align-items: center;
  width: 100%;
  height: 100%;
}
mat-card {
  width: 20em;
  margin: 5px;
  flex: 0 0 20em;
}

.full-width {
  width: 100%;
}

.text-right {
  margin: 10px;
  text-align: end;
}
二、register Component
1、在login下面新建register组件
ng g c login/register
2、注册组件头像模块使用svg
在之前文章介绍过matIcon中可以使用svg做为资源。
通过addSvgIconSetInNamespace来添加图标集
import { MatIconRegistry } from "@angular/material";
import { DomSanitizer } from "@angular/platform-browser";

export const loadSvgResources = (ir: MatIconRegistry, ds: DomSanitizer) => {
  const imgDir = "assets/img";
  const avatarDir = `${imgDir}/avatar`;
  const sidebarDir = `${imgDir}/sidebar`;
  const dayDir = `${imgDir}/days`;

  ir.addSvgIconSetInNamespace( //通过addSvgIconSetInNamespace来添加图标集
    "avatars",
    ds.bypassSecurityTrustResourceUrl(`${avatarDir}/avatars.svg`)
  );
  ir.addSvgIcon(
    "day",
    ds.bypassSecurityTrustResourceUrl(`${sidebarDir}/day.svg`)
  );
  ir.addSvgIcon(
    "month",
    ds.bypassSecurityTrustResourceUrl(`${sidebarDir}/month.svg`)
  );
  ir.addSvgIcon(
    "project",
    ds.bypassSecurityTrustResourceUrl(`${sidebarDir}/project.svg`)
  );
  ir.addSvgIcon(
    "projects",
    ds.bypassSecurityTrustResourceUrl(`${sidebarDir}/projects.svg`)
  );
  ir.addSvgIcon(
    "week",
    ds.bypassSecurityTrustResourceUrl(`${sidebarDir}/week.svg`)
  );

  const days =[1,2,3,4,5,6,7,8,9,10,11,12,13,14,15,16,17,18,19,20,21,22,23,24,25,26,27,28,29,30,31];
  days.forEach((d)=>{
    ir.addSvgIcon(
      `day${d}`,
      ds.bypassSecurityTrustResourceUrl(`${dayDir}/day${d}.svg`)
    );
  });
};
在注册页面中
  ngOnInit() {
    const nums = [1, 2, 3, 4, 5, 6, 7, 8, 9, 10, 11, 12, 13, 14, 15, 16];
    this.items = nums.map(d => `avatars:svg-${d}`);
  }
在模版中
      <mat-grid-list cols="8">
        <mat-grid-tile *ngFor="let item of items">
<mat-icon [svgIcon]="item"></mat-icon>
        </mat-grid-tile>
3,修改样式
让icon变圆。
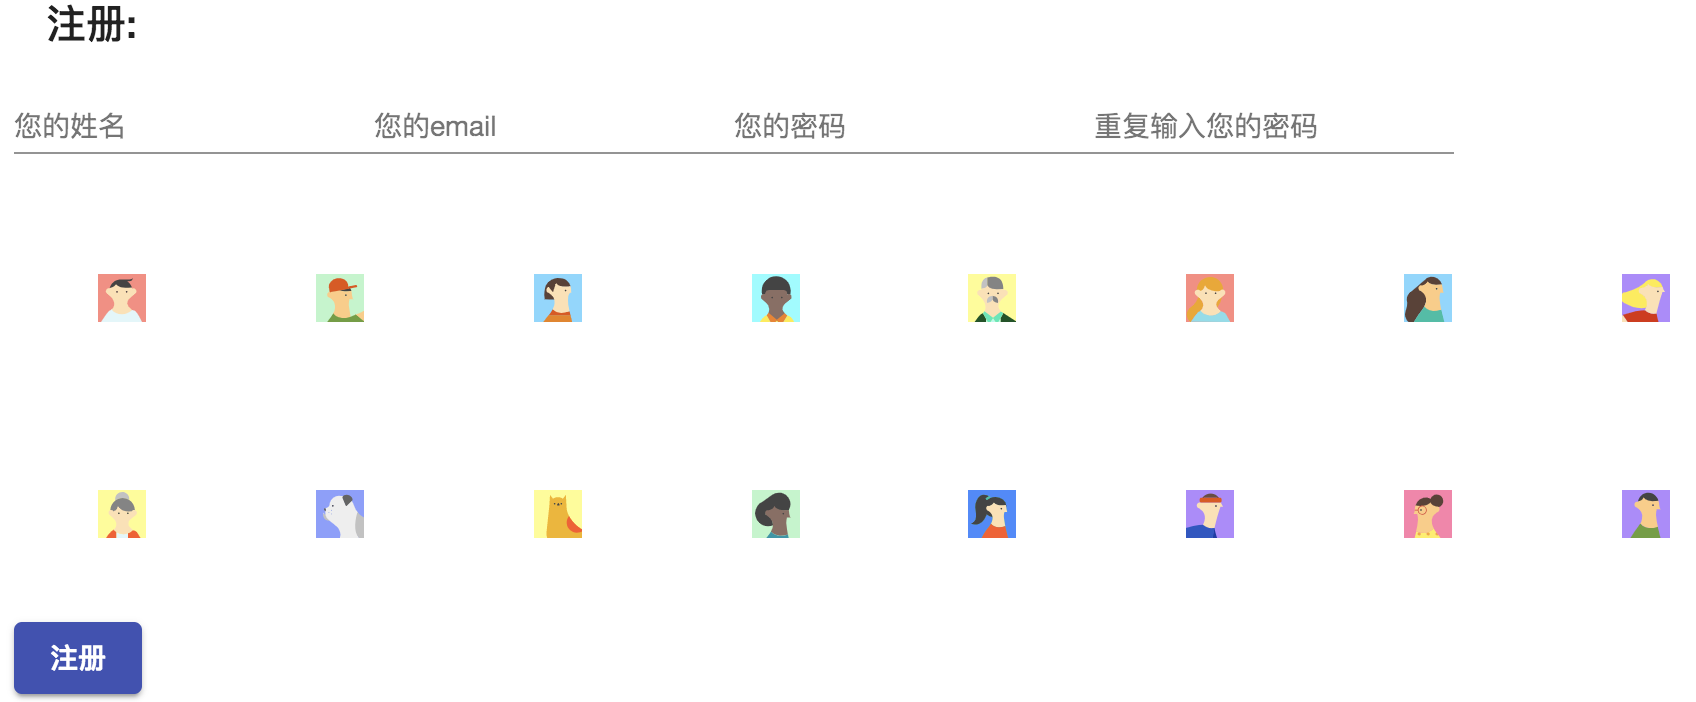
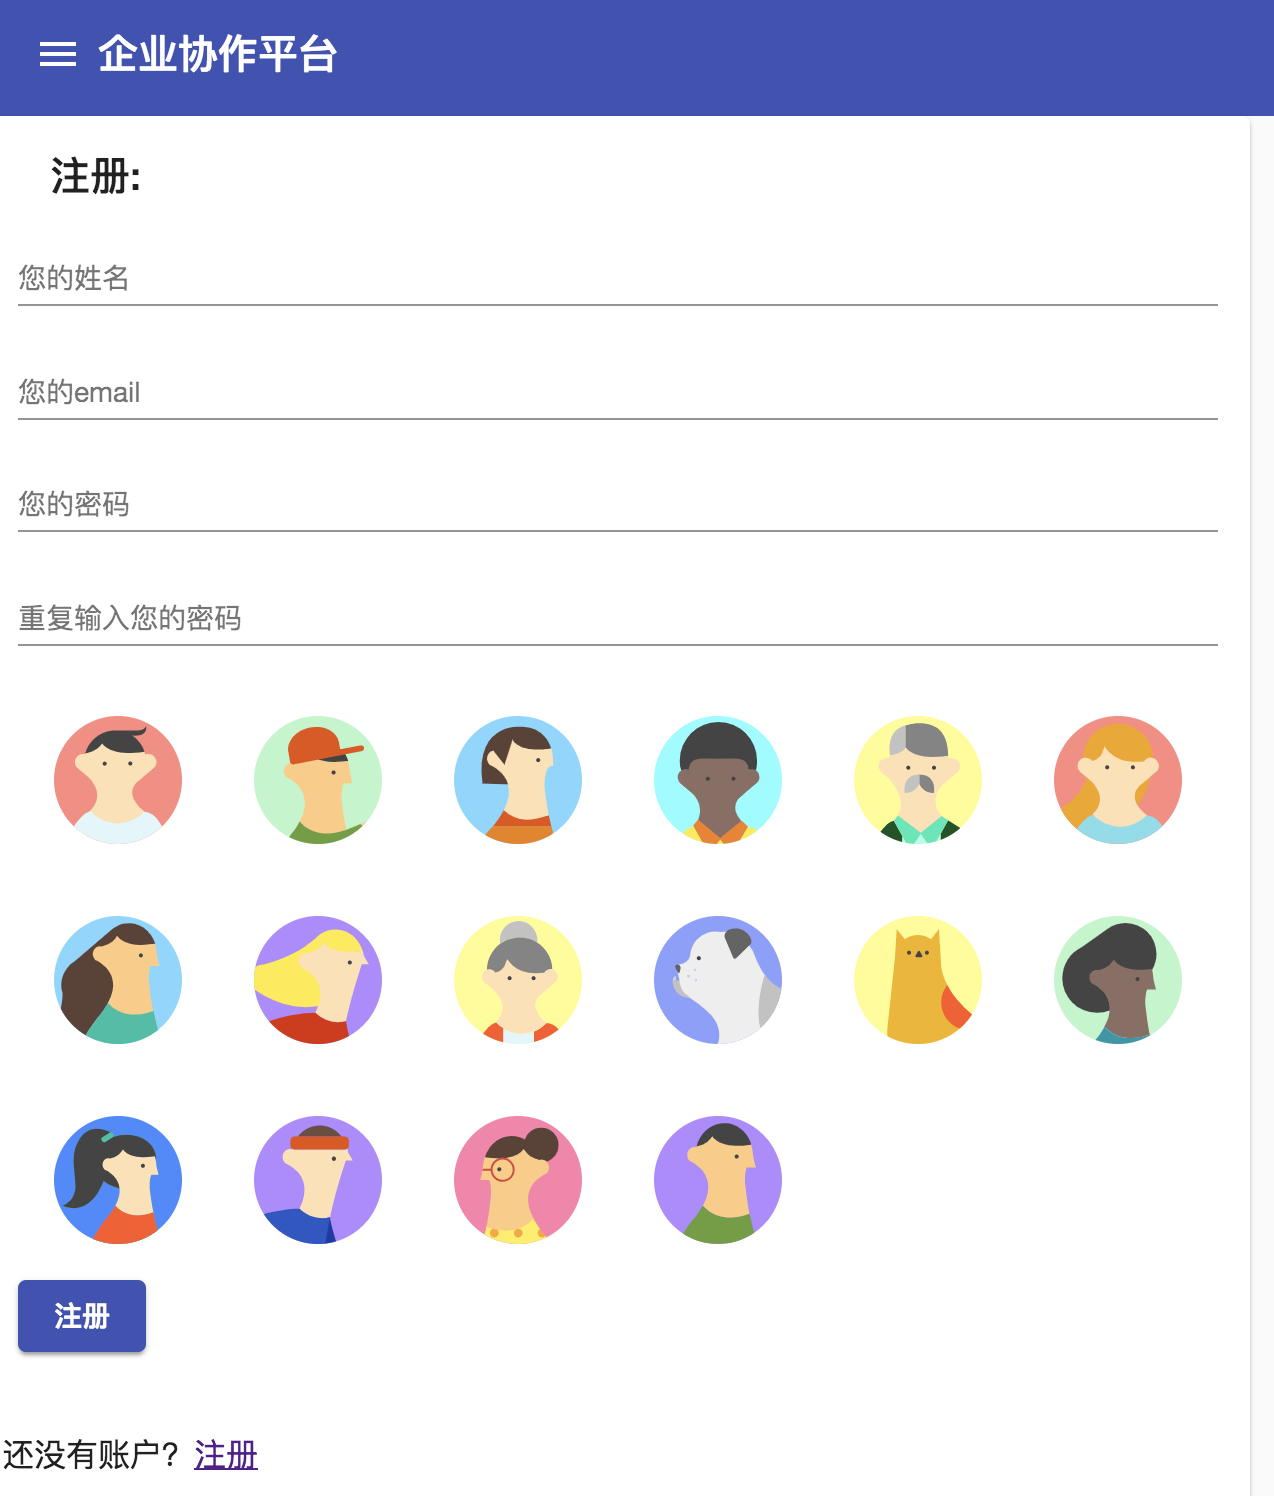
<form>
  <mat-card class="example-card">
    <mat-card-header>
      <mat-card-title>注册:</mat-card-title>
    </mat-card-header>
    <mat-card-content>
      <mat-form-field class="full-width">
        <input type="text" matInput placeholder="您的姓名" style="text-align: right">
      </mat-form-field>
      <mat-form-field class="full-width">
        <input type="text" matInput placeholder="您的email" style="text-align: right">
      </mat-form-field>
      <mat-form-field class="full-width">
        <input type="password" matInput placeholder="您的密码" style="text-align: right">
      </mat-form-field>
      <mat-form-field class="full-width">
        <input type="password" matInput placeholder="重复输入您的密码" style="text-align: right">
      </mat-form-field>
      <mat-grid-list cols="6">
        <mat-grid-tile *ngFor="let item of items">
          <mat-icon class="avatar" [svgIcon]="item"></mat-icon>
        </mat-grid-tile>
      </mat-grid-list>
      <button mat-raised-button type="button" color="primary">注册</button>

    </mat-card-content>
    <mat-card-actions class="text-right">
      <p>还没有账户?<a href="">注册</a></p>
      <p>忘记密码?<a href="">找回</a></p>
    </mat-card-actions>
  </mat-card>
</form>
mat-icon.avatar {
  overflow: hidden;
  width: 64px;
  height: 64px;
  border-radius: 50%;
  margin: 12px;
}

mat-card {
  width: 600px;
}
.full-width {
  width: 100%;
}
三、相关报错TroubleShoting
ERROR Error: Uncaught (in promise): Error: Cannot match any routes. URL Segment: 'login'
之前路由配置
AppRoutingModule里这样配置
{path: '', redirectTo: '/login', pathMatch: 'full'}
LoginRoutingModule里这样配置
{ path: 'login', component: LoginComponent }
修改为:
AppRoutingModule:
const routes: Routes = [
  {path: '', redirectTo: '/login', pathMatch: 'full'},
  {path:'login',loadChildren:'./login/login.module#LoginModule'}
];
LoginRoutingModule
如果觉得本文对您有帮助~可以微信支持一下:


 浙公网安备 33010602011771号