DevExpress07、DataNavigator、 ControlNavigator
https://documentation.devexpress.com/WindowsForms/DevExpress.XtraEditors.DataNavigator.class

1、DataNavigator
使用方法
绑定数据源:例如:
List<int> datasource = new List<int>();
datasource.AddRange(new int[] { 0, 1, 2, 3, 4 });
myDataNavigator1.DataSource = datasource;
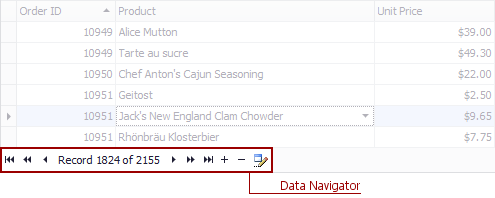
DataNavigator刚拖到窗体上默认的样子:
![]()
设置DataNavigator控件常用属性:
Dock=Bottom;
TextLocation=End;
TextStringFormat=第 {0}页 ,共 {1}页;
运行效果如下:
![]()
绑定同步数据源
使用System.Windows.Forms.BindingSource控件,绑定同步资源。
sampleBindingSource.DataSource = ds;
sampleBindingSource.DataMember = dh.DataMember;
//DataBinding
txtBox1.DataBindings.Add("EditValue", sampleBindingSource, "value1");
gridControl1.DataSource = sampleBindingSource;
dataNavigator1.DataSource = sampleBindingSource;
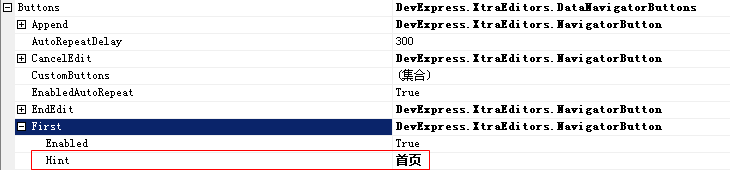
显示按钮的ToolTip
需把ShowToolTips设置为True,同时可设置Button的Hint为自己想要显示的内容。
比如:
在运行时会有下面效果:

自定义按钮图片
上图中的首页、前一页、后一页、尾页的图片是自定义的,那么怎么使用自定义图片呢?方法如下:
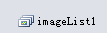
1. 拖拽一个imageList控件,
2. 然后在imageList中选择要使用的自定义图片
3. 然后在Buttons选项卡下将ImageList属性 设置为刚才选择过图片的imageList1控件,
4. 然后在DataNavigator控件 buttons下, 选择ImageIndex即可,
比如下图的First

按钮事件处理:
private void dataNavigator1_ButtonClick(object sender, DevExpress.XtraEditors.NavigatorButtonClickEventArgs e)
{
    //下一页
    if ((e.Button).ButtonType == DevExpress.XtraEditors.NavigatorButtonType.NextPage)
    {
    }
    //上一页
    if ((e.Button).ButtonType == DevExpress.XtraEditors.NavigatorButtonType.PrevPage)
    {
    }
    //首页
    if ((e.Button).ButtonType == DevExpress.XtraEditors.NavigatorButtonType.First)
    {
    }
    //尾页
    if ((e.Button).ButtonType == DevExpress.XtraEditors.NavigatorButtonType.Last)
    {
    }
}
posted on 2019-01-21 14:45 springsnow 阅读(1543) 评论(0) 收藏 举报


 浙公网安备 33010602011771号