
lunbotu
HTML代码如下

<!DOCTYPE html>
<html>
<head>
<meta charset="UTF-8">
<title></title>
</head>
<body>
<div id="container">
 <div id="list" style="left: -600px;">
            <img src="img/5.jpg" alt="1" />
            <img src="img/1.jpg" alt="1" />
            <img src="img/2.jpg" alt="2" />
            <img src="img/3.jpg" alt="3" />
            <img src="img/4.jpg" alt="4" />
            <img src="img/5.jpg" alt="5" />
            <img src="img/1.jpg" alt="5" />
</div>
<div id="buttons">
<span index="1" class="on"></span>
<span index="2"></span>
<span index="3"></span>
<span index="4"></span>
<span index="5"></span>
</div>
<a href="javascript:;" id="prev" class="arrow"><</a>
<a href="javascript:;" id="next" class="arrow">></a>
</div>
</body>
</html>
疑问一:为什么用id?
方便获取被操作的元素
疑问二:为什么轮播图加类“on”?
为了方便操作,如果加了"on",即说明当前图片正在轮播
疑问三:
<a href="javascript:;" id="prev" class="arrow"><</a>
//href="javascript:;" 是为了防止多次点击,并且为了防止跳出链接
//id = prev 是为了获取操作
//class = arrow 是属于左右移动
//<是左括号 "<" ,属于web安全符号
疑问四:为什么加了一个单独的样式,style = left: -600px;
<div id="list" style="left: -600px;">
<img src="img/5.jpg" alt="1" />
<img src="img/1.jpg" alt="1" />
<img src="img/2.jpg" alt="2" />
<img src="img/3.jpg" alt="3" />
<img src="img/4.jpg" alt="4" />
<img src="img/5.jpg" alt="5" />
<img src="img/1.jpg" alt="5" />
</div>
为了实现轮播图偏移量。
CSS代码如下
  * {
            margin: 0;
            padding: 0;
            text-decoration: none;
        }

        body {
            padding: 20px;
        }

        #container {
            position: relative;
            width: 600px;
            height: 400px;
            border: 3px solid #333;
            overflow: hidden;
        }

        #list {
            position: absolute;
            z-index: 1;
            width: 4200px;
            height: 400px;
        }

        #list img {
            float: left;
            width: 600px;
            height: 400px;
        }

        #buttons {
            position: absolute;
            left: 250px;
            bottom: 20px;
            z-index: 2;
            height: 10px;
        }

        #buttons span {
            float: left;
            margin-right: 5px;
            width: 10px;
            height: 10px;
            border: 1px solid #fff;
            border-radius: 50%;
            background: #333;
            cursor: pointer;
        }

        #buttons .on {
            background: orangered;
        }

        .arrow {
            position: absolute;
            top: 180px;
            z-index: 2;
            display: none;
            width: 40px;
            height: 40px;
            font-size: 36px;
            font-weight: bold;
            line-height: 39px;
            text-align: center;
            color: #fff;
            background-color: RGBA(0, 0, 0, .3);
            cursor: pointer;
        }

        .arrow:hover {
            background-color: RGBA(0, 0, 0, .7);
        }

        #container:hover .arrow {
            display: block;
        }

        #prev {
            left: 20px;
        }

        #next {
            right: 20px;
        }
疑问一:谈论一下绝对定位和相对定位?
position: relative 是相对定位
position: absolute是绝对定位
如果父元素没有被赋予相对定位,那么子元素的绝对定位是基于网页的!
疑问二:为什么用.7? 而不是0.7
 .arrow:hover {
            background-color: RGBA(0, 0, 0, .7);
  }
为了方便书写,可以用.7替代0.7。
疑问三:父元素用相对定位,子元素为什么一定要用绝对定位?
父元素:
 #container {
            position: relative;
            width: 600px;
            height: 400px;
            border: 3px solid #333;
            overflow: hidden;
}
子元素:
 #list {
            position: absolute;
            z-index: 1;
            width: 4200px;
            height: 400px;
}
如何区分父元素和子元素 , 即包括起来的,如下图所示
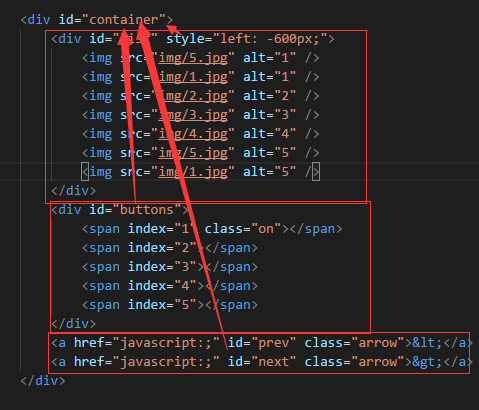
所有元素的父元素就是 container
所有绝对定位都是相对于父元素 container
JS代码如下
 window.onload = function() {
            var container = document.getElementById('container');
            var list = document.getElementById('list');
        var imgLen= document.getElementTagName('img');
            var buttons = document.getElementById('buttons').getElementsByTagName('span');
            var prev = document.getElementById('prev');
            var next = document.getElementById('next');
            var index = 1;
            var timer;

            function animate(offset) {
                //获取的是style.left,是相对左边获取距离,所以第一张图后style.left都为负值,
                //且style.left获取的是字符串,需要用parseInt()取整转化为数字。
                var newLeft = parseInt(list.style.left) + offset;
                list.style.left = newLeft + 'px';
                //无限滚动判断
                if (newLeft > -600) {
                    list.style.left = -3000 + 'px';
                }
                if (newLeft < -3000) {
                    list.style.left = -600 + 'px';
                }
            }

            function play() {
                //重复执行的定时器
                timer = setInterval(function() {
                    next.onclick();
                }, 2000)
            }

            function stop() {
                clearInterval(timer);
            }

            function buttonsShow() {
                //将之前的小圆点的样式清除
                for (var i = 0; i < buttons.length; i++) {
                    if (buttons[i].className == "on") {
                        buttons[i].className = "";
                    }
                }
                //数组从0开始,故index需要-1
                buttons[index - 1].className = "on";
            }

            prev.onclick = function() {
                index -= 1;
                if (index < 1) {
                    index = 5
                }
                buttonsShow();
                animate(600);
            };

            next.onclick = function() {
                //由于上边定时器的作用,index会一直递增下去,我们只有5个小圆点,所以需要做出判断
                index += 1;
                if (index > 5) {
                    index = 1
                }
                animate(-600);
                buttonsShow();
            };

            for (var i = 0; i < buttons.length; i++) {
                (function(i) {
                    buttons[i].onclick = function() {

                        /*  这里获得鼠标移动到小圆点的位置,用this把index绑定到对象buttons[i]上,去谷歌this的用法  */
                        /*  由于这里的index是自定义属性,需要用到getAttribute()这个DOM2级方法,去获取自定义index的属性*/
                        var clickIndex = parseInt(this.getAttribute('index'));
                        var offset = 600 * (index - clickIndex); //这个index是当前图片停留时的index
                        animate(offset);
                        index = clickIndex; //存放鼠标点击后的位置,用于小圆点的正常显示
                        buttonsShow();
                    }
                })(i)
            }

            container.onmouseover = stop;
            container.onmouseout = play;
            play();

        }

 浙公网安备 33010602011771号