

Vue14之TabBar
TabBar中显示的内容由外界决定,可以传入图片文字等。
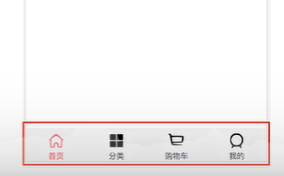
我们想制作这个东西,首先我们新建了一个tabbar的脚手架项目。
然后我们删除掉helloworld相关的内容,之后我们先写个大概试试:
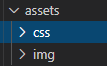 asserts下面设置两个文件夹,用来装css样式和img图片。
body{
    padding: 0;
    margin: 0;
}
随便写个样式然后如何使用这个样式呢?当然是在App.vue的style标签中。
@import "./assets/css/base.css";
先把目标图片中的四个类别用div造出来:
<template>
  <div id="app">
    <div id="tab-bar">
      <div class="tab-bar-item">首页</div>
      <div class="tab-bar-item">分类</div>
      <div class="tab-bar-item">购物车</div>
      <div class="tab-bar-item">我的</div>
    </div>
  </div>
</template>
然后我们加上一些样式让它看起来像个人做的。
  .tab-bar-item{
    flex:1;   //等间隔
    text-align:center;  //四个模块内容居中
    height:49px;    //手机端适配高度默认49
  }
然后制作一下分割的线和tabbar背景色:
  #tab-bar{
    display: flex;  //内容横着铺
    background-color:#f6f6f6;  #背景颜色
    position:fixed;       #位置
    left:0;
    right:0;
    bottom:0;
    box-shadow: 0px -3px 1px rgba(100,100,100,.3);  #分割线颜色
  }
效果:
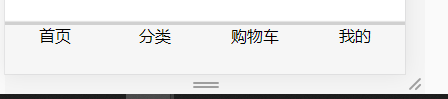
感觉还可以哈。但是这样写代码以后肯定会很复杂很乱,我们需要封装然后放在各种文件夹里管理。
我们在components中设置一个tabbar文件夹,里面加入一个TabBar.vue文件,然后我们加入以下代码:
<template>
    <div id="tab-bar">
      <div class="tab-bar-item">
          <img src="../../assets/img/tabbar/detec.png" alt="">
          <div>警察信息</div>
      </div>
      <div class="tab-bar-item">
          <img src="~@/assets/img/tabbar/gun.svg" alt="">
          <div>武器分类</div>
      </div>
      <div class="tab-bar-item">
          <img src="~@/assets/img/tabbar/letter.svg" alt="">
          <div>绑架信箱</div>
      </div>
      <div class="tab-bar-item">
          <img src="~@/assets/img/tabbar/money.svg" alt="">
          <div>抢钱总计</div>
      </div>
    </div>
</template>

<script>
export default {
    name:'TabBar'
}
</script>

<style scoped>
 #tab-bar{
    display: flex;
    background-color:#f6f6f6;
    position:fixed;
    left:0;
    right:0;
    bottom:0;
    box-shadow: 0px -3px 1px rgba(100,100,100,.3);
  }
  .tab-bar-item{
    flex:1;
    text-align:center;
    height:49px;
  }

  .tab-bar-item img{
      width:24px;
      height:24px;
  }
</style>
说白了就是把代码转移到这里来了,把这个TabBar当作一个组件。然后我们注册这个组件:
下面是App.vue的部分内容
<template>
  <div id="app">
    <tab-bar></tab-bar>
  </div>
</template>

<script>
import TabBar from './components/tabbar/TabBar'

export default {
  name: 'App',
  components: {
    TabBar
  }
}
</script>
这里我们加入一个tab-bar到template中,这个组件我们import后在components中注册。
这样我们实现了效果:
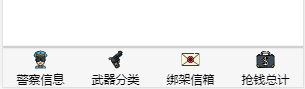
但是这样写代码可拓展性还是不好,我们应该用插槽的方法来对代码进行重构。也就是把TabBarItem单独提取出来,新建这个TabBarItem.vue文件:
<template>
    <div class="tab-bar-item">
        <slot name="item-icon"></slot>
        <slot name="item-text"></slot>
    </div>
</template>

<script>

export default {
  name: 'TabBarItem',
}
</script>

<style>
  .tab-bar-item{
    flex:1;
    text-align:center;
    height:49px;
    margin-top:3px;
    vertical-align: middle;
  }

  .tab-bar-item img{
      width:24px;
      height:24px;
  }

</style>
下面都是样式,上面我们可以看到这个tabbaritem实际上由一个icon插槽和一个text插槽构成。那么tabbar呢?
<template>
    <div id="tab-bar">
      <slot></slot>
    </div>
</template>
样式代码省略了,tabbar则由一个插槽构成,当然这个插槽实际就是值tabbaritem了。
那么界面呢?
<template>
  <div id="app">
    <tab-bar>
      <tab-bar-item>
        <img slot="item-icon" src="./assets/img/tabbar/cop.svg" alt="">
        <div slot="item-text">警察信息</div>
      </tab-bar-item>
      <tab-bar-item>
        <img slot="item-icon" src="./assets/img/tabbar/gun.svg" alt="">
        <div slot="item-text">武器分类</div>
      </tab-bar-item>
      <tab-bar-item>
        <img slot="item-icon" src="./assets/img/tabbar/letter.svg" alt="">
        <div slot="item-text">绑架信箱</div>
      </tab-bar-item>
      <tab-bar-item>
        <img slot="item-icon" src="./assets/img/tabbar/money.svg" alt="">
        <div slot="item-text">抢钱总计</div>
      </tab-bar-item>
    </tab-bar>
  </div>
</template>
当然是嵌套着把插槽都实现了,这样新添加也非常的方便,别忘记要在components也注册一下tabbarItem才可以。
import TabBar from './components/tabbar/TabBar'
import TabBarItem from './components/tabbar/TabBarItem'
export default {
  name: 'App',
  components: {
    TabBar,
    TabBarItem
  }
}
这样就可以了。
之后最麻烦的地方就是配置路由了,这里由于操作的问题让我调了很久的错误。重点说一下。
我们希望点击下面的每一个专栏页面的内容就要变成那个专栏的内容,这里我们是需要路由的,前面我们已经说过了路由的配置。我们再啰嗦一次:
下载路由:运行时依赖
npm install vue-router --save
然后src下面建一个router设置一个index.js文件,内容:
import Vue from 'vue'
import VueRouter from 'vue-router'
Vue.use(VueRouter)
const routes=[]   //这里配置映射关系
const router = new VueRouter({
    routes
})
export default router
main中导入
import router from "./router"
下面把router填写进去。
new Vue({
  el: '#app',
  router,
  render: h => h(App)
})
到这里位置,后来我报了一个这样的错误:
Cannot read property 'replace' of undefined
就是说this.$router的replace用不了,为啥用不了,上面Vue.use(VueRouter)错写成Vue.user(VueRouter)!!!!坑!!!
之后我们就可以配置我们的路由信息了,为了方便管理,我们在router同级设置了一个views文件夹:
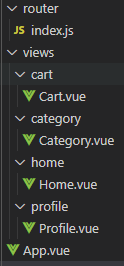
这里面四个文件夹包含四个文件代表四个界面,点击一个路由转到一个的内容,方便以后管理,因此我们可以在路由里面配置信息了;
const routes =[
    {
        path:'',
        redirect:'/home'
    },
    {
        path:'/home',
        component:Home
    },
    {
        path:'/category',
        component:Category
    },
    {
        path:'/cart',
        component:Cart
    },
    {
        path:'/profile',
        component:Profile
    },
]
这里小心component没有s 没有s!!!!!!
配置完成我们就可以在TabBarItem中用@Click进行监听了:
<template>
    <div class="tab-bar-item" @click="itemClick">
        <div v-if="!isActive"><slot name="item-icon"></slot></div>
        <div v-else><slot name = "item-icon-active"></slot></div>
        <div :class="{active:isActive}">
          <slot name="item-text"></slot>
        </div>
    </div>
</template>
这里加入了isActive负责管理点击后激活改变颜色图片什么的,itemClick函数就是你点击完了走路由用的。下面的data自然要实现这些属性和函数:
export default {
  name: 'TabBarItem',
  props:{
    path:String           //传来数据给replace
  },
  data(){
    return{
      isActive:true,
    }
  },
  methods:{
    itemClick(){
      this.$router.replace(this.path)
    }
  }
}
这里通过props来动态传过来path的数据,你得知道你点击之后要跑到那个界面,然后我们在父组件直接送过:
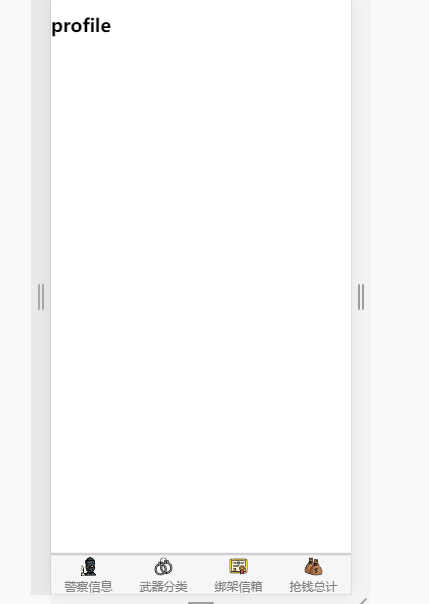
path="/home" 就是写死了,你点击这个就到home界面,下面那个点击就到category界面,别忘了把这个router-view补上,要不然啥都不显示。
ok 这就完了,实现了点哪显示哪的功能:


 浙公网安备 33010602011771号