javaIO流(三)--IO深入操作
一.字符编码
在计算机的世界中,本质上只认识0,1的字节数据,如果要想描述一些文字的编码就需要对这些二进制的数据进行组合,就需要对二进制的数据进行组合,所以才有了现在可看见的中文显示,但是在进行编码的时候如果想要正确显示出内容则一定需要解码,所以编码和解码一定要使用统一的一套标准,如果标准不统一,那么就会出现乱码.
--在实际的开发之中,常用的编码有如下几种:
GBK/GB2312:国标编码,可以描述中文信息,其中GB2312只描述简体中文,而GBK包含有简体中文与繁体中文
ISO8859-1:国际通用码,可以用其描述所有的文字的信息,但是如果处理不当,也会造成乱码
Unicode编码:采用16进制的方式存储,可以描述所有的字母信息,如果是象形文字,则需要进行编码处理
UTF编码:象形文字部分使用十六进制的编码,而普通的字母采用的是ISO8859-1的编码,它的优势在于适合快速的传输,节约带宽,因此也就成为了开发之中首选的编码.其中UTF编码存在UTF-8,UTF-16,主要使用的则是utf-8.
--如果要想知道本地所支持的所有编码规则,则可以使用如下代码列出全部的本机属性:
 1 package IO常用类库.IO深入;
 2
 3 /**
 4  * @author : S K Y
 5  * @version :0.0.1
 6  */
 7 public class MyCode {
 8     public static void main(String[] args) {
 9         System.getProperties().list(System.out);
10     }
11 }
--运行结果
-- listing properties --
java.runtime.name=Java(TM) SE Runtime Environment
sun.boot.library.path=C:\Program Files\Java\jdk1.8.0_201\jr...
java.vm.version=25.201-b09
java.vm.vendor=Oracle Corporation
java.vendor.url=http://java.oracle.com/
path.separator=;
java.vm.name=Java HotSpot(TM) 64-Bit Server VM
file.encoding.pkg=sun.io
user.script=
user.country=CN
sun.java.launcher=SUN_STANDARD
sun.os.patch.level=
java.vm.specification.name=Java Virtual Machine Specification
user.dir=F:\idea_workspace\RunnableProject
java.runtime.version=1.8.0_201-b09
java.awt.graphicsenv=sun.awt.Win32GraphicsEnvironment
java.endorsed.dirs=C:\Program Files\Java\jdk1.8.0_201\jr...
os.arch=amd64
java.io.tmpdir=C:\Users\USER\AppData\Local\Temp\
line.separator=

java.vm.specification.vendor=Oracle Corporation
user.variant=
os.name=Windows 10
sun.jnu.encoding=GBK
java.library.path=C:\Program Files\Java\jdk1.8.0_201\bi...
java.specification.name=Java Platform API Specification
java.class.version=52.0
sun.management.compiler=HotSpot 64-Bit Tiered Compilers
os.version=10.0        //当前的操作系统名称,即Windows10
user.home=C:\Users\USER
user.timezone=
java.awt.printerjob=sun.awt.windows.WPrinterJob
file.encoding=UTF-8      //文件的默认编码
java.specification.version=1.8
user.name=USER
java.class.path=C:\Program Files\Java\jdk1.8.0_201\jr...
java.vm.specification.version=1.8
sun.arch.data.model=64
java.home=C:\Program Files\Java\jdk1.8.0_201\jre
sun.java.command=IO常用类库.IO深入.MyCode
java.specification.vendor=Oracle Corporation
user.language=zh
awt.toolkit=sun.awt.windows.WToolkit
java.vm.info=mixed mode
java.version=1.8.0_201
java.ext.dirs=C:\Program Files\Java\jdk1.8.0_201\jr...
sun.boot.class.path=C:\Program Files\Java\jdk1.8.0_201\jr...
java.vendor=Oracle Corporation
file.separator=\      //文件路径分隔符
java.vendor.url.bug=http://bugreport.sun.com/bugreport/
sun.cpu.endian=little
sun.io.unicode.encoding=UnicodeLittle
sun.desktop=windows
sun.cpu.isalist=amd64

Process finished with exit code 0
--我们可以发现不进行任何设置的话,所采用的编码就是UTF-8
--范例:编写程序
 1 public class MyCode {
 2     public static void main(String[] args) throws IOException {
 3         File file = new File("d:" + File.separator + "java_test" + File.separator + "demo01.txt");
 4         OutputStream output = new FileOutputStream(file);
 5         //此时为默认的处理操作,因此必然可以进行正常的显示输出操作
 6         /*output.write("今天天气不错".getBytes());
 7         output.close();*/
 8         //强制性设置编码,此时文件的输出将会造成乱码
 9         output.write("今天天气不错".getBytes(StandardCharsets.ISO_8859_1));
10         output.close();
11     }
12 }
--项目中出现的乱码问题就是编码和解码的标准不统一,因此最好的解决乱码的方式:所有的编码都使用UTF-8
二.内存操作流
在之前所使用的都是文件操作流,文件操作流的特点是程序使用InputStream读取文件内容,而后利用OutputStream向文件输出内容,所有的操作都是以文件为终端的.但是此时任然存在问题,比如现在需要实现IO操作,可是又不希望产生文件(临时文件),则可以以内存为终端实现操作处理.
--在java中提供有两类的内存操作流:
字节内存操作流: ByteArrayOutputStream,ByteArrayInputStream
字符内存操作流程: CharArrayWriter,CharArrayReader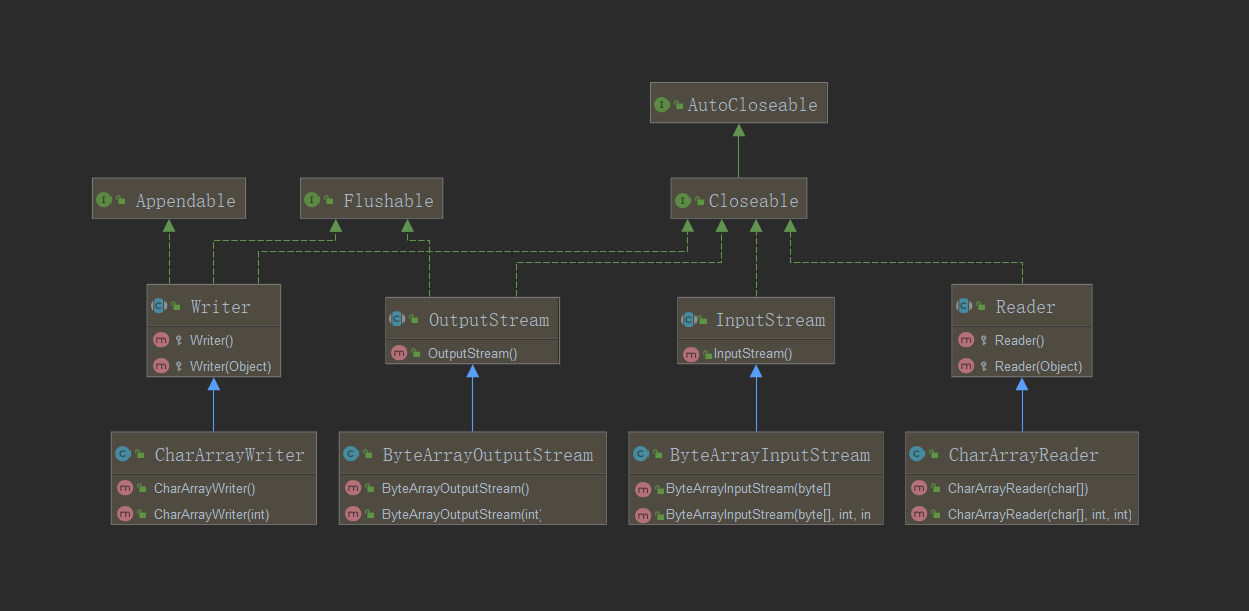
--此时完成的继承结构图: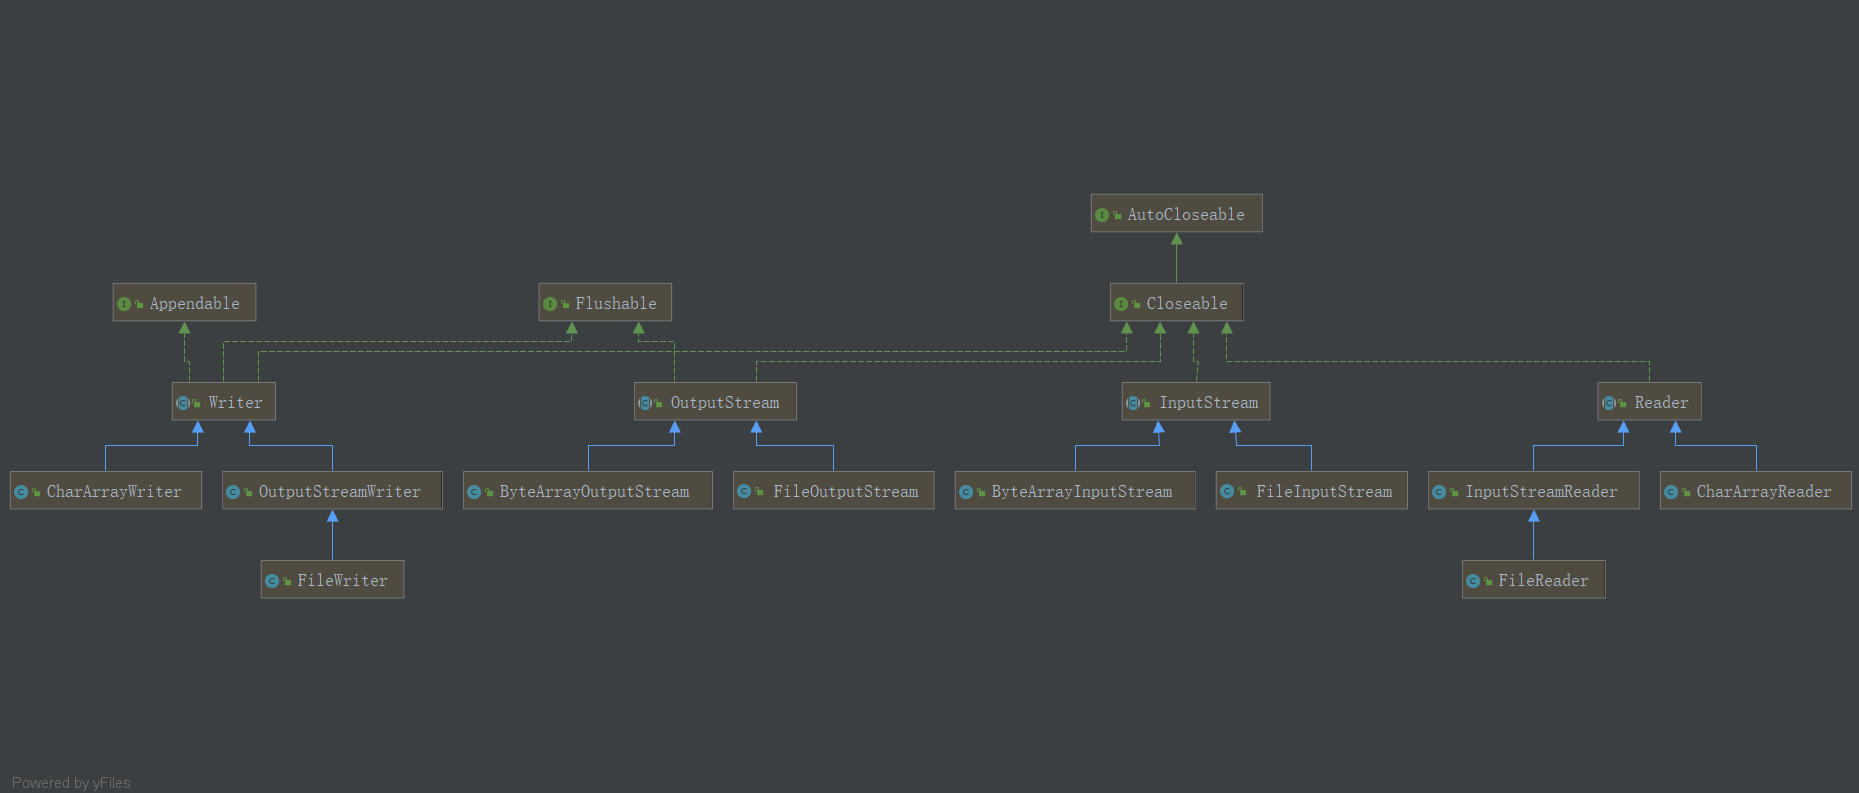
--观察上方ByteArrayInputStream的构造方法,可以发现能够传入参数byte[],而ByteArrayOutputStream则提供有无参构造
--范例:利用内存流实现一个小写字母转化为大写字符的操作
 1 public class ByteCharStreamDemo {
 2     public static void main(String[] args) throws IOException {
 3         String str = "www.baidu.com";
 4         InputStream input = new ByteArrayInputStream(str.getBytes());   //将数据保存到内存流
 5         OutputStream output = new ByteArrayOutputStream();  //读取内存中的数据
 6         int data = 0;
 7         while ((data = input.read()) != -1) {    //每次只读取一个字节
 8             output.write(Character.toUpperCase((char) data));       //向输出流保存数据
 9         }
10         //在ByteArrayOutputStream类中有一个重要的方法获取全部保存在内存中的数据流信息:
11         //    public synchronized byte toByteArray()[]
12         //    public synchronized String toString()
13         System.out.println(output);
14         output.close();
15     }
16 }
--运行结果
WWW.BAIDU.COM

Process finished with exit code 0
--如果现在不希望只是以字符串的形式返回,因为可能存放的是其他二进制的数据,那么此时就可以利用ByteArrayOutputStream子类的扩展功能(此时不能在进行对象上转型)toByteArray()来获取数据
 1 public class ByteCharStreamDemo {
 2     public static void main(String[] args) throws IOException {
 3         String str = "www.baidu.com";
 4         InputStream input = new ByteArrayInputStream(str.getBytes());   //将数据保存到内存流
 5         ByteArrayOutputStream output = new ByteArrayOutputStream();  //读取内存中的数据
 6         int data = 0;
 7         while ((data = input.read()) != -1) {    //每次只读取一个字节
 8             output.write(Character.toUpperCase((char) data));       //向输出流保存数据
 9         }
10         //在ByteArrayOutputStream类中有一个重要的方法获取全部保存在内存中的数据流信息:
11         //    public synchronized byte toByteArray()[]
12         //    public synchronized String toString()
13         byte[] result = output.toByteArray();       //获取全部数据
14         System.out.println(new String(result));
15         output.close();
16     }
17 }
--在最初的时候可以利用ByteArrayOutputStream实现大规模文本文件的读取
三.管道流
管道流主要的功能是实现两个线程之间的IO处理,对于管道流也可以分为两类
--管道流的分类
字节管道流:PipedOutputStream PipedInputStream
void connect(PipedInputStream snk) 将此管道输出流连接到接收器。
字符管道流: PipedWriter PipedReader
void connect(PipedReader snk) 将此管道写入器连接到接收器。
--实现管道操作:
 1 class SendThread implements Runnable {
 2     private PipedOutputStream output;       //管道的输出流
 3
 4     public SendThread(PipedOutputStream output) {
 5         this.output = output;
 6     }
 7
 8     @Override
 9     public void run() {
10         for (int i = 0; i < 10; i++) {
11             try {   //利用管道实现数据的发送处理
12                 this.output.write(("信息发送: " + "第" + (i + 1) + "条消息\r\n").getBytes());
13             } catch (IOException e) {
14                 e.printStackTrace();
15             }
16         }
17         try {
18             this.output.close();
19         } catch (IOException e) {
20             e.printStackTrace();
21         }
22     }
23
24     public PipedOutputStream getOutput() {
25         return output;
26     }
27 }
28
29 class ReceiveThread implements Runnable {
30     private PipedInputStream input;     //管道的输入流
31
32     public ReceiveThread(PipedInputStream input) {
33         this.input = input;
34     }
35
36     @Override
37     public void run() {
38         byte[] data = new byte[1024];
39         int len = 0;
40         OutputStream output = new ByteArrayOutputStream();  //所有的数据保存到内存输出流
41
42         try {
43             while ((len = this.input.read(data)) != -1) {
44                 output.write(data, 0, len);
45             }
46             System.out.println("接收数据: " + "{" + output.toString() + "}");
47         } catch (IOException e) {
48             e.printStackTrace();
49         }
50         try {
51             this.input.close();
52         } catch (IOException e) {
53             e.printStackTrace();
54         }
55
56     }
57
58     public PipedInputStream getInput() {
59         return input;
60     }
61 }
62
63 public class MyPipDemo {
64     public static void main(String[] args) throws IOException {
65         SendThread sendThread = new SendThread(new PipedOutputStream());
66         ReceiveThread receiveThread = new ReceiveThread(new PipedInputStream());
67         sendThread.getOutput().connect(receiveThread.getInput());   //进行管道连接
68         new Thread(sendThread, "消息发送线程").start();
69         new Thread(receiveThread, "消息接收线程").start();
70
71     }
72 }
--运行结果
接收数据: {信息发送: 第1条消息
信息发送: 第2条消息
信息发送: 第3条消息
信息发送: 第4条消息
信息发送: 第5条消息
信息发送: 第6条消息
信息发送: 第7条消息
信息发送: 第8条消息
信息发送: 第9条消息
信息发送: 第10条消息
}

Process finished with exit code 0
四.RandomAccessFile 随机读取类
对于文件内容的处理操作主要是通过InputStream(Reader),OutputStream(Writer)来实现,但是利用这些类进行数据的读取,那么只能将数据部分部分读取进来,如果说现在给了一个非常庞大的文件,例如有20GB的大小,如果此时按照传统的IO操作进行读取和分析,根本就不可能完成。因此在这种情况下java.io包就提供了一个RandomAccessFile类,这个类可以实现文件的跳跃式读取,可以读取文件中间的部分内容(前提:需要有一个完善的保存形式).数据保存的位数要多确定好.
--构造方法 public RandomAccessFile(String name, String mode)throws FileNotFoundException
--文件处理模式:
r:
rw:
rws:
rwd:
--实现文件的保存:
 1 public class RandomAccessFileDemo {
 2     public static void main(String[] args) throws IOException {
 3         File file = new File("d:" + File.separator + "java_test" + File.separator + "demo01.txt");
 4         RandomAccessFile accessFile = new RandomAccessFile(file, "rw");     //读写模式
 5         String[] names = new String[]{"zhangsan", "wangwu  ", "lisi    "};
 6         int[] ages = new int[]{30, 20, 16};
 7         for (int i = 0; i < names.length; i++) {
 8             accessFile.write(names[i].getBytes());      //写入字符串
 9             accessFile.writeInt(ages[i]);
10         }
11         accessFile.close();
12     }
13 }
--运行结果
zhangsan
wangwu lisi
--RandomAccessFile最大的特点是在于数据的读取处理上,因为所有的数据是按照固定的长度进行保存,所以在读取的时候就可以进行跳字节读取
跳字节读取方法(向下跳跃): public int skipBytes(int n) throws IOException
跳字节读取方法(向上跳跃): public void seek(long pos) throws IOException
--读取数据:
 1 class ReaderDemo {
 2     public static void main(String[] args) throws IOException {
 3         File file = new File("d:" + File.separator + "java_test" + File.separator + "demo01.txt");
 4         RandomAccessFile accessFile = new RandomAccessFile(file, "rw");     //读写模式
 5         //读取"lisi    "的数据
 6         accessFile.skipBytes(24);       //跳过24个字节数据,每个人的信息所占的字节数(8 + 4);
 7         byte[] data = new byte[8];
 8         int len = accessFile.read(data);
 9         System.out.println("姓名: "+new String(data,0,len) + "年龄: " + accessFile.readInt());
10     }
11 }
--运行结果
姓名: lisi    年龄: 16

Process finished with exit code 0
--范例:回跳读取数据
 1 class ReaderDemo {
 2     public static void main(String[] args) throws IOException {
 3         File file = new File("d:" + File.separator + "java_test" + File.separator + "demo01.txt");
 4         RandomAccessFile accessFile = new RandomAccessFile(file, "rw");     //读写模式
 5         //读取"wangwu  "的数据,而后回跳24位读取"zhangsan"的数据
 6         accessFile.skipBytes(12);       //跳过12个字节数据,每个人的信息所占的字节数(8 + 4);
 7         byte[] data = new byte[8];
 8         int len = accessFile.read(data);
 9         System.out.println("姓名: " + new String(data, 0, len) + "年龄: " + accessFile.readInt());
10         accessFile.seek(0);        //回跳都顶点
11         len = accessFile.read(data);
12         System.out.println("姓名: " + new String(data, 0, len) + "年龄: " + accessFile.readInt());
13     }
14 }
--运行结果
姓名: wangwu  年龄: 20
姓名: zhangsan年龄: 30

Process finished with exit code 0
--可以发现在整体的使用之中,由用户自定义读取的位置,而后按照指定的结构进行数据的读取(前提:数据的长度要保持一致)

 浙公网安备 33010602011771号