Git 服务使用搭建集合
一、本地Git 仓库搭建与使用
1、Git 概念介绍
版本控制系统
版本控制是一种记录若干文件内容变化,以便将来查阅特定版本修订情况的系统。大部分时候我们使用最频繁的还是对源代码文件的版本控制,其实任何文件都可以纳入版本控制系统。
1.更好备份:
相比于将不同版本的文件以时间等命名存储备份,使用版本控制系统能节约更多的磁盘空间,因为版本控制系统不是文件的复制备份,而是差异备份,文件快照备份等等。
2.更好的回溯:
可以将某个文件回溯到之前的任何一个提交状态,甚至将整个项目回退到过去的某个时间点。
3.更好的团队协作:
这是最重要的,团队共同开发一款软件,如果没有版本控制,那是不可想象的,简单点的可以使用文件传输到某一位核心开发者库上进行合并,但如果团队的成员是分散在全国各地的,甚至是世界各地的,比如linux内核的开发,那完全是没办法进行的。使用版本控制后,可以比较文件的变化,可以查询是谁提交了新的更新,并且可以由项目负责人管理提交,进行更新的管理。
2、Git 安装
基础软件源中有Git软件包。所以我们直接可以使用install git进行下载安装,


[root@git7-1 ~]# yum -y install git
3、Git 本地仓库的创建
为了我们使用的规范及文件的可找性,我们在使用之前建立相应的用户和存放Git代码的目录:
[root@git7-1 ~]# useradd git                    #创建Git使用的用户
[root@git7-1 ~]# mkdir /git-root                #创建Git存放代码的目录
[root@git7-1 ~]# chown git.git /git-root -R     #赋予git用户对git目录的权限
[root@git7-1 ~]$ su - git                       #为了安全,我们使用git用户来做git服务
初始化Git仓库
[git@git7-1 ~]$ cd /git-root/
[git@git7-1 git-root]$ git init --bare test.git #初始化git库
Initialized empty Git repository in /git-root/test.git/
[git@git7-1 git-root]$ ls
test.git
[git@git7-1 git-root]$ tree
.
└── test.git
├── branches
├── config
├── description
├── HEAD
├── hooks
│ ├── applypatch-msg.sample
│ ├── commit-msg.sample
│ ├── post-update.sample
│ ├── pre-applypatch.sample
│ ├── pre-commit.sample
│ ├── prepare-commit-msg.sample
│ ├── pre-push.sample
│ ├── pre-rebase.sample
│ └── update.sample
├── info
│ └── exclude
├── objects
│ ├── info
│ └── pack
└── refs
├── heads
└── tags
10 directories, 13 files
到这里我们的Git 本地服务就搭建完成了!
克隆使用Git 库
我们先需要添加root用户的公钥到git用户!
[git@git7-1 ~]$ exit                    #退出git 用户

[root@git7-1 ~]# ssh-keygen -b 1024 -t rsa        #生成密钥对

[root@git7-1 ~]# cat .ssh/id_rsa.pub
ssh-rsa caSjzeWoxGnV98O99HNHeCeJHFVSmE1XjX5I6gJvzg6ZtPftX9eIeKoceDB2+SEhUi6fBlDXlasw+qdpCqjq1zEO4YdMR0G0vUjL7DsjWHbrwWPu7uYeJfUnSv3t+H9SwlxIAMXBAKgK3JCY9Ju8Cj4ukM+wRoAxF4Z5LB6StIiL0+7enOecDjuPl1 root@git7-1                            #复制刚刚生成的这个公钥
[root@git7-1 ~]$ su - git                #切换git 用户
[git@git7-1 ~]$ ssh-keygen -b 1024 -t rsa        #生成git用户的秘钥对
Generating public/private rsa key pair.
Enter file in which to save the key (/home/git/.ssh/id_rsa):
Created directory '/home/git/.ssh'.
Enter passphrase (empty for no passphrase):
Enter same passphrase again:
Your identification has been saved in /home/git/.ssh/id_rsa.
Your public key has been saved in /home/git/.ssh/id_rsa.pub.
The key fingerprint is:
SHA256:2IuYTw74T5QITWIqGsgSWDUG7sEc61RywnLalkSwc+k git@git7-1
The key's randomart image is:
+---[RSA 2048]----+
|+=XoB            |
|=O+& .           |
|OB@..            |
|=O+o . +         |
|..E . + S        |
|   . + . .       |
|  . + + .        |
|   . *           |
|    ..+          |
+----[SHA256]-----+
[git@git7-1 ~]$ cp .ssh/id_rsa.pub .ssh/authorized_keys        #复制git用户的公钥并且改名为authorized_keys
[git@git7-1 ~]$ echo 'ssh-rsa caSjzeWoxGnV98O99HNHeCeJHFVSmE1XjX5I6gJvzg6ZtPftX9eIeKoceDB2+SEhUi6fBlDXlasw+qdpCqjq1zEO4YdMR0G0vUjL7DsjWHbrwWPu7uYeJfUnSv3t+H9SwlxIAMXBAKgK3JCY9Ju8Cj4ukM+wRoAxF4Z5LB6StIiL0+7enOecDjuPl1 root@git7-1 root@git7-1' >> .ssh/authorized_keys        #导入刚刚root的公钥

[git@git7-1 ~]$ exit                        #退出git这个用户
[root@git7-1 ~]# ssh git@10.18.43.10    #现在我们使用root用户链接git这个用户,检查秘钥是否成功
The authenticity of host '10.18.43.10 (10.18.43.10)' can't be established.
ECDSA key fingerprint is SHA256:s07v2nPlnRozxlcOcEkrUMtGWiBe92gXnyDvTckvCm0.
ECDSA key fingerprint is MD5:7e:ad:79:7a:28:04:4a:67:fa:55:23:84:c2:4b:38:ab.
Are you sure you want to continue connecting (yes/no)? yes
Warning: Permanently added '10.18.43.10' (ECDSA) to the list of known hosts.
Last login: Mon Jul 16 23:40:31 2018
[git@git7-1 ~]$ exit                        #退出git用户
[root@git7-1 git-git]# echo 'echo "hello world"' > test/echo.sh #我们创建一个脚本代码实验
[root@git7-1 git-git]# cd test/
[root@git7-1 test]# ls
echo.sh
[root@git7-1 test]# git add . #上传至缓存区
[root@git7-1 test]# git commit -m 'test_v1.01' #提交缓存空间的文件到库
[master (root-commit) cd2f8a5] test_v1.01
1 file changed, 1 insertion(+)
create mode 100644 echo.sh
[root@git7-1 test]# git push origin master #推送库中的代码。
Counting objects: 3, done.
Writing objects: 100% (3/3), 221 bytes | 0 bytes/s, done.
Total 3 (delta 0), reused 0 (delta 0)
To git@10.18.43.10:/git-root/test.git
* [new branch] master -> master
4、Git基础操作
1、git 默认有一个分支master
[root@git7-1 test]# git branch                #查看当前分支
* master
[root@git7-1 test]# git branch test            #创建test分支
[root@git7-1 test]# git branch                 #查看当前分支
* master
  test
[root@git7-1 test]# git checkout test         #切换分支test
Switched to branch 'test'
[root@git7-1 test]# git branch                 #查看当前分支
  master
* test
[root@git7-1 test]# git checkout -b test_2    #-b创建并切换
Switched to a new branch 'test_2'
[root@git7-1 test]# git branch                 #查看当前分支,
  master
  test
* test_2
[root@git7-1 test]# echo 'echo 123321' > echo2.sh       #编写代码
[root@git7-1 test]# git add .                           #上传代码至缓存区
[root@git7-1 test]# git commit -m 'test_2-v1.0'         #提交缓存区代码到库,
[test_2 bcc1330] test_2-v1.0
 1 file changed, 1 insertion(+)
 create mode 100644 echo2.sh
[root@git7-1 test]# git push origin test_2              #上传库代码到test_2分支
Counting objects: 4, done.
Delta compression using up to 2 threads.
Compressing objects: 100% (2/2), done.
Writing objects: 100% (3/3), 272 bytes | 0 bytes/s, done.
Total 3 (delta 0), reused 0 (delta 0)
To git@10.18.43.10:/git-root/test.git
 * [new branch]      test_2 -> test_2
[root@git7-1 test]# git checkout master                 #切换分支到master
Switched to branch 'master'
Your branch is ahead of 'origin/master' by 1 commit.
  (use "git push" to publish your local commits)
[root@git7-1 test]# git merge master test_2             #以当前master 合并test_2分支代码
Updating cd2f8a5..bcc1330
Fast-forward
 echo2.sh | 1 +
 1 file changed, 1 insertion(+)
 create mode 100644 echo2.sh
到此处git 本地仓库全部完成
二、Github 使用与链接
Github官网:https://github.com/
1、Github账号注册
首先在Github官网注册一个账号,准备一个邮箱。

注册完成进入个人账号引导界面
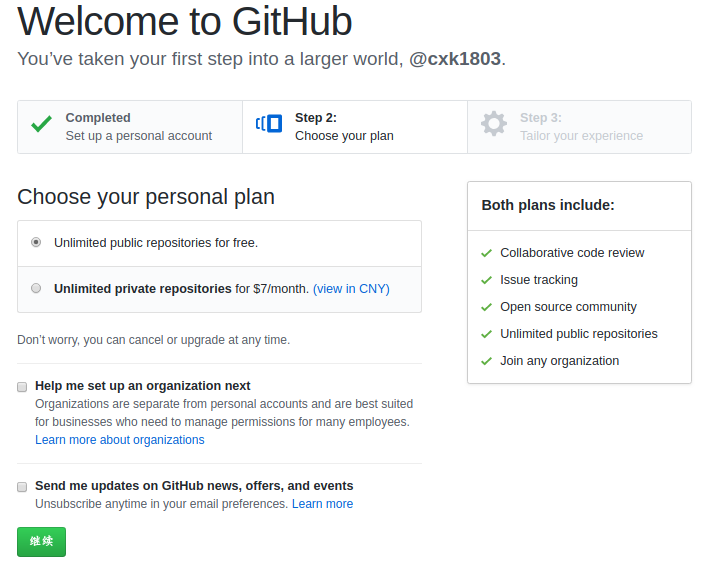
填写个人账户的相关信息,这一步可以跳过不填写;

注册引导完成
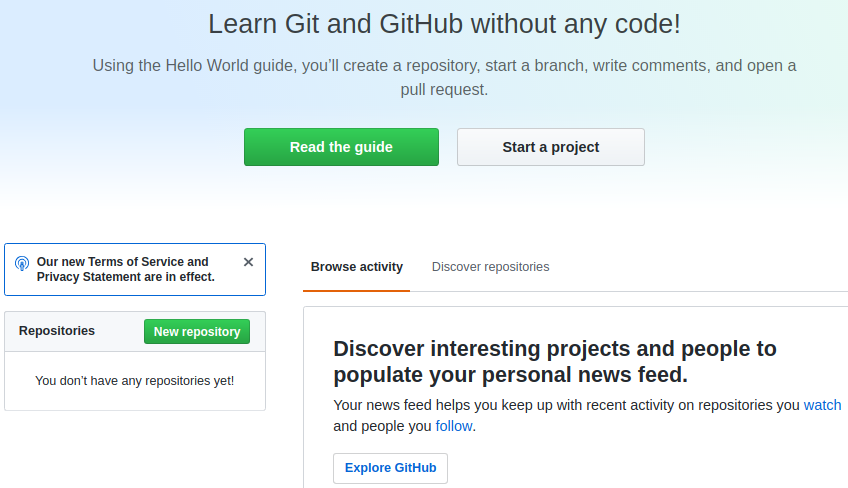
到这一步,你可以选择启动一个项目(start a project)也可以选择创建一个新的存储库(new repository),不过现在都需要验证刚刚注册时,使用的那个邮箱。
2、项目启用
我们启动一个新的项目(start a project),验证邮箱过之后,

点击create repository创建这个项目
链接创建方法(一)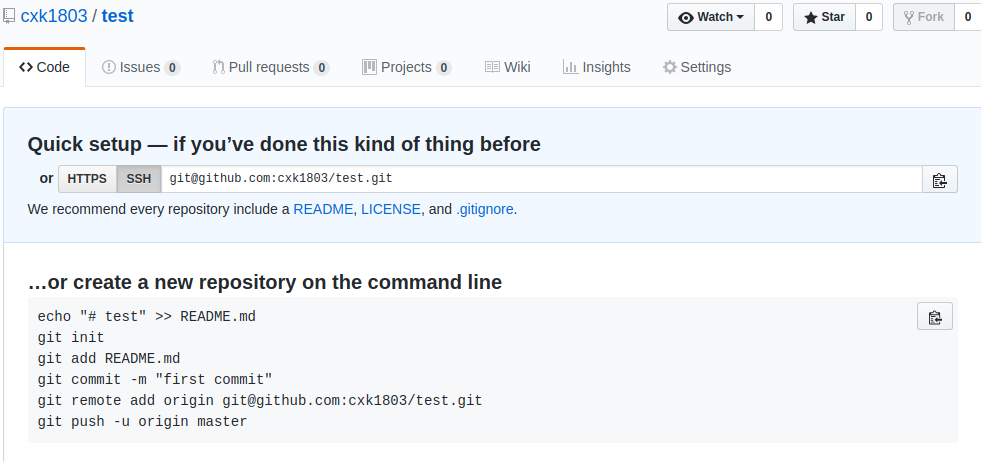
复制…or create a new repository on the command line框中的代码,在命令行使用来创建一个新的库
#需要先上传本机器的公钥,我们先把这段代码拷贝出来,等公钥上传完成之后在使用。
echo "# test" >> README.md
git init
git add README.md
git commit -m "first commit"
git remote add origin git@github.com:cxk1803/test.git
git push -u origin master
复制公钥到Github上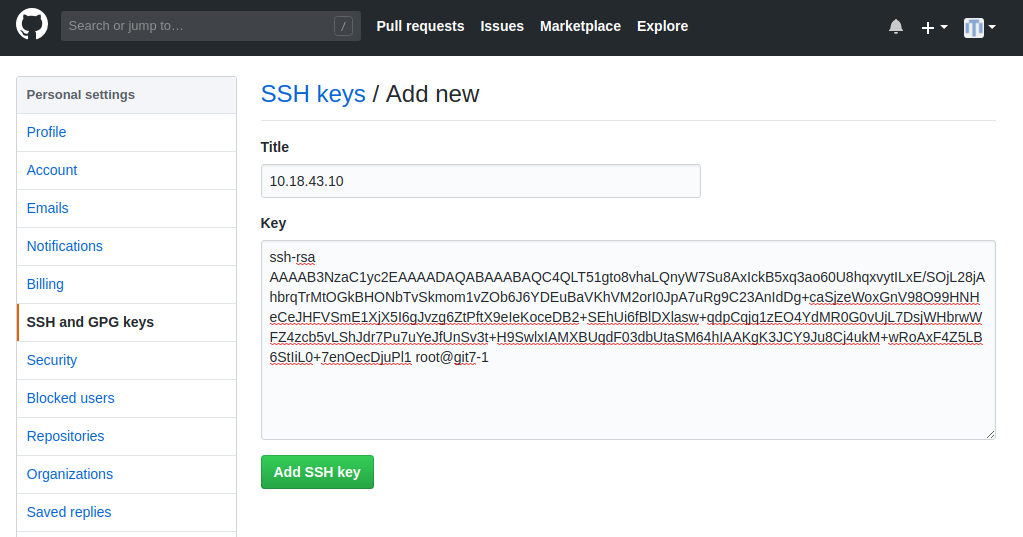
公钥创建成功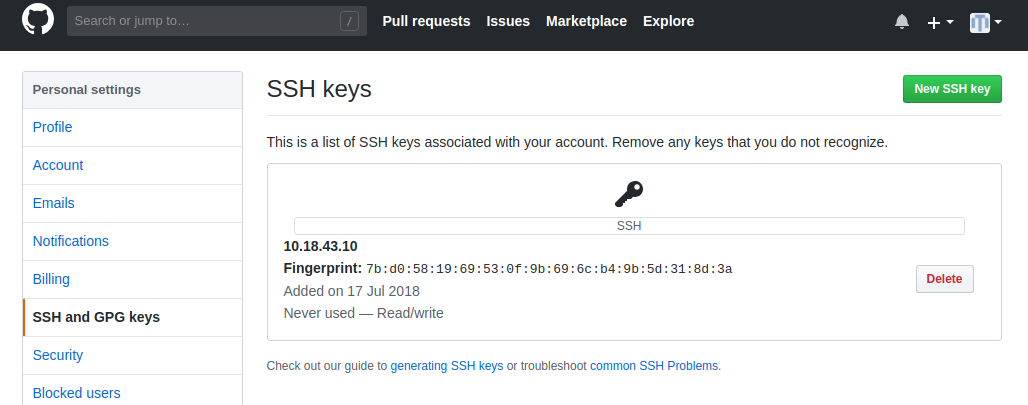
使用开头记录的代码创建库
[root@git7-1 github]# echo "# test" >> README.md
[root@git7-1 github]# git init
Reinitialized existing Git repository in /github/.git/
[root@git7-1 github]# git add README.md
[root@git7-1 github]# git commit -m "first commit"
[master 08f80ab] first commit
 1 file changed, 1 insertion(+)
[root@git7-1 github]# git remote add origin git@github.com:cxk1803/test.git
fatal: remote origin already exists.
[root@git7-1 github]# git push -u origin master
Counting objects: 6, done.
Delta compression using up to 2 threads.
Compressing objects: 100% (2/2), done.
Writing objects: 100% (6/6), 419 bytes | 0 bytes/s, done.
Total 6 (delta 0), reused 0 (delta 0)
To git@github.com:cxk1803/test.git
 * [new branch]      master -> master
Branch master set up to track remote branch master from origin.
[root@git7-1 github]# ls
README.md
[root@git7-1 github]# ls -a
.  ..  .git  README.md
链接创建方法(二)
也可以使用克隆下载;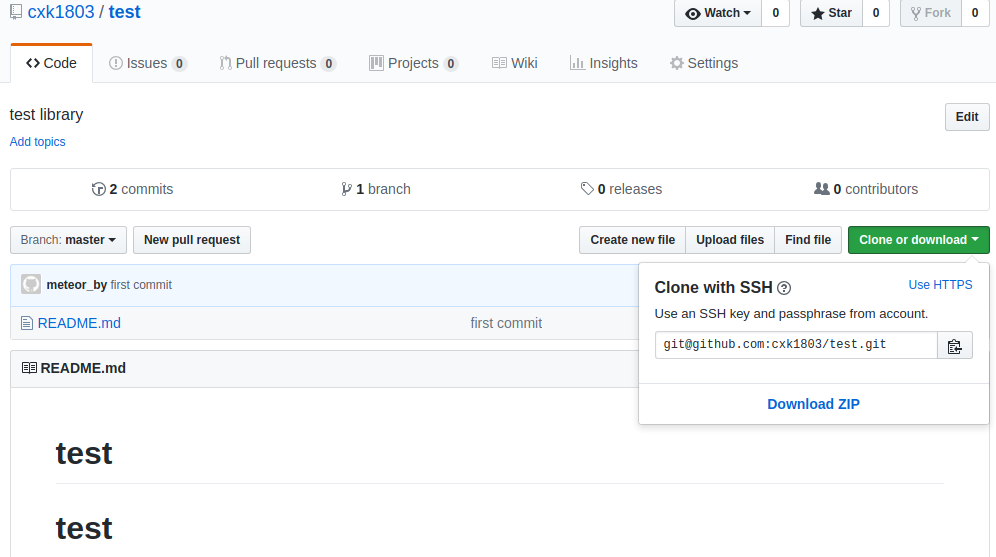
[root@git7-1 github]# git clone git@github.com:cxk1803/test.git
Cloning into 'test'...
Warning: Permanently added the RSA host key for IP address '13.250.177.223' to the list of known hosts.
remote: Counting objects: 6, done.
remote: Compressing objects: 100% (2/2), done.
remote: Total 6 (delta 0), reused 6 (delta 0), pack-reused 0
Receiving objects: 100% (6/6), done.
[root@git7-1 github]# ls
test
[root@git7-1 github]# ls -a #这里们就可以看见test这个库
. .. .git test
3、上传代码测试
[root@git7-1 github]# cd test/
[root@git7-1 test]# echo 'echo "这是一测试代码!!!"' > echo.sh
[root@git7-1 test]# git add .
[root@git7-1 test]# git commit -m 'test-v1.0'
[master cb24792] test-v1.0
1 file changed, 1 insertion(+)
create mode 100644 echo.sh
[root@git7-1 test]# git push origin master
Warning: Permanently added the RSA host key for IP address '13.229.188.59' to the list of known hosts.
Counting objects: 4, done.
Delta compression using up to 2 threads.
Compressing objects: 100% (2/2), done.
Writing objects: 100% (3/3), 301 bytes | 0 bytes/s, done.
Total 3 (delta 0), reused 0 (delta 0)
To git@github.com:cxk1803/test.git
08f80ab..cb24792 master -> master
为了验证,我们去网站看看。
比之前多出一个echo.sh的脚本。
三、Gitlab 搭建使用
(一)、Gitlab 环境部署
1、预处理
关闭主机的selinux和firewalld;因为用到了JVM,所以我们把主机的内存调到2G。
gitlab软件包下载点:https://mirrors.tuna.tsinghua.edu.cn/gitlab-ce/yum/el7/
jdk软件下载点:http://www.oracle.com/technetwork/java/javase/overview/index.html
[root@gitlab ~]# ls
gitlab-ce-10.8.4-ce.0.el7.x86_64.rpm  jdk-8u171-linux-x64.tar.gz
2、安装依赖环境
安装gitlab需要一些环境,gitlab自身并不能解决,所以我们要手动下载一些软件。
[root@gitlab ~]# yum install -y curl openssh-server openssh-clients postfix cronie policycoreutils-python
JDK 配置
[root@gitlab ~] tar -xf jdk-8u171-linux-x64.tar.gz -C /usr/local/
[root@gitlab ~] ln -s /usr/local/jdk1.8.0_171 /usr/local/java
[root@gitlab ~] vim /etc/profile #在最后添加系统环境变量
JAVA_HOME=/usr/local/java
PATH=$JAVA_HOME/bin:$PATH
export JAVA_HOME PATH
#退出保存
[root@gitlab ~] source /etc/profile #重新读取系统变量
[root@gitlab ~] java -version #查看Java版本
java version "1.8.0_171"
Java(TM) SE Runtime Environment (build 1.8.0_171-b11)
Java HotSpot(TM) 64-Bit Server VM (build 25.171-b11, mixed mode)
(二)、Gitlab安装使用
1、 安装
[root@gitlab ~] yum -y install gitlab-ce-10.8.4-ce.0.el7.x86_64.rpm
2、 配置Gitab
[root@gitlab ~]# vim /etc/gitlab/gitlab.rd
[root@gitlab ~]# grep -P "^[^#].*smtp_|user_email|gitlab_email" /etc/gitlab/gitlab.rb
gitlab_rails['gitlab_email_enabled'] = true
gitlab_rails['gitlab_email_from'] = '邮箱地址@126.com' #发件人邮箱地址
gitlab_rails['gitlab_email_display_name'] = 'gitlabAdmin' #邮件属主
gitlab_rails['gitlab_email_reply_to'] = '邮箱地址@126.com' #邮箱地址
gitlab_rails['gitlab_email_subject_suffix'] = '[gitlab]' #发件组名称
gitlab_rails['smtp_enable'] = true
gitlab_rails['smtp_address'] = "smtp.126.com" #邮件服务器
gitlab_rails['smtp_port'] = 25 #服务器端口
gitlab_rails['smtp_user_name'] = "邮箱地址@126.com" #发件人邮箱
gitlab_rails['smtp_password'] = "授权密码" #邮箱授权密码
gitlab_rails['smtp_domain'] = "126.com" #邮箱后缀
gitlab_rails['smtp_authentication'] = "login" #登录认证
gitlab_rails['smtp_enable_starttls_auto'] = true
gitlab_rails['smtp_tls'] = false
user['git_user_email'] = "邮箱地址@126.com" #发件人地址
pages_external_url "http://10.18.43.5" #监听地址
[root@gitlab ~]# grep "^external_url" /etc/gitlab/gitlab.rb
external_url 'http://10.18.43.5'
3、 初始化,自动安装
[root@gitlab ~]# gitlab-ctl reconfigure
#这里需要注意,每次只要那你修改配置文件,都需要执行这条命令,进行加载配置;
第一次初始化安装比较慢
4、 查看端口
[root@gitlab ~]# lsof -i:80
COMMAND  PID       USER   FD   TYPE DEVICE SIZE/OFF NODE NAME
nginx   5333       root    9u  IPv4  58464      0t0  TCP *:http (LISTEN)
nginx   5334 gitlab-www    9u  IPv4  58464      0t0  TCP *:http (LISTEN)
nginx   5335 gitlab-www    9u  IPv4  58464      0t0  TCP *:http (LISTEN)
5、 测试邮件服务是否正常
[root@gitlab ~]# gitlab-rails console
Loading production environment (Rails 4.2.10)
irb(main):001:0>  Notify.test_email('邮件地址@qq.com', 'Message Subject', 'Message Body').deliver_now
查看是否有收到邮件,如果有收到邮件,表示邮件服务一切正常,我这里是没有报错情况;
6、 登录http://10.18.43.5
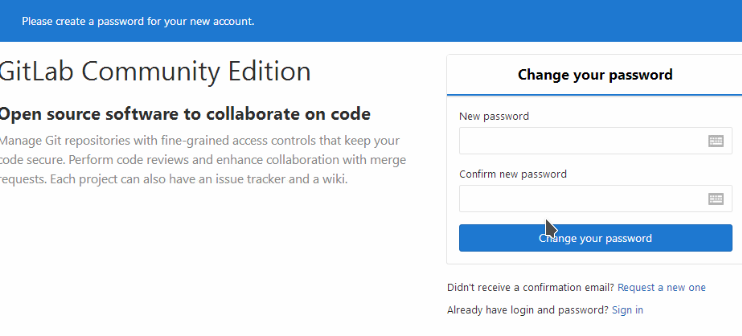
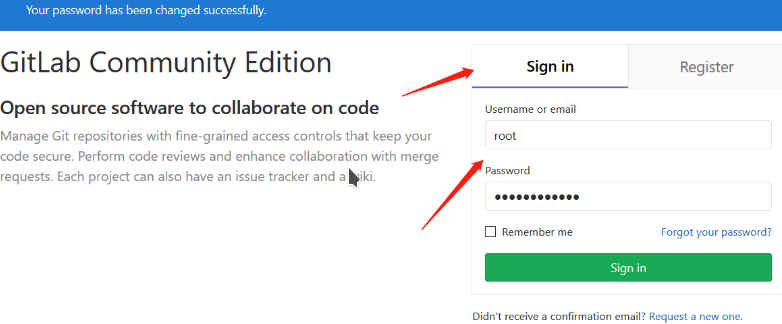
第一次登录会提示修改密码,密码是root用户的密码;              #root用户并不是系统用户root
修改成功后就可以登录了,登录用是root,密码是之前修改的。
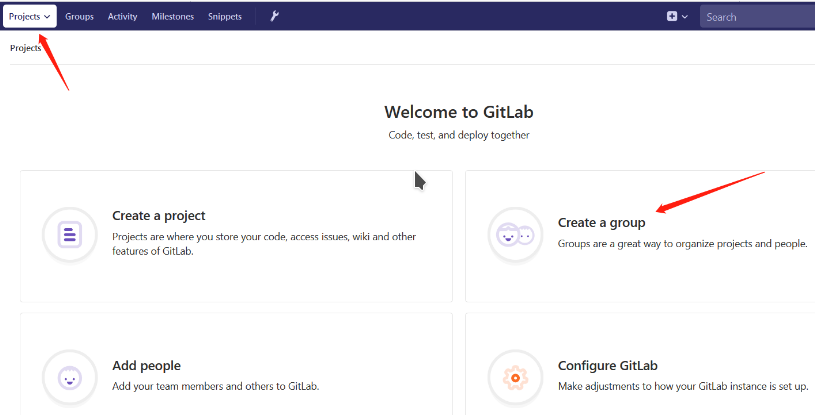
(三)、gitlab web页面设置
1、登录:
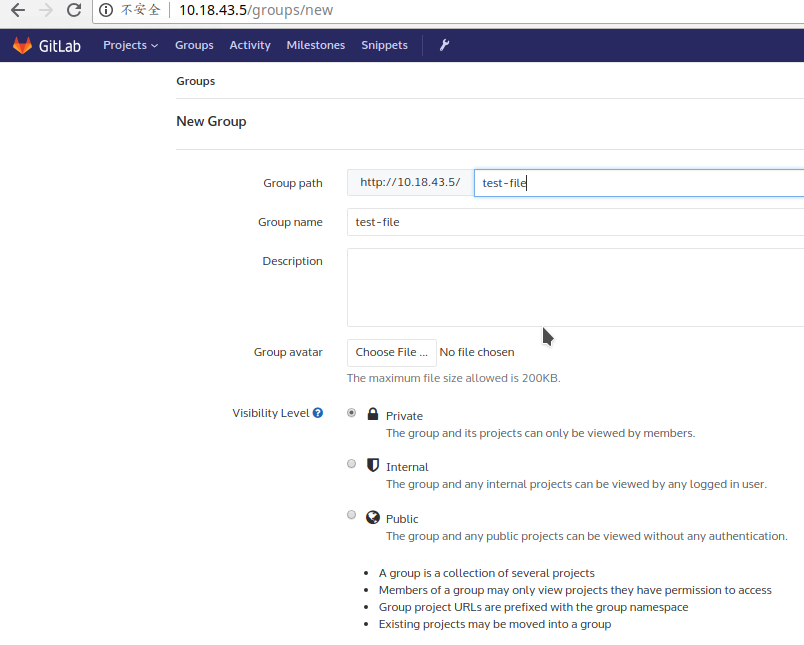
2、创建组:
3、组示范:
4、取消自动注册
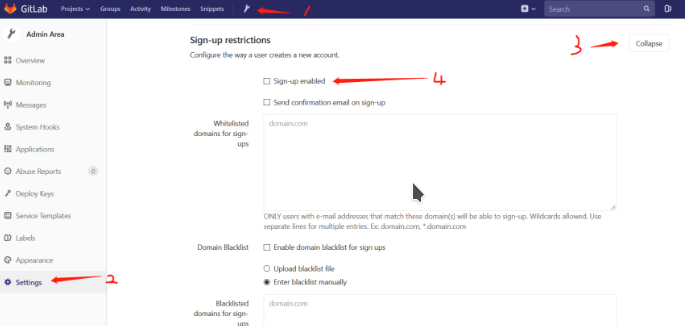
admin are -> settings -> Sign-up Restrictions 去掉钩钩,然后拉到最下面保存,重新登录
因为gitlab一般都是只在公司内部提供服务,上传的代码是整个公司的命脉,也是公司的核心所在,所以一般只能在公司内部使用,离开公司之后,要使用vpn链接到公司内部网络,在链接gitlab服务器上传代码;也不需要对外提供注册服务,我们就将注册接口关掉;

您的资助是我最大的动力!
金额随意,欢迎来赏!


 浙公网安备 33010602011771号