


20、SpringBoot 整合 RabbitMQ
使用docker-compose 安装RabbitMQ
version: '3.1'
services:
  rabbitmq:
    restart: always
    image: rabbitmq:management
    container_name: rabbitmq
    ports:
      - 5672:5672
      - 15672:15672
    environment:
      TZ: Asia/Shanghai
      RABBITMQ_DEFAULT_USER: rabbit
      RABBITMQ_DEFAULT_PASS: 123456
    volumes:
      - ./data:/var/lib/rabbitmq
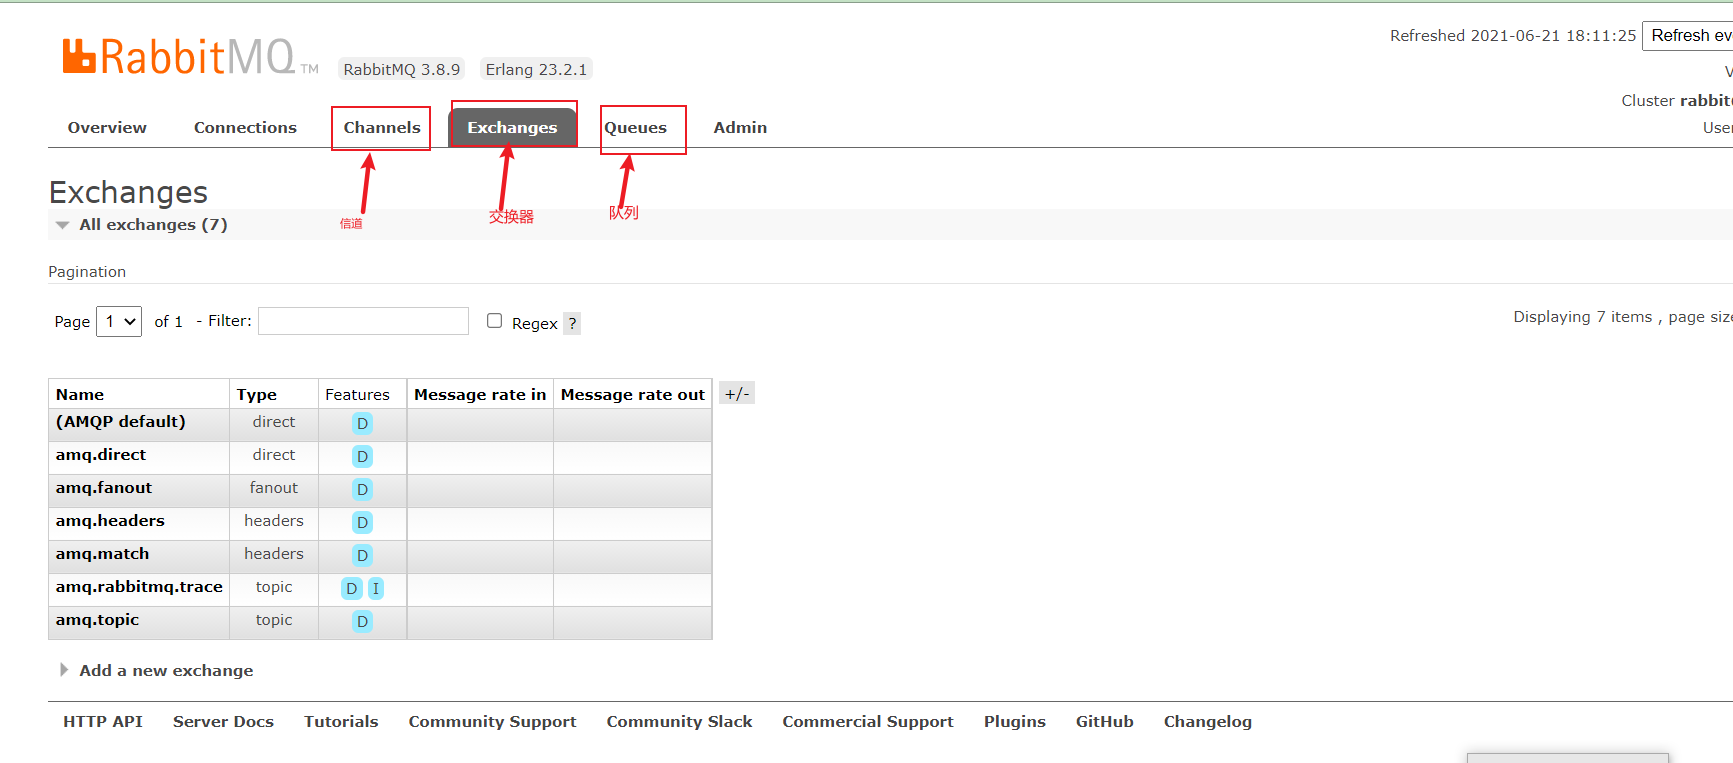
1、安装RabbitMQ,登入之后
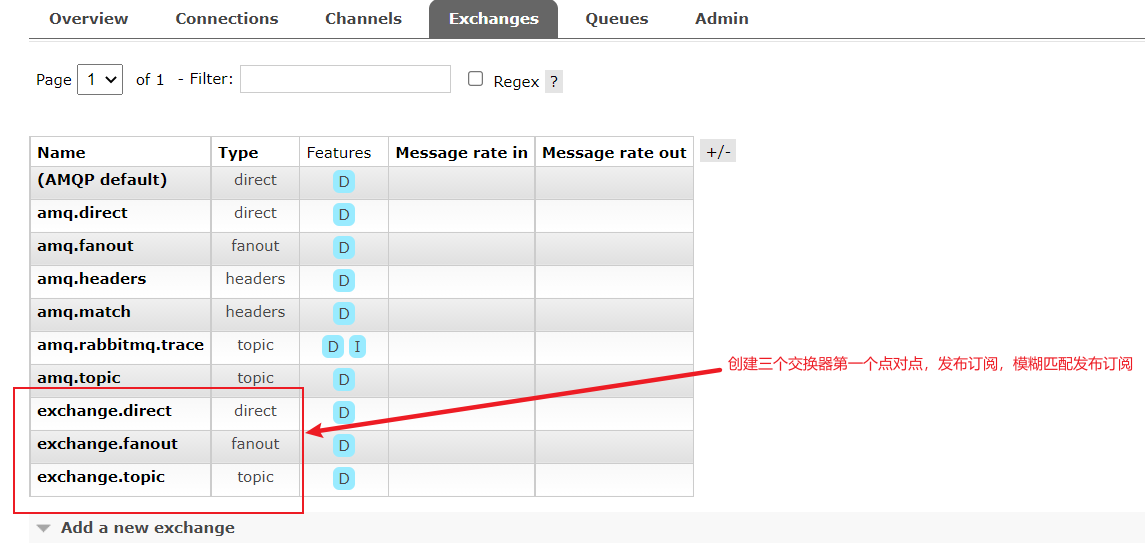
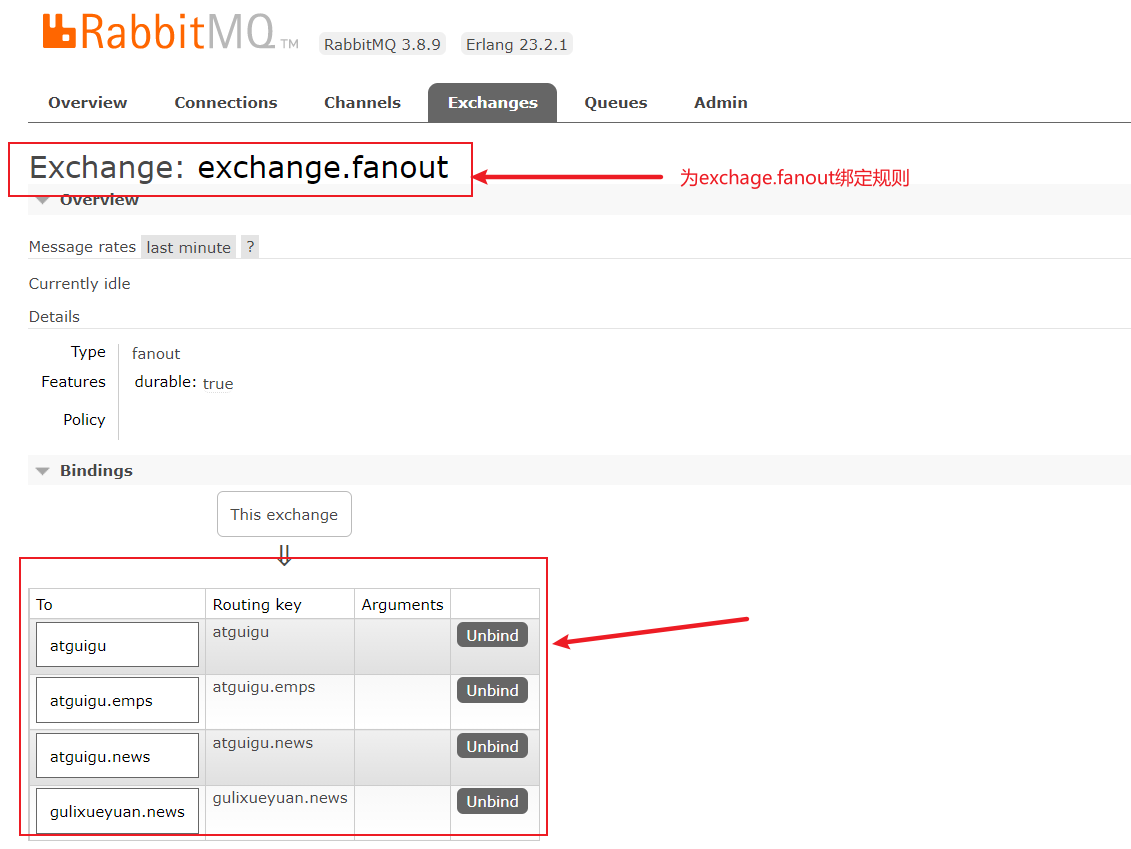
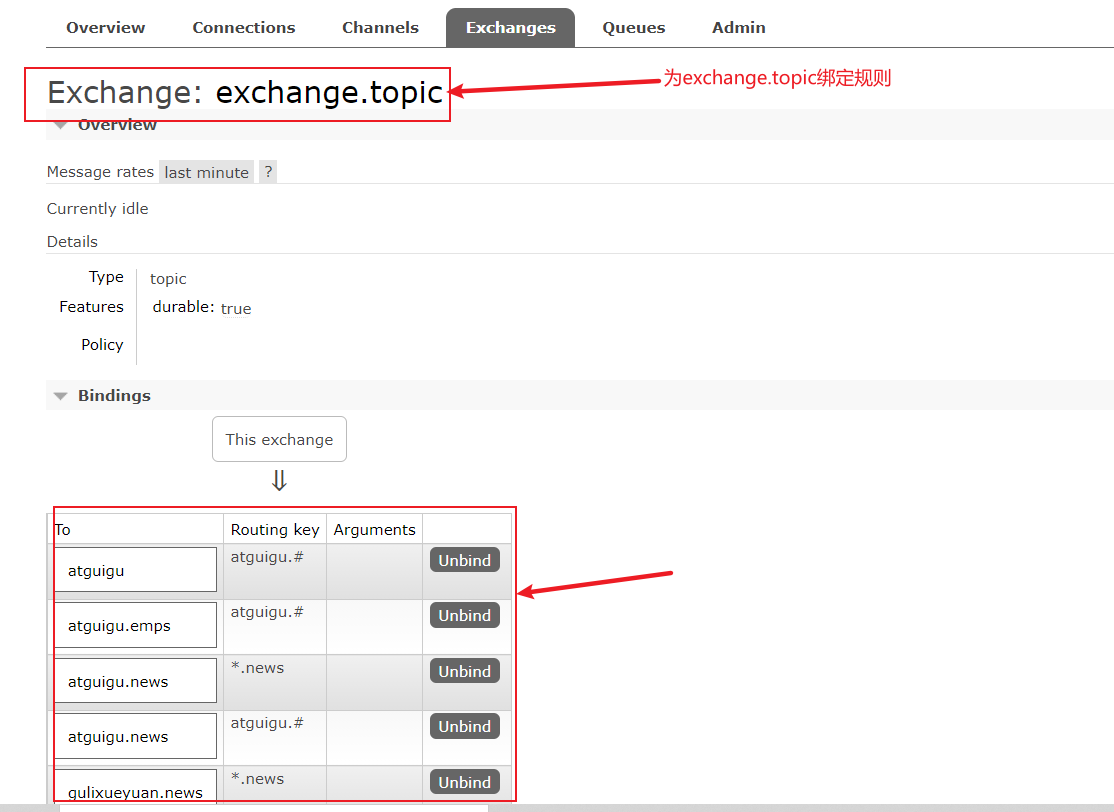
2、创建交换器
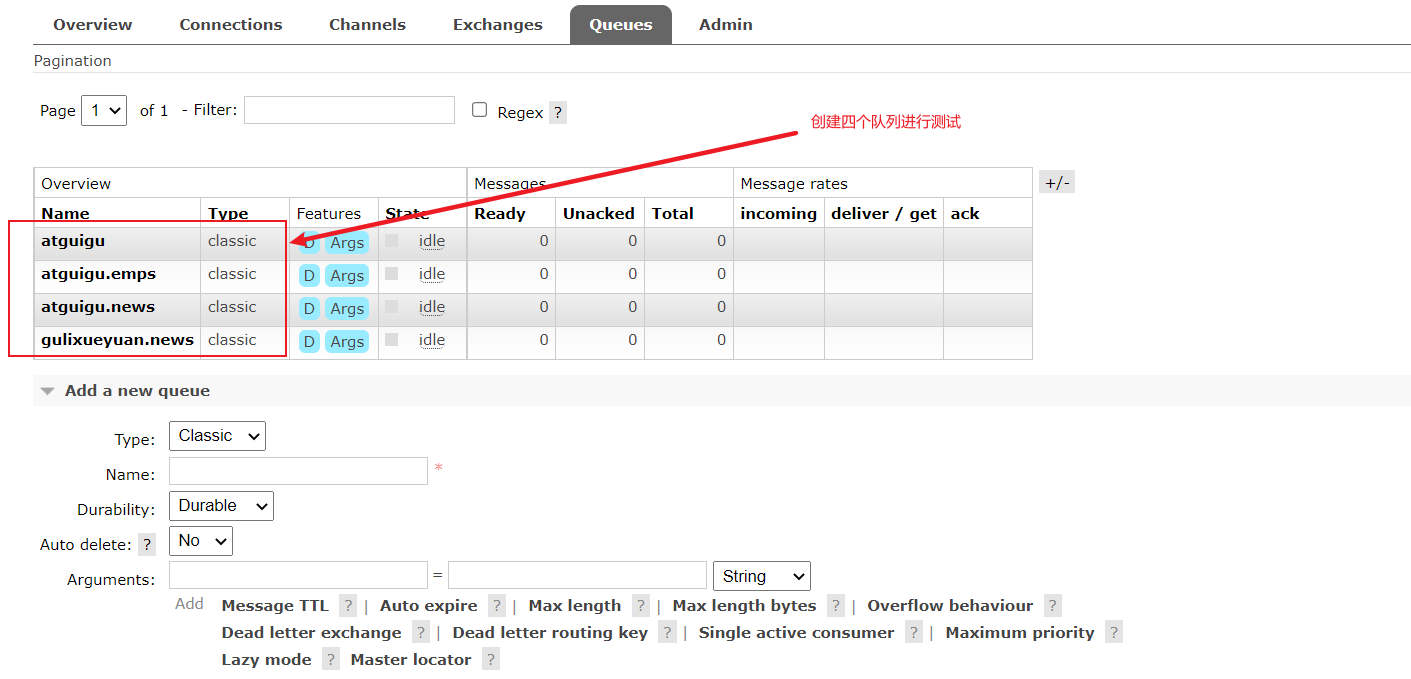
3、创建队列四个
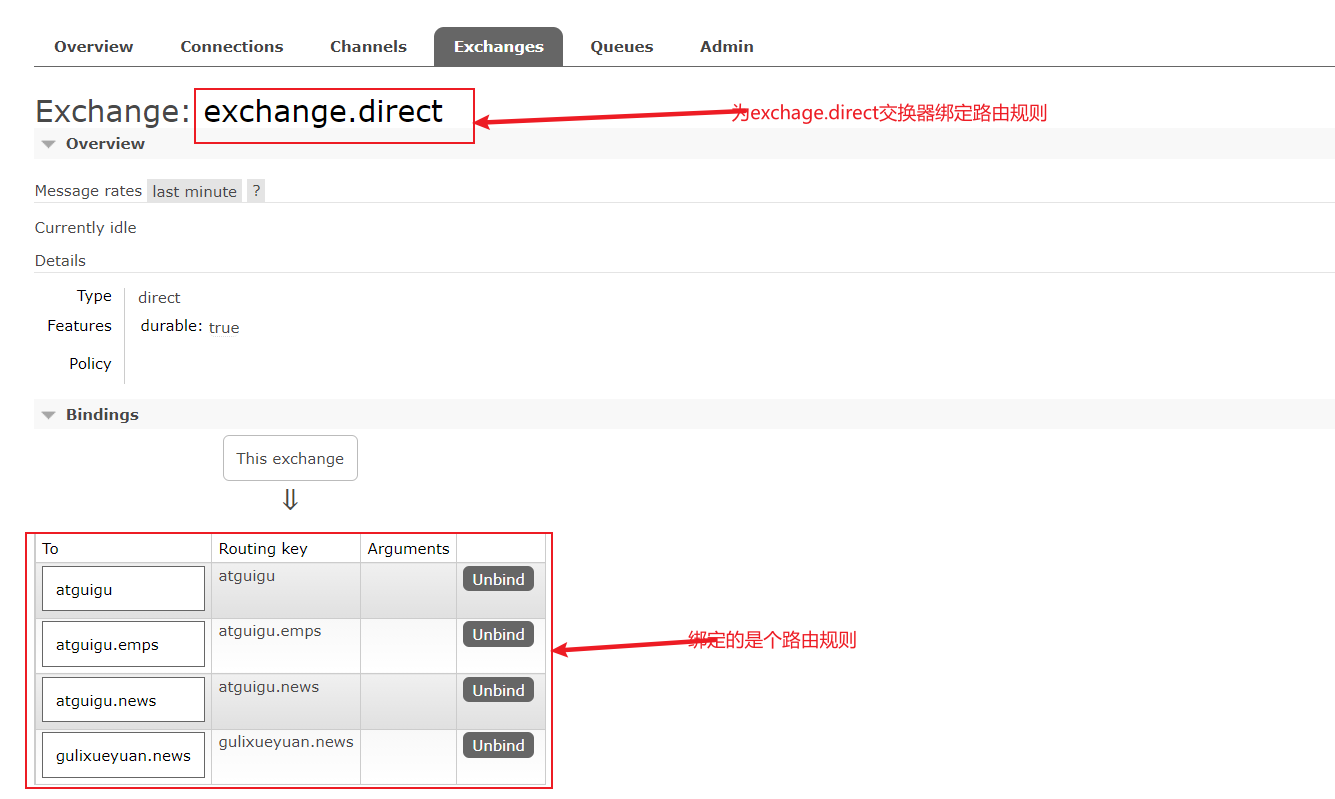
4、创建交换器和队列的绑定关系
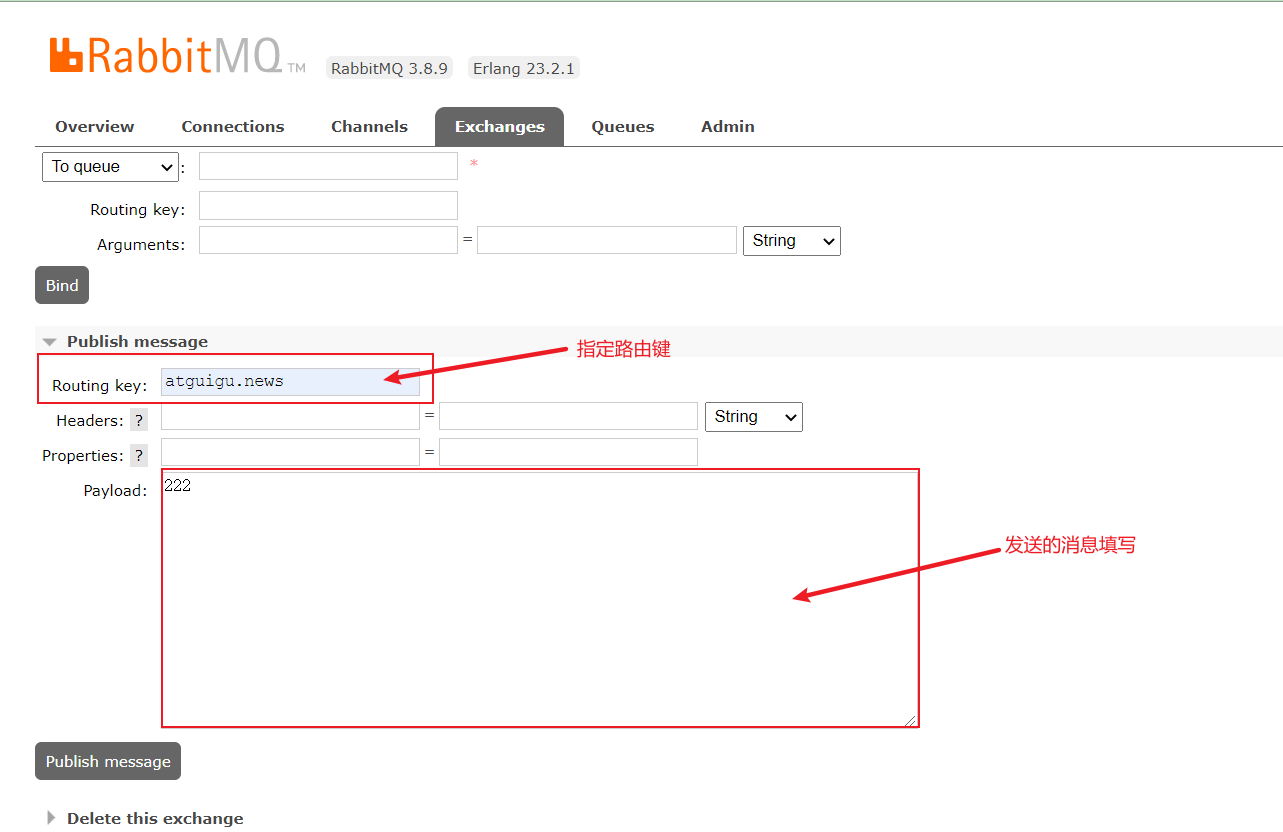
5、测试发送消息
6、用Java代码测试RabbitMQ,首先添加rabbit的依赖
<dependency>
            <groupId>org.springframework.boot</groupId>
            <artifactId>spring-boot-starter-amqp</artifactId>
        </dependency>
7、配置application.yml配置文件
spring:
  rabbitmq:
    host: 8.129.215.115
    username: rabbit
    password: 123456
    port: 5672
8、修改发送时数据的格式化要求wei:josn 格式
@Configuration
public class MyAMQPConfig {

    @Bean
    public MessageConverter messageConverter () {
        return new Jackson2JsonMessageConverter();
    }
}
9、单元测试RabbitMQ是否正常工作
 @Autowired
    RabbitTemplate rabbitTemplate;
    @Autowired
    AmqpAdmin amqpAdmin;

    @Test
    void contextLoads() {
        Map<String,Object> map = new HashMap<>();
        map.put("name","美男子");
        map.put("age",25);
        map.put("msg", Arrays.asList("666",123,true));
        rabbitTemplate.convertAndSend("exchange.direct","atguigu.news",map);
    }

    @Test
    void test01() {
        Object o = rabbitTemplate.receiveAndConvert("atguigu.news");
        System.out.println(o.getClass());
        System.out.println(o);
    }

    @Test
    void test02() {
        Book book = new Book("西游记","吴承恩");
        rabbitTemplate.convertAndSend("exchange.fanout","",book);
    }

    @Test
    void test03() {
        Book book = new Book("三国演义","罗贯中");
        rabbitTemplate.convertAndSend("exchange.topic","hello.news",book);
    }
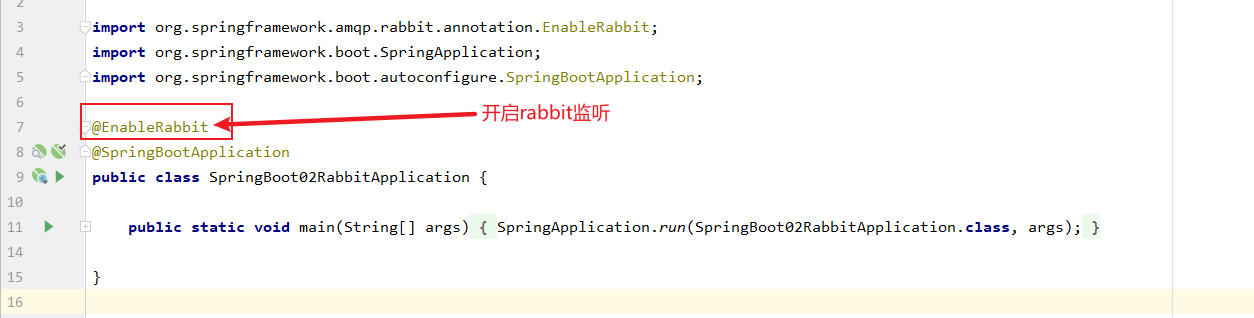
10、开启Rabbit的监听功能
11、监听指定队列的数据信息
@Service
public class BookService {

    @RabbitListener(queues = {"gulixueyuan.news"})
    public void receive (Book book) {
        System.out.println(book);
    }

    @RabbitListener(queues = {"atguigu.news"})
    public void receive02 (Message message) {
        System.out.println(message.getBody());
        System.out.println(message.getMessageProperties());
    }
}
12、AmqpAdmin 组件的使用
    @Autowired
    AmqpAdmin amqpAdmin;

    @Test
    void amqpAdminTest() {
        //创建交换器
        amqpAdmin.declareExchange(new DirectExchange("amqpAdmin.exchane",true,false));
        //创建队列
        amqpAdmin.declareQueue(new Queue("amqpAdmin.queue"));
        //创建绑定规则
        amqpAdmin.declareBinding(new Binding("amqpAdmin.queue",Binding.DestinationType.QUEUE,"amqpAdmin.exchane","amqpAdmin.hehe",null));
    }


 浙公网安备 33010602011771号