fabric多机部署
多机部署
对多机部署文章的步骤遇到问题记录一下
环境及配置
- go version go1.17.7 linux/amd64
- docker version 20.10.7
- fabric 2.2
- ubuntu 20.04
- docker-compose version 1.25.0
go env 查看我的go环境变量,可以根据需求改一下
建立多机部署的文件夹
go env -w GOPROXY=https://goproxy.io,direct
这条指令是设置代理服务器。
建议改成:
go env -w GOPROXY=https://goproxy.cn,direct
proxy是代理服务器的意思。国内的网络有防火墙的存在,这导致有些Go语言的第三方包我们无法直接通过go get命令获取。GOPROXY 是Go语言官方提供的一种通过中间代理商来为用户提供包下载服务的方式。要使用 GOPROXY 只需要设置环境变量 GOPROXY 即可。
go mod vendor 之后最好加个 go mod tidy
go mod包依赖管理工具使用
建议看下,还是挺重要的(go 版本低的话是没有go mod 的)
生成证书及通道配置
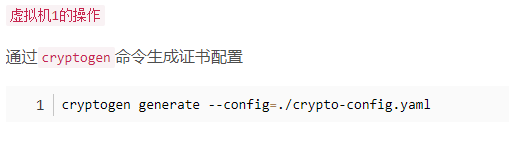
cryptogen 这个指令要加入环境变量才可以直接用
详情看:https://hyperledger-fabric.readthedocs.io/zh_CN/release-2.2/install.html

这个加入环境配置文件中才可以一直用,否则只能在当前终端用
如何改环境变量看:https://blog.csdn.net/White_Idiot/article/details/78253004
IP与域名映射配置(虚拟机1和虚拟机2都需要设定)
注意虚拟机1和虚拟机2的区别。
查看ip地址:https://bynss.com/linux/342156.html#:~:text=登录到Ubuntu桌面系统,命令行查看IP地址。
编写网络启动脚本并启动网络
虚拟机1和虚拟机2的docker-compose-up.yaml 文件内容是有区别的不要直接复制1的文件(偷懒踩过坑 🙇)

这个可以等久一点
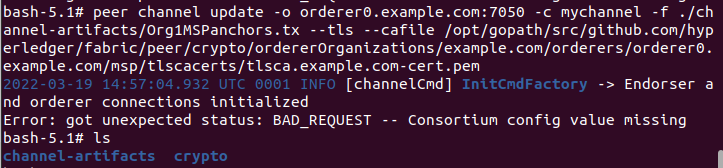
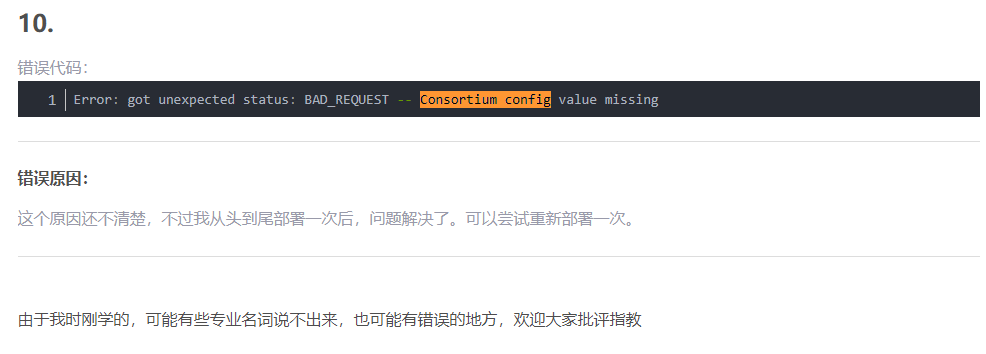
遇到创建通道错误的问题,重新部署一下就可以了
网上看到的。。。。:https://blog.csdn.net/Xiao__FengFeng/article/details/114587756
安装与调用链码(智能合约)
打包链码前要把GO111MODULE设置为auto
注意是在容器中设置
go env -w GO111MODULE=auto


否则会遇到这个错误
facar单机与多机部署
可以和之前多机部署的文件一起看,有些问题重复的
多机部署链接:https://blog.csdn.net/bean_business/article/details/110100669
单机部署
链接:https://github.com/hyperledger/fabric-samples/tree/master
需要在linux上下载,在win10下载后复制过去似乎编码啥的有问题,运行会报错
单机部署的js版(运行过没问题)
https://hyperledger-fabric.readthedocs.io/zh_CN/release-2.2/write_first_app.html
多机部署
仍然是用multiple-deployment文件夹中内容
先把两台机的mychannel.block,之前打包的链码压缩包删掉
建议开始前再检查一遍docker-compose-up.yaml文件中ip地址有没有错误 (两台都检查一下)
host也要检查 😡(浪费好长时间)
没有改host初始化链码错误
返回错误代码500
proposal response was not successful, error code 500
可能因为我更新了wmware导致和之前ip不一样了
以下是虚拟机1的操作,复制fabric样例中的名为 fabcar 的链码(智能合约)到chaincode/go下
cp -r ../chaincode/fabcar/go/* chaincode/go
go env -w GO111MODULE=on
go mod tidy
在虚拟机1打包链码前需要在cli1内执行
go env -w GO111MODULE=auto
安装链码的操作直接复制就可以(不改名字之类的话)
(如果试着改下名字可以熟练下那些参数)
操作可以参考
https://blog.csdn.net/bean_business/article/details/108015490
https://hyperledger-fabric.readthedocs.io/zh_CN/release-2.2/commands/peerlifecycle.html
主要看前两个
初始化链码
args里的就是参数。(表明调用哪个函数,传进什么参数)
peer chaincode invoke -o [orderer0.example.com:7050](http://orderer0.example.com:7050/) --isInit --tls true --cafile /opt/gopath/src/github.com/hyperledger/fabric/peer/crypto/ordererOrganizations/example.com/orderers/orderer0.example.com/msp/tlscacerts/tlsca.example.com-cert.pem -C mychannel -n mycc --peerAddresses [peer0.org1.example.com:7051](http://peer0.org1.example.com:7051/) --tlsRootCertFiles /opt/gopath/src/github.com/hyperledger/fabric/peer/crypto/peerOrganizations/org1.example.com/peers/peer0.org1.example.com/tls/ca.crt --peerAddresses [peer0.org2.example.com:7051](http://peer0.org2.example.com:7051/) --tlsRootCertFiles /opt/gopath/src/github.com/hyperledger/fabric/peer/crypto/peerOrganizations/org2.example.com/peers/peer0.org2.example.com/tls/ca.crt -c '{"Args":["InitLedger"]}' --waitForEvent

查询所有车辆 (query查询)
peer chaincode query -C mychannel -n mycc -c '{"Args":["QueryAllCars"]}'

创建新车
与初始化链码的指令差别就在args
peer chaincode invoke -o [orderer.example.com:7050](http://orderer.example.com:7050/) --tls true --cafile /opt/gopath/src/github.com/hyperledger/fabric/peer/crypto/ordererOrganizations/example.com/orderers/orderer0.example.com/msp/tlscacerts/tlsca.example.com-cert.pem -C mychannel -n mycc --peerAddresses [peer0.org1.example.com:7051](http://peer0.org1.example.com:7051/) --tlsRootCertFiles /opt/gopath/src/github.com/hyperledger/fabric/peer/crypto/peerOrganizations/org1.example.com/peers/peer0.org1.example.com/tls/ca.crt --peerAddresses [peer0.org2.example.com:7051](http://peer0.org2.example.com:9051/) --tlsRootCertFiles /opt/gopath/src/github.com/hyperledger/fabric/peer/crypto/peerOrganizations/org2.example.com/peers/peer0.org2.example.com/tls/ca.crt --isInit -c '{"Args":["CreateCar","CAR10","GEELY","Borui","Blue","Yujialing"]}'

查询具体的车
peer chaincode query -C mychannel -n mycc -c '{"Args":["QueryCar","CAR10"]}’
更改车辆所有者(调用ChangeCarOwner函数)
peer chaincode invoke -o [orderer0.example.com:7050](http://orderer0.example.com:7050/) --tls true --cafile /opt/gopath/src/github.com/hyperledger/fabric/peer/crypto/ordererOrganizations/example.com/orderers/orderer0.example.com/msp/tlscacerts/tlsca.example.com-cert.pem -C mychannel -n mycc --peerAddresses [peer0.org1.example.com:7051](http://peer0.org1.example.com:7051/) --tlsRootCertFiles /opt/gopath/src/github.com/hyperledger/fabric/peer/crypto/peerOrganizations/org1.example.com/peers/peer0.org1.example.com/tls/ca.crt --peerAddresses [peer0.org2.example.com:7051](http://peer0.org2.example.com:7051/) --tlsRootCertFiles /opt/gopath/src/github.com/hyperledger/fabric/peer/crypto/peerOrganizations/org2.example.com/peers/peer0.org2.example.com/tls/ca.crt -c '{"Args":["ChangeCarOwner","CAR10","广东靓仔"]}’ --waitForEvent
更改并同步成功


 浙公网安备 33010602011771号