

9、vs2022_Web API服务端添加jwtToken验证
一、token验证机制
1.用户使用用户名密码来请求服务器
2.服务器进行验证用户的信息
3.服务器通过验证发送给用户一个token
4.客户端存储token,并在每次请求时附送这个token值,附带在http请求的header里
5.服务端验证token值,并返回数据
二、CommonLib库
1、添加工具包
Install-Package Microsoft.AspNetCore.Authentication.JwtBearer
Install-Package Microsoft.IdentityModel.Tokens
Install-Package System.IdentityModel.Tokens.Jwt
Install-Package Newtonsoft.Json
2、CommonLib库下,添加ResultModel.cs和JWTService.cs
namespace CommonLib
{
    public class ResultModel
    {
        public bool success { get; set; }
        public string? message { get; set; }
        public int count { get; set; }
        public object data { get; set; }
    }
}
using Microsoft.IdentityModel.Tokens;
using Newtonsoft.Json;
using System.IdentityModel.Tokens.Jwt;
using System.Security.Claims;
using System.Text;

namespace CommonLib
{
    public static class JWTService
    {
        /// <summary>
        /// 创建token字符串
        /// </summary>
        /// <param name="model"></param>
        /// <returns></returns>
        public static string CreateToken(TokenModel model)
        {
            //将用户的部分信息存到了Claim中,using System.Security.Claims;
            var claims = new List<Claim> {
                new Claim("UserId",model.UserId),
                new Claim("UserName",model.UserName),
                new Claim("NickName",model.NickName),
            };
            // 用户的多个角色(如:Admin,System)全部赋予
            if (!string.IsNullOrWhiteSpace(model.Role))
            {
                claims.AddRange(model.Role.Split(',').Select(s => new Claim(ClaimTypes.Role, s)));
                claims.Add(new Claim("Role", model.Role));
            }
            //秘钥,using Microsoft.IdentityModel.Tokens;
            var key = new SymmetricSecurityKey(Encoding.UTF8.GetBytes(model.SecurityKey));
            var creds = new SigningCredentials(key, SecurityAlgorithms.HmacSha256);//密钥和加密方式
            //using System.IdentityModel.Tokens.Jwt;
            var jwt = new JwtSecurityToken(
                issuer: model.Issuer,  //颁发者
                audience: model.Audience,  //受众
                expires: DateTime.Now.AddMinutes(60),  //有效期
                signingCredentials: creds,
                claims: claims
            );
            var jwtHandler = new JwtSecurityTokenHandler();
            var token = jwtHandler.WriteToken(jwt);
            return token;
        }

        /// <summary>
        /// 解析token字符串,不检查有效性
        /// </summary>
        /// <param name="token"></param>
        /// <returns></returns>
        public static TokenModel SerializeToken(string token)
        {
            //不校验,直接解析token
            var jwtToken = new JwtSecurityTokenHandler().ReadJwtToken(token);
            //using Newtonsoft.Json;
            var tokenModel = JsonConvert.DeserializeObject<TokenModel>(jwtToken.Payload.SerializeToJson());
            return tokenModel;
        }
    }
    /// <summary>
    /// 令牌
    /// </summary>
    public class TokenModel
    {
        public string UserId { get; set; }
        public string UserName { get; set; }
        public string NickName { get; set; }
        public string Role { get; set; }
        public string Issuer { get; set; }
        public string Audience { get; set; }
        public string SecurityKey { get; set; }
    }
}
三、WebApi_DEMO项目下,
1、在appsettings.json中配置jwt参数的值
{
  "Jwt": {
    "Issuer": "jwtIssuer", //颁发者
    "Audience": "jwtAudience", //可以给哪些客户端使用
    "SecurityKey": "abcdefghijklmnopqrstuvwxyz" //加密的Key,大于16位的字符串
  },
}
2、在Program.cs中配置jwt鉴权
//配置Jwt鉴权
builder.Services.AddAuthentication(JwtBearerDefaults.AuthenticationScheme)
    //using Microsoft.AspNetCore.Authentication.JwtBearer;
    .AddJwtBearer(options =>{
        var tokenModel = builder.Configuration.GetSection("Jwt").Get<TokenModel>();
        var secretByte = Encoding.UTF8.GetBytes(tokenModel.SecurityKey);
        //using Microsoft.IdentityModel.Tokens;
        options.TokenValidationParameters = new TokenValidationParameters(){
            ValidateIssuer = true, //是否验证Issuer
            ValidateAudience = true, //是否验证Audience
            ValidateLifetime = true, //是否验证失效时间
            ValidIssuer = tokenModel.Issuer,
            ValidAudience = tokenModel.Audience, //这两项和前面签发jwt的设置一致
            IssuerSigningKey = new SymmetricSecurityKey(secretByte) // 拿到SecurityKey
        };
        options.Events = new JwtBearerEvents{
            OnChallenge = context =>{
                return Task.FromResult(0);
            },
            //403
            OnForbidden = context =>{
                return Task.FromResult(0);
            }
        };
});
3、在Program.cs中使用jwt鉴权
//使用鉴权授权
app.UseAuthentication();
app.UseAuthorization();
四、使用EF构建登录信息,获取token
1、新建数据库表sys_User
create table sys_User(
    id nvarchar(50) PRIMARY KEY NOT NULL,
    name nvarchar(50) NULL,
    nickname nvarchar(50) NULL,
    password nvarchar(50) NOT NULL,
    role_id nvarchar(50) NOT NULL
    )
go
--添加测试数据
insert into sys_User  values ('zhou','周金辉','生之韵','123','admin')
insert into sys_User  values ('an','安安','安若子渔','456','system')
go
2、WebApi_DEMO项目下,新建Model文件夹,添加sys_User.cs
    public class sys_User
    {
        [Key]
        public string id { get; set; }
        public string name { get; set; }
        public string nickname { get; set; }
        public string password { get; set; }
        public string role_id { get; set; }

    }
3、WebApi_DEMO项目下,新建Repository文件夹,添加DemoDbContext.cs
namespace WebApi_DEMO.Repository
{
    public class DemoDbContext : DbContext
    {
        protected override void OnConfiguring(DbContextOptionsBuilder optionsBuilder)
        {
            optionsBuilder.UseSqlServer(@"server=127.0.0.1;database=demo;uid=sa;pwd=1234");
        }
        public DbSet<sys_User> users { get; set; }
        protected override void OnModelCreating(ModelBuilder modelBuilder)
        {
            modelBuilder.Entity<sys_User>().ToTable("sys_User");
        }
    }
}
4、WebApi_DEMO项目下,Program.cs文件注入服务
builder.Services.AddDbContext<DemoDbContext>();
builder.Services.AddDatabaseDeveloperPageExceptionFilter(); //数据库异常筛选器
5、WebApi_DEMO项目下,新建API控制器,添加sys_LoginController


using CommonLib;
using Microsoft.AspNetCore.Authorization;
using Microsoft.AspNetCore.Mvc;
using Microsoft.EntityFrameworkCore;
using WebApi_DEMO.Repository;

namespace WebApi_DEMO.Controllers
{
    /// <summary>
    /// 用户登录
    /// </summary>
    [Route("api/[controller]/[action]")]
    [ApiController]
    public class sys_LoginController : ControllerBase
    {
        private readonly DemoDbContext _context;
        private IConfiguration _configuration;
        public sys_LoginController(DemoDbContext context, IConfiguration configuration)
        {
            _context = context;
            _configuration = configuration;
        }
        /// <summary>
        /// 登陆获取token
        /// </summary>
        /// <param name="UId">用户ID</param>
        /// <param name="Pwd">密码</param>
        /// <returns></returns>
        [HttpGet]
        public async Task<ResultModel> LoginIn(string UId, string Pwd)
        {
            var user = await _context.users.Where(u => u.id == UId && u.password == Pwd).FirstOrDefaultAsync();
            if (user != null)
            {
                //读取配置信息中的jwt公共数据
                var tokenModel = _configuration.GetSection("Jwt").Get<TokenModel>();
                //读取用户传入的信息
                tokenModel.UserId = user.id;
                tokenModel.UserName = user.name;
                tokenModel.NickName = user.nickname;
                tokenModel.Role = user.role_id;
                var token = JWTService.CreateToken(tokenModel);
                return new ResultModel
                {
                    success = true,
                    message = "登陆成功",
                    count = token.Count(),
                    data = token
                };
            }
            return new ResultModel
            {
                success = false,
                message = "登陆失败",
                count = 0,
                data = ""
            };
        }
        /// <summary>
        /// 通过token解析用户信息
        /// </summary>
        /// <param name="Authorization"></param>
        /// <returns></returns>
        [HttpGet]
        [Authorize]
        public IActionResult DeToken([FromHeader] string Authorization)
        {
            var str = Authorization.Replace("Bearer ", "");
            var token = JWTService.SerializeToken(str);
            return Ok(token);
        }
    }
}
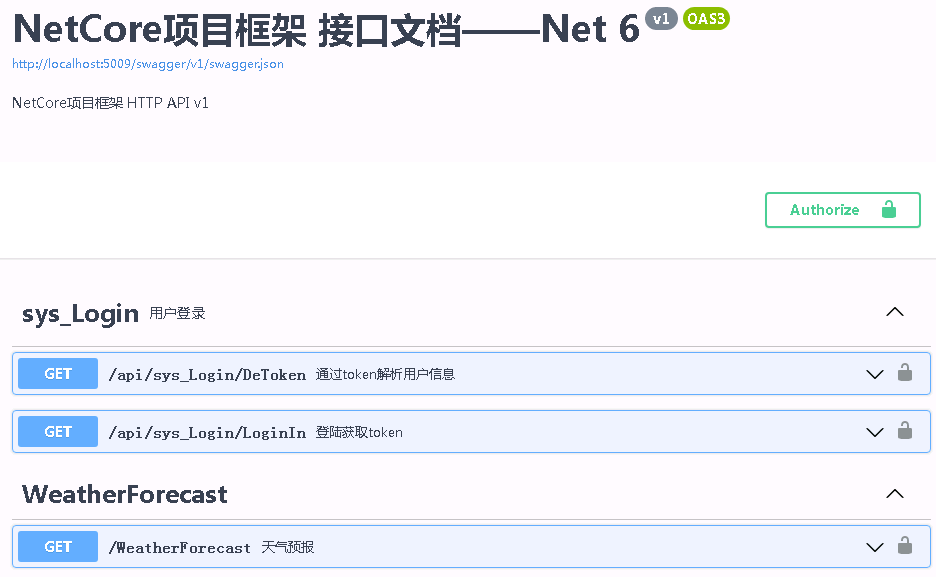
6、F5运行,运行结果如下
ps:获取的token字符串,可以登录https://jwt.io/ 网站解析token信息
六、前端获取
<template>
  <button type="button" @click="getToken">获取token</button>
</template>

<script setup>
// 安装axios,npm install axios
import axios from "axios";
// 安装jwt-decode,npm install jwt-decode --save
import jwttoken from "jwt-decode";

const url = "http://127.0.0.1:8888/api/sys_Login/LoginIn";
const getToken = async () => {
  axios
    .get(url, {
      params: {
        UId: "zhou",
        Pwd: "123",
      },
    })
    .then((res) => {
      console.log(res.data);
      sessionStorage.token = res.data.data;
      sessionStorage.userInfo = jwttoken(res.data.data).NickName;
    });
};
</script>
ps:jwt-decode操作
// 安装
npm install jwt-decode --save
// 导入
import jwttoken from "jwt-decode";
// 解析
const decode = jwttoken(res.data).UserId;
// 保存UserId
localStorage.setItem("decode", decode);
// 获取解析的UserId
localStorage.getItem("decode");

 浙公网安备 33010602011771号