
词云教程
一、简介
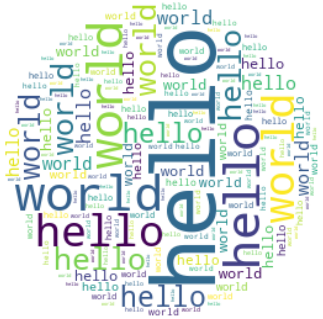
词云,又称文字云,是文本数据的视觉表示,由词汇组成类似云的彩色图形,用于展示大量文本数据。 通常用于描述网站上的关键字元数据(标签),或可视化自由格式文本。 每个词的重要性以字体大小或颜色显示。
在Python中可通过wordcloud实现:
pip install wordcloud
import numpy as np
import matplotlib.pyplot as plt
from wordcloud import WordCloud


text = "square"

x, y = np.ogrid[:300, :300]

mask = (x - 150) ** 2 + (y - 150) ** 2 > 130 ** 2
mask = 255 * mask.astype(int)


wc = WordCloud(background_color="white", repeat=255, mask=mask)
wc.generate(text)

plt.axis("off")
plt.imshow(wc, interpolation="bilinear")
plt.show()
首先生成文本:
text = "square"
接着通过numpy生成对应的矩阵np.ogrid,返回一个开放的多维“meshgrid”,每个返回的数组只有一个维度大于 1。输出数组的维度和数量等于索引维度的数量。
>>> from numpy import ogrid
>>> ogrid[0:5,0:5]
[array([[0],
        [1],
        [2],
        [3],
        [4]]), array([[0, 1, 2, 3, 4]])]
然后生成对应的mask,这个mask返回的是bool值:
mask = (x - 150) ** 2 + (y - 150) ** 2 > 130 ** 2
[[ True True True ... True True True]
[ True True True ... True True True]
[ True True True ... True True True]
...[ True True True ... True True True]
[ True True True ... True True True]
[ True True True ... True True True]]
通过astype将其进行数据转换,生成如下结果:
[[ 255 255 255 ... 255 255 255]
[ 255 255 255 ... 255 255 255]
[ 255 255 255 ... 255 255 255]
...[ 255 255 255 ... 255 255 255]
[ 255 255 255 ... 255 255 255]
[ 255 255 255 ... 255 255 255]]
后面就是通过wordcloud提供的方法返回用于生成和绘制的词云对象,通过generate方法生成词云。最后通过matplotlib生成图形。
二、API简介
wordcloud提供了一些API用于词云的操作:
(一)wordcloud.WordCloud
用于生成和绘制的词云对象。
classwordcloud.WordCloud(font_path=None, width=400, height=200, margin=2, ranks_only=None, prefer_horizontal=0.9, mask=None, scale=1, color_func=None, max_words=200, min_font_size=4, stopwords=None, random_state=None, background_color='black', max_font_size=None, font_step=1, mode='RGB', relative_scaling='auto', regexp=None, collocations=True, colormap=None, normalize_plurals=True, contour_width=0, contour_color='black', repeat=False, include_numbers=False, min_word_length=0, collocation_threshold=30)
1、参数
-
font_path string
将使用的字体的字体路径(OTF 或 TTF)。默认为 Linux 机器上的 DroidSansMono 路径。如果您在其他操作系统上或没有此字体,则需要调整此路径。
-
**width **int (default=400)
画布的宽度。
-
height int (default=200)
画布的高度。
-
prefer_horizontal float (default=0.90)
水平拟合与垂直拟合的次数之比。prefer_horizontal < 1,如果不合适,算法将尝试旋转单词。(目前没有内置的方法来只获取垂直单词。)
-
mask nd-array or None (default=None)
如果不是 None,则给出一个关于在哪里绘制单词的二进制掩码。如果 mask 不是 None,宽度和高度将被忽略,而使用 mask 的形状代替。所有白色(#FF 或#FFFFFF)条目将被视为“屏蔽”,而其他条目将可以自由使用。
-
contour_width: float (default=0)
如果 mask 不是 None 且 contour_width > 0,则绘制 mask 轮廓。
-
contour_color: color value (default=”black”)
蒙版轮廓颜色。
-
scale float (default=1)
在计算和绘图之间缩放。对于大型词云图像,使用比例而不是更大的画布尺寸要快得多,但可能会导致对词的拟合更粗糙。
-
min_font_size int (default=4)
要使用的最小字体大小。当此尺寸没有更多空间时将停止。
-
font_step int (default=1)
字体的步长。font_step > 1 可能会加快计算速度,但效果更差。
-
max_words number (default=200)
最大字数。
-
stopwords set of strings or None
单词将被淘汰的话。如果没有,将使用内置的停用词列表。如果使用 generate_from_frequencies,则忽略。
-
background_color color value (default=”black”)
词云图像的背景颜色。
-
max_font_size int or None (default=None)
最大字的最大字体大小。如果没有,则使用图像的高度。
-
**mode **string (default=”RGB”)
当mode为“RGBA”且background_color为None时,将生成透明背景。
-
relative_scaling float (default=’auto’)
字体大小的相对词频的重要性。当 relative_scaling=0 时,只考虑词序。当 relative_scaling=1 时,出现频率加倍的词将具有两倍的大小。如果你想考虑词频而不仅仅是它们的排名,0.5 左右的 relative_scaling 通常看起来不错。如果为“auto”,它将被设置为 0.5,除非 repeat 为真,在这种情况下它将被设置为 0。
-
color_func callable, default=None
可使用参数 word、font_size、position、orientation、font_path、random_state 调用,返回每个单词的 PIL 颜色。覆盖“颜色图”。请参阅颜色图以指定 matplotlib 颜色图。要创建具有单一颜色的词云,请使用 . 也可以使用 RGB 代码指定单一颜色。例如 将颜色设置为红色。
color_func=lambda *args, **kwargs: "white"``color_func=lambda *args, **kwargs: (255,0,0) -
regexp string or None (optional)
将输入文本拆分为 process_text 中的标记的正则表达式。如果未指定,
r"\w[\w']+"则使用。如果使用 generate_from_frequencies,则忽略。 -
collocations bool, default=True
是否包括两个词的搭配(二元组)。如果使用 generate_from_frequencies,则忽略。
-
**colormap **string or matplotlib colormap, default=”viridis”
Matplotlib colormap 为每个单词随机绘制颜色。如果指定了“color_func”,则忽略。
-
normalize_plurals bool, default=True
是否从单词中删除尾随的“s”。如果 True 和一个单词出现时有或没有尾随 's',则删除带有尾随 's' 的单词并将其计数添加到没有尾随 's' 的版本中 - 除非单词以 'ss' 结尾。如果使用 generate_from_frequencies,则忽略。
-
repeat bool, default=False
是否重复单词和短语直到达到 max_words 或 min_font_size。
-
include_numbers bool, default=False
是否将数字包含为短语。
-
min_word_length int, default=0
一个单词必须包含的最少字母数。
-
collocation_threshold: int, default=30
双字母组的 Dunning 似然搭配分数必须大于此参数才能算作双字母组。默认值 30 是任意的。
2、方法
fit_words(frequencies) |
从单词和频率创建 word_cloud。 |
|---|---|
generate(text) |
从文本生成词云。 |
generate_from_frequencies(frequencies[, …]) |
从单词和频率创建 word_cloud。 |
generate_from_text(text) |
从文本生成词云。 |
process_text(text) |
将长文本拆分为单词,消除停用词。 |
recolor([random_state, color_func, colormap]) |
重新着色现有布局。 |
to_array() |
转换为 numpy 数组。 |
to_file(filename) |
导出为图像文件。 |
to_svg([embed_font, optimize_embedded_font, …]) |
导出为 SVG。 |
(二)wordcloud.ImageColorGenerator
基于彩色图像的颜色生成器。
基于 RGB 图像生成颜色。单词将使用彩色图像中封闭矩形的平均颜色着色。
构造后,该对象充当可调用对象,可以将其作为 color_func 传递给词云构造函数或 recolor 方法。
class wordcloud.ImageColorGenerator(image, default_color=None)[source]
1、参数
-
imagend-array, shape (height, width, 3)
用于生成单词颜色的图像。Alpha 通道将被忽略。这应该与画布大小相同。对于词云。
-
default_colortuple or None, default=None
画布大于图像时使用的后备颜色,格式为 (r, g, b)。如果没有,则改为引发 ValueError。
2、方法
__call__(word, font_size, font_path, …) |
从单词和频率创建 word_cloud。 |
|---|---|
| ``init`(image, default_color=None) | 初始化自己。 |
3、实例
import numpy as np
import matplotlib.pyplot as plt
from wordcloud import WordCloud, ImageColorGenerator
from PIL import Image


text = "square"

x, y = np.ogrid[:300, :300]

mask = (x - 150) ** 2 + (y - 150) ** 2 > 130 ** 2
mask = 255 * mask.astype(int)

alice_coloring = np.array(Image.open("./files/alice_color.jpg"))

# create coloring from image
image_colors = ImageColorGenerator(alice_coloring)

wc = WordCloud(background_color="white", repeat=255, mask=mask)
wc.generate(text)

plt.axis("off")
plt.imshow(wc.recolor(color_func=image_colors), interpolation="bilinear")
plt.show()
(三)wordcloud.random_color_func
随机色调颜色生成。
默认着色方法。这只是选择一个随机色调,值为 80%,亮度为 50%。
wordcloud.random_color_func(word = None,font_size = None,position = None,orientation = None,font_path = None,random_state = None)
1、参数
-
word, font_size, position, orientation
忽略
-
random_state random.Random object or None, (default=None)
如果给定一个 random 对象, 将被用于生成随机数字.
(四)wordcloud.get_single_color_func
创建一个返回单一色调和饱和度的颜色函数。不同的值(HSV)。接受的值是 PIL/Pillow 可用的颜色字符串。
wordcloud.get_single_color_func(color)
>>> color_func1 = get_single_color_func('deepskyblue')
>>> color_func2 = get_single_color_func('#00b4d2')
三、wordcloud实战
(一)案例一
import wordcloud

w = wordcloud.WordCloud()

w.generate('AI IOT 5G Deeplearning deepfake')

w.to_file('output1.png')
(二)案例二
import wordcloud

# 构建词云对象w,设置词云图片宽、高、字体、背景颜色等参数
w = wordcloud.WordCloud(width=1000,height=700,background_color='white',font_path='msyh.ttc')

# 调用词云对象的generate方法,将文本传入
w.generate('深度学习 人工智能 神经网络 物联网 5G AI  机器学习 PYTHON C/C++ java html css google yolo ')

# 将生成的词云保存为output2-poem.png图片文件,保存到当前文件夹中
w.to_file('output2-poem.png')
(三)案例三
import wordcloud

# 从外部.txt文件中读取大段文本,存入变量txt中
f = open('files/2023春晚.txt',encoding='utf-8')
txt = f.read()

# 构建词云对象w,设置词云图片宽、高、字体、背景颜色等参数
w = wordcloud.WordCloud(width=1000,
                        height=700,
                        background_color='white',
                        font_path='msyh.ttc')

# 将txt变量传入w的generate()方法,给词云输入文字
w.generate(txt)

# 将词云图片导出到当前文件夹
w.to_file('output3-sentence.png')
(四)案例四
# 导入词云制作库wordcloud和中文分词库jieba
import jieba
import wordcloud
# 构建并配置词云对象w
w = wordcloud.WordCloud(width=1000,
                        height=700,
                        background_color='white',
                        font_path='msyh.ttc')

# 调用jieba的lcut()方法对原始文本进行中文分词,得到string
txt = '人工智能 深度学习 神经网络 物联网平台 嵌入式 '
txtlist = jieba.lcut(txt)
string = " ".join(txtlist)

# 将string变量传入w的generate()方法,给词云输入文字
w.generate(string)

# 将词云图片导出到当前文件夹
w.to_file('output4-tongji.png')
(五)案例五
# 导入词云制作库wordcloud和中文分词库jieba
import jieba
import wordcloud

# 构建并配置词云对象w
w = wordcloud.WordCloud(width=1000,
                        height=700,
                        background_color='white',
                        font_path='msyh.ttc')

# 对来自外部文件的文本进行中文分词,得到string
f = open('files/2023春晚.txt',encoding='utf-8')
txt = f.read()
txtlist = jieba.lcut(txt)
print(txtlist)
string = " ".join(txtlist)

# 将string变量传入w的generate()方法,给词云输入文字
w.generate(string)

# 将词云图片导出到当前文件夹
w.to_file('output5-village.png')
(六)案例六
# 导入词云制作库wordcloud和中文分词库jieba
import jieba
import wordcloud

# 导入imageio库中的imread函数,并用这个函数读取本地图片,作为词云形状图片
import imageio.v2 as imageio
mk = imageio.imread("./files/alice_color.jpg")
w = wordcloud.WordCloud(mask=mk)

# 构建并配置词云对象w,注意要加scale参数,提高清晰度
w = wordcloud.WordCloud(width=1000,
                        height=700,
                        background_color='white',
                        font_path='msyh.ttc',
                        mask=mk,
                        scale=15)

# 中文分词,得到string
txt = '人工智能 深度学习 神经网络 物联网平台 嵌入式 '
txtlist = jieba.lcut(txt)
string = " ".join(txtlist)

# 将string变量传入w的generate()方法,给词云输入文字
w.generate(string)

# 将词云图片导出到当前文件夹
w.to_file('output6-village.png')
四、官方案例
(一)最小的例子
import os

from os import path
from wordcloud import WordCloud

# get data directory (using getcwd() is needed to support running example in generated IPython notebook)
d = path.dirname(__file__) if "__file__" in locals() else os.getcwd()

# Read the whole text.
text = open(path.join(d, 'files/constitution.txt')).read()

# Generate a word cloud image
wordcloud = WordCloud().generate(text)

# Display the generated image:
# the matplotlib way:
import matplotlib.pyplot as plt
plt.imshow(wordcloud, interpolation='bilinear')
plt.axis("off")

# lower max_font_size
wordcloud = WordCloud(max_font_size=40).generate(text)
plt.figure()
plt.imshow(wordcloud, interpolation="bilinear")
plt.axis("off")
plt.show()

# The pil way (if you don't have matplotlib)
# image = wordcloud.to_image()
# image.show()
(二)蒙面词云
使用掩码,您可以生成任意形状的词云。
from os import path
from PIL import Image
import numpy as np
import matplotlib.pyplot as plt
import os

from wordcloud import WordCloud, STOPWORDS

# get data directory (using getcwd() is needed to support running example in generated IPython notebook)
d = path.dirname(__file__) if "__file__" in locals() else os.getcwd()

# Read the whole text.
text = open(path.join(d, 'alice.txt')).read()

# read the mask image
# taken from
# http://www.stencilry.org/stencils/movies/alice%20in%20wonderland/255fk.jpg
alice_mask = np.array(Image.open(path.join(d, "alice_mask.png")))

stopwords = set(STOPWORDS)
stopwords.add("said")

wc = WordCloud(background_color="white", max_words=2000, mask=alice_mask,
               stopwords=stopwords, contour_width=3, contour_color='steelblue')

# generate word cloud
wc.generate(text)

# store to file
wc.to_file(path.join(d, "alice.png"))

# show
plt.imshow(wc, interpolation='bilinear')
plt.axis("off")
plt.figure()
plt.imshow(alice_mask, cmap=plt.cm.gray, interpolation='bilinear')
plt.axis("off")
plt.show()
(三)频率词云
import multidict as multidict

import numpy as np

import os
import re
from PIL import Image
from os import path
from wordcloud import WordCloud
import matplotlib.pyplot as plt


def getFrequencyDictForText(sentence):
    fullTermsDict = multidict.MultiDict()
    tmpDict = {}

    # making dict for counting frequencies
    for text in sentence.split(" "):
        if re.match("a|the|an|the|to|in|for|of|or|by|with|is|on|that|be", text):
            continue
        val = tmpDict.get(text, 0)
        tmpDict[text.lower()] = val + 1
    for key in tmpDict:
        fullTermsDict.add(key, tmpDict[key])
    return fullTermsDict


def makeImage(text):
    alice_mask = np.array(Image.open("alice_mask.png"))

    wc = WordCloud(background_color="white", max_words=1000, mask=alice_mask)
    # generate word cloud
    wc.generate_from_frequencies(text)

    # show
    plt.imshow(wc, interpolation="bilinear")
    plt.axis("off")
    plt.show()


# get data directory (using getcwd() is needed to support running example in generated IPython notebook)
d = path.dirname(__file__) if "__file__" in locals() else os.getcwd()

text = open(path.join(d, 'alice.txt'), encoding='utf-8')
text = text.read()
makeImage(getFrequencyDictForText(text))
(四)图像彩色词云
您可以使用 ImageColorGenerator 中实现的基于图像的着色策略为词云着色。它使用源图像中单词所占区域的平均颜色。您可以将其与遮罩结合使用 - 当作为遮罩传递时,纯白色将被 WordCloud 对象解释为“不占用”。如果你想要白色作为合法颜色,你可以将不同的图像传递给“mask”,但要确保图像形状对齐。
from os import path
from PIL import Image
import numpy as np
import matplotlib.pyplot as plt
import os

from wordcloud import WordCloud, STOPWORDS, ImageColorGenerator

# get data directory (using getcwd() is needed to support running example in generated IPython notebook)
d = path.dirname(__file__) if "__file__" in locals() else os.getcwd()

# Read the whole text.
text = open(path.join(d, 'alice.txt')).read()

# read the mask / color image taken from
# http://jirkavinse.deviantart.com/art/quot-Real-Life-quot-Alice-282261010
alice_coloring = np.array(Image.open(path.join(d, "alice_color.png")))
stopwords = set(STOPWORDS)
stopwords.add("said")

wc = WordCloud(background_color="white", max_words=2000, mask=alice_coloring,
               stopwords=stopwords, max_font_size=40, random_state=42)
# generate word cloud
wc.generate(text)

# create coloring from image
image_colors = ImageColorGenerator(alice_coloring)

# show
fig, axes = plt.subplots(1, 3)
axes[0].imshow(wc, interpolation="bilinear")
# recolor wordcloud and show
# we could also give color_func=image_colors directly in the constructor
axes[1].imshow(wc.recolor(color_func=image_colors), interpolation="bilinear")
axes[2].imshow(alice_coloring, cmap=plt.cm.gray, interpolation="bilinear")
for ax in axes:
    ax.set_axis_off()
plt.show()
(五)中文词云
wordcloud是一个很好的工具,但是如果你想制作中文wordcloud,仅仅wordcloud是不够的。该文件显示了如何将 wordcloud 与中文一起使用。首先,你需要一个中文分词库jieba,jieba是目前python中最优雅最流行的中文分词工具。您可以使用'PIP 安装jieba'。安装它。可以看到,wordcloud与jieba同时使用非常方便
import jieba
jieba.enable_parallel(4)
# Setting up parallel processes :4 ,but unable to run on Windows
from os import path
from imageio import imread
import matplotlib.pyplot as plt
import os
# jieba.load_userdict("txt\userdict.txt")
# add userdict by load_userdict()
from wordcloud import WordCloud, ImageColorGenerator

# get data directory (using getcwd() is needed to support running example in generated IPython notebook)
d = path.dirname(__file__) if "__file__" in locals() else os.getcwd()

stopwords_path = d + '/wc_cn/stopwords_cn_en.txt'
# Chinese fonts must be set
font_path = d + '/fonts/SourceHanSerif/SourceHanSerifK-Light.otf'

# the path to save worldcloud
imgname1 = d + '/wc_cn/LuXun.jpg'
imgname2 = d + '/wc_cn/LuXun_colored.jpg'
# read the mask / color image taken from
back_coloring = imread(path.join(d, d + '/wc_cn/LuXun_color.jpg'))

# Read the whole text.
text = open(path.join(d, d + '/wc_cn/CalltoArms.txt')).read()

# if you want use wordCloud,you need it
# add userdict by add_word()
userdict_list = ['阿Q', '孔乙己', '单四嫂子']


# The function for processing text with Jieba
def jieba_processing_txt(text):
    for word in userdict_list:
        jieba.add_word(word)

    mywordlist = []
    seg_list = jieba.cut(text, cut_all=False)
    liststr = "/ ".join(seg_list)

    with open(stopwords_path, encoding='utf-8') as f_stop:
        f_stop_text = f_stop.read()
        f_stop_seg_list = f_stop_text.splitlines()

    for myword in liststr.split('/'):
        if not (myword.strip() in f_stop_seg_list) and len(myword.strip()) > 1:
            mywordlist.append(myword)
    return ' '.join(mywordlist)


wc = WordCloud(font_path=font_path, background_color="white", max_words=2000, mask=back_coloring,
               max_font_size=100, random_state=42, width=1000, height=860, margin=2,)


wc.generate(jieba_processing_txt(text))

# create coloring from image
image_colors_default = ImageColorGenerator(back_coloring)

plt.figure()
# recolor wordcloud and show
plt.imshow(wc, interpolation="bilinear")
plt.axis("off")
plt.show()

# save wordcloud
wc.to_file(path.join(d, imgname1))

# create coloring from image
image_colors_byImg = ImageColorGenerator(back_coloring)

# show
# we could also give color_func=image_colors directly in the constructor
plt.imshow(wc.recolor(color_func=image_colors_byImg), interpolation="bilinear")
plt.axis("off")
plt.figure()
plt.imshow(back_coloring, interpolation="bilinear")
plt.axis("off")
plt.show()

# save wordcloud
wc.to_file(path.join(d, imgname2))

 浙公网安备 33010602011771号