这段时间忙着交接工作,找工作,找房子,入职,杂七杂八的,差不多一个月没有静下来学习了.这周末晚上等外卖的时间学习一下二维码的制作与扫描.
项目采用OC语言,只要使用iOS自带的CoreImage框架,通过滤镜CIFilter生成二维码,扫描使用原生自带相机实现.
开撸:
先写一个类,封装把string转换我image和把CIImage转换为string:
QRImage.h


 1 //
 2 //  QRImage.h
 3 //  QRcode
 4 //
 5 //  Created by Shaoting Zhou on 2017/11/19.
 6 //  Copyright © 2017年 Shaoting Zhou. All rights reserved.
 7 //
 8
 9 #import <Foundation/Foundation.h>
10 #import <CoreImage/CoreImage.h>
11 #import <UIKit/UIKit.h>
12
13 @interface QRImage : NSObject
14
15 + (UIImage *)imageWithQRString:(NSString *)string;  //把string转换我image
16 + (NSString *)stringFromCiImage:(CIImage *)ciimage; //把CIImage转换为string
17
18 @end
QRImage.m
 1 //
 2 //  QRImage.m
 3 //  QRcode
 4 //
 5 //  Created by Shaoting Zhou on 2017/11/19.
 6 //  Copyright © 2017年 Shaoting Zhou. All rights reserved.
 7 //
 8
 9 #import "QRImage.h"
10
11 @implementation QRImage
12
13 #pragma mark - 把string转换为Image
14 + (UIImage *)imageWithQRString:(NSString *)string{
15     NSData * stringData = [string dataUsingEncoding:NSUTF8StringEncoding];
16
17     CIFilter * qrFilter = [CIFilter filterWithName:@"CIQRCodeGenerator"]; //过滤器
18     [qrFilter setValue:stringData forKey:@"inputMessage"];
19     [qrFilter setValue:@"M" forKey:@"inputCorrectionLevel"];  //纠错等级
20     UIImage * image =  [self createUIImageFromCIImage:qrFilter.outputImage withSize:300];
21     return image;
22 }
23
24
25 #pragma mark - CIImgae ->  UIImage
26 + (UIImage *)createUIImageFromCIImage:(CIImage *)image withSize:(CGFloat)size{
27     CGRect extent = CGRectIntegral(image.extent);
28     CGFloat scale = MIN(size/CGRectGetWidth(extent), size/CGRectGetHeight(extent));
29
30     //1.创建bitmap;
31     size_t width = CGRectGetWidth(extent) * scale;
32     size_t height = CGRectGetHeight(extent) * scale;
33     CGColorSpaceRef cs = CGColorSpaceCreateDeviceGray();
34     CGContextRef bitmapRef = CGBitmapContextCreate(nil, width, height, 8, 0, cs, (CGBitmapInfo)kCGImageAlphaNone);
35     CIContext *context = [CIContext contextWithOptions:nil];
36     CGImageRef bitmapImage = [context createCGImage:image fromRect:extent];
37     CGContextSetInterpolationQuality(bitmapRef, kCGInterpolationNone);
38     CGContextScaleCTM(bitmapRef, scale, scale);
39     CGContextDrawImage(bitmapRef, extent, bitmapImage);
40
41     //2.保存bitmap到图片
42     CGImageRef scaledImage = CGBitmapContextCreateImage(bitmapRef);
43     CGContextRelease(bitmapRef);
44     CGImageRelease(bitmapImage);
45     return [UIImage imageWithCGImage:scaledImage];
46
47 }
48
49
50 #pragma mark - 把image转换为string
51 + (NSString *)stringFromCiImage:(CIImage *)ciimage{
52     NSString * content = nil;
53     if(!ciimage){
54         return  content;
55     }
56     CIDetector * detector = [CIDetector detectorOfType:CIDetectorTypeQRCode context:[CIContext contextWithOptions:nil] options:@{CIDetectorAccuracy:CIDetectorAccuracyHigh}];
57     NSArray * features = [detector featuresInImage:ciimage];
58     if(features.count){
59         for (CIFeature * feature in features) {
60             if([feature isKindOfClass:[CIQRCodeFeature class]]){
61                 content = ((CIQRCodeFeature *)feature).messageString;
62                 break;
63             }
64         }
65     }else{
66         NSLog(@"解析失败,确保硬件支持");
67     }
68
69     return content;
70 }
71 @end
上面的代码就是关键之处.
下面,写一个界面生成二维码,通过上面写好的string转换我image,显示在屏幕之上.
MainViewController.h
 1 //
 2 //  MainViewController.h
 3 //  QRcode
 4 //
 5 //  Created by Shaoting Zhou on 2017/11/18.
 6 //  Copyright © 2017年 Shaoting Zhou. All rights reserved.
 7 //
 8
 9 #import <UIKit/UIKit.h>
10 #import "QRImage.h"
11 #import "ScanViewController.h"
12
13 @interface MainViewController : UIViewController
14 @property (nonatomic,strong) UIImageView * qrImageView;
15 @property (nonatomic,strong) UITextField * textField;
16 @end
MainViewController.m
 1 //
 2 //  MainViewController.m
 3 //  QRcode
 4 //
 5 //  Created by Shaoting Zhou on 2017/11/18.
 6 //  Copyright © 2017年 Shaoting Zhou. All rights reserved.
 7 //
 8
 9 #import "MainViewController.h"
10
11 @interface MainViewController ()
12
13 @end
14
15 @implementation MainViewController
16
17 - (void)viewDidLoad {
18     [super viewDidLoad];
19     [self setUI];
20     self.title = @"生成二维码";
21
22     self.navigationItem.rightBarButtonItem = [[UIBarButtonItem alloc]initWithTitle:@"扫描" style:(UIBarButtonItemStylePlain) target:self action:@selector(scangQRimage)];
23 }
24
25 -(void)setUI{
26     self.textField = [[UITextField alloc]initWithFrame:CGRectMake(10, 200, 200, 50)];
27     self.textField.borderStyle = UITextBorderStyleRoundedRect;
28     [self.view addSubview:self.textField];
29
30     UIButton * btn = [[UIButton alloc]initWithFrame:CGRectMake(230, 200, 120, 50)];
31     [btn setTitle:@"生成二维码" forState:(UIControlStateNormal)];
32     [btn setTitleColor:[UIColor redColor] forState:(UIControlStateNormal)];
33     [btn addTarget:self action:@selector(makeQRcode) forControlEvents:(UIControlEventTouchUpInside)];
34     [self.view addSubview:btn];
35
36     self.qrImageView = [[UIImageView alloc]initWithFrame:CGRectMake(20, 300, 200, 200)];
37     [self.view addSubview:self.qrImageView];
38
39
40 }
41 #pragma mark - 生成二维码
42 -(void)makeQRcode{
43     [self.textField resignFirstResponder];
44     UIImage * img = [QRImage imageWithQRString:self.textField.text];
45     self.qrImageView.image = img;
46 }
47
48 #pragma mark - push到扫描界面
49 -(void)scangQRimage{
50     ScanViewController * scanVC = [[ScanViewController alloc]init];
51     [self.navigationController pushViewController:scanVC animated:NO];
52 }
53
54 - (void)didReceiveMemoryWarning {
55     [super didReceiveMemoryWarning];
56     // Dispose of any resources that can be recreated.
57 }
58
59 /*
60 #pragma mark - Navigation
61
62 // In a storyboard-based application, you will often want to do a little preparation before navigation
63 - (void)prepareForSegue:(UIStoryboardSegue *)segue sender:(id)sender {
64     // Get the new view controller using [segue destinationViewController].
65     // Pass the selected object to the new view controller.
66 }
67 */
68
69 @end
再写一个界面扫描二维码和通过相册选择二维码扫描,通过上面写好的把CIImage转换为string,扫描出二维码信息显示出来即可.
ScanViewController.h
 1 //
 2 //  ScanViewController.h
 3 //  QRcode
 4 //
 5 //  Created by Shaoting Zhou on 2017/11/19.
 6 //  Copyright © 2017年 Shaoting Zhou. All rights reserved.
 7 //
 8
 9 #import <UIKit/UIKit.h>
10 #import <AVFoundation/AVFoundation.h>
11 #import "QRImage.h"
12 @interface ScanViewController : UIViewController <AVCaptureMetadataOutputObjectsDelegate,UINavigationControllerDelegate,UIImagePickerControllerDelegate>
13 @property (nonatomic,strong) AVCaptureSession * session;
14 @property (nonatomic,strong) UITextField * textField;
15
16 @end
ScanViewController.m
  1 //
  2 //  ScanViewController.m
  3 //  QRcode
  4 //
  5 //  Created by Shaoting Zhou on 2017/11/19.
  6 //  Copyright © 2017年 Shaoting Zhou. All rights reserved.
  7 //
  8
  9 #import "ScanViewController.h"
 10
 11 @interface ScanViewController ()
 12
 13 @end
 14
 15 @implementation ScanViewController
 16
 17 - (void)viewDidLoad {
 18     [super viewDidLoad];
 19     self.title = @"扫描二维码";
 20
 21     self.textField = [[UITextField alloc]initWithFrame:CGRectMake(10, 100, 200, 50)];
 22     self.textField.borderStyle = UITextBorderStyleRoundedRect;
 23     self.textField.userInteractionEnabled = NO;
 24     [self.view addSubview:self.textField];
 25
 26
 27     self.navigationItem.rightBarButtonItem = [[UIBarButtonItem alloc]initWithTitle:@"相册" style:(UIBarButtonItemStylePlain) target:self action:@selector(presentImagePicker)];
 28
 29
 30 }
 31 - (void)viewWillAppear:(BOOL)animated{
 32     [super viewWillAppear:animated];
 33     [self startScan];
 34
 35 }
 36
 37 #pragma  mark - 开始扫描
 38 - (void)startScan{
 39     if([AVCaptureDevice authorizationStatusForMediaType:AVMediaTypeVideo] == AVAuthorizationStatusAuthorized || [AVCaptureDevice authorizationStatusForMediaType:AVMediaTypeVideo] == AVAuthorizationStatusNotDetermined ){
 40         self.session = [[AVCaptureSession alloc]init];
 41         AVCaptureDeviceInput * input = [[AVCaptureDeviceInput alloc]initWithDevice:[AVCaptureDevice defaultDeviceWithMediaType:AVMediaTypeVideo] error:nil];
 42         if(input){
 43             [self.session addInput:input];
 44         }
 45
 46         AVCaptureMetadataOutput * output = [[AVCaptureMetadataOutput alloc]init];
 47         [output setMetadataObjectsDelegate:self queue:dispatch_get_main_queue()];
 48         if(output){
 49             [self.session addOutput:output];
 50         }
 51
 52         NSMutableArray * ary = [[NSMutableArray alloc]init];
 53         if([output.availableMetadataObjectTypes containsObject:AVMetadataObjectTypeQRCode]){
 54             [ary addObject:AVMetadataObjectTypeQRCode];
 55         }
 56         if([output.availableMetadataObjectTypes containsObject:AVMetadataObjectTypeEAN13Code]){
 57             [ary addObject:AVMetadataObjectTypeEAN13Code];
 58         }
 59         if([output.availableMetadataObjectTypes containsObject:AVMetadataObjectTypeEAN8Code]){
 60             [ary addObject:AVMetadataObjectTypeEAN8Code];
 61         }
 62         if([output.availableMetadataObjectTypes containsObject:AVMetadataObjectTypeCode128Code]){
 63             [ary addObject:AVMetadataObjectTypeCode128Code];
 64         }
 65         output.metadataObjectTypes = ary;
 66
 67         AVCaptureVideoPreviewLayer * layer = [AVCaptureVideoPreviewLayer layerWithSession:self.session];
 68         layer.videoGravity = AVLayerVideoGravityResizeAspectFill;
 69         layer.frame = CGRectMake((self.view.bounds.size.width - 300)/2, 164, 300, 300);
 70         [self.view.layer addSublayer:layer];
 71
 72         UIImageView * imageView = [[UIImageView alloc]initWithFrame:CGRectMake((self.view.bounds.size.width - 300)/2, 164, 300, 300)];
 73
 74         [self.view addSubview:imageView];
 75         [self.session startRunning];
 76     }
 77 }
 78
 79 #pragma mark - AVCaptureMetadataOutputObjectsDelegate代理方法
 80 - (void)captureOutput:(AVCaptureOutput *)output didOutputMetadataObjects:(NSArray<__kindof AVMetadataObject *> *)metadataObjects fromConnection:(AVCaptureConnection *)connection{
 81     NSString * str = nil;
 82     for (AVMetadataObject * obj in metadataObjects) {
 83         if([obj.type isEqualToString:AVMetadataObjectTypeQRCode]){
 84             str = [(AVMetadataMachineReadableCodeObject *)obj stringValue];
 85             [self.session startRunning];
 86             break;
 87         }
 88     }
 89     self.textField.text = str;
 90 }
 91
 92 #pragma mark - UIImagePickerControllerDelegate代理方法
 93 - (void)imagePickerController:(UIImagePickerController *)picker didFinishPickingMediaWithInfo:(NSDictionary<NSString *,id> *)info{
 94     UIImage * image = [info objectForKey:UIImagePickerControllerOriginalImage];
 95
 96     CIImage * ciimage = [[CIImage alloc]initWithImage:image];
 97     NSString * str = [QRImage stringFromCiImage:ciimage];
 98     self.textField.text = str;
 99     [self dismissViewControllerAnimated:YES completion:nil];
100 }
101
102
103 #pragma mark - 弹出相册
104 - (void)presentImagePicker{
105     UIImagePickerController * imagePicker = [[UIImagePickerController alloc]init];
106     imagePicker.delegate = self;
107     [self presentViewController:imagePicker animated:NO completion:nil];
108 }
109
110 - (void)didReceiveMemoryWarning {
111     [super didReceiveMemoryWarning];
112     // Dispose of any resources that can be recreated.
113 }
114
115 /*
116  #pragma mark - Navigation
117
118  // In a storyboard-based application, you will often want to do a little preparation before navigation
119  - (void)prepareForSegue:(UIStoryboardSegue *)segue sender:(id)sender {
120  // Get the new view controller using [segue destinationViewController].
121  // Pass the selected object to the new view controller.
122  }
123  */
124
125 @end
github: https://github.com/pheromone/QRcode
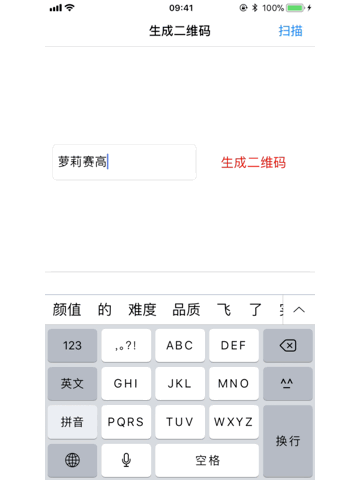
效果如下: