
上一篇介绍的是以太坊下基于geth+remix-ide智能合约环境的搭建和部署运行,本篇介绍的是基于truffle+ganache。
ganache相当于是geth的图形化操作界面,相对于纯指令操作的geth较为简单易上手,并且运行交易和生成区块的过程一目了然。
【前期准备】
1.Node.js安装(这一点在上一篇文章中提到过,所以此处不做展示)
2.指令输入:
npm install -g solc(安装智能合约)

npm install -g ganache-cli (安装ganache开发端)

npm install -g truffle (安装truffle框架)
3.vscode运行环境
【智能合约】
1.新建智能合约
①新建一个文件夹eg:helloworld,并进入该文件夹下进行指令操作:
cd helloworld
②创建一个truffle项目:
truffle init

③将新建的文件夹helloworldzheng整体搬进vscode中:
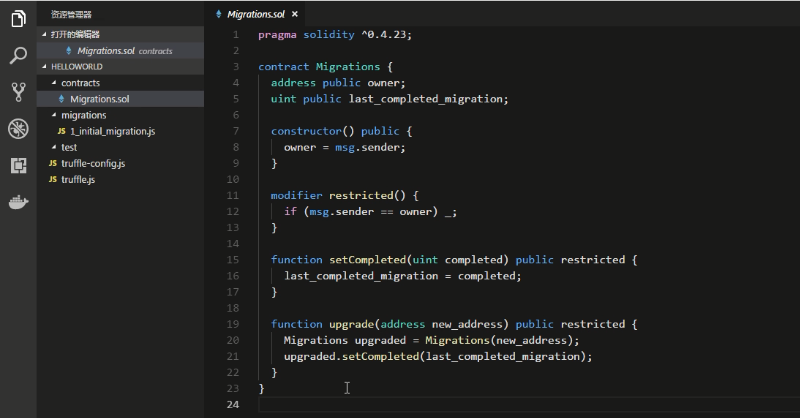
④在helloworld下的contracts文件夹中创建新合约,起名helloworld.sol,并输入如下代码:
pragma solidity ^0.5.2;

contract helloworld{
    function say() public pure returns(string memory){
        return "hello world";
    }
}
⑤在helloworld下的migrations文件夹中点开1_initial_migrations.js文件,并将其中的"Migrations"参数一律改成helloworld:
const helloworld = artifacts.require("./helloworld.sol");

module.exports = function(deployer) {
  deployer.deploy(helloworld);
};
⑥回到truffle操作环境里,对上述文件进行编译:
注意,一定要进入到contracts文件夹下进行编译操作,否则会报错找不到对应合约。
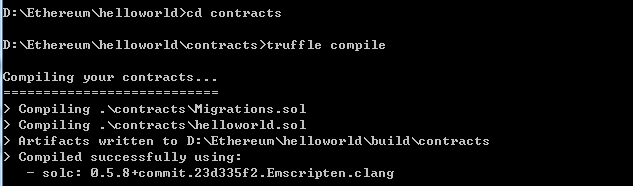
编译成功。
2.连接ganache
①运行ganache

②智能合约与ganache连接:
回到vscode,打开truffle-config.js文件:
在module-exports模块中输入如下内容:

之后我们回到ganache,打开设置,点击server,看到如下操作面,其中上图中的host,port,network_id参数都是根据ganache中对应的参数填写的:

③准备好之后,可以部署合约:
回到truffle操作,指令输入:
truffle migrate
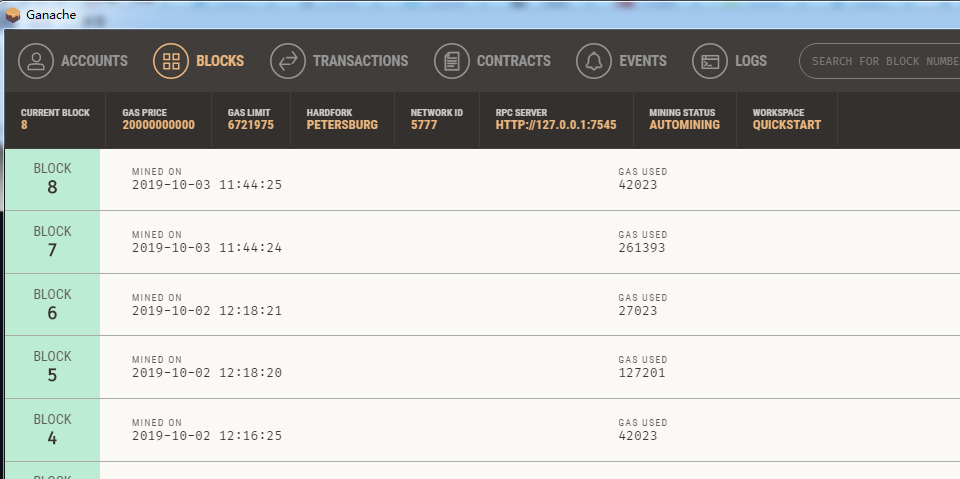
如果按照上述操作一步步来,那么部署成功我们可以看到ganache下的区块增加了:
④接下来可以开始尝试调用合约:
回到truffle操作指令,输入如下指令进入操作台:
truffle console
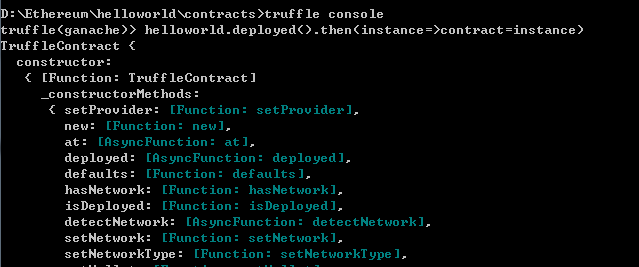
如果顺利进入操作台即可以进行合约函数的调用:
输入指令:
helloworld.deployed().then(instance=>contract=instance)
console中预载了truffle-contract函数库,所以可以直接对合约的函数进行操作。
上述指令含义是获取helloworld合约,存为instance,并将其存储到contract变量中以便后期使用。
接下来可以调用helloworld合约中我们定义好的say()函数了:
输入指令:
contract.say()

合约部署成功,调用成功。

 浙公网安备 33010602011771号