 6
6 nginx 配置文件与日志模块
nginx 配置文件与日志模块
内容概要
- Nginx 虚拟主机
- 基于多 IP 的方式
- 基于多端口的方式
- 基于多域名的方式
- 日志配置(日志格式详解)
- Nginx 访问控制模块(可以去 Nginx.org 文档 documentation 查找)
- Nginx 访问认证模块
- Nginx 状态监控模块
内容详细
一、Nginx 虚拟主机
搭建完 Nginx 服务之后,可以通过多种方式来访问网站
1、基于多 IP 的方式
[root@web01 conf.d]# cat game2.conf
server {
    listen 80;
    server_name 192.168.15.7;        < -- 使用不同的 IP 地址访问进入不同的网站根目录
    location / {
        root /opt/Super_Marie;
        index index.html;
    }
}
server {
    listen 80;
    server_name 172.16.1.7;        < -- 使用不同的 IP 地址访问进入不同的网站根目录
    location / {
        root /opt/tank;
        index index.html;
    }
}
2、基于多端口的方式
[root@web01 conf.d]# cat game3.conf
server {
    listen 80;                    < -- 使用不同的 端口 访问进入不同的网站根目录
    server_name 192.168.15.7;
    location / {
        root /opt/Super_Marie;
        index index.html;
    }
}
server {
    listen 81;                    < -- 使用不同的 端口 访问进入不同的网站根目录
    server_name 192.168.15.7;
    location / {
        root /opt/tank;
        index index.html;
    }
}
3、基于多域名的方式(需要配置 解析文件 hosts)
[root@web01 conf.d]# cat game4.conf
server {
    listen 80;
    server_name game.maro.com;
    location / {
        root /opt/Super_Marie;
        index index.html;
    }
}
server {
    listen 80;
    server_name game.chinese_chess.com;
    location / {
        root /opt/tank;
        index index.html;
    }
}

# 配置解析文件
windows
    C:\Windows\System32\drivers\etc\hosts
二、Nginx 日志详解
# 企业中 Nginx 日志监控指标(日志作用)
    网站状态码是500的比例:
        比例高表示网站稳定性不好
    网站的访问来源
        查看恶意访问 IP ,短时间发起大量请求
    网站排错
        查看 Nginx 报错位置
        systemctl status nginx.service -l

        或查看日志

        cat /var/log/nginx/error.log

$remote_addr  : 客户端IP
$http_x_forwarded_for  : 真实的客户端IP(在反向代理中生效)

Nginx 日志格式配置文件 : /etc/nginx/nginx.conf
log_format json '{"@timestamp":"$time_iso8601",'
                  '"host":"$server_addr",'
                  '"service":"nginxTest",'
                  '"trace":"$upstream_http_ctx_transaction_id",'
                  '"log":"log",'
                  '"clientip":"$remote_addr",'
                  '"remote_user":"$remote_user",'
                  '"request":"$request",'
                  '"http_user_agent":"$http_user_agent",'
                  '"size":$body_bytes_sent,'
                  '"responsetime":$request_time,'
                  '"upstreamtime":"$upstream_response_time",'
                  '"upstreamhost":"$upstream_addr",'
                  '"http_host":"$host",'
                  '"url":"$uri",'
                  '"domain":"$host",'
                  '"xff":"$http_x_forwarded_for",'
                  '"referer":"$http_referer",'
                  '"status":"$status"}';
    access_log /var/log/nginx/access.log json ;
简约版本
    log_format  main  '$remote_addr - $remote_user [$time_local] "$request" '
                      '$status $body_bytes_sent "$http_referer" '
                      '"$http_user_agent" "$http_x_forwarded_for"';

    access_log  /var/log/nginx/access.log  main;
日志格式详解
搭配日志输出结果了解日志变量意思:

tail -f : 实时查看日志文件
[root@web01 ~]# tail -f /var/log/nginx/access.log

日志变量

$remote_addr : 客户端 IP (上一层访问的 IP ,如果是通过 VPN 访问,显示跳板机 IP)
$http_x_forwarded_for  : 真实的客户端IP(在反向代理中生效)

$remote_addr : 192.168.15.1
$remote_user [$time_local] : [04/Jan/2022:16:17:51 +0800]
$request : "GET / HTTP/1.1" (请求方式为 GET )

$status    : 404 (状态码)
$body_bytes_sent : 555 (文件大小)
$http_referer : "http://192.168.15.7/" (访问的域名)
$http_user_agent : "Mozilla/5.0 (Windows NT 10.0; Win64; x64) AppleWebKit/537.36 (KHTML, like Gecko) Chrome/96.0.4664.110 Safari/537.36" (请求载体的身份标识)
三、日志模块
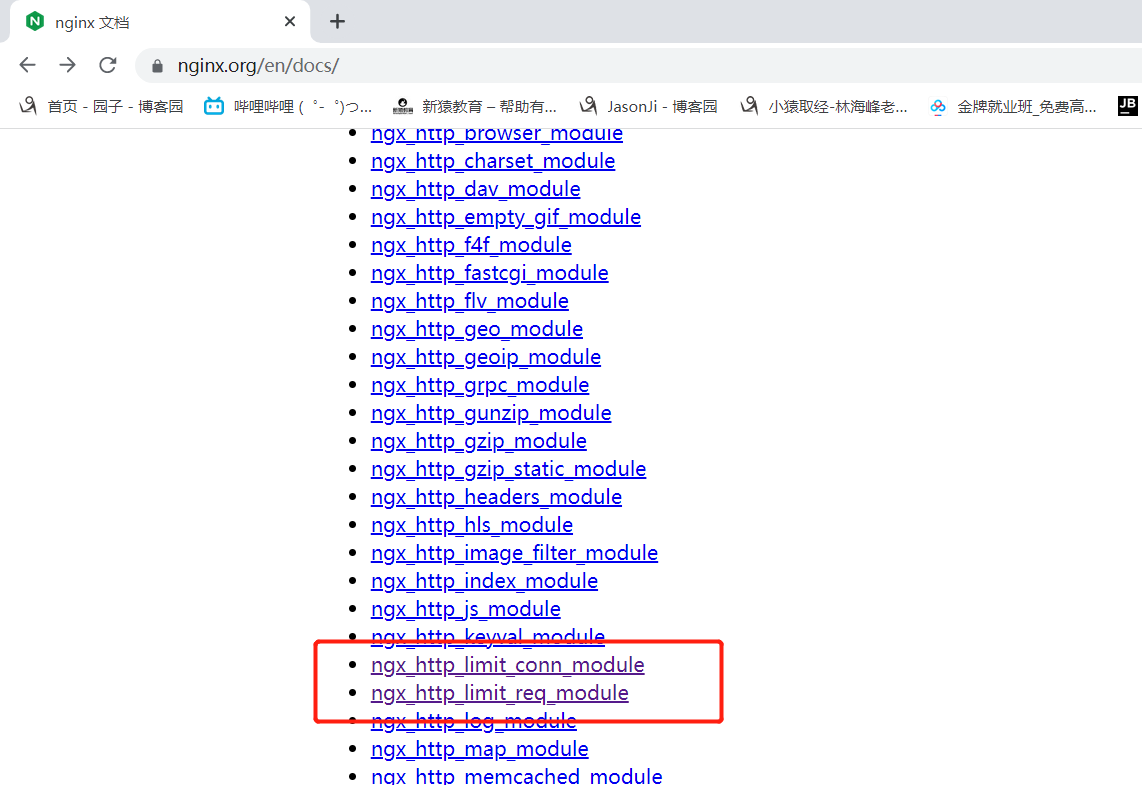
Nginx 配备了很多日志模块,具体使用方法查看官方文档 : https://nginx.org/en/docs/
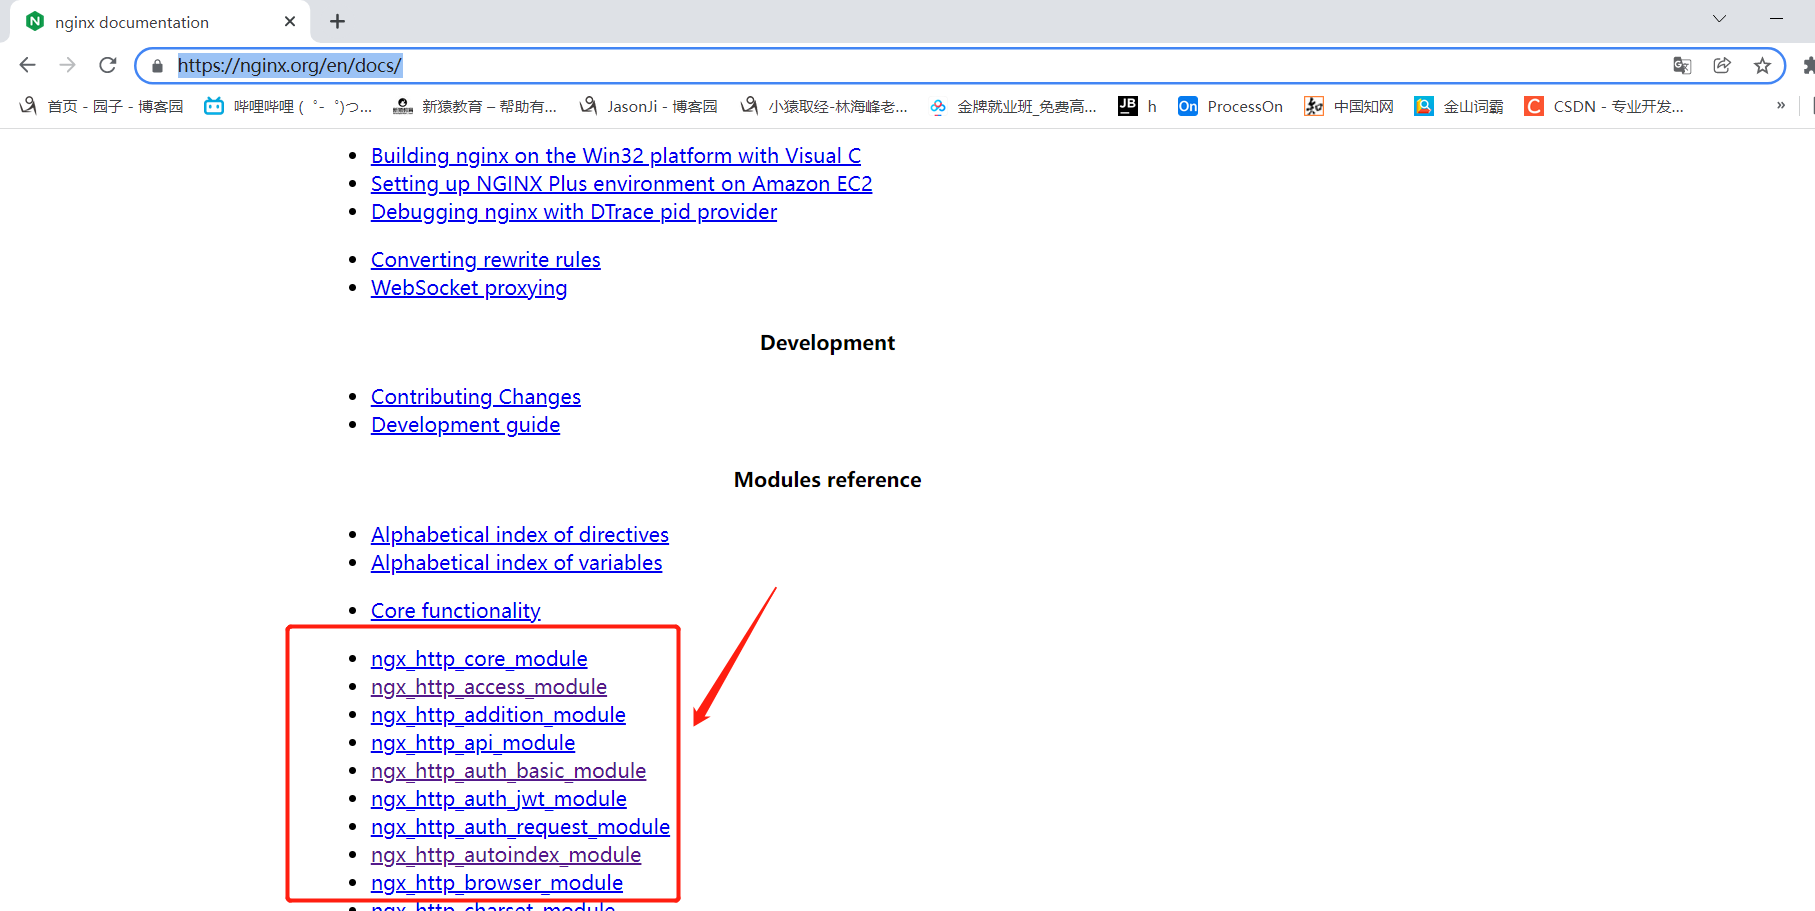
1、Nginx 访问控制模块
查看该模块原始启动状态

ngx_http_access_module
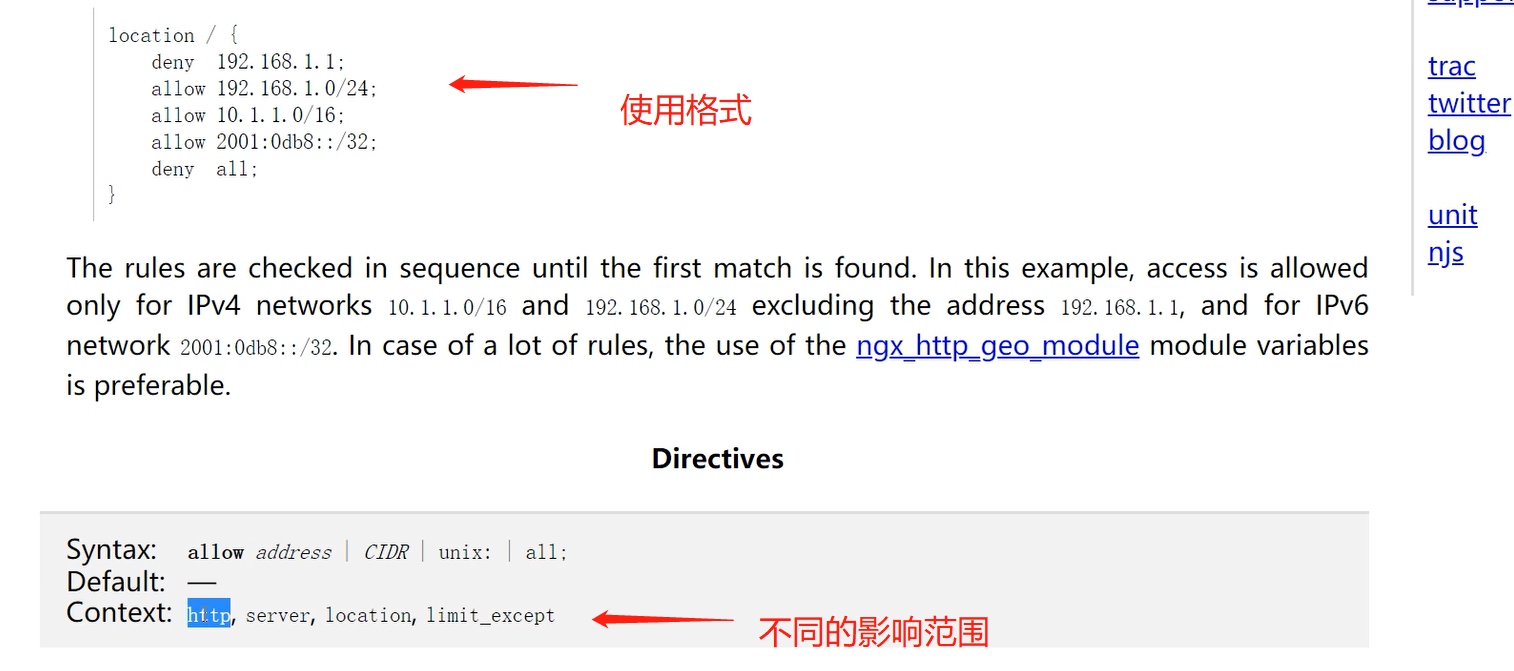
允许或者拒绝某些 IP 的访问
    deny    : 拒绝 (阻止某个访问者的 IP)
    allow    : 允许

案例1:允许192.168.15.1访问,不允许其他IP访问(执行顺序自上而下)
    allow 192.168.15.1;
    deny all;

案例2:允许192.168.15.0这个网段访问,不允许其他网段访问
    allow 192.168.15.0/24;
    deny all;

案例3:只允许通过VPN来访问
   allow 172.16.1.81;
   deny all;
ngx_http_auth_basic_module
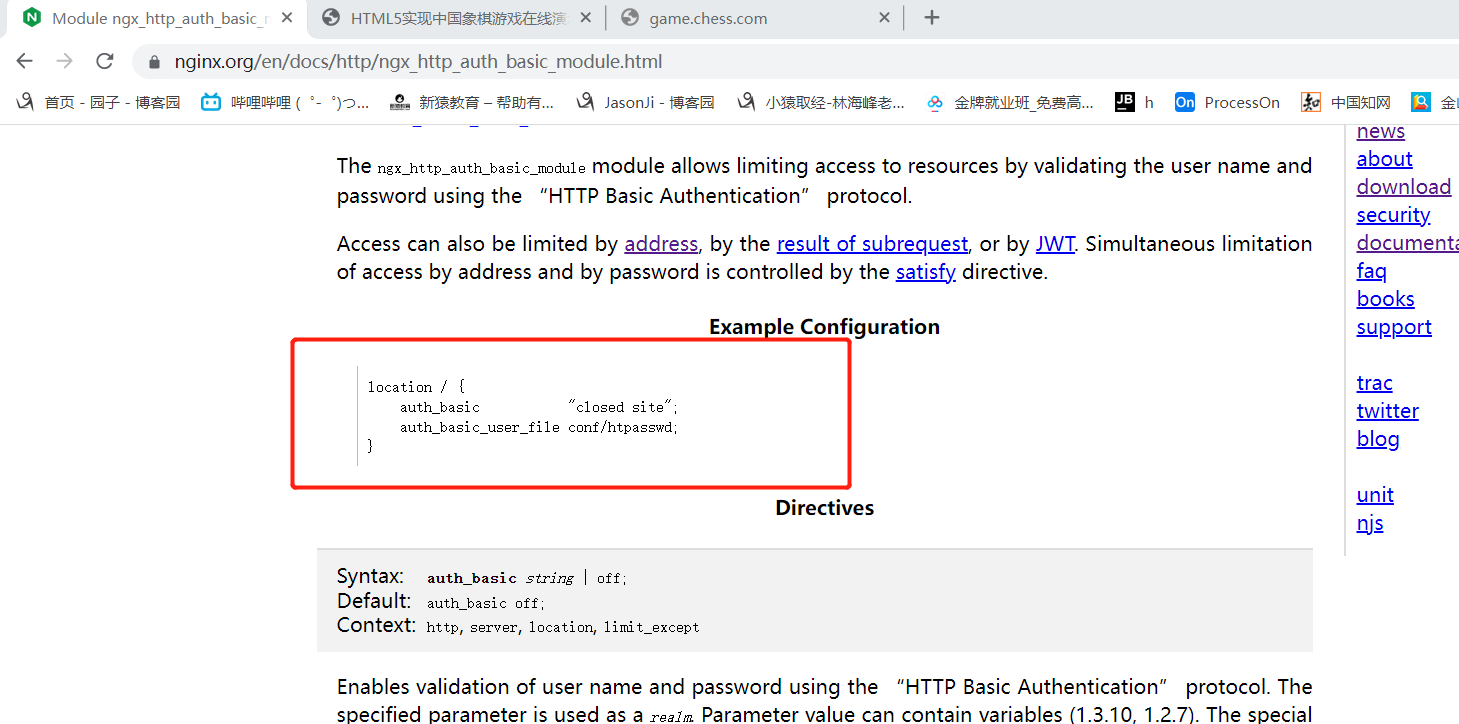
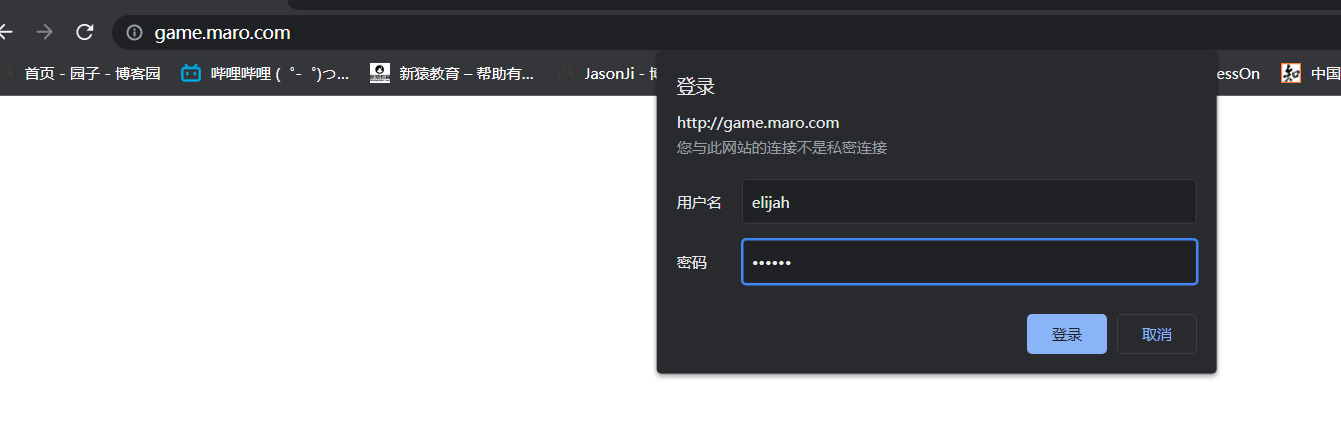
设置访问之前需要进行登录

1、安装httpd-tools
    [root@web01 ~]# yum install httpd-tools -y
2、生成用户名密码文件
    [root@web01 nginx]# htpasswd -c /etc/nginx/auth elijah
    New password:
    Re-type new password:
    Adding password for user elijah (在 /etc/nginx 路径下创建认证文件 auth,登录用户名为 elijah)

    [root@web01 nginx]# cat auth
    elijah:$apr1$H9Mw0K6b$pOATFh4sydoHKIG8ciGYI1

3、将文件路径加入Nginx配置
    [root@web01 conf.d]# cat game.conf
    server {
        listen       80;
        server_name  game.maro.com;
        auth_basic "welcome to login";           < -- 将登录认证文件添加到 server 模块
        auth_basic_user_file /etc/nginx/auth;
        location / {
            root   /opt/super_Maro;
            index  index.html;
        }
    }

4、重启Nginx
    [root@web01 conf.d]# systemctl restart nginx
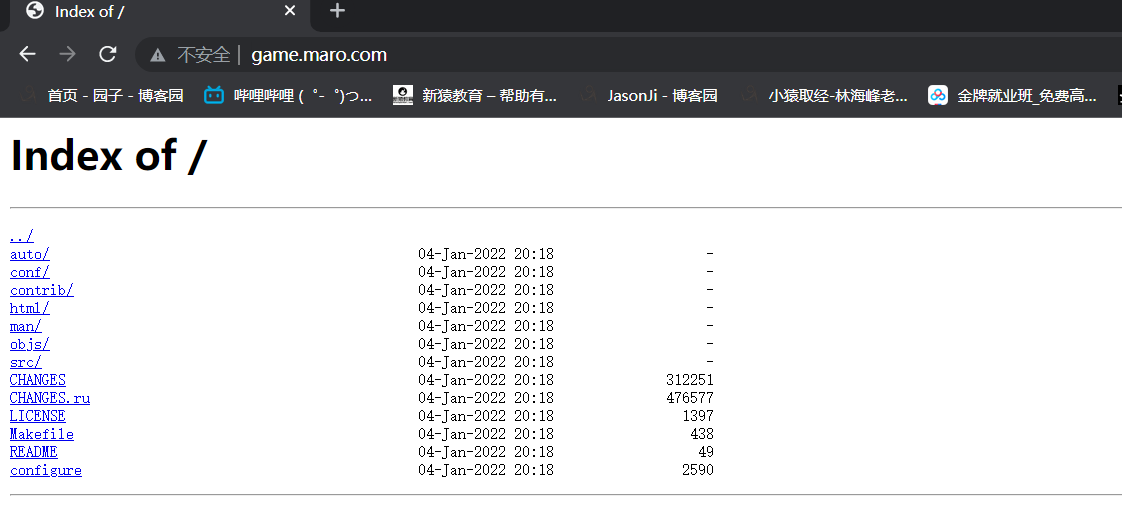
ngx_http_autoindex_module

展示目录索引

autoindex on;                 (打开索引)
autoindex_exact_size on;    (显示文件大小)
autoindex_localtime on;        (显示文件时间,当地时间)
autoindex_format json;        (页面展示的格式 默认 html)
[root@web01 conf.d]# vim game.conf
[root@web01 conf.d]# cat game.conf
server {
    listen       80;
    server_name  game.maro.com;
    autoindex on;
    autoindex_exact_size on;
    autoindex_localtime on;
    autoindex_format html;
    location / {
        root   /tmp/nginx-1.20.2;
        index  index.html;
    }
}
补充:

nginx 如果是编译安装,想要执行 nginx 命令,需要输入完整目录
    /usr/local/nginx/sbin/nginx -t

太麻烦了,需要添加到环境变量才方便使用
    临时添加:
        PATH=$PATH:/usr/local/nginx/sbin
    永久添加:
        vim /root/.bash_profile
            PATH=$PATH:$HOME/bin:/usr/local/nginx/sbin
        source .bash_profile (使环境变量不用重启就能让里面新增的变量生效)
2、Nginx 状态监控模块
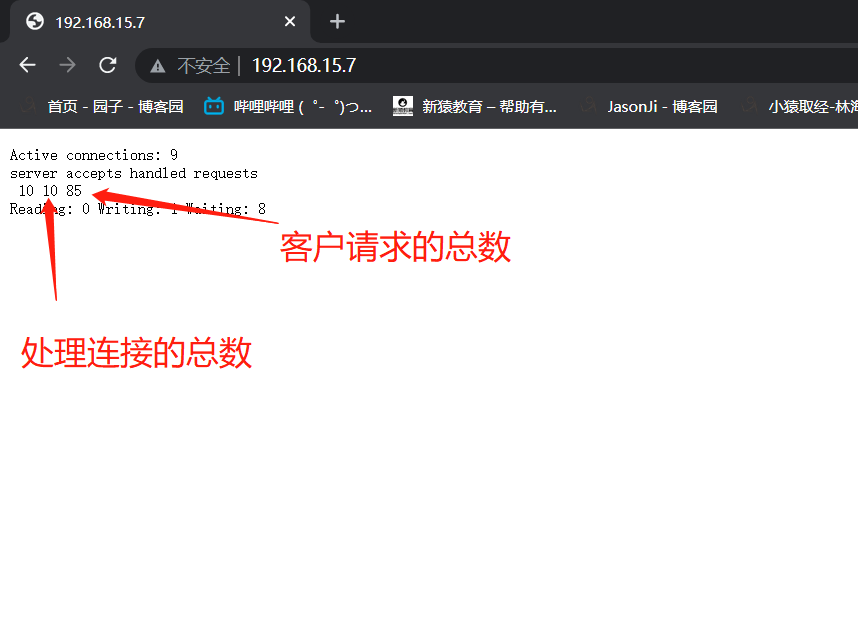
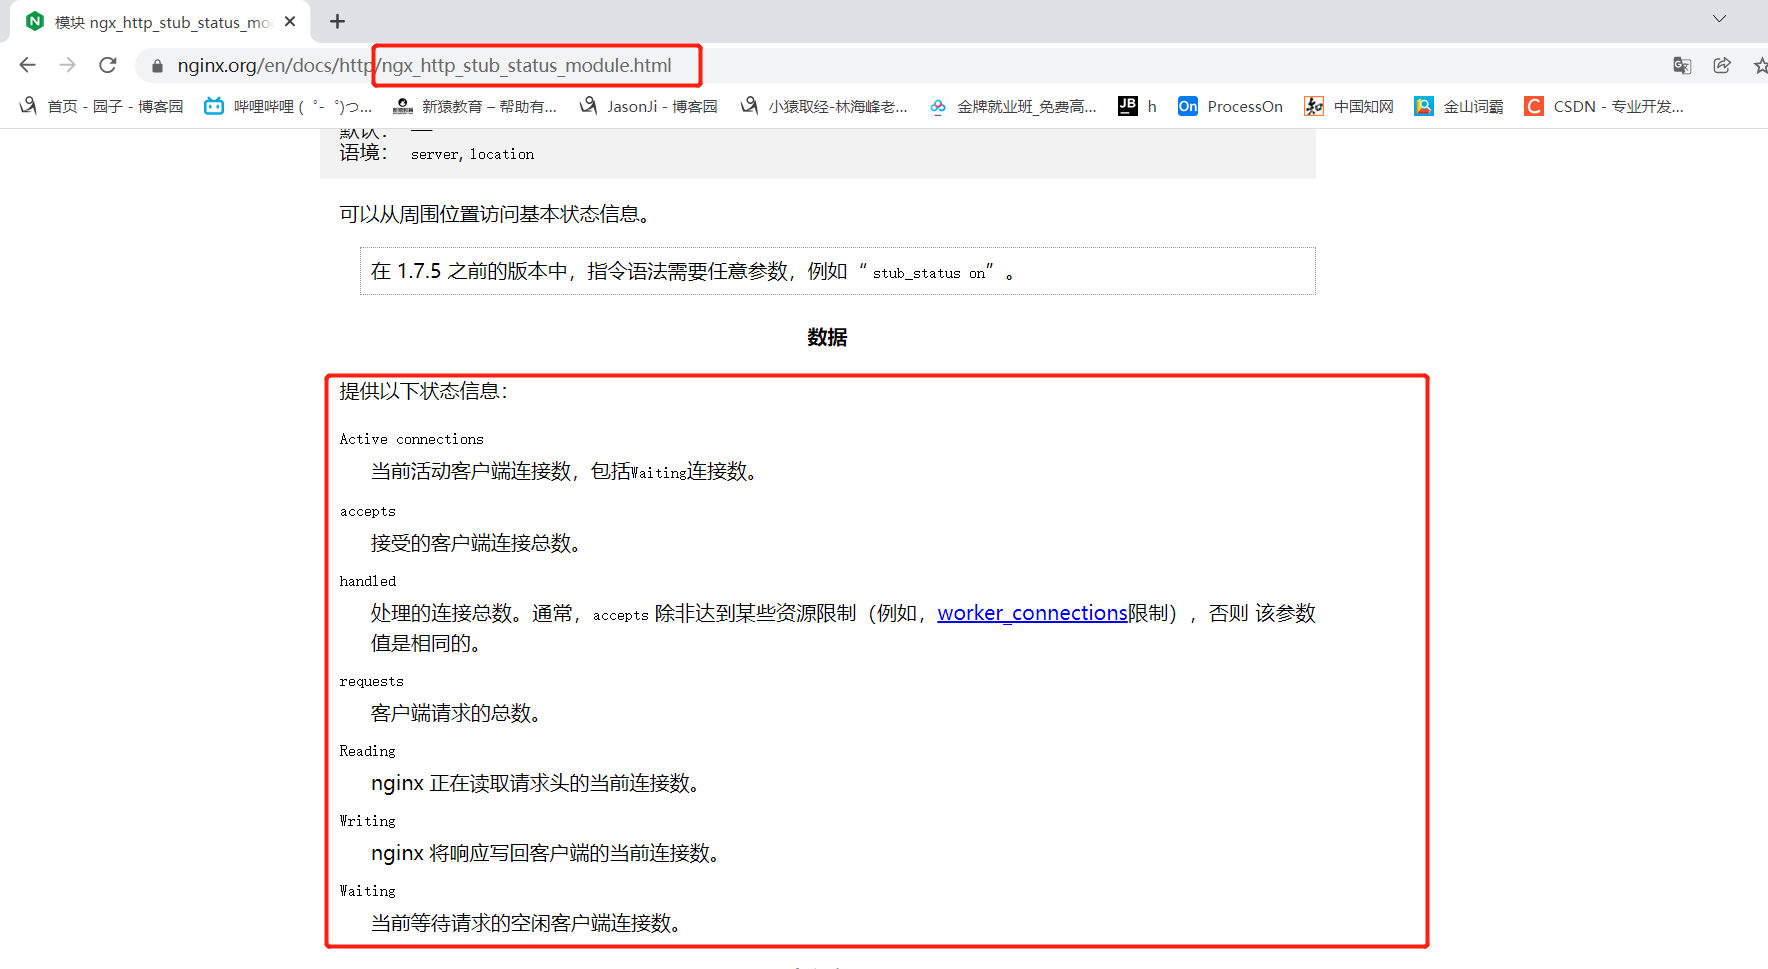
监控 Nginx 运行状态

[root@web01 conf.d]# cat game5.conf
server {
    listen 80;
    server_name 192.168.15.7;
    location / {
        stub_status;
    }
}
3、访问连接控制模块(控制访问速率)
1、控制 Nginx 连接数

ngx_http_limit_conn_module

1、安装 ab 测命令(压力测试)
    yum install httpd-tools -y

2、ab 参数
    -n : 总共需要访问多少次
    -c : 每次访问多少个(请求数)

limit_conn_zone $remote_addr zone=addr:10m;
server {
    listen 80;
    server_name 192.168.15.7;
    limit_conn addr 1;
    location / {
        root /opt/super_Maro;
        index index.html;
    }
}
ngx_http_limit_req_module

2、控制 Nginx 访问量

1、创建连接池(可以用来记录被访问的次数)
    limit_req_zone $remote_addr zone=one:10m rate=1r/s;
    声明连接池      变量(客户端IP)  名称  连接池的大小  速率

2、限制数
    limit_req_zone $remote_addr zone=one:10m rate=1r/s;

server {
    listen 80;
    server_name 192.168.15.7;
    limit_req zone=one burst=5;    < -- 每秒超过1次请求的次数不能超过5个
        location  {
            root /opt/super_Maro;
            index index.html;
    }
}

 浙公网安备 33010602011771号