centos7安装lamp
一、配置防火墙和SELINUX
1、关闭firewall
#停止firewall服务
systemctl stop firewalld.service
#禁止firewall开机启动
systemctl disable firewalld.service

2、安装iptables
yum install iptables-services

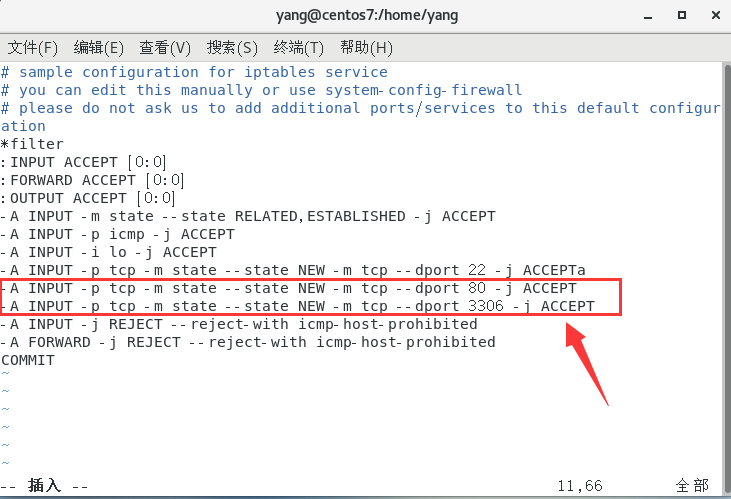
#编辑防火墙配置文件
vim /etc/sysconfig/iptables
在该文件中添加以下红色框中内容,开启80和3306端口
3、最后重启防火墙使配置生效
systemctl restart iptables.service
#设置防火墙开机启动
systemctl enable iptables.service

4、关闭selinux
#修改配置文件
vi /etc/selinux/config

5、使配置立即生效
setenforce 0
三、安装apache
yum install -y httpd

可能会用到的:
systemctl start httpd.service //启动apache
systemctl stop httpd.service //停止apache
systemctl restart httpd.service //重启apache
systemctl enable httpd.service //设置apache开机启动
systemctl restart httpd.service //重启服务
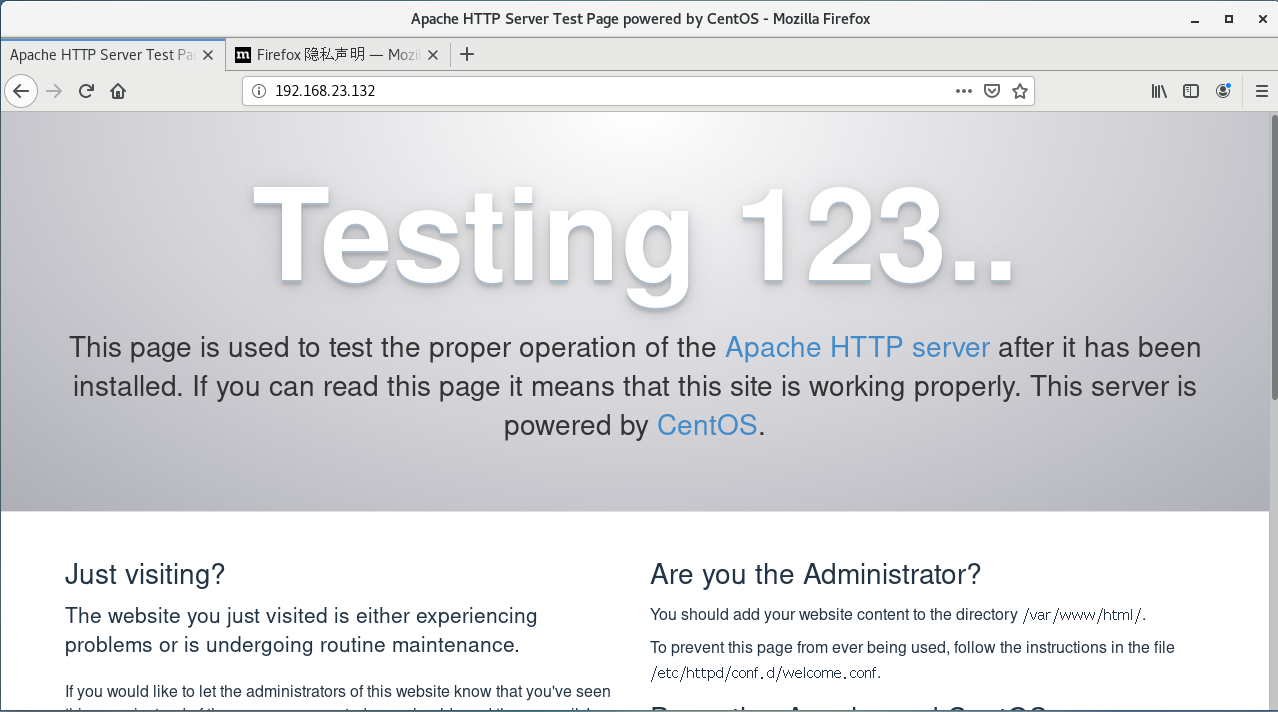
输入 192.168.23.132 出现如下界面,就代表apache安装成功。
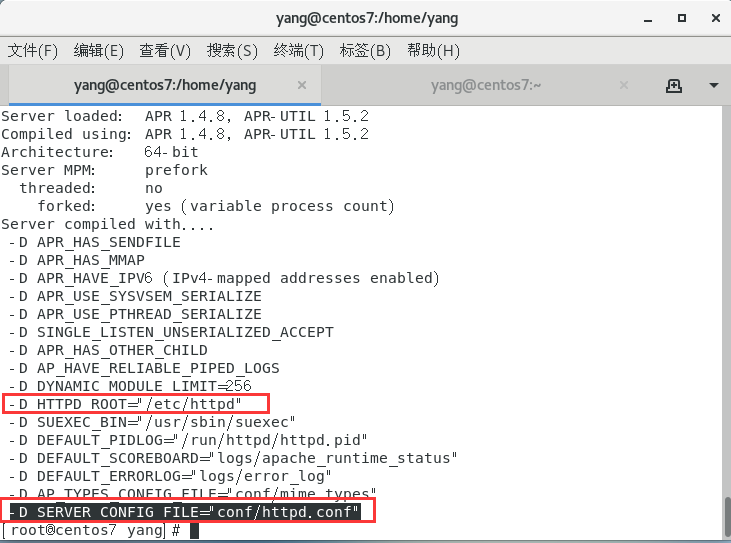
拓展:如何查看apache配置文件 httpd.conf 的路径
我们只需要执行 httpd -V 就可以了,输出如下
2、目录文件
- 程序目录:/usr/sbin/httpd
- 默认网站主页存放目录: /var/www/html/
- 日志文件存放目录:/var/log/httpd/
- 主配置文件:/etc/httpd/conf/httpd.conf
- 从配置文件:/etc/httpd/conf.d/
3、主配置文件的一些参数
ServerRoot “/etc/httpd“ //服务配置文件目录
PidFile run/httpd.pid //PID文件
Listen 80 //默认监听端口
Include conf.modules.d/ *.conf //包含模块目录的配置文件
User apache //启动用户
Group apache //启动组
ServerAdmin root@localhost //管理员邮箱
ServerName www.example.com:80 //域名主机名
DocumentRoot “/var/www/html“ //默认主页存放目录
DirectoryIndex index.html index.html.var //索引文件
<Directory "/var/www"> //规定网站根目录的位置
AllowOverride All
# Allow open access:
Require all granted
</Directory>
ErrorLog logs/error_log //错误日志
CustomLog logs/access_log combined //访问日志
AddDefaultCharset UTF-8 //默认字符集
IncludeOptional conf.d/ *.conf //包含了 conf.d/*.conf 的配置文件
<IfModule dir_module>
DirectoryIndex index.html //默认索引
</IfModule>
4、配置多个站点
在配置文件中 /etc/httpd/conf.d/ 下创建一个配置文件,我们新建一个 port.conf 文件(*.conf都可被自动包含进来,名字可以自己取),然后加入下面几行:
Listen 8080
<VirtualHost *:80>
DocumentRoot /var/www/html/web1
</VirtualHost>
<VirtualHost *:8080>
DocumentRoot /var/www/html/web2
</VirtualHost>
四、安装mysql
由于yum源上没有mysql-server。所以必须去官网下载后在安装吗,这里我们用wget命令,直接获取。
wget http://dev.mysql.com/get/mysql-community-release-el7-5.noarch.rpm

rpm -ivh mysql-community-release-el7-5.noarch.rpm // Redhat Linux Package Manager 红帽包管理器, -i : install

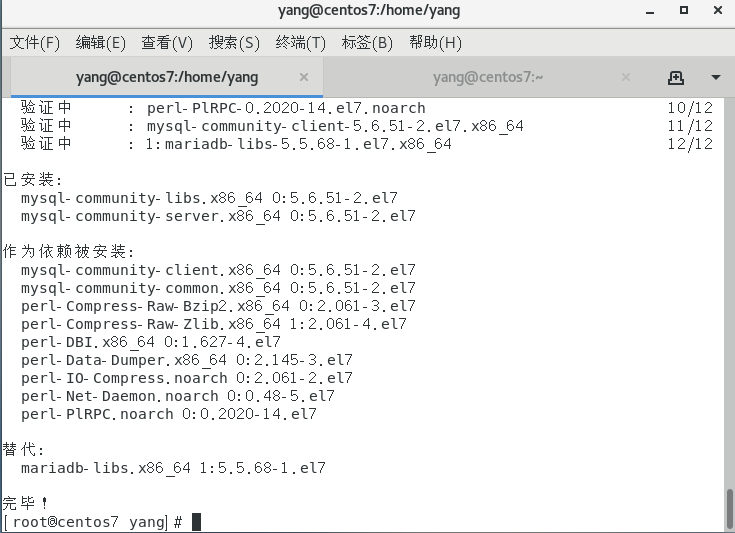
yum install -y mysql-community-server

systemctl restart mysqld.service //安装完成后重启mysql
初始安装 root用户没有密码,设置一个密码 mysql -u root
#设置msyql密码 mysql> set password for 'root'@'localhost' =password('密码');
#远程连接设置,所有以root账号连接的远程用户,为其设置密码
mysql> grant all privileges on *.* to root@'%'identified by '密码';
#更新权限
mysql>flush privileges;

五、安装PHP
由于自带的yum 源php版本是 php5.4 ,我觉得有点儿低,在此安装php7.1
首先我们需要追加CentOS 7.0的epel及remi源。
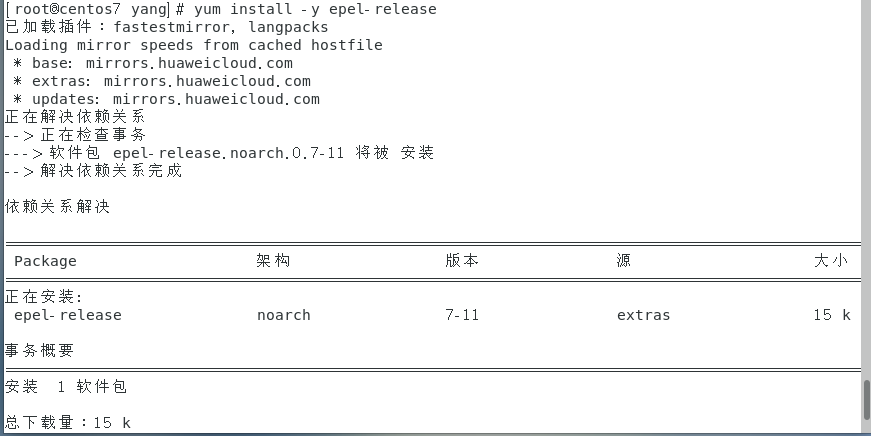
yum install -y epel-release //EPEL(Extra Pacakges for Enterprise Linux ) 为红帽操作系统提供的额外软件包,首先我们需要安装一个叫”epel-release”的软件包,这个软件包会自动配置yum的软件仓库
rpm -ivh http://rpms.famillecollet.com/enterprise/remi-release-7.rpm //Remi repository 是包含最新版本 PHP 和 MySQL 包的 Linux 源,由 Remi 提供维护。有个这个源之后,使用 YUM 安装或更新 PHP、MySQL、phpMyAdmin 等服务器相关程序的时候就非常方便了,相关内容可以参考http://www.ttlsa.com/yum/linux-remi-repository/

//使用yum list命令查看可安装的包(Packege)。
yum list --enablerepo=remi --enablerepo=remi-php71 | grep php
//yum源配置好了,下一步就安装PHP7.1。
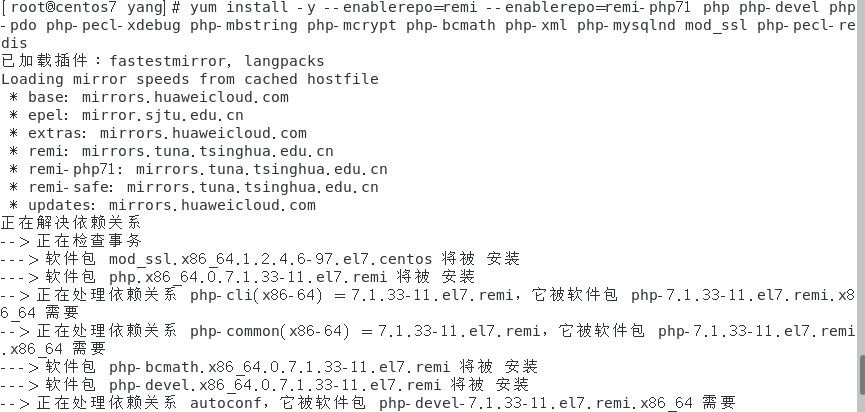
yum install -y --enablerepo=remi --enablerepo=remi-php71 php php-devel php-pdo php-pecl-xdebug php-mbstring php-mcrypt php-bcmath php-xml php-mysqlnd mod_ssl php-pecl-redis
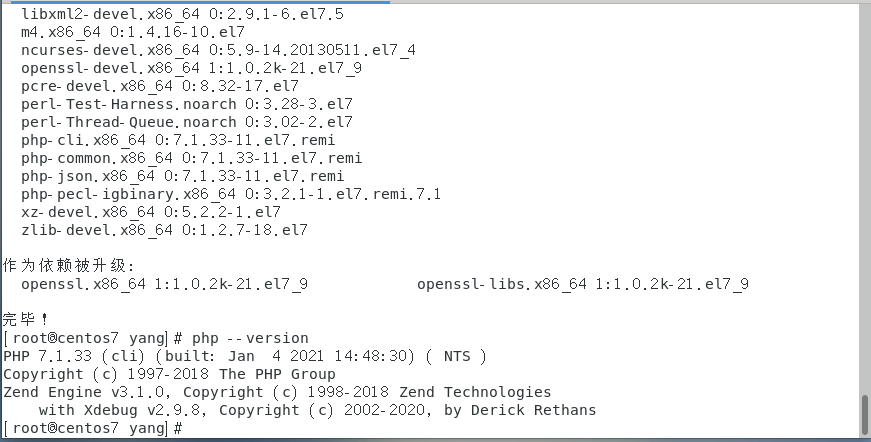
//用PHP命令查看版本。
php --version
六、验证LAMP是否安装成功
1、重启一下 apache 和 mysql

2、cd /var/www/html
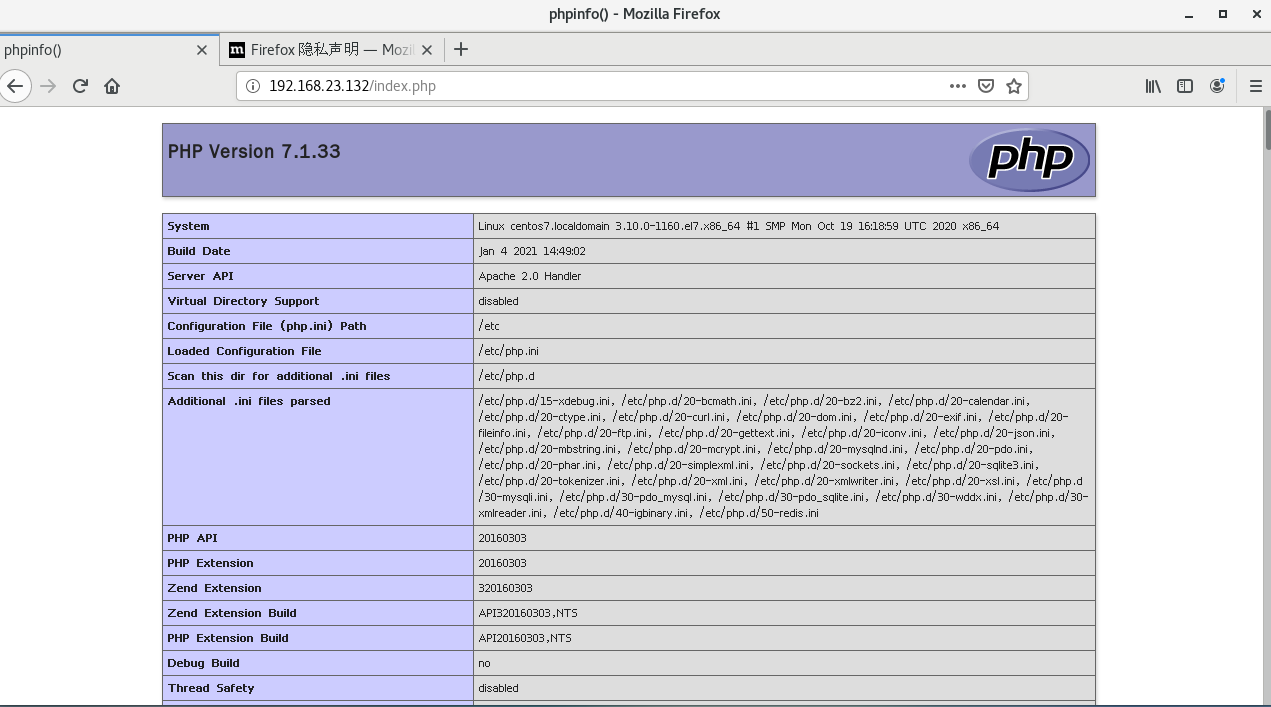
vim index.php 写入 phpinfo();
验证 http://192.168.23.132/index.php ,出现如下界面,代表安装OK。
到这里就完成了centos7的lamp安装

 浙公网安备 33010602011771号