python抓取电影<海王>影评词云生成

海王是前段时间大热的影片,个人对这种动漫题材的电影并不是很感兴趣.然鹅,最近这部电影实在太热了,正好最近看自然语言处理的时候,无意间发现了word cloud这个生成词云的库,还蛮好玩的,那就抓抓这部电影的影评来试试吧.
爬虫抓取豆瓣海王影评
首先我们登陆豆瓣,进入海王的影评页面.然后打开影评的每一页,看看url有什么特点.
还不错,url很规律.
再开个页面,F12看看, ,评论内容在<span class="short">的tag下.
ok,那就闲话少说,开始抓取吧.requests和BeautifulSoup那是必备的库了,写过爬虫的都知道,贼好用,谁用谁知道.
comments_counts = 0
current_url = "https://movie.douban.com/subject/3878007/comments?start=%d&limit=20&sort=new_score&status=P" % (comments_counts)
while True:
    r=requests.get(current_url)
    print("processing",current_url)
    if r.status_code == 200:
        bs = BeautifulSoup(r.text,"html.parser")
        #print(bs.find_all("span",class_="short"))
        for comment in bs.find_all("span",class_="short"):
            #print(comment.get_text())
            comments.append(comment.get_text())
    else:
        print(r.status_code,current_url)
        break

    comments_counts += 20
    current_url = "https://movie.douban.com/subject/3878007/comments?start=%d&limit=20&sort=new_score&status=P" % (comments_counts)
爬的过程里,遇到2个问题,本来爬的好好的,爬着爬着都给我返回403了,403是禁止访问啊,尼玛,肯定是豆瓣给反爬了.糟老头子坏得很嘛.
这时候我们需要把自己的爬虫请求伪装成浏览器请求.F12看一下.选中Network--左侧选中一个url-右侧headers中找到Request headers,其中包含了我们伪装爬虫所需要的信息.
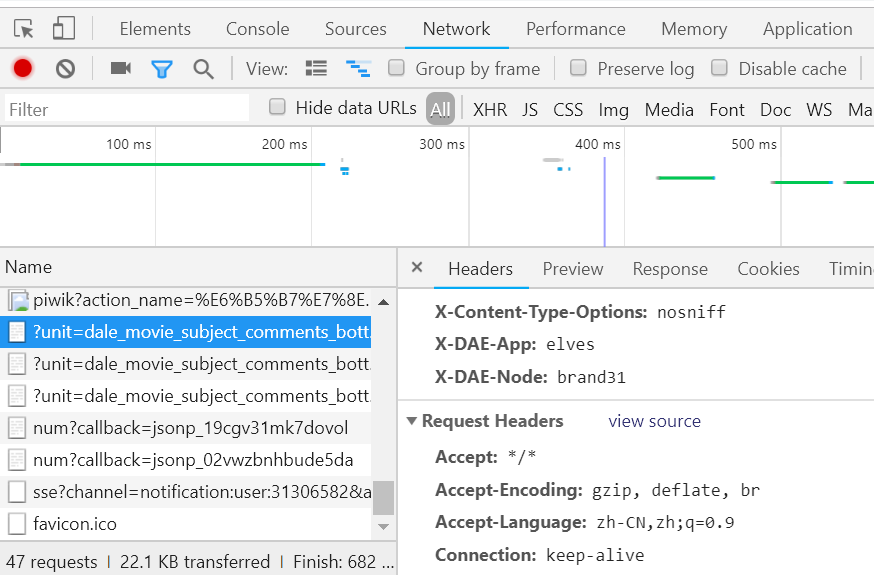
我们将我们的请求里加上
headers={'User-Agent': 'Mozilla/5.0 (Windows NT 10.0; Win64; x64) AppleWebKit/537.36 (KHTML, like Gecko) Chrome/71.0.3578.98 Safari/537.36'}
后发现请求还是返回403,再一次尝试加上cookiecookies = {'cookie':'你的cookie'},并且每次访问都sleep 2秒,免得服务器认为我访问太频繁把我ip给封了.此时访问成功了.
headers = {
           'User-Agent': 'Mozilla/5.0 (Windows NT 10.0; Win64; x64) AppleWebKit/537.36 (KHTML, like Gecko) Chrome/71.0.3578.98 Safari/537.36'
           ,'Connection': 'keep-alive'
           }
cookies = {'cookie':'你自己的cookie'}

r=requests.get(current_url,headers=headers,cookies=cookies)
然后,爬虫就开始开开心心地爬了,爬了N久,还没爬完,果然又采坑了..................
上面讲到,url很有规律,所以我们每一个url都是拼接出来的,我原先的想法是,如果评论一共200页,那么第201页的url应该是不能访问的.然鹅,即便是没有评论的评论页,也是可以访问的,比如第xx页.......
再次修改我们的代码
comments_counts = 0
current_url = "https://movie.douban.com/subject/3878007/comments?start=%d&limit=20&sort=new_score&status=P" % (comments_counts)
comments = []
headers = {
           'User-Agent': 'Mozilla/5.0 (Windows NT 10.0; Win64; x64) AppleWebKit/537.36 (KHTML, like Gecko) Chrome/71.0.3578.98 Safari/537.36'
           ,'Connection': 'keep-alive'
           }
cookies = {'cookie':'替换成你自己的cookie'}
effective = True
while effective:
    r=requests.get(current_url,headers=headers,cookies=cookies)
    print("processing",current_url)
    effective = False
    if r.status_code == 200:
        bs = BeautifulSoup(r.text,"html.parser")
        #print(bs.find_all("span",class_="short"))
        for comment in bs.find_all("span",class_="short"):
            #print(comment.get_text())
            comments.append(comment.get_text())
            effective = True
    else:
        print(r.status_code,current_url)
        break
    print(effective)
    comments_counts += 20
    current_url = "https://movie.douban.com/subject/3878007/comments?start=%d&limit=20&sort=new_score&status=P" % (comments_counts)

    time.sleep(2)
好了,到了这里,影评就已经抓取到存到了comments里.
这一步,我们做分词处理.用大名鼎鼎的jieba分词——一个中文分词库.
有2点要注意
- 去除各种标点符号
- 去除stopwords
去除标点请参考 https://github.com/fxsjy/jieba/issues/528.通过判断中文编码范围去除标点.
我是用正则表达式处理的,new_sentence = re.sub(r'[^\u4e00-\u9fa5]', ' ', old_sentence) 然后再进行分词的, \u4e00-\u9fa5这个是utf-8中,中文编码的范围
不过也有说对中文字符而言,不存在确定的范围,建议自己写个标点符号的dict,去做排除.
Actually, CJK characters are encoded together so there's no critical range for Chinese characters. A punctuation dict could be used to do the filtering.
幸运的是,通过中文编码范围的方式已经能够解决我的问题了.
去除stopwords的话要去下载中文的stopwords集.https://github.com/goto456/stopwords
我们选用"哈工大停用词表".
开始分词.jieba分词里有3种模式.官方git请戳这里.
支持三种分词模式:
- 精确模式,试图将句子最精确地切开,适合文本分析;
- 全模式,把句子中所有的可以成词的词语都扫描出来, 速度非常快,但是不能解决歧义;
- 搜索引擎模式,在精确模式的基础上,对长词再次切分,提高召回率,适合用于搜索引擎分
# encoding=utf-8
import jieba

seg_list = jieba.cut("我来到北京清华大学", cut_all=True)
print("Full Mode: " + "/ ".join(seg_list))  # 全模式

seg_list = jieba.cut("我来到北京清华大学", cut_all=False)
print("Default Mode: " + "/ ".join(seg_list))  # 精确模式

seg_list = jieba.cut("他来到了网易杭研大厦")  # 默认是精确模式
print(", ".join(seg_list))

seg_list = jieba.cut_for_search("小明硕士毕业于中国科学院计算所,后在日本京都大学深造")  # 搜索引擎模式
print(", ".join(seg_list))
【全模式】: 我/ 来到/ 北京/ 清华/ 清华大学/ 华大/ 大学 【精确模式】: 我/ 来到/ 北京/ 清华大学 【新词识别】:他, 来到, 了, 网易, 杭研, 大厦 (此处,“杭研”并没有在词典中,但是也被Viterbi算法识别出来了) 【搜索引擎模式】: 小明, 硕士, 毕业, 于, 中国, 科学, 学院, 科学院, 中国科学院, 计算, 计算所, 后, 在, 日本, 京都, 大学, 日本京都大学, 深造
这里我们采用,精确模式去对我们的影评分词.
f = open("哈工大停用词表.txt",encoding='utf-8')
stopword_list = [line.strip() for line in f.readlines()]

new_comments = []
for comment in comments:
    new_comment = re.sub(r'[^\u4e00-\u9fa5]', '', comment)
    new_comments.append(new_comment)

word_list = [word for word in jieba.cut(''.join(new_comments),cut_all=False) if word not in stopword_list]
print(word_list)
word_list内容如下:
['精美绝伦', '水下', '世界', '宏伟', '瑰丽', '海底',.....]
完成了分词以后,我们开始绘制我们的词云.
我们使用wordcloud. 官方文档https://amueller.github.io/word_cloud/index.html
在绘图的时候又踩了个坑,中文的词绘制出来全是空的长方形.请参考https://blog.csdn.net/xiemanR/article/details/72796739.
经过测试发现不支持显示中文的原因是因为wordcloud的默认字体不支持中文,那就好办了,我们设置一种支持中文的字体即可, wordlcloud.WordCloud类初始化函数有个设置字体的参数font_path,把支持中文的字体的路径传给font_path。
你可以去C:\Windows\Fonts下找一个自己喜欢的中文字体.右键属性可以看到字体名称.或者你去网上下载自己喜欢的中文字体.
wordcloud的api用法请参考官方文档的例子.wordcloud的api简单,稍微拿个例子看看改改就能上手.这里就不多说了.我选用了自己的博客头像做背景图样式.
from wordcloud import WordCloud, ImageColorGenerator
from scipy.misc import imread
back_coloring = imread('./background.jpg')
print(type(back_coloring))
#wc = WordCloud(background_color="white", max_words=200, mask=back_coloring,max_font_size=100, random_state=42, width=1000, height=860, margin=2,)
font='C:\Windows\Fonts\simhei.ttf'
wc = WordCloud(background_color="black",font_path=font,mask=back_coloring,max_words=2000)
wc.generate(" ".join(word_list))#注意:传进来的word_list要用空格分隔

import matplotlib.pyplot as plt

# create coloring from image
image_colors_default = ImageColorGenerator(back_coloring)

plt.figure()
# recolor wordcloud and show
plt.imshow(wc, interpolation="bilinear")
plt.axis("off")
plt.show()

# save wordcloud
wc.to_file('./海王_wordcloud.png')
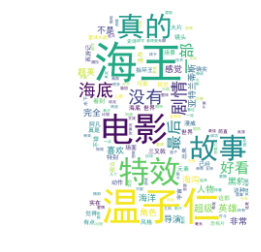
大功告成.
完整代码请戳:这里.

 浙公网安备 33010602011771号