

pytest测试框架
一.安装下载
终端命令下载,下载到python/lib/site-packages;python interpreter里下载可以下载到指定的interpreter(如果使用conda需要下载到指定interpreter)。
1.pytest
pip install pytest
2.pytest -html:生成报告
pip install python --html
3.python -repeat:重复执行
pip install python -repeat
二.命名规则
1.py文件必须是以test_开头或以_test结尾;
2.测试类必须是以Test开头,并且不能带init方法,类里的方法必须以test_开头;
3.用例函数必须以test_开头。
三.ini配置文件
在项目根目录创建ini文件,内容:
[pytest]
addopts=-vs -m slow --html=./report/report.html
testpaths=testcase
test_files=test_*.py
test_classes=Test*
test_functions=test_*
四.测试执行
1.使用main函数执行
(1)使用main(['-s','文件名'])
2.命令执行
终端输入:pytest 文件名 --html=./report/report.html
五.前后置用例
setup_*,teardown_*
范围:function,class,module
六.conftest.py文件
1.pytest默认读取conftest.py文件里的所有fixture;
2.conftest.py名字不能改动;
3.conftest.py只对package下的用例生效;
4.不同目录可以有独立的conftest.py,一个项目可以有多个conftest.py;
5.测试用例文件不需要手动import conftest.py
6.最顶层的conftest.py一般写全局的fixture。
七.fixture装饰器
fixture装饰器可以写在conftest.py文件里也可以直接写在测试用例的py文件里。
测试用例可以引用fixture装饰器的方法,
@pytest.fixture()          #fixture装饰器
def get_data1():             #fixture装饰器的方法
    a="-----------fixture1-----------"
    b="2"
    print(a)
    return b
def test_1(get_data1):         #测试用例引用fixture装饰器的方法
    print("test_1")
    print(get_data1+"1")
测试用例可以引用多个fixture装饰器,fixture装饰器也可以相互调用
@pytest.fixture()
def get_data2():       #被get_data3调用
    c="-----------fixture2------------"
    print(c)
    return c
@pytest.fixture()
def get_data3(get_data2):      #get_data3装饰器方法调用get_data2装饰器方法
    d="-----------fixture3------------"
    e="fixture3"+get_data2
    print(e)
    print(d)
    return e
def test_7(get_data1,get_data3):     #引用多个fixture装饰器的方法
    print("test_7")
fixture作用范围:@pytest.fixture(scope="*")
*为作用范围,session,module,class,function
fixture自动调用:@pytest.fixture(autouse=True)
fixture的param和ids:
param可选多种形式传入,类似for循环,必须在fixture方法内引入request,再使用request.param的返回值提供给函数调用。
一般与ids一起使用,一对一配对。
@pytest.fixture(params=[1,[1,2],"ed",(2,1,"f")],ids=['one','two','three','four'])   #param和ids一对一对应
def get_data4(request):
    return request.param    #固定写法
def test_4(get_data4):
    print(get_data4)
fixture重命名:@pytest.fixture(name="rename")
测试用例引入fixture方法时不再使用原本的函数名称而是使用重命名函数,使用函数名称会报错
def test_5(rename):     #执行成功
def test_7(get_data7):     #执行失败
八.跳过测试用例
1.装饰器:
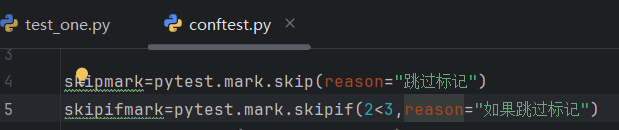
@pytest.mark.skip(reason="跳过用例"),@pytest.mark.skipif(2>3,reason="跳过用例")
可以赋值给一个变量,不同模块可以共享这一个变量,可以把变量统一放在一个文件里。
2.skip函数:pytest.skip
相当于break跳出循环,不再执行剩余内容。
九.参数化
1.一次传入多个参数
@pytest.mark.parametrize("input,output",[(2,3),(5,7),(7,4)])
def test_1(input,output):
    print("input=%d,output=%d"%(input,output))
2.函数返回值作为参数
def set_data():
    return [(1,3),(65,52)]
@pytest.mark.parametrize("a,b",set_data())
def test_2(self,a,b):
    print("a=%d,b=%d"%(a,b))
3.做标记的参数
@pytest.mark.parametrize("input,output",[(2,3),(5,7),pytest.param(21,44,marks=pytest.mark.xfail)])
十.用例执行失败重试
下载pytest-rerunfailures。pytest-rerun插件需要使用git,如果系统没有git插件,下载的时候git插件也会一起下载,如果把git插件卸载会报错,git和rerun下载后还需要配置,否则会报错export GIT_PYTHON_REFRESH=quiet。以下是失败重跑的三种方法:
1.装饰器:@pytest.mark.flaky(reruns=3,reruns_delay=2),reruns的值为失败后重跑的次数,reruns_delay为失败后延迟重跑的时间。
2.pytest.main(["-vs","--reruns","3","--reruns-delay","2","./test_onw.py"]),
3.终端命令:pytest ./testcase/testone/test_onw.py --reruns 20 --reruns-delay 5
十一.标记对测试用例进行分级
1.一个测试类或方法可以有多个标记;
2.一个标记可以作用于多个类或方法;
3.命令行输入执行:pytest filename -m markname;
4.执行多个标记:pytest filename -m "markname1 or markname2";
@pytest.mark.L1
@pytest.mark.L2
def test_4():
    print("test_4")
@pytest.mark.L1
def test_5():
    print("test_5")
十二.解析yaml文件传递数据
1.新建yaml文件和解析yaml的文件
import yaml      #先下载第三方库,在conftest.py文件里无法引入yam库
def readyaml():
    with open('yaml文件绝对路径','r',encoding='utf-8') as f:
        get_yaml=yaml.load(f,Loader=yaml.FullLoader)
    print(get_yaml)
    print(type(get_yaml))
    return get_yaml['data']      #readyaml方法返回的是yaml文件里的值
2.conftest.py文件的fixture方法里引入解析的yaml
from testcase.testone.yamldata import *       #引入解析yaml的文件
@pytest.fixture(params=readyaml())         #引入readyaml方法的返回值,也就是yaml文件里的值
def get_data8(request):
    return request.param
3.在测试用例里引入contest.py文件的fixture方法
def test_8(get_data8):
    print(get_data8)
十三.测试报告
1.html报告
pytest框架自带的测试报告,但是可读性不太好。
下载:pip install pytest-html,命令:pytest testfile --html=./report/report.html
2.allure报告
(1)下载allure
https://github.com/allure-framework/allure2/releases,可以解压放在python的Lib/site-package里,然后环境变量里设置环境变量。在dos窗口输入allure验证是否环境变量是否配置成功。
(2)下载allure-pytest插件
pycharam终端命令行pip install allure-pytest,allure-pytest下载到python的site-package里。
(3)测试报告描述
先import allure。在类上加装饰器@allure.feature(""),测试用例前加上@allure.story(""),在用例里添加步骤with allure.step(""):。
(4)命令生成和查看allure测试报告
生成测试报告:pytest testfile --alluredir=./report/allure-result。
读取测试报告:allure serve ./report/alluresult 。
清除allure-result历史数据:在生成测试报告的命令后面加上--clean-alluredir。pytest testfile --alluredir=./report/allure-result --clean-alluredir。
十四.日志

 浙公网安备 33010602011771号