
windows安装zookeeper和kafka,flume
2018-05-03 16:52 晨曦曙光 阅读(1471) 评论(0) 收藏 举报一、安装JDK
过程比较简单,这里不做说明。
最后打开cmd输入如下内容,表示安装成功

二、安装zooeleeper
下载安装包:http://zookeeper.apache.org/releases.html#download
下载后解压到一个目录:
1.进入Zookeeper设置目录,笔者D:\Java\Tool\zookeeper-3.4.6\conf
2. 将“zoo_sample.cfg”重命名为“zoo.cfg”
3. 在任意文本编辑器(如notepad)中打开zoo.cfg
4. 找到并编辑dataDir=D:\\Java\\Tool\\zookeeper-3.4.6\\tmp
5. 与Java中的做法类似,我们在系统环境变量中添加:
a. 在系统变量中添加ZOOKEEPER_HOME = D:\Java\Tool\zookeeper-3.4.6
b. 编辑path系统变量,添加为路径%ZOOKEEPER_HOME%\bin;
6. 在zoo.cfg文件中修改默认的Zookeeper端口(默认端口2181)
这是笔者最终的文件内容:
# The number of milliseconds of each tick
tickTime=2000
# The number of ticks that the initial
# synchronization phase can take
initLimit=10
# The number of ticks that can pass between
# sending a request and getting an acknowledgement
syncLimit=5
# the directory where the snapshot is stored.
# do not use /tmp for storage, /tmp here is just
# example sakes.
dataDir=D:\\Java\\Tool\\zookeeper-3.4.6\\tmp
# the port at which the clients will connect
clientPort=2181
# the maximum number of client connections.
# increase this if you need to handle more clients
#maxClientCnxns=60
#
# Be sure to read the maintenance section of the
# administrator guide before turning on autopurge.
#
# http://zookeeper.apache.org/doc/current/zookeeperAdmin.html#sc_maintenance
#
# The number of snapshots to retain in dataDir
#autopurge.snapRetainCount=3
# Purge task interval in hours
# Set to "0" to disable auto purge feature
#autopurge.purgeInterval=1
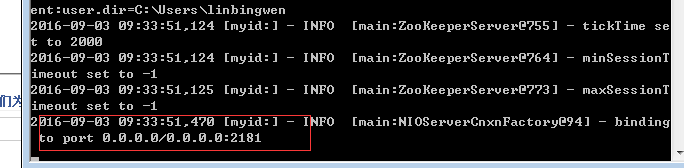
7. 打开新的cmd,输入zkServer,运行Zookeeper。
8. 命令行提示如下:说明本地Zookeeper启动成功
三、安装与运行Kafka
下载
http://kafka.apache.org/downloads.html。注意要下载二进制版本的
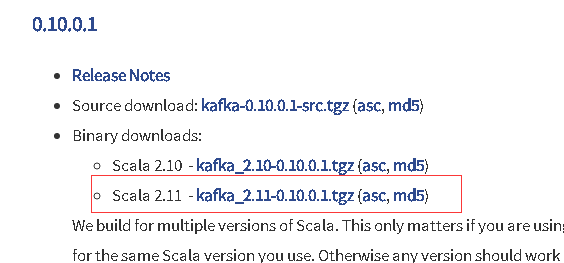
下载后解压到任意一个目录,笔者的是D:\Java\Tool\kafka_2.11-0.10.0.1
1. 进入Kafka配置目录,D:\Java\Tool\kafka_2.11-0.10.0.1
2. 编辑文件“server.properties”
3. 找到并编辑log.dirs=D:\Java\Tool\kafka_2.11-0.10.0.1\kafka-log,这里的目录自己修改成自己喜欢的
4. 找到并编辑zookeeper.connect=localhost:2181。表示本地运行
5. Kafka会按照默认,在9092端口上运行,并连接zookeeper的默认端口:2181。
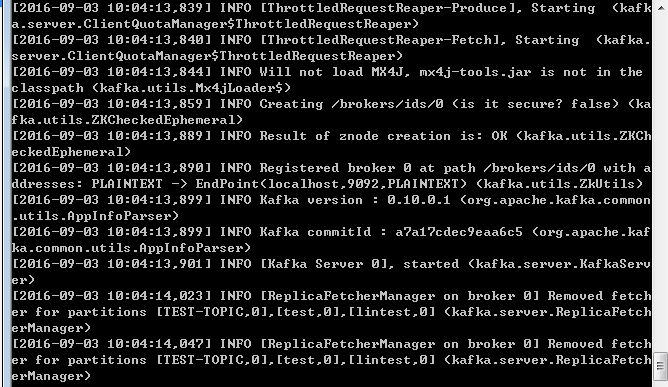
运行:
重要:请确保在启动Kafka服务器前,Zookeeper实例已经准备好并开始运行。
1.进入Kafka安装目录D:\Java\Tool\kafka_2.11-0.10.0.1
2.按下Shift+右键,选择“打开命令窗口”选项,打开命令行。
3.现在输入
.\bin\windows\kafka-server-start.bat .\config\server.properties
并回车。
2.kafka第一次启动报错:找不到或无法加载主类
(1)在配置好kafka的server.properties文件后,cmd进入命令窗口输入命令:.\bin\windows\kafka-server-start.bat config\server.properties提示错误:错误: 找不到或无法加载主类 Files\Java\jdk1.7.0_80\lib;C:\Program 解决方式如下:在kafka安装目录中找到bin\windows目录中的kafka-run-class.bat找到142行为%CLASSPATH%加上双引号
修改前:
set COMMAND=%JAVA% %KAFKA_HEAP_OPTS% %KAFKA_JVM_PERFORMANCE_OPTS% %KAFKA_JMX_OPTS% %KAFKA_LOG4J_OPTS% -cp %CLASSPATH% %KAFKA_OPTS% %*
修改后:
set COMMAND=%JAVA% %KAFKA_HEAP_OPTS% %KAFKA_JVM_PERFORMANCE_OPTS% %KAFKA_JMX_OPTS% %KAFKA_LOG4J_OPTS% -cp "%CLASSPATH%" %KAFKA_OPTS% %*
四、测试
上面的Zookeeper和kafka一直打开
(1)、创建主题
1.进入Kafka安装目录D:\Java\Tool\kafka_2.11-0.10.0.1
2.按下Shift+右键,选择“打开命令窗口”选项,打开命令行。
3.现在输入
.\bin\windows\kafka-topics.bat --create --zookeeper localhost:2181 --replication-factor 1 --partitions 1 --topic linlin
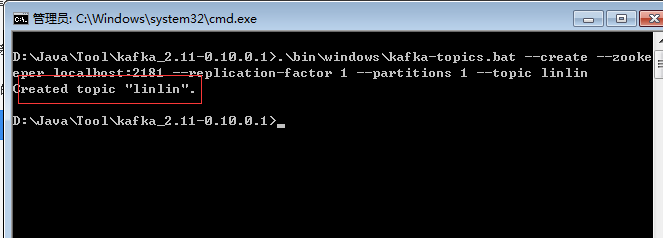
注意不要关了这个窗口!
(2)创建生产者
1.进入Kafka安装目录D:\Java\Tool\kafka_2.11-0.10.0.1
2.按下Shift+右键,选择“打开命令窗口”选项,打开命令行。
3.现在输入
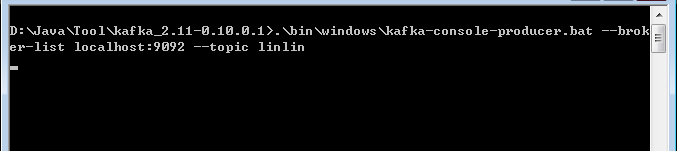
注意不要关了这个窗口!
(3)创建消费者
1.进入Kafka安装目录D:\Java\Tool\kafka_2.11-0.10.0.1
2.按下Shift+右键,选择“打开命令窗口”选项,打开命令行。
3.现在输入
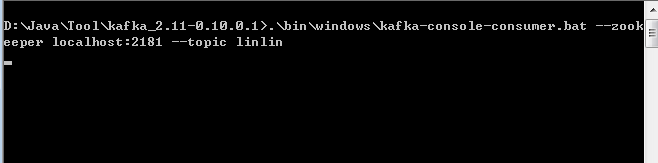
注意不要关了这个窗口!
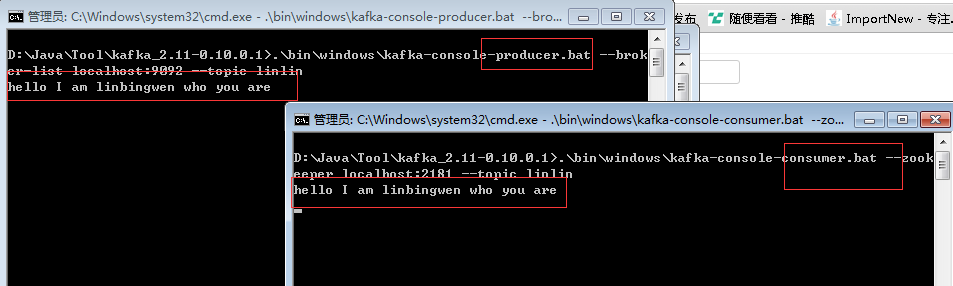
然后在第2个窗口中输入内容,最后记得回车
五,安装flume
1、运行
-
创建配置文件:在解压后的文件apache-flume-1.6.0-bin/conf下创建一个flume.conf,内容如下。
 # example.conf: A single-node Flume configuration

 # Name the components on this agent
 a1.sources = r1
 a1.sinks = k1
 a1.channels = c1

 # Describe/configure the source
 a1.sources.r1.type = netcat
 a1.sources.r1.bind = localhost
 a1.sources.r1.port = 44444

 # Describe the sink
 a1.sinks.k1.type = logger

 # Use a channel which buffers events in memory
 a1.channels.c1.type = memory
 a1.channels.c1.capacity = 1000
 a1.channels.c1.transactionCapacity = 100

 # Bind the source and sink to the channel
 a1.sources.r1.channels = c1
 a1.sinks.k1.channel = c1
2.打开cmd进入到apache-flume-1.6.0-bin\bin目录下,运行如下命令
flume-ng.cmd agent -conf ../conf -conf-file ../conf/flume.conf -name al -property flume.root.logger=INFO,console

 浙公网安备 33010602011771号