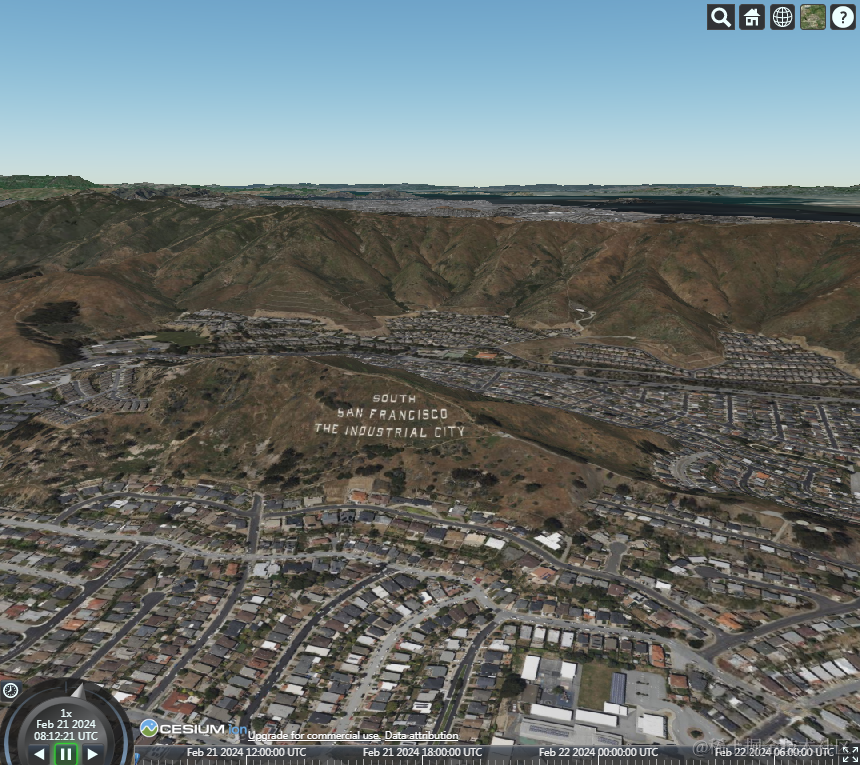
Cesium之Webpack配置指南
1. 获取Token
注册 Cesium 账号,点击 Access Tokens Tab 并复制默认 token

2. 安装依赖包
npm init
npm install cesium
npm install --save-dev webpack webpack-cli
npm install --save-dev style-loader css-loader  # 处理css
npm install --save-dev html-webpack-plugin      # 生成html
npm install --save-dev copy-webpack-plugin      # 复制静态资源插件 (* node14之前的,请安装 copy-webpack-plugin@9)
npm install --save-dev webpack-dev-server       # 开发环境[可选] (* node14之前的,请安装 webpack-dev-server@4 )
npm install --save-dev @babel/core @babel/preset-env babel-loader  # 兼容js[可选](* node14之前的,请安装 babel-loader@8)
3. 文件结构
node_modules
package-lock.json
package.json
Public
   index.html        # 模板
src
   index.js          # 入口
webpack.config.js    # webpack配置
其中模板如下:
<!DOCTYPE html>
<html>
   <head>
      <title>Map</title>
      <style>
         #root {
            width: 1080px;
            height: 960px;
         }
      </style>
   </head>
   <body>
      <div id="root"></div>
   </body>
</html>
4. Webpack 配置
webpack.config.js
const path = require('path');
const webpack = require('webpack');
const HtmlWebpackPlugin = require('html-webpack-plugin');
const CopyWebpackPlugin = require('copy-webpack-plugin');

// 从这里复制Cesium静态资源  (Workers、ThirdParty、Assets、Widgets)
const CESIUM_SOURCE_PATH = 'node_modules/cesium/Build/Cesium';
// 打包后Cesium静态资源放置的位置
const CESIUM_BASE_URL = 'public/Cesium/BaseSource';

module.exports = {
   mode: 'production',
   entry: './src/index.js', // 入口
   output: {
      filename: 'js/[name].[hash].js',
      path: path.resolve(__dirname, 'dist'),
      clean: true
   },

   // 开发环境(可选)
   devServer: {
      static: './dist',
   },
   // 关闭性能提示(可选)
   performance: {
      hints: false,
   },

   plugins: [
      new HtmlWebpackPlugin({
         title: 'output',
         template: './Public/index.html',
      }),

      // 复制静态资源
      new CopyWebpackPlugin({
         patterns: [
            {
               from: path.join(CESIUM_SOURCE_PATH, 'Workers'),
               to: `${CESIUM_BASE_URL}/Workers`,
            },
            {
               from: path.join(CESIUM_SOURCE_PATH, 'ThirdParty'),
               to: `${CESIUM_BASE_URL}/ThirdParty`,
            },
            {
               from: path.join(CESIUM_SOURCE_PATH, 'Assets'),
               to: `${CESIUM_BASE_URL}/Assets`,
            },
            {
               from: path.join(CESIUM_SOURCE_PATH, 'Widgets'),
               to: `${CESIUM_BASE_URL}/Widgets`,
            }
         ],
      }),

      // 定义全局变量
      new webpack.DefinePlugin({
         CESIUM_BASE_URL: JSON.stringify(CESIUM_BASE_URL), //  CesiumJS 静态资源位置
      }),
   ],

   // 处理 js 、 css 和 图片资源
   module: {
      rules: [
          // js可选
          {
            test: /\.m?js$/,
            exclude: /node_modules/,
            use: {
               loader: 'babel-loader',
               options: {
                  presets: ['@babel/preset-env'],
               },
            },
         },
         {
            test: /\.css$/i,
            use: ['style-loader', 'css-loader'],
         },
         {
            test: /\.(png|svg|jpg|jpeg|gif)$/i,
            type: 'asset/resource',
         },
      ],
   },
};
package.json 中定义脚本
"scripts": {
   "build": "webpack",              /** 生产环境 */
   /** 如果还要配置开发环境 */
   "start": "webpack serve --open"
},
5. 初始化 Cesium
// src/index.js (官方例子)

import {
   Cartesian3,
   createOsmBuildingsAsync,
   Ion,
   Math as CesiumMath,
   Terrain,
   Viewer,
} from 'cesium';
import 'cesium/Build/Cesium/Widgets/widgets.css';

// ** 填入Token
Ion.defaultAccessToken = '你的token';

// 指定某个容器ID,初始化 Cesium Viewer
const viewer = new Viewer('root', {
   terrain: Terrain.fromWorldTerrain(),
});

// 定义摄像头的位置与角度 官方给的位置是旧金山
viewer.camera.flyTo({
   destination: Cartesian3.fromDegrees(-122.4175, 37.655, 400),
   orientation: {
      heading: CesiumMath.toRadians(0.0),
      pitch: CesiumMath.toRadians(-15.0),
   },
});

// 加入建筑图集
const buildingTileset = await createOsmBuildingsAsync(); // 创建建筑物图集
viewer.scene.primitives.add(buildingTileset); // primitives:所有物体的数组
6. 运行
npm run build后,把生产文件夹dist的内容放在 Apache 或者 Nginx 服务器上,进行访问;或者右键dist文件夹下index.html,点击open with live server(VsCode 插件)。npm run start,开发环境实时查看

加载本地地图瓦片
首先需要一个地图瓦片资源。下面例子中用的是官方TMS例子的资源,已经将瓦片资源放在了Public\Cesium\TmsSource中。
修改webpack.config.js
// 定义一个变量:打包后地图瓦片放置的位置
const CESIUM_MAP_SOURCE_URL = 'public/Cesium/MapSource';

// ...

plugins:[
     new CopyWebpackPlugin({
         patterns: [
            // ...
            // 复制地图瓦片到指定位置
            {
               from: path.join('Public', 'Cesium', 'TmsSource'),
               to: CESIUM_MAP_SOURCE_URL,
            },
         ],
      }),
     // 增加一个全局变量
    new webpack.DefinePlugin({
     // ...
     CESIUM_MAP_SOURCE_URL: JSON.stringify(CESIUM_MAP_SOURCE_URL)
    }),
]
将入口的index.js的代码换成:
import * as Cesium from 'cesium';
import 'cesium/Build/Cesium/Widgets/widgets.css';

const viewer = new Cesium.Viewer('root');
const provider = await Cesium.TileMapServiceImageryProvider.fromUrl(
   CESIUM_MAP_SOURCE_URL,  // 上面配置过的地址
   {
      fileExtension: 'png',
      maximumLevel: 4,
      rectangle: new Cesium.Rectangle(
         Cesium.Math.toRadians(-120.0),
         Cesium.Math.toRadians(20.0),
         Cesium.Math.toRadians(-60.0),
         Cesium.Math.toRadians(40.0)
      ),
   }
);
const imageryLayer = new Cesium.ImageryLayer(provider);
viewer.imageryLayers.add(imageryLayer);
重新运行
npm run start

打包的一些优化
瓦片数据有时很大,一般会放在其他服务器上。如果依旧放在本地,那么可以手动将资源复制到对应打包路径下,跳过打包的复制操作,让编译过程更快:
- 把地图瓦片资源复制到
CESIUM_MAP_SOURCE_URL中,也就是dist/public/Cesium/MapSource中。 - 注释掉
plugins的CopyWebpackPlugin关于地图瓦片复制的操作。// webpack.config.js plugins: [ new CopyWebpackPlugin({ patterns: [ // ... ], }), ], - 输出时保留public文件夹,并把其他的重新清理替换掉
// webpack.config.js

output: {
   // ...
   clean: {
      keep: /public/, // 保留 'public' 下的静态资源
   },
}
Cesium的必要静态资源也很少变动,也可以用以上方式操作。即手动把
node_modules/cesium/Build/Cesium的四个文件夹复制到打包目录的public/Cesium/BaseSource中,并注释掉CopyWebpackPlugin中关于复制的操作


 浙公网安备 33010602011771号