

ActiveMQ
ActiveMQ 是 Apache 出品,最流行的,能力强劲的开源消息总线。ActiveMQ 是一个完全支持 JMS1.1 和 J2EE 1.4 规范的 JMS Provider 实现,尽管 JMS 规范出台已经是很久的事情了,但是 JMS 在当今的 J2EE 应用中间仍然扮演着特殊的地位。
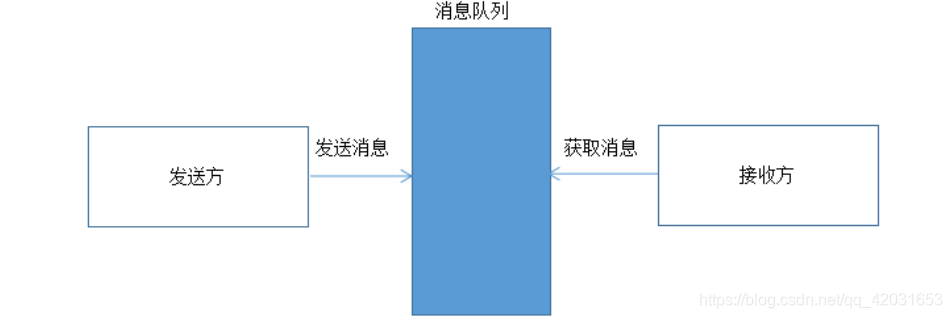
“消息”是在两台计算机间传送的数据单位。消息可以非常简单,例如只包含文本字符串;也可以更复杂,可能包含嵌入对象。
“消息队列”是在消息的传输过程中保存消息的容器。
常用消息服务应用 :
ActiveMQ
ActiveMQ 是 Apache 出品,最流行的,能力强劲的开源消息总线。ActiveMQ 是一个完全支持 JMS1.1 和 J2EE 1.4 规范的 JMS Provider 实现。
RabbitMQ
RabbitMQ 是一个在 AMQP 基础上完成的,可复用的企业消息系统。他遵循 Mozilla Public License 开源协议。开发语言Erlang。
RocketMQ
由阿里巴巴定义开发的一套消息队列应用服务。
消息服务的应用场景
消息队列的主要特点是异步处理,主要目的是减少请求响应时间和解耦。所以主要的使用场景就是将比较耗时而且不需要即时(同步)返回结果的操作作为消息放入消息队列。同时由于使用了消息队列,只要保证消息格式不变,消息的发送方和接收方并不需要彼此联系,也不需要受对方的影响,即解耦和。
什么是 JMS
JMS(Java Messaging Service)是 Java 平台上有关面向消息中间件的技术规范,它便于消息系统中的 Java 应用程序进行消息交换,并且通过提供标准的产生、发送、接收消息的接口,简化企业应用的开发。
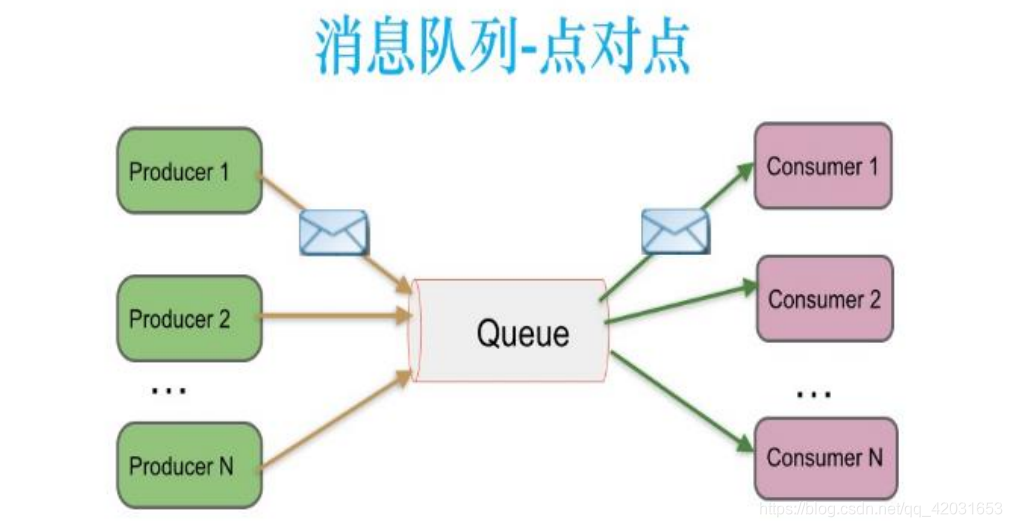
点对点模型(Point To Point)
生产者发送一条消息到 queue,只有一个消费者能收到。
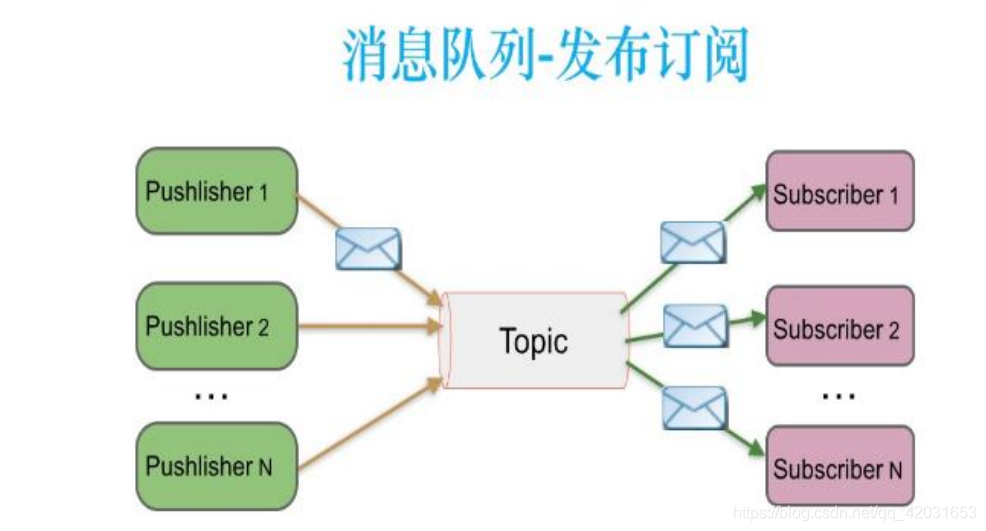
发布订阅模型(Publish/Subscribe)
发布者发送到 topic 的消息,只有订阅了 topic 的订阅者才会收到消息。
ActiveMQ 安装:
ActiveMQ 官网: http://activemq.apache.org
ActiveMQ5.10.x 以上版本必须使用 JDK1.8 才能正常使用。
ActiveMQ5.9.x 及以下版本使用 JDK1.7 即可正常使用。
上传至 Linux 服务器
解压安装文件
tar -zxf apache-activemq-5.9.0-bin.tar.gz
检查权限
ls -al apache-activemq-5.9.0/bin
如果权限不足,则无法执行,需要修改文件权限:
chmod 755 activemq
复制应用至本地目录
cp -r apache-activemq-5.9.0 /usr/local/activemq
启动 ActiveMQ
/usr/local/activemq/bin/activemq start
测试 ActiveMQ
ps aux | grep activemq
见到下述内容即代表启动成功

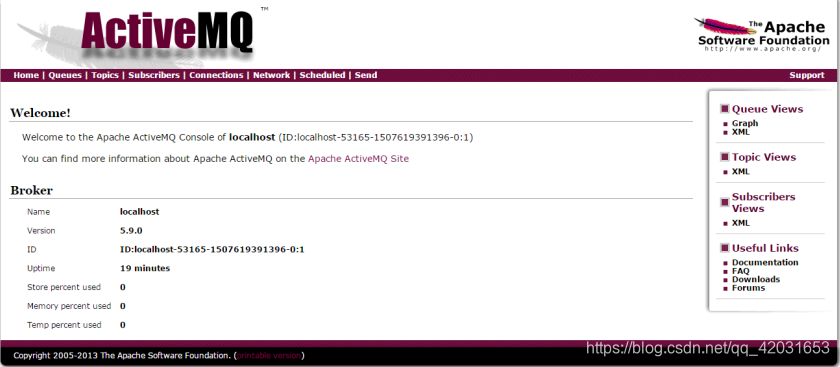
管理界面 :
使用浏览器访问 ActiveMQ 管理应用, 地址如下:
http://ip:8161/admin/
用户名: admin
密码: admin
ActiveMQ 使用的是 jetty 提供 HTTP 服务.启动稍慢,建议短暂等待再访问测试.
见到如下界面代表服务启动成功
如果需要修改访问端口的话
修改 ActiveMQ 配置文件: /usr/local/activemq/conf/jetty.xml

配置文件修改完毕,保存并重新启动 ActiveMQ 服务。
如果需要修改用户名和密码的话
修改 conf/users.properties 配置文件.内容为: 用户名=密码
保存并重启 ActiveMQ 服务即可.
重启 ActiveMQ
/usr/local/activemq/bin/activemq restart
配置文件 activemq.xml
配置文件中,配置的是 ActiveMQ 的核心配置信息. 是提供服务时使用的配置. 可以修改启动的访问端口. 即 java 编程中访问ActiveMQ 的访问端口.
默认端口为 61616.
使用协议是: tcp 协议.
修改端口后, 保存并重启 ActiveMQ 服务即可.
ActiveMQ 目录介绍 :
从它的目录来说,还是很简单的:
* bin 存放的是脚本文件
* conf 存放的是基本配置文件
* data 存放的是日志文件
* docs 存放的是说明文档
* examples 存放的是简单的实例
* lib 存放的是 activemq 所需 jar 包
* webapps 用于存放项目的目录
ActiveMQ 术语:
1 Destination
目的地,JMS Provider(消息中间件)负责维护,用于对 Message 进行管理的对象。
MessageProducer 需要指定 Destination 才能发送消息,MessageReceiver 需要指定 Destination 才能接收消息。
2 Producer
消息生成者,负责发送 Message 到目的地。
3 Consumer | Receiver
消息消费者,负责从目的地中消费【处理|监听|订阅】Message。
4 Message
消息,消息封装一次通信的内容。
ActiveMQ 常用 API 简介
下述 API 都是接口类型,由定义在 javax.jms 包中.是 JMS 标准接口定义.
1.1ConnectionFactory
链接工厂, 用于创建链接的工厂类型.
1.2Connection
链接. 用于建立访问 ActiveMQ 连接的类型, 由链接工厂创建.
1.3Session
会话, 一次持久有效有状态的访问. 由链接创建.
1.4Destination & Queue
目的地, 用于描述本次访问 ActiveMQ 的消息访问目的地. 即 ActiveMQ 服务中的具体队列. 由会话创建. interface Queue extends Destination
1.5MessageProducer
消息生成者, 在一次有效会话中, 用于发送消息给 ActiveMQ 服务的工具. 由会话创建.
1.6MessageConsumer
消息消费者【消息订阅者,消息处理者】, 在一次有效会话中, 用于从 ActiveMQ 服务中获取消息的工具. 由会话创建.
1.7Message
消息, 通过消息生成者向 ActiveMQ 服务发送消息时使用的数据载体对象或消息消费者从 ActiveMQ 服务中获取消息时使用的数据载体对象. 是所有消息【文本消息,对象消息等】 具体类型的顶级接口. 可以通过会话创建或通过会话从 ActiveMQ 服务中获取.
练习:
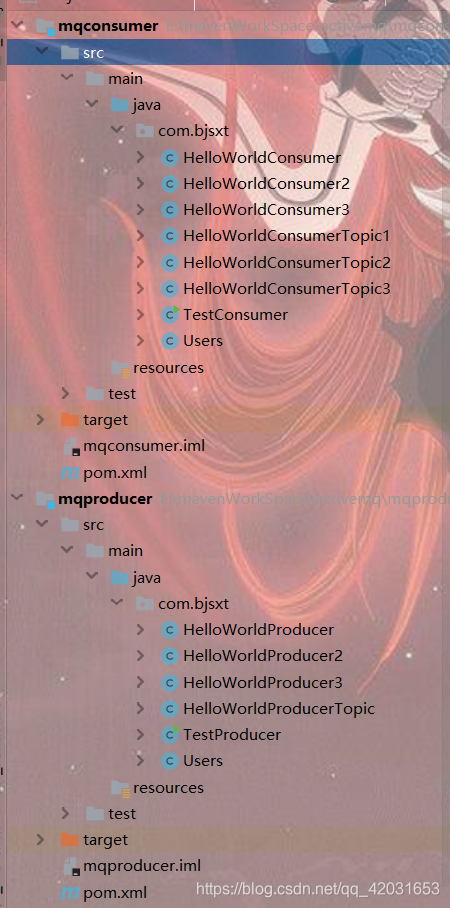
producer-pom
<?xml version="1.0" encoding="UTF-8"?>
<project xmlns="http://maven.apache.org/POM/4.0.0"
         xmlns:xsi="http://www.w3.org/2001/XMLSchema-instance"
         xsi:schemaLocation="http://maven.apache.org/POM/4.0.0 http://maven.apache.org/xsd/maven-4.0.0.xsd">
    <modelVersion>4.0.0</modelVersion>

    <groupId>com.bjsxt</groupId>
    <artifactId>mq-producer</artifactId>
    <version>1.0-SNAPSHOT</version>
    <packaging>jar</packaging>
    <dependencies>
        <dependency>
            <groupId>org.apache.activemq</groupId>
            <artifactId>activemq-all</artifactId>
            <version>5.9.0</version>
        </dependency>
    </dependencies>

</project>
consumer-pom
<?xml version="1.0" encoding="UTF-8"?>
<project xmlns="http://maven.apache.org/POM/4.0.0"
         xmlns:xsi="http://www.w3.org/2001/XMLSchema-instance"
         xsi:schemaLocation="http://maven.apache.org/POM/4.0.0 http://maven.apache.org/xsd/maven-4.0.0.xsd">
    <modelVersion>4.0.0</modelVersion>

    <groupId>com.bjsxt</groupId>
    <artifactId>mqconsumer</artifactId>
    <version>1.0-SNAPSHOT</version>
    <packaging>jar</packaging>
    <dependencies>
        <dependency>
            <groupId>org.apache.activemq</groupId>
            <artifactId>activemq-all</artifactId>
            <version>5.9.0</version>
        </dependency>
    </dependencies>
</project>
com.bjsxt.HelloWorldConsumer:
package com.bjsxt;

import org.apache.activemq.ActiveMQConnectionFactory;

import javax.jms.*;

public class HelloWorldConsumer {
    /**
     * 读取消息的消费者
     */
    public void readHelloWorldActiveMQ() {

        //定义连接工厂
        ConnectionFactory connectionFactory = null;

        //定义连接对象
        Connection connection = null;

        //定义会话
        Session session = null;

        //目的地
        Destination destination = null;

        //读取消息的消费之
        MessageConsumer consumer=null;

        //定义消息
        Message message = null;

        try {

            // username:访问activemq的用户名,默认是admin用户名可以通过jetty-ream.properties 文件进行修改
            // password:访问activemq的密码,默认是admin密码可以通过jetty-ream.properties 文件进行修改
            // brokerURl:访问activemq的路径地址,路径结构:协议名://主机地址:端口号

            connectionFactory = new ActiveMQConnectionFactory("admin", "admin", "tcp://192.168.181.126:61616");

            //创建连接对象
            connection = connectionFactory.createConnection();

            //启动连接
            connection.start();

            //transacted:是否使用事务 可选值为:true\false
            //true:使用事务 当设置次变量值。Session.SESSION_TRANSACTED
            //false:不适用事务,设置次变量则 acknowledgeMode 参数必须设置
            // acknowledgeMode:
            //Session.AUTO_ACKNOWLEDGE:自动消息确认机制
            //Session.CLIENT_ACKNOWLEDGE:客户端确认机制
            //Session.DUPS_OK_ACKNOWLEDGE:有副本的客户端确认机制

            session = connection.createSession(false, Session.AUTO_ACKNOWLEDGE);

            //创建目的地,目的地的名称就是队列的名称。消费者需要通过此名称去访问对应的队列
            destination = session.createQueue("helloword-destination");

            //创建读取消息的消费者
            consumer=session.createConsumer(destination);

            //创建消息接收
            message=consumer.receive();


            //处理消息
            String msg=((TextMessage)message).getText();
            System.out.println("从 ActiveMQ 服务中获取的文本信息: "+msg);


        } catch (Exception e) {
            e.printStackTrace();
        } finally {
            //关闭资源
            if (consumer != null) {
                try {
                    consumer.close();
                } catch (Exception e) {
                    e.printStackTrace();
                }
            }

            if (session != null) {
                try {
                    session.close();
                } catch (Exception e) {
                    e.printStackTrace();
                }
            }

            if (connection != null) {
                try {
                    connection.close();
                } catch (Exception e) {
                    e.printStackTrace();
                }
            }
        }
    }
}
com.bjsxt.HelloWorldProducer
package com.bjsxt;

import org.apache.activemq.ActiveMQConnectionFactory;
import sun.security.krb5.internal.crypto.Des;

import javax.jms.*;

public class HelloWorldProducer {

    /**
     * 编写消息的生产者
     */
    public void sendHelloWorldActiveMQ(String msgTest){

        //定义连接工厂
        ConnectionFactory connectionFactory=null;

        //定义连接对象
        Connection connection=null;

        //定义会话
        Session session=null;

        //目的地
        Destination destination=null;

        //定义消息的发送者
        MessageProducer producer=null;

        //定义消息
        Message message=null;

        try {

            // username:访问activemq的用户名,默认是admin用户名可以通过jetty-ream.properties 文件进行修改
            // password:访问activemq的密码,默认是admin密码可以通过jetty-ream.properties 文件进行修改
            // brokerURl:访问activemq的路径地址,路径结构:协议名://主机地址:端口号

            connectionFactory = new ActiveMQConnectionFactory("admin", "admin", "tcp://192.168.181.126:61616");

            //创建连接对象
            connection=connectionFactory.createConnection();

            //启动连接
            connection.start();

            //transacted:是否使用事务 可选值为:true\false
                //true:使用事务 当设置次变量值。Session.SESSION_TRANSACTED
                //false:不适用事务,设置次变量则 acknowledgeMode 参数必须设置
                    // acknowledgeMode:
                        //Session.AUTO_ACKNOWLEDGE:自动消息确认机制
                        //Session.CLIENT_ACKNOWLEDGE:客户端确认机制
                        //Session.DUPS_OK_ACKNOWLEDGE:有副本的客户端确认机制

            session=connection.createSession(false,Session.AUTO_ACKNOWLEDGE);

            //创建目的地,目的地的名称就是队列的名称。消费者需要通过此名称去访问对应的队列
            destination=session.createQueue("helloword-destination");

            //创建消息的生产者
            producer=session.createProducer(destination);

            //创建消息对象
            message=session.createTextMessage(msgTest);

            //发送消息
            producer.send(message);


        }catch (Exception e){
            e.printStackTrace();
        }finally {
            //关闭资源
            if (producer!=null){
                try {
                    producer.close();
                }catch (Exception e){
                    e.printStackTrace();
                }
            }

            if (session!=null){
                try {
                    session.close();
                }catch (Exception e){
                    e.printStackTrace();
                }
            }

            if (connection!=null){
                try {
                    connection.close();
                }catch (Exception e){
                    e.printStackTrace();
                }
            }
        }

    }
}
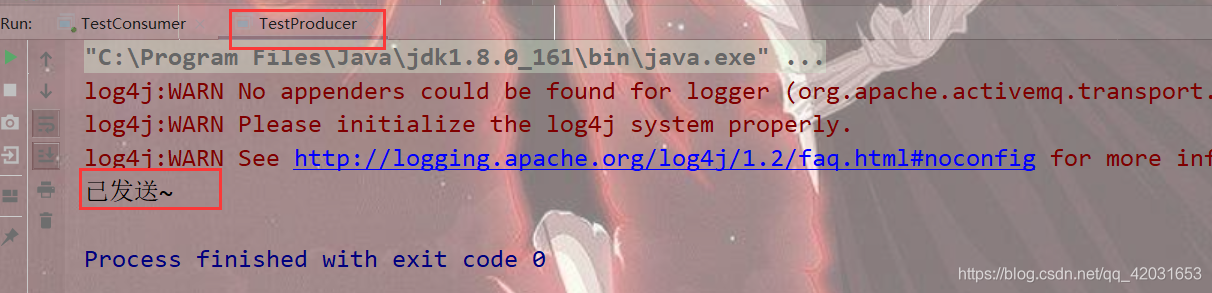
com.bjsxt.TestProducer
package com.bjsxt;

public class TestProducer {
    public static void main(String[] args) {
        HelloWorldProducer producer=new HelloWorldProducer();
        //producer.sendHelloWorldActiveMQ("你好 ActiveMQ");
        Users users=new Users(1001,"张三",18);

        HelloWorldProducer2 producer2=new HelloWorldProducer2();
        //producer2.sendHelloWorldActiveMQ(users);

        HelloWorldProducer3 producer3=new HelloWorldProducer3();
        //producer3.sendHelloWorldActiveMQ("你好~中国3");

        HelloWorldProducerTopic topic=new HelloWorldProducerTopic();
        topic.sendHelloWorldActiveMQ("Hello Topic");
        System.out.println("已发送~");
    }
}
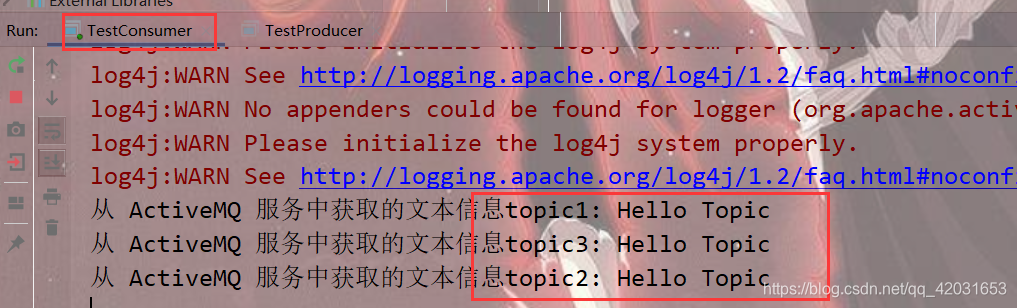
com.bjsxt.TestConsumer
package com.bjsxt;

public class TestConsumer {
    public static void main(String[] args) {
        HelloWorldConsumer consumer=new HelloWorldConsumer();
        //consumer.readHelloWorldActiveMQ();

        HelloWorldConsumer2 consumer2=new HelloWorldConsumer2();
        //consumer2.readHelloWorldActiveMQ();

        HelloWorldConsumer3 consumer3=new HelloWorldConsumer3();
        //consumer3.readHelloWorldActiveMQ();

        HelloWorldConsumerTopic1 topic1=new HelloWorldConsumerTopic1();
        Thread thread1=new Thread(topic1);
        thread1.start();

        HelloWorldConsumerTopic2 topic2=new HelloWorldConsumerTopic2();
        Thread thread2=new Thread(topic2);
        thread2.start();

        HelloWorldConsumerTopic3 topic3=new HelloWorldConsumerTopic3();
        Thread thread3=new Thread(topic3);
        thread3.start();

    }
}
使用发布订阅模型(Publish/Subscribe):
com.bjsxt.HelloWorldProducerTopic
package com.bjsxt;

import org.apache.activemq.ActiveMQConnectionFactory;

import javax.jms.*;

public class HelloWorldProducerTopic {

    /**
     * 编写消息的生产者
     */
    public void sendHelloWorldActiveMQ(String msgTest){

        //定义连接工厂
        ConnectionFactory connectionFactory=null;

        //定义连接对象
        Connection connection=null;

        //定义会话
        Session session=null;

        //目的地
        Destination destination=null;

        //定义消息的发送者
        MessageProducer producer=null;

        //定义消息
        Message message=null;

        try {

            // username:访问activemq的用户名,默认是admin用户名可以通过jetty-ream.properties 文件进行修改
            // password:访问activemq的密码,默认是admin密码可以通过jetty-ream.properties 文件进行修改
            // brokerURl:访问activemq的路径地址,路径结构:协议名://主机地址:端口号

            connectionFactory = new ActiveMQConnectionFactory("admin", "admin", "tcp://192.168.181.126:61616");

            //创建连接对象
            connection=connectionFactory.createConnection();

            //启动连接
            connection.start();

            //transacted:是否使用事务 可选值为:true\false
                //true:使用事务 当设置次变量值。Session.SESSION_TRANSACTED
                //false:不适用事务,设置次变量则 acknowledgeMode 参数必须设置
                    // acknowledgeMode:
                        //Session.AUTO_ACKNOWLEDGE:自动消息确认机制
                        //Session.CLIENT_ACKNOWLEDGE:客户端确认机制
                        //Session.DUPS_OK_ACKNOWLEDGE:有副本的客户端确认机制

            session=connection.createSession(false,Session.AUTO_ACKNOWLEDGE);

            //创建目的地,目的地的名称就是队列的名称。消费者需要通过此名称去访问对应的队列
            destination=session.createTopic("topic-thread");

            //创建消息的生产者
            producer=session.createProducer(destination);

            //创建消息对象
            message=session.createTextMessage(msgTest);

            //发送消息
            producer.send(message);


        }catch (Exception e){
            e.printStackTrace();
        }finally {
            //关闭资源
            if (producer!=null){
                try {
                    producer.close();
                }catch (Exception e){
                    e.printStackTrace();
                }
            }

            if (session!=null){
                try {
                    session.close();
                }catch (Exception e){
                    e.printStackTrace();
                }
            }

            if (connection!=null){
                try {
                    connection.close();
                }catch (Exception e){
                    e.printStackTrace();
                }
            }
        }

    }
}
com.bjsxt.HelloWorldConsumerTopic1(有三个类似的消费者)

package com.bjsxt;

import org.apache.activemq.ActiveMQConnectionFactory;

import javax.jms.*;

public class HelloWorldConsumerTopic1 implements Runnable {
    /**
     * 读取消息的消费者
     */
    public void readHelloWorldActiveMQ() {

        //定义连接工厂
        ConnectionFactory connectionFactory = null;

        //定义连接对象
        Connection connection = null;

        //定义会话
        Session session = null;

        //目的地
        Destination destination = null;

        //读取消息的消费之
        MessageConsumer consumer=null;

        //定义消息
        Message message = null;

        try {

            // username:访问activemq的用户名,默认是admin用户名可以通过jetty-ream.properties 文件进行修改
            // password:访问activemq的密码,默认是admin密码可以通过jetty-ream.properties 文件进行修改
            // brokerURl:访问activemq的路径地址,路径结构:协议名://主机地址:端口号

            connectionFactory = new ActiveMQConnectionFactory("admin", "admin", "tcp://192.168.181.126:61616");

            //创建连接对象
            connection = connectionFactory.createConnection();

            //启动连接
            connection.start();

            //transacted:是否使用事务 可选值为:true\false
            //true:使用事务 当设置次变量值。Session.SESSION_TRANSACTED
            //false:不适用事务,设置次变量则 acknowledgeMode 参数必须设置
            // acknowledgeMode:
            //Session.AUTO_ACKNOWLEDGE:自动消息确认机制
            //Session.CLIENT_ACKNOWLEDGE:客户端确认机制
            //Session.DUPS_OK_ACKNOWLEDGE:有副本的客户端确认机制

            session = connection.createSession(false, Session.AUTO_ACKNOWLEDGE);

            //创建目的地,目的地的名称就是队列的名称。消费者需要通过此名称去访问对应的队列
            destination = session.createTopic("topic-thread");

            //创建读取消息的消费者
            consumer=session.createConsumer(destination);

            //创建消息接收
            consumer.setMessageListener(new MessageListener() {
                @Override
                public void onMessage(Message message) {
                    //处理消息
                    String msg=null;
                    try {
                        msg=((TextMessage)message).getText();
                    }catch (Exception e){
                        e.printStackTrace();
                    }
                    System.out.println("从 ActiveMQ 服务中获取的文本信息topic1: "+msg);
                }
            });


        } catch (Exception e) {
            e.printStackTrace();
        }
    }

    @Override
    public void run() {
        this.readHelloWorldActiveMQ();
    }
}
运行结果

 浙公网安备 33010602011771号