Day3-Ceph RGW、Dashboard及监控
一、ceph rgw的使用
1、安装radosgw服务并初始化
(1)在mgr节点安装radosgw服务
magedu@ceph-mgr1:~$ sudo apt install radosgw -y
magedu@ceph-mgr2:~$ sudo apt install radosgw -y

(2)在deploy节点操作将mgr节点初始化为radosgw服务

magedu@ceph-deploy:~/ceph-cluster$ ceph-deploy rgw create ceph-mgr1
magedu@ceph-deploy:~/ceph-cluster$ ceph-deploy rgw create ceph-mgr2
[ceph_deploy.conf][DEBUG ] found configuration file at: /home/magedu/.cephdeploy.conf
[ceph_deploy.cli][INFO  ] Invoked (2.0.1): /usr/bin/ceph-deploy rgw create ceph-mgr2
[ceph_deploy.cli][INFO  ] ceph-deploy options:
[ceph_deploy.cli][INFO  ]  username                      : None
[ceph_deploy.cli][INFO  ]  verbose                       : False
[ceph_deploy.cli][INFO  ]  rgw                           : [('ceph-mgr2', 'rgw.ceph-mgr2')]
[ceph_deploy.cli][INFO  ]  overwrite_conf                : False
[ceph_deploy.cli][INFO  ]  subcommand                    : create
[ceph_deploy.cli][INFO  ]  quiet                         : False
[ceph_deploy.cli][INFO  ]  cd_conf                       : <ceph_deploy.conf.cephdeploy.Conf instance at 0x7fcd38021f50>
[ceph_deploy.cli][INFO  ]  cluster                       : ceph
[ceph_deploy.cli][INFO  ]  func                          : <function rgw at 0x7fcd388cd750>
[ceph_deploy.cli][INFO  ]  ceph_conf                     : None
[ceph_deploy.cli][INFO  ]  default_release               : False
[ceph_deploy.rgw][DEBUG ] Deploying rgw, cluster ceph hosts ceph-mgr2:rgw.ceph-mgr2
[ceph-mgr2][DEBUG ] connection detected need for sudo
[ceph-mgr2][DEBUG ] connected to host: ceph-mgr2
[ceph-mgr2][DEBUG ] detect platform information from remote host
[ceph-mgr2][DEBUG ] detect machine type
[ceph_deploy.rgw][INFO  ] Distro info: Ubuntu 18.04 bionic
[ceph_deploy.rgw][DEBUG ] remote host will use systemd
[ceph_deploy.rgw][DEBUG ] deploying rgw bootstrap to ceph-mgr2
[ceph-mgr2][DEBUG ] write cluster configuration to /etc/ceph/{cluster}.conf
[ceph-mgr2][WARNIN] rgw keyring does not exist yet, creating one
[ceph-mgr2][DEBUG ] create a keyring file
[ceph-mgr2][DEBUG ] create path recursively if it doesn't exist
[ceph-mgr2][INFO  ] Running command: sudo ceph --cluster ceph --name client.bootstrap-rgw --keyring /var/lib/ceph/bootstrap-rgw/ceph.keyring auth get-or-create client.rgw.ceph-mgr2 osd allow rwx mon allow rw -o /var/lib/ceph/radosgw/ceph-rgw.ceph-mgr2/keyring
[ceph-mgr2][INFO  ] Running command: sudo systemctl enable ceph-radosgw@rgw.ceph-mgr2
[ceph-mgr2][WARNIN] Created symlink /etc/systemd/system/ceph-radosgw.target.wants/ceph-radosgw@rgw.ceph-mgr2.service → /lib/systemd/system/ceph-radosgw@.service.
[ceph-mgr2][INFO  ] Running command: sudo systemctl start ceph-radosgw@rgw.ceph-mgr2
[ceph-mgr2][INFO  ] Running command: sudo systemctl enable ceph.target
[ceph_deploy.rgw][INFO  ] The Ceph Object Gateway (RGW) is now running on host ceph-mgr2 and default port 7480
magedu@ceph-deploy:~/ceph-cluster$

(3)在mgr1和mgr2查看rgw进程状态,端口7480监听状态
magedu@ceph-mgr1:~$ sudo ps aux | grep rgw
ceph       2191  0.3  2.9 6277180 59220 ?       Ssl  10:54   0:03 /usr/bin/radosgw -f --cluster ceph --name client.rgw.ceph-mgr1 --setuser ceph --setgroup ceph
magedu@ceph-mgr2:~$ sudo ps aux | grep rgw
ceph      18894  0.4  2.7 6277144 56228 ?       Ssl  11:13   0:00 /usr/bin/radosgw -f --cluster ceph --name client.rgw.ceph-mgr2 --setuser ceph --setgroup ceph

magedu@ceph-mgr1:~$ ss -tln
LISTEN     0           128                        [::]:7480                      [::]:*

(4)查看集群状态和存储池信息
magedu@ceph-deploy:~/ceph-cluster$ ceph -s
  cluster:
    id:     62a77301-99a4-4d37-b6ad-60a729107cfd
    health: HEALTH_OK

  services:
    mon: 3 daemons, quorum ceph-mon1,ceph-mon2,ceph-mon3 (age 26m)
    mgr: ceph-mgr1(active, since 23m), standbys: ceph-mgr2
    mds: 2/2 daemons up, 2 standby
    osd: 12 osds: 12 up (since 17m), 12 in (since 12d)
    rgw: 2 daemons active (2 hosts, 1 zones)

  data:
    volumes: 1/1 healthy
    pools:   11 pools, 425 pgs
    objects: 419 objects, 459 MiB
    usage:   1.5 GiB used, 1.2 TiB / 1.2 TiB avail
    pgs:     425 active+clean

magedu@ceph-deploy:~/ceph-cluster$ ceph osd pool ls
device_health_metrics
mypool
myrdb1
myrbd1
.rgw.root     #包含realm(领域信息),比如zone和zonegroup;
default.rgw.log  #存储日志信息,用于记录各种log信息;
default.rgw.control  #系统控制池,在有数据更新时,通知其它RGW更新缓存;
default.rgw.meta  #元数据存储池,通过不同的名称空间分别存储不同的rados对象,这些名称空间包括用户UID及其bucket映射信息的名称空间users.uid、用户的密钥名称空间users.keys、用户的email名称空间users.email、用户的subuser的名称空间users.swift,以及bucket的名称空间root等;
rbd-data1
cephfs-metadata
cephfs-data
magedu@ceph-deploy:~/ceph-cluster$

(5)验证RGW zone信息
magedu@ceph-deploy:~/ceph-cluster$ radosgw-admin zone get --rgw-zone=default
{
    "id": "ccb9daad-b754-4a9e-8f6f-b1a0ff085e11",
    "name": "default",
    "domain_root": "default.rgw.meta:root",
    "control_pool": "default.rgw.control",
    "gc_pool": "default.rgw.log:gc",
    "lc_pool": "default.rgw.log:lc",
    "log_pool": "default.rgw.log",
    "intent_log_pool": "default.rgw.log:intent",
    "usage_log_pool": "default.rgw.log:usage",
    "roles_pool": "default.rgw.meta:roles",
    "reshard_pool": "default.rgw.log:reshard",
    "user_keys_pool": "default.rgw.meta:users.keys",
    "user_email_pool": "default.rgw.meta:users.email",
    "user_swift_pool": "default.rgw.meta:users.swift",
    "user_uid_pool": "default.rgw.meta:users.uid",
    "otp_pool": "default.rgw.otp",
    "system_key": {
        "access_key": "",
        "secret_key": ""
    },
    "placement_pools": [
        {
            "key": "default-placement",
            "val": {
                "index_pool": "default.rgw.buckets.index",
                "storage_classes": {
                    "STANDARD": {
                        "data_pool": "default.rgw.buckets.data"
                    }
                },
                "data_extra_pool": "default.rgw.buckets.non-ec",
                "index_type": 0
            }
        }
    ],
    "realm_id": "",
    "notif_pool": "default.rgw.log:notif"
}


(6)访问radowgw服务
magedu@ceph-deploy:~/ceph-cluster$ curl 172.31.6.104:7480
<?xml version="1.0" encoding="UTF-8"?><ListAllMyBucketsResult xmlns="http://s3.amazonaws.com/doc/2006-03-01/"><Owner><ID>anonymous</ID><DisplayName></DisplayName></Owner><Buckets></Buckets></ListAllMyBucketsResult>

magedu@ceph-deploy:~/ceph-cluster$ curl 172.31.6.105:7480
<?xml version="1.0" encoding="UTF-8"?><ListAllMyBucketsResult xmlns="http://s3.amazonaws.com/doc/2006-03-01/"><Owner><ID>anonymous</ID><DisplayName></DisplayName></Owner><Buckets></Buckets></ListAllMyBucketsResult>
magedu@ceph-deploy:~/ceph-cluster$

(7)radosgw设置自定义端口,参考杰哥示例
[root@jack-ceph-mgr2 ~]# vim /etc/ceph/ceph.conf
[client.rgw.ceph-mgr2] #在最后面添加针对当前节点的自定义配置如下:
rgw_host = ceph-mgr2
rgw_frontends = civetweb port=8080

#重启服务
[root@jack-ceph-mgr2 ~]# systemctl restart ceph-radosgw@rgw.ceph-mgr2.service


(8)支持开启SSL访问,参考杰哥示例
# 自签名证书
[root@ceph-mgr2 ~]# cd /etc/ceph/
[root@ceph-mgr2 ceph]# mkdir certs
[root@ceph-mgr2 ceph]# cd certs/
[root@ceph-mgr2 certs]# openssl genrsa -out civetweb.key 2048
[root@ceph-mgr2 certs]# openssl req -new -x509 -key civetweb.key -out civetweb.crt -subj "/CN=rgw.magedu.net"
(如果提示Cannot open file /home/xxx/.rnd文件,没有影响;也可以直接touch /home/xxx/.rnd文件就没有报错了)
[root@ceph-mgr2 certs]# cat civetweb.key civetweb.crt > civetweb.pem
[root@ceph-mgr2 certs]# tree
.├── civetweb.crt
 ├── civetweb.key
 └── civetweb.pem
 0 directories, 3 files

# SSL 配置:
[root@ceph-mgr2 certs]# vim /etc/ceph/ceph.conf
[client.rgw.ceph-mgr2]
rgw_host = eph-mgr2
rgw_frontends = "civetweb port=8080+8443s ssl_certificate=/etc/ceph/certs/civetweb.pem"
[root@ceph-mgr2 certs]# systemctl restart ceph-radosgw@rgw.ceph-mgr2.service

(9)多个radosgw前端可以配置haproxy+nginx组合使用实现https和高可用;
haproxy示例
root@ceph-client1-ubuntu:~# ip a | grep inet| grep eth0
    inet 172.31.6.160/24 brd 172.31.6.255 scope global eth0
root@ceph-client1-ubuntu:~# apt install haproxy -y
root@ceph-client1-ubuntu:~# tail /etc/haproxy/haproxy.cfg
添加以下行
listen ceph-rgw
  bind 172.31.6.160:80
  mode tcp
  server rgw1 172.31.6.104:7480 check inter 3s fall 3 rise 5
  server rgw2 172.31.6.105:7480 check inter 3s fall 3 rise 5
root@ceph-client1-ubuntu:~#
root@ceph-client1-ubuntu:~# systemctl start haproxy.service
浏览器访问http:// 192.168.25.160可以访问radosgw服务;

(10)RGW日志及其它优化配置
magedu@ceph-mgr1:~$ sudo mkdir /var/log/radosgw
magedu@ceph-mgr1:~$ sudo chown ceph.ceph /var/log/radosgw/
magedu@ceph-mgr1:~$ sudo vi /etc/ceph/ceph.conf
添加以下行
[client.rgw.ceph-mgr1]
rgw_host = ceph-mgr1
rgw_frontends = "civetweb port=7480 request_timeout_ms=30000 error_log_file=/var/log/radosgw/civetweb.error.log access_log_file=/var/log/radosgw/civetweb.access.log num_threads=100"

[client.rgw.ceph-mgr2]
rgw_host = ceph-mgr2
rgw_frontends = "civetweb port=7480 request_timeout_ms=30000 error_log_file=/var/log/radosgw/civetweb.error.log access_log_file=/var/log/radosgw/civetweb.access.log num_threads=100"

重启rgw服务
magedu@ceph-mgr1:~$ sudo systemctl restart ceph-radosgw@rgw.ceph-mgr1.service
magedu@ceph-mgr1:~$ ss -tln
magedu@ceph-mgr1:~$ tail /var/log/radosgw/civetweb.access.log
172.31.6.1 - - [29/Aug/2021:12:20:56 +0800] "GET / HTTP/1.1" 200 437 - Mozilla/5.0 (Windows NT 10.0; Win64; x64) AppleWebKit/537.36 (KHTML, like Gecko) Chrome/92.0.4515.159 Safari/537.36
172.31.6.1 - - [29/Aug/2021:12:20:56 +0800] "GET /favicon.ico HTTP/1.1" 404 449 http://172.31.6.104/ Mozilla/5.0 (Windows NT 10.0; Win64; x64) AppleWebKit/537.36 (KHTML, like Gecko) Chrome/92.0.4515.159 Safari/537.36
172.31.6.1 - - [29/Aug/2021:12:27:56 +0800] "GET / HTTP/1.1" 200 437 - Mozilla/5.0 (Windows NT 10.0; Win64; x64) AppleWebKit/537.36 (KHTML, like Gecko) Chrome/92.0.4515.159 Safari/537.36
2、创建RGW普通用户
magedu@ceph-deploy:~/ceph-cluster$ radosgw-admin user create --uid="xiaoma" --display-name="for test"
{
    "user_id": "xiaoma",
    "display_name": "for test",
    "email": "",
    "suspended": 0,
    "max_buckets": 1000,
    "subusers": [],
    "keys": [
        {
            "user": "xiaoma",
            "access_key": "83A3XYUB1XLCZHS4SPNH",
            "secret_key": "QZOqkKMuD4pkIXqFBe5kiN6oEGnCnTTC0QAWoQcq"
        }
    ],
    "swift_keys": [],
    "caps": [],
    "op_mask": "read, write, delete",
    "default_placement": "",
    "default_storage_class": "",
    "placement_tags": [],
    "bucket_quota": {
        "enabled": false,
        "check_on_raw": false,
        "max_size": -1,
        "max_size_kb": 0,
        "max_objects": -1
    },
    "user_quota": {
        "enabled": false,
        "check_on_raw": false,
        "max_size": -1,
        "max_size_kb": 0,
        "max_objects": -1
    },
    "temp_url_keys": [],
    "type": "rgw",
    "mfa_ids": []
}

magedu@ceph-deploy:~/ceph-cluster$
3、客户安装s3cmd和配置客户端执行环境
(1)安装s3cdm客户端
root@ceph-deploy:~# apt install s3cmd -y
(2)配置客户端执行环境
ceph-deploy作为客户端安装s3cmd命令,并添加/etc/hosts文件172.31.6.160 rgw.s209.local;
ceph-client1-172.31.6.160部署了haproxy做为入口,转发请求到两台rgw服务节点ceph-mgr1和ceph-mgr2;
root@ceph-deploy:~# tail -n2 /etc/hosts

172.31.6.160 rgw.s209.local


# 初始化s3cmd参数
root@ceph-deploy:~# s3cmd --configure

Enter new values or accept defaults in brackets with Enter.
Refer to user manual for detailed description of all options.

Access key and Secret key are your identifiers for Amazon S3. Leave them empty for using the env variables.
Access Key: 83A3XYUB1XLCZHS4SPNH
Secret Key: QZOqkKMuD4pkIXqFBe5kiN6oEGnCnTTC0QAWoQcq
Default Region [US]:

Use "s3.amazonaws.com" for S3 Endpoint and not modify it to the target Amazon S3.
S3 Endpoint [s3.amazonaws.com]: rgw.s209.local

Use "%(bucket)s.s3.amazonaws.com" to the target Amazon S3. "%(bucket)s" and "%(location)s" vars can be used
if the target S3 system supports dns based buckets.
DNS-style bucket+hostname:port template for accessing a bucket [%(bucket)s.s3.amazonaws.com]: rgw.s209.local/%(bucket)

Encryption password is used to protect your files from reading
by unauthorized persons while in transfer to S3
Encryption password:
Path to GPG program [/usr/bin/gpg]:

When using secure HTTPS protocol all communication with Amazon S3
servers is protected from 3rd party eavesdropping. This method is
slower than plain HTTP, and can only be proxied with Python 2.7 or newer
Use HTTPS protocol [Yes]: No

On some networks all internet access must go through a HTTP proxy.
Try setting it here if you can't connect to S3 directly
HTTP Proxy server name:

New settings:
  Access Key: 83A3XYUB1XLCZHS4SPNH
  Secret Key: QZOqkKMuD4pkIXqFBe5kiN6oEGnCnTTC0QAWoQcq
  Default Region: US
  S3 Endpoint: rgw.s209.local
  DNS-style bucket+hostname:port template for accessing a bucket: rgw.s209.local/%(bucket)
  Encryption password:
  Path to GPG program: /usr/bin/gpg
  Use HTTPS protocol: False
  HTTP Proxy server name:
  HTTP Proxy server port: 0

Test access with supplied credentials? [Y/n] Y
Please wait, attempting to list all buckets...
Success. Your access key and secret key worked fine :-)

Now verifying that encryption works...
Not configured. Never mind.

Save settings? [y/N] y
Configuration saved to '/root/.s3cfg'
root@ceph-deploy:~#

# 验证s3cmd权限
root@ceph-deploy:~# s3cmd la
root@ceph-deploy:~# s3cmd mb s3://xiaoma-bucket1
Bucket 's3://xiaoma-bucket1/' created
root@ceph-deploy:~#
4、创建bucket和上传数据
使用AWS的s3cdm命令客户端,使用文档参考help说明或者文档https://s3tools.org/usage;
root@ceph-deploy:~# s3cmd mb s3://xiaoma-static   #创建bucket
Bucket 's3://xiaoma-static/' created
root@ceph-deploy:~# s3cmd put /etc/hosts s3://xiaoma-static  #上传文件,默认私密权限
upload: '/etc/hosts' -> 's3://xiaoma-static/hosts'  [1 of 1]
 722 of 722   100% in    2s   350.32 B/s  done
root@ceph-deploy:~# ls
root@ceph-deploy:~# s3cmd get s3://xiaoma-static/hosts  #下载文件,验证文件内容
download: 's3://xiaoma-static/hosts' -> './hosts'  [1 of 1]
 722 of 722   100% in    0s    14.04 kB/s  done
root@ceph-deploy:~# tail hosts
....
172.31.6.160 rgw.s209.local


root@ceph-deploy:~# s3cmd put /etc/passwd --acl-public s3://xiaoma-static #上传文件,指定为公开可访问权限
upload: '/etc/passwd' -> 's3://xiaoma-static/passwd'  [1 of 1]
 1729 of 1729   100% in    0s    90.13 kB/s  done
Public URL of the object is: http://rgw.s209.local/xiaoma-static/passwd
root@ceph-deploy:~# curl -k http://rgw.s209.local/xiaoma-static/passwd   #浏览器访问验证或者curl命令验证
root:x:0:0:root:/root:/bin/bash
daemon:x:1:1:daemon:/usr/sbin:/usr/sbin/nologin
二、Ceph dashboard和监控
Ceph mgr是一个多插件(模块化)的组件,其组件可以单独的启用或关闭,以下为在ceph-deploy节点操作服务初始化;(需要安装dashboard包,而且需要安装在mgr节点)
官方文档:
https://docs.ceph.com/en/mimic/mgr/
https://docs.ceph.com/en/latest/mgr/dashboard/
https://packages.debian.org/unstable/ceph-mgr-dashboard
1、在mgr节点安装ceph-mgr-dashboard包
root@ceph-mgr1:~# apt-cache madison ceph-mgr-dashboard
ceph-mgr-dashboard | 16.2.5-1bionic | https://mirrors.tuna.tsinghua.edu.cn/ceph/debian-pacific bionic/main amd64 Packages
ceph-mgr-dashboard | 16.2.5-1bionic | https://mirrors.tuna.tsinghua.edu.cn/ceph/debian-pacific bionic/main i386 Packages

root@ceph-mgr1:~# apt install ceph-mgr-dashboard -y
2、在deploy节点操作启动dashboard插件
magedu@ceph-deploy:~/ceph-cluster$ ceph mgr module -h  #查看帮助
magedu@ceph-deploy:~/ceph-cluster$ ceph mgr module ls   #查看所有模块
magedu@ceph-deploy:~/ceph-cluster$ ceph mgr module ls | grep dash

magedu@ceph-deploy:~/ceph-cluster$ ceph mgr module enable dashboard  #启用dashboard插件
magedu@ceph-deploy:~/ceph-cluster$ ceph config set mgr mgr/dashboard/ssl false  #关闭SSL

magedu@ceph-deploy:~/ceph-cluster$ ceph config set mgr mgr/dashboard/ceph-mgr1/server_addr 172.31.6.104  #指定dashboard监听地址
magedu@ceph-deploy:~/ceph-cluster$ ceph config set mgr mgr/dashboard/ceph-mgr1/server_port 9009   #指定dashboard监听端口

magedu@ceph-deploy:~/ceph-cluster$ ceph -s  #查看集群状态有无报错,CentOS7上安装新模块可能遇到报错,安装不上;


# 在mgr1节点查看端口监听状态:
root@ceph-mgr1:~# ss -tln
State      Recv-Q      Send-Q            Local Address:Port              Peer Address:Port
LISTEN     0           5                  172.31.6.104:9009                   0.0.0.0:*
如果dashboard端口没有成功监听,可尝试重启mgr节点上的mgr服务试下;
root@ceph-mgr1:~# systemctl restart ceph-mgr@ceph-mgr1.service
3、创建dashboard账号和密码
magedu@ceph-deploy:~/ceph-cluster$ ceph dashboard set-login-credentials xiaoma 123456   #以前版本创建dashboard账号方式,新版本有所改变;
Invalid command: unused arguments: ['123456']
dashboard set-login-credentials <username> :  Set the login credentials. Password read from -i <file>
Error EINVAL: invalid command
magedu@ceph-deploy:~/ceph-cluster$ touch pass.txt
magedu@ceph-deploy:~/ceph-cluster$ echo "12345678." > pass.txt
magedu@ceph-deploy:~/ceph-cluster$ ceph dashboard set-login-credentials xiaoma -i pass.txt
******************************************************************
***          WARNING: this command is deprecated.              ***
*** Please use the ac-user-* related commands to manage users. ***
******************************************************************
Username and password updated
magedu@ceph-deploy:~/ceph-cluster$
4、浏览器登录dashboard验证
示例使用的是http://172.31.6.104:9009/

5、对dashboard启用SSL
magedu@ceph-deploy:~/ceph-cluster$ ceph dashboard create-self-signed-cert
Self-signed certificate created
magedu@ceph-deploy:~/ceph-cluster$ ceph config set mgr mgr/dashboard/ssl true
magedu@ceph-deploy:~/ceph-cluster$ ceph mgr services
{
    "dashboard": "http://172.31.6.104:9009/"
}


# 查看https是否生效;如果没有生效,可以到mgr1节点重启mgr服务(systemctl restart ceph-mgr@ceph-mgr1.service )
magedu@ceph-deploy:~/ceph-cluster$ ceph mgr services
{
    "dashboard": "https://172.31.6.104:8443/"
}
magedu@ceph-deploy:~/ceph-cluster$
浏览器访问验证,查看证书颁发者信息;(会显示ceph-dashboard,IT)

6、配置Ceph集群监控
这里是在mgr1节点安装promethus监控和grafana,在ceph-node节点安装node-exporter,并针对ceph集群启用prometheus监控组件。
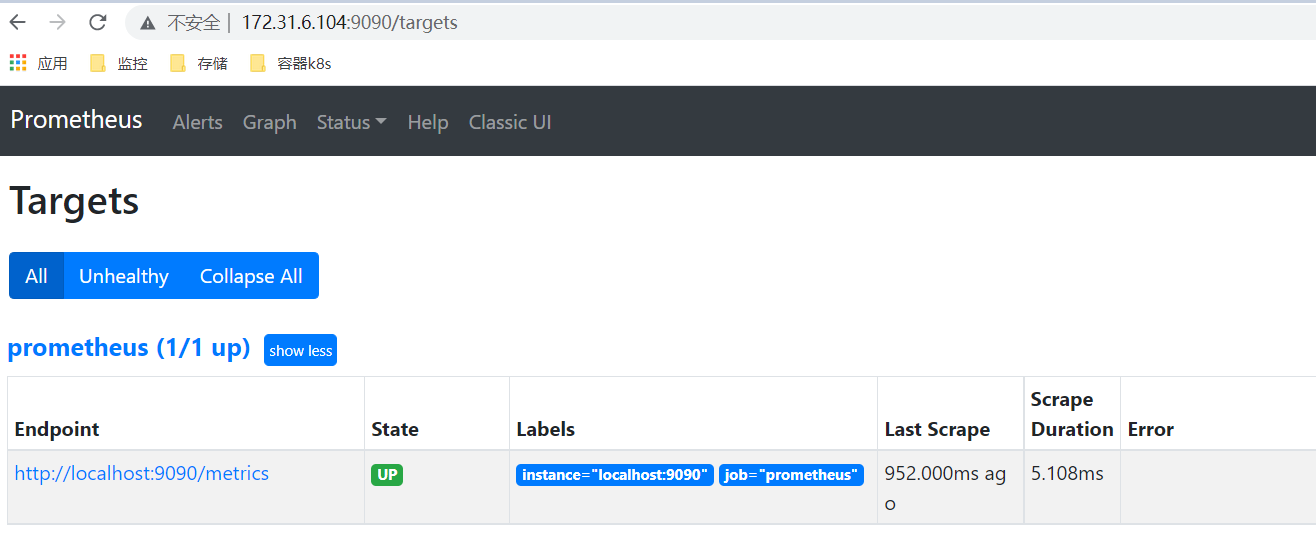
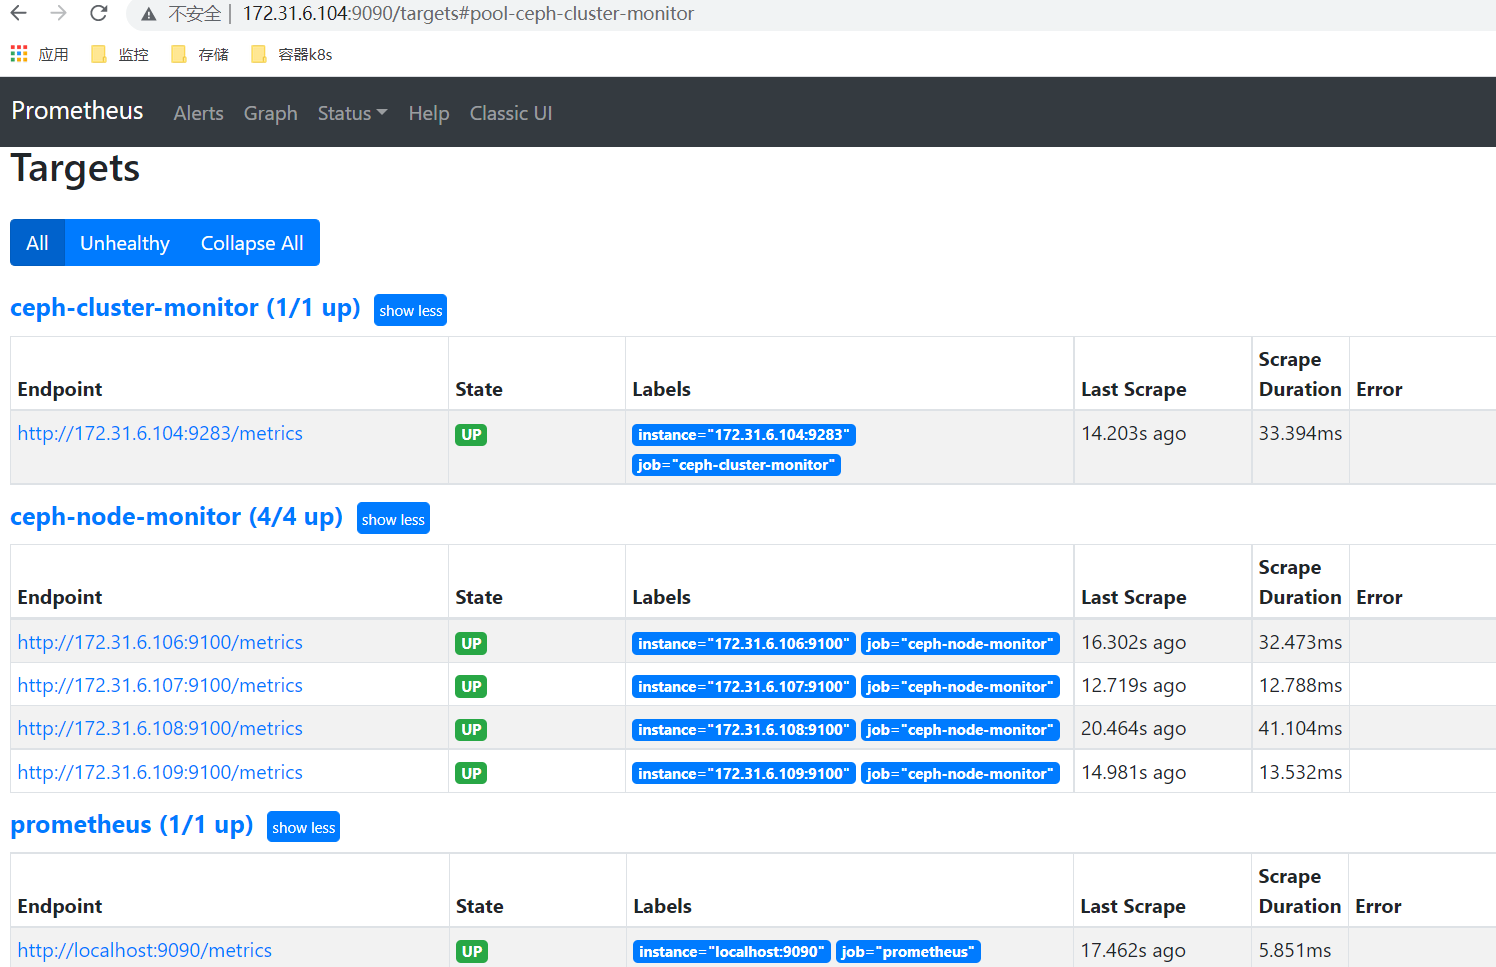
(1)在mgr1节点安装prometheus,并设置开机启动,默认监听9090端口;安装后可以登录http://172.31.6.104:9090/targets查看采集到的targets数据;
root@ceph-mgr1:~# mkdir /apps
root@ceph-mgr1:~# cd /apps/
root@ceph-mgr1:/apps# wget https://github.com/prometheus/prometheus/releases/download/v2.29.2/prometheus-2.29.2.linux-amd64.tar.gz
root@ceph-mgr1:/apps# tar xf prometheus-2.29.2.linux-amd64.tar.gz
root@ceph-mgr1:/apps# ls
prometheus-2.29.2.linux-amd64  prometheus-2.29.2.linux-amd64.tar.gz
root@ceph-mgr1:/apps# cd prometheus-2.29.2.linux-amd64/
root@ceph-mgr1:/apps/prometheus-2.29.2.linux-amd64# ./prometheus    #测试prometheus服务直接启动

# 配置通过service启动promethus
root@ceph-mgr1:~# ln -sv /apps/prometheus-2.29.2.linux-amd64 /apps/prometheus
'/apps/prometheus' -> '/apps/prometheus-2.29.2.linux-amd64'
root@ceph-mgr1:~# vi /etc/systemd/system/prometheus.service
[Unit]
Description=Prometheus server
Documentation=https://prometheus.io/docs/introduction/overview/
After=network.target

[Service]
Restart=on-failure
WorkingDirectory=/apps/prometheus/
ExecStart=/apps/prometheus/prometheus --config.file=/apps/prometheus/prometheus.yml

[Install]
WantedBy=multi-user.target

root@ceph-mgr1:~# systemctl start prometheus.service
root@ceph-mgr1:~# systemctl enable prometheus.service
Created symlink /etc/systemd/system/multi-user.target.wants/prometheus.service → /etc/systemd/system/prometheus.service.
root@ceph-mgr1:~#

# 查看prometheus监听端口,默认是9090
root@ceph-mgr1:~# ss -tln
State        Recv-Q         Send-Q                  Local Address:Port                  Peer Address:Port
LISTEN       0              128                                 *:9090                             *:*
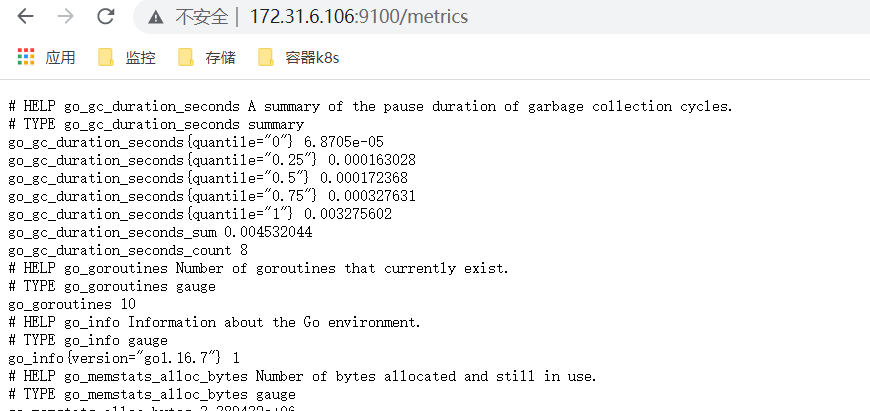
(2)在ceph-node节点安装node-exporter,并设置开机启动,默认监控9100端口;(ceph-node1、2、3、4进行同样操作)
root@ceph-node1:~# mkdir /apps
root@ceph-node1:~# cd /apps/
root@ceph-node1:/apps# wget https://github.com/prometheus/node_exporter/releases/download/v1.2.2/node_exporter-1.2.2.linux-amd64.tar.gz
root@ceph-node1:/apps# tar xvf node_exporter-1.2.2.linux-amd64.tar.gz
root@ceph-node1:~#  ln -sv /apps/node_exporter-1.2.2.linux-amd64 /apps/node_exporter
root@ceph-node1:~# vi /etc/systemd/system/node-exporter.service
root@ceph-node1:~# cat /etc/systemd/system/node-exporter.service
[Unit]
Description=Prometheus Node Exporter
After=network.target

[Service]
ExecStart=/apps/node_exporter/node_exporter

[Install]
WantedBy=multi-user.target
root@ceph-node1:~# systemctl start node-exporter.service
root@ceph-node1:~# systemctl enable node-exporter.service

root@ceph-node1:~# ss -tln
State        Recv-Q        Send-Q                   Local Address:Port                  Peer Address:Port
LISTEN       0             128                                  *:9100                             *:*
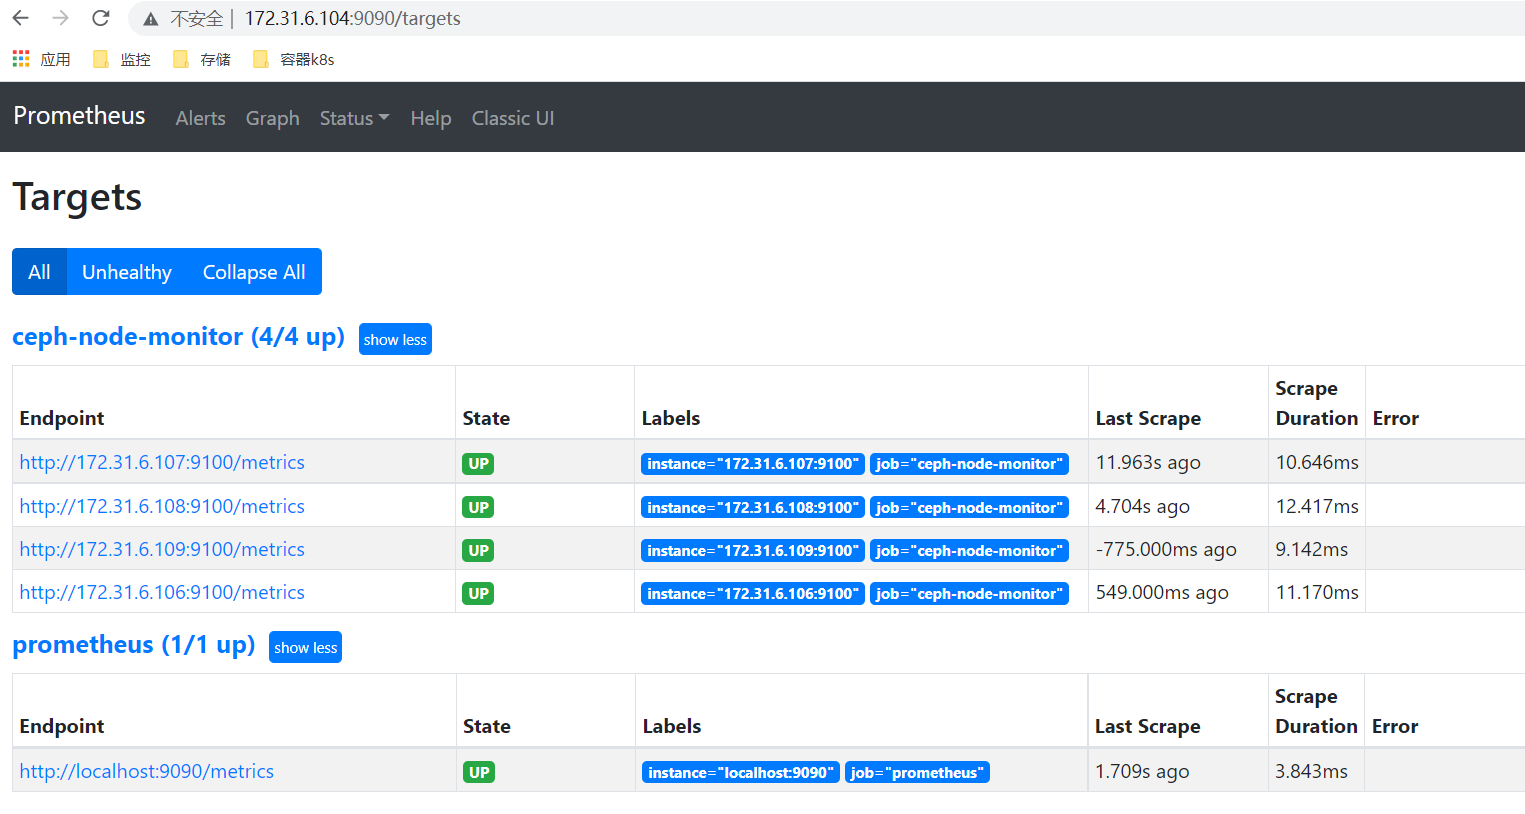
(3)配置prometheus的yml文件采集node节点的监控数据;
root@ceph-mgr1:~# tail -n 11 /apps/prometheus/prometheus.yml
  - job_name: "prometheus"

    # metrics_path defaults to '/metrics'
    # scheme defaults to 'http'.

    static_configs:
      - targets: ["localhost:9090"]

  - job_name: 'ceph-node-monitor'
    static_configs:
    - targets: ['172.31.6.106','172.31.6.108','172.31.6.108','172.31.6.109']
root@ceph-mgr1:~# systemctl restart prometheus.service
(4)从deploy节点对ceph集群启用prometheus监控模块,(默认会在所有mgr节点开启监听9283端口)
magedu@ceph-deploy:~/ceph-cluster$ ceph mgr module enable prometheus
magedu@ceph-deploy:~/ceph-cluster$ ceph mgr module ls | grep prometheus
查看mgr中端口监听状态
root@ceph-mgr1:~# ss -tln
State        Recv-Q         Send-Q                  Local Address:Port                  Peer
LISTEN       0              5                        172.31.6.104:9283                       0.0.0.0:*

root@ceph-mgr2:~# ss -tln
State        Recv-Q         Send-Q                  Local Address:Port                  Peer Address:Port
LISTEN       0              5                                   *:9283                             *:*
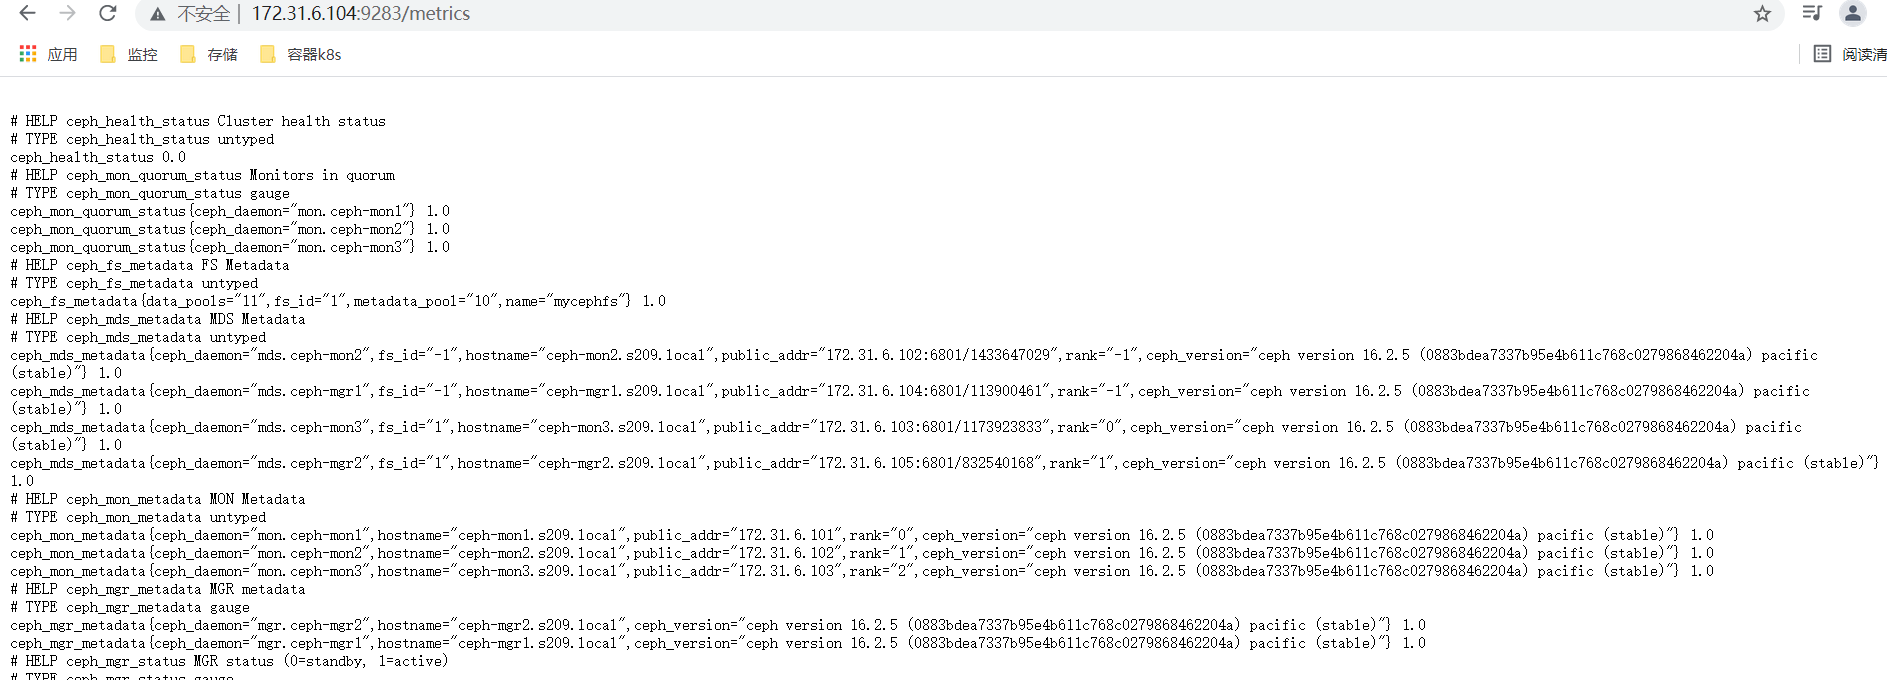
(5)配置prometheus server的yml配置文件,采集mgr 9283的数据
root@ceph-mgr1:~# tail -n 15 /apps/prometheus/prometheus.yml
  - job_name: "prometheus"

    # metrics_path defaults to '/metrics'
    # scheme defaults to 'http'.

    static_configs:
      - targets: ["localhost:9090"]

  - job_name: 'ceph-node-monitor'
    static_configs:
            - targets: ['172.31.6.106:9100','172.31.6.107:9100','172.31.6.108:9100','172.31.6.109:9100']

  - job_name: 'ceph-cluster-monitor'
    static_configs:
            - targets: ['172.31.6.104:9283']      #这里只配置一个mgr节点的9283端口就可以
root@ceph-mgr1:~# systemctl restart prometheus.service
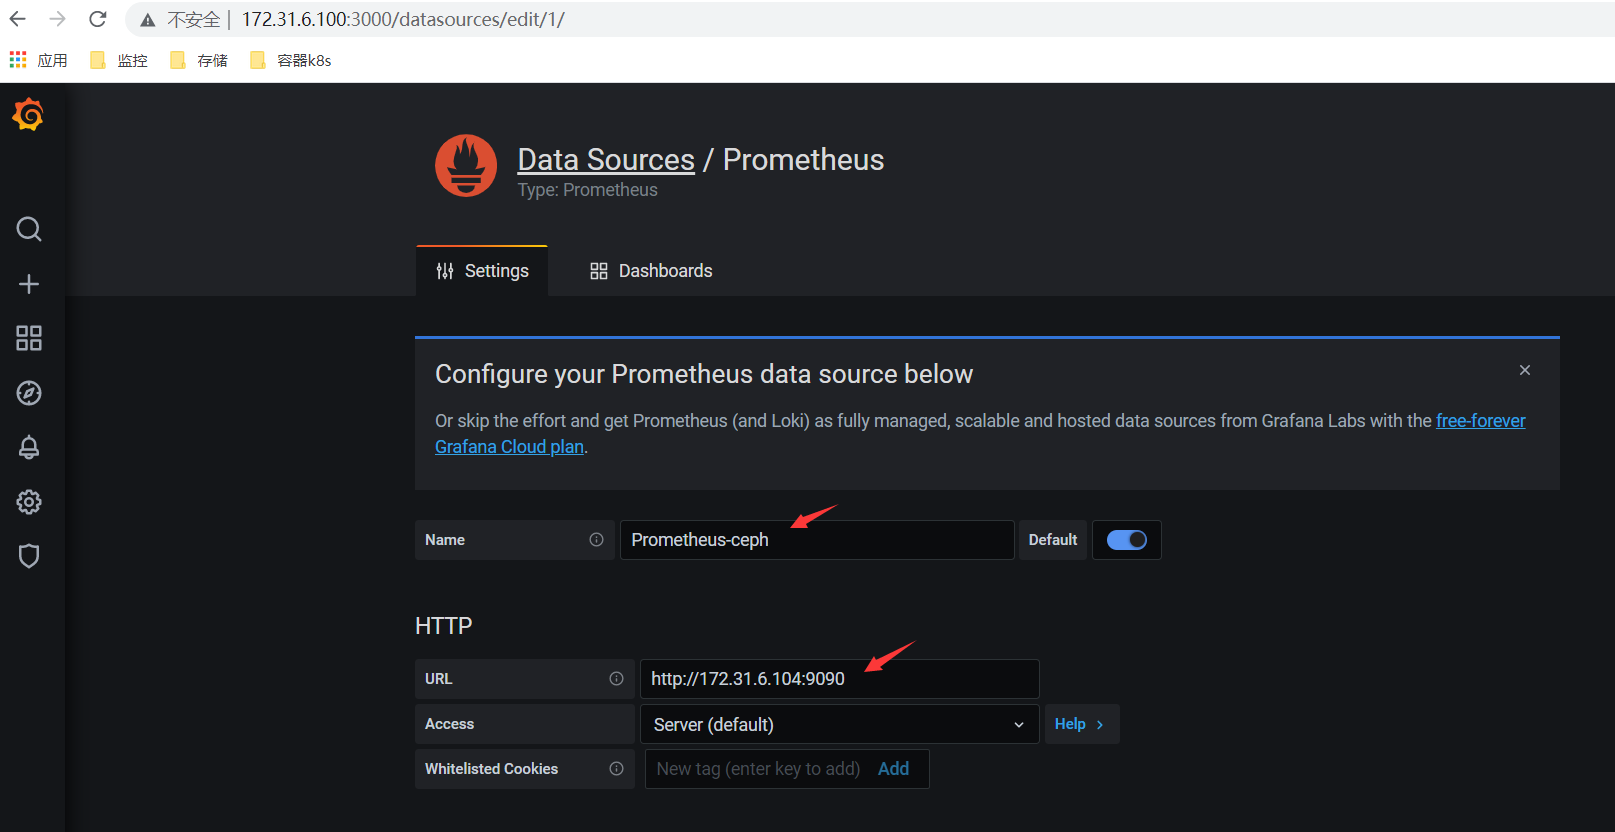
(6)在deploy节点安装grafana展示监控数据,默认监听3000端口;(添加promethus数据源,使用模块展示监控数据)
grafana文档和下载地址https://grafana.com/grafana/download/7.5.10?pg=get&plcmt=selfmanaged-box1-cta1&edition=oss
magedu@ceph-deploy:~$ sudo -i
root@ceph-deploy:~# apt-get install -y adduser libfontconfig1  #按照官方文档安装依赖包
root@ceph-deploy:~# wget https://dl.grafana.com/oss/release/grafana_7.5.10_amd64.deb
root@ceph-deploy:~# dpkg -i grafana_7.5.10_amd64.deb
root@ceph-deploy:~# systemctl start grafana-server.service
root@ceph-deploy:~# ss -tln
State        Recv-Q         Send-Q                  Local Address:Port                  Peer Address:Port
LISTEN       0              128                                 *:3000                             *:*
浏览器内访问http://172.31.6.100:3000/登录grafana;(grafana部署在ceph-deploy节点中)
添加数据源promethus http://172.31.6.104:9090;(prometheus部署在mgr1节点中)
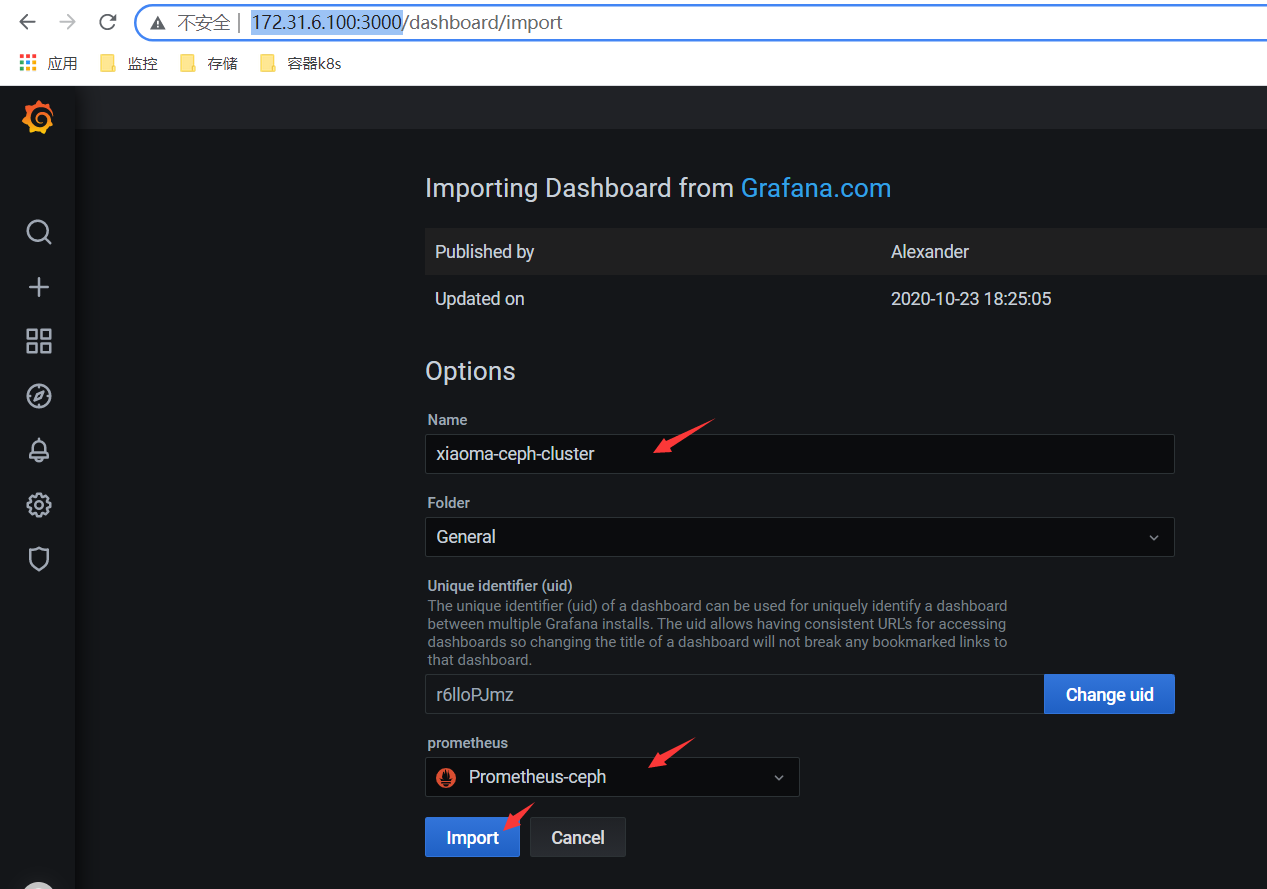
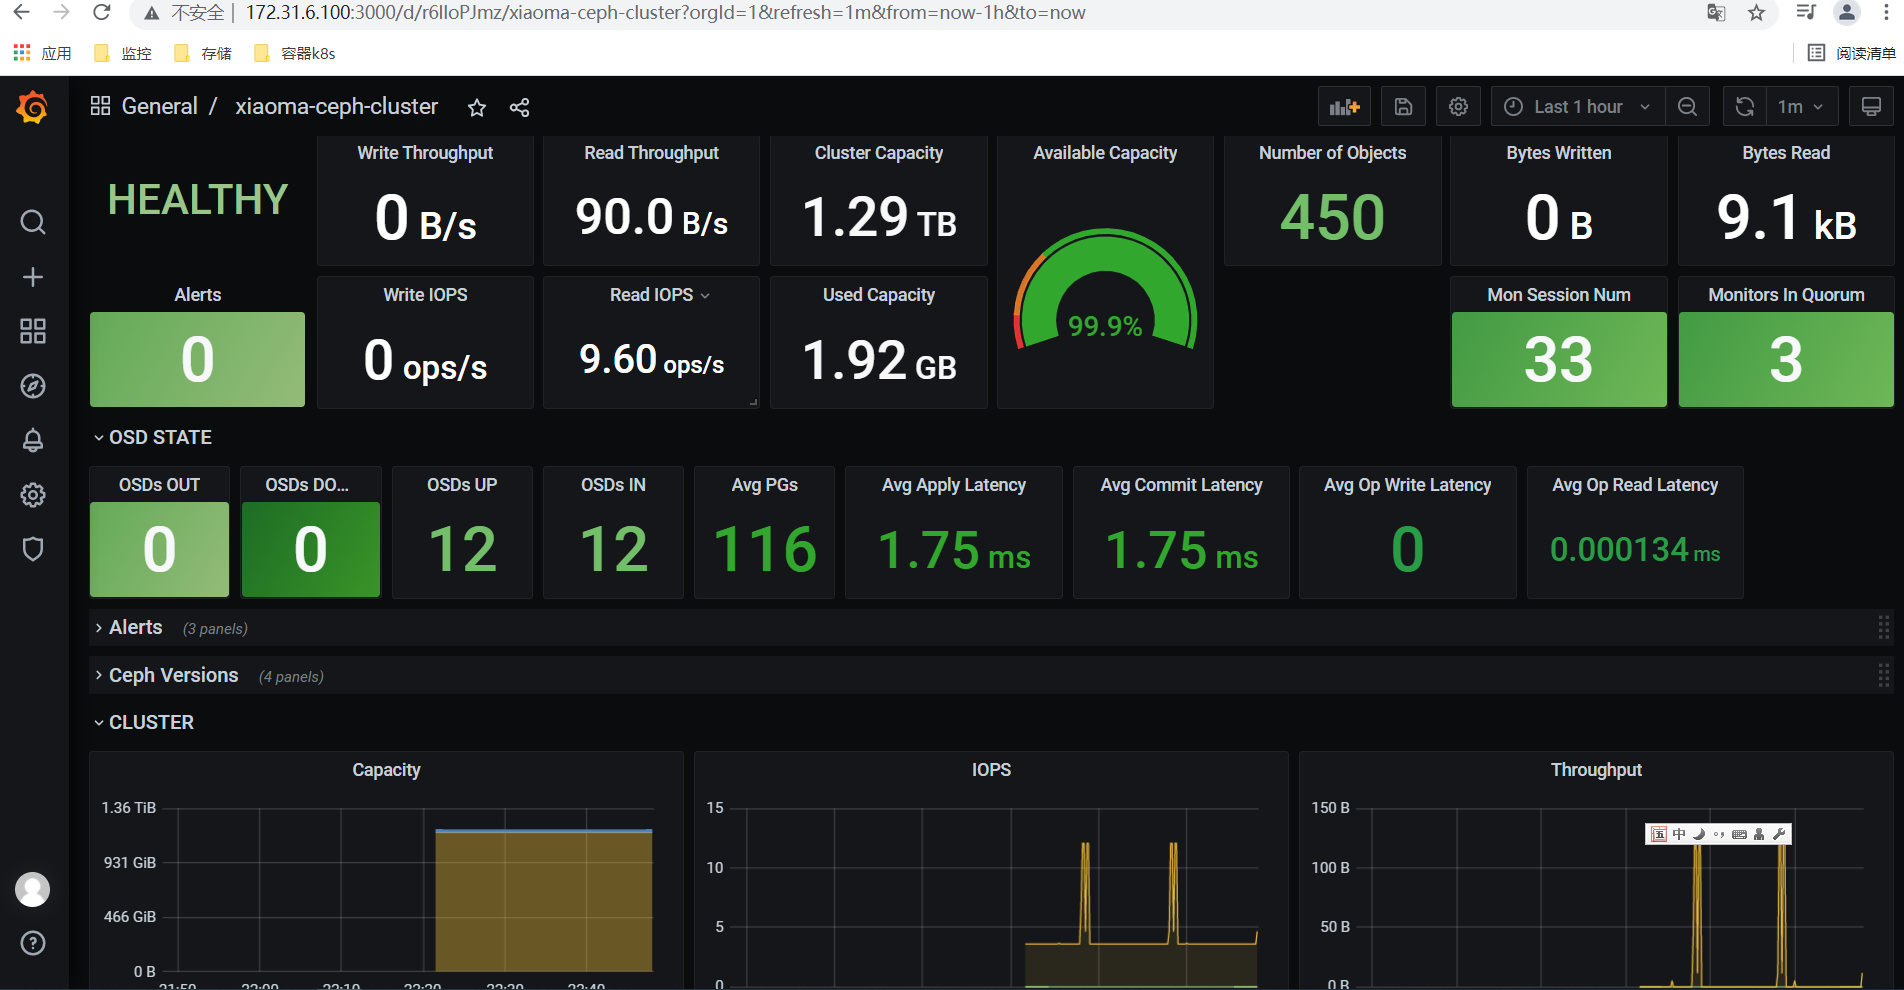
导入模板2842,查看ceph集群监控图展示;
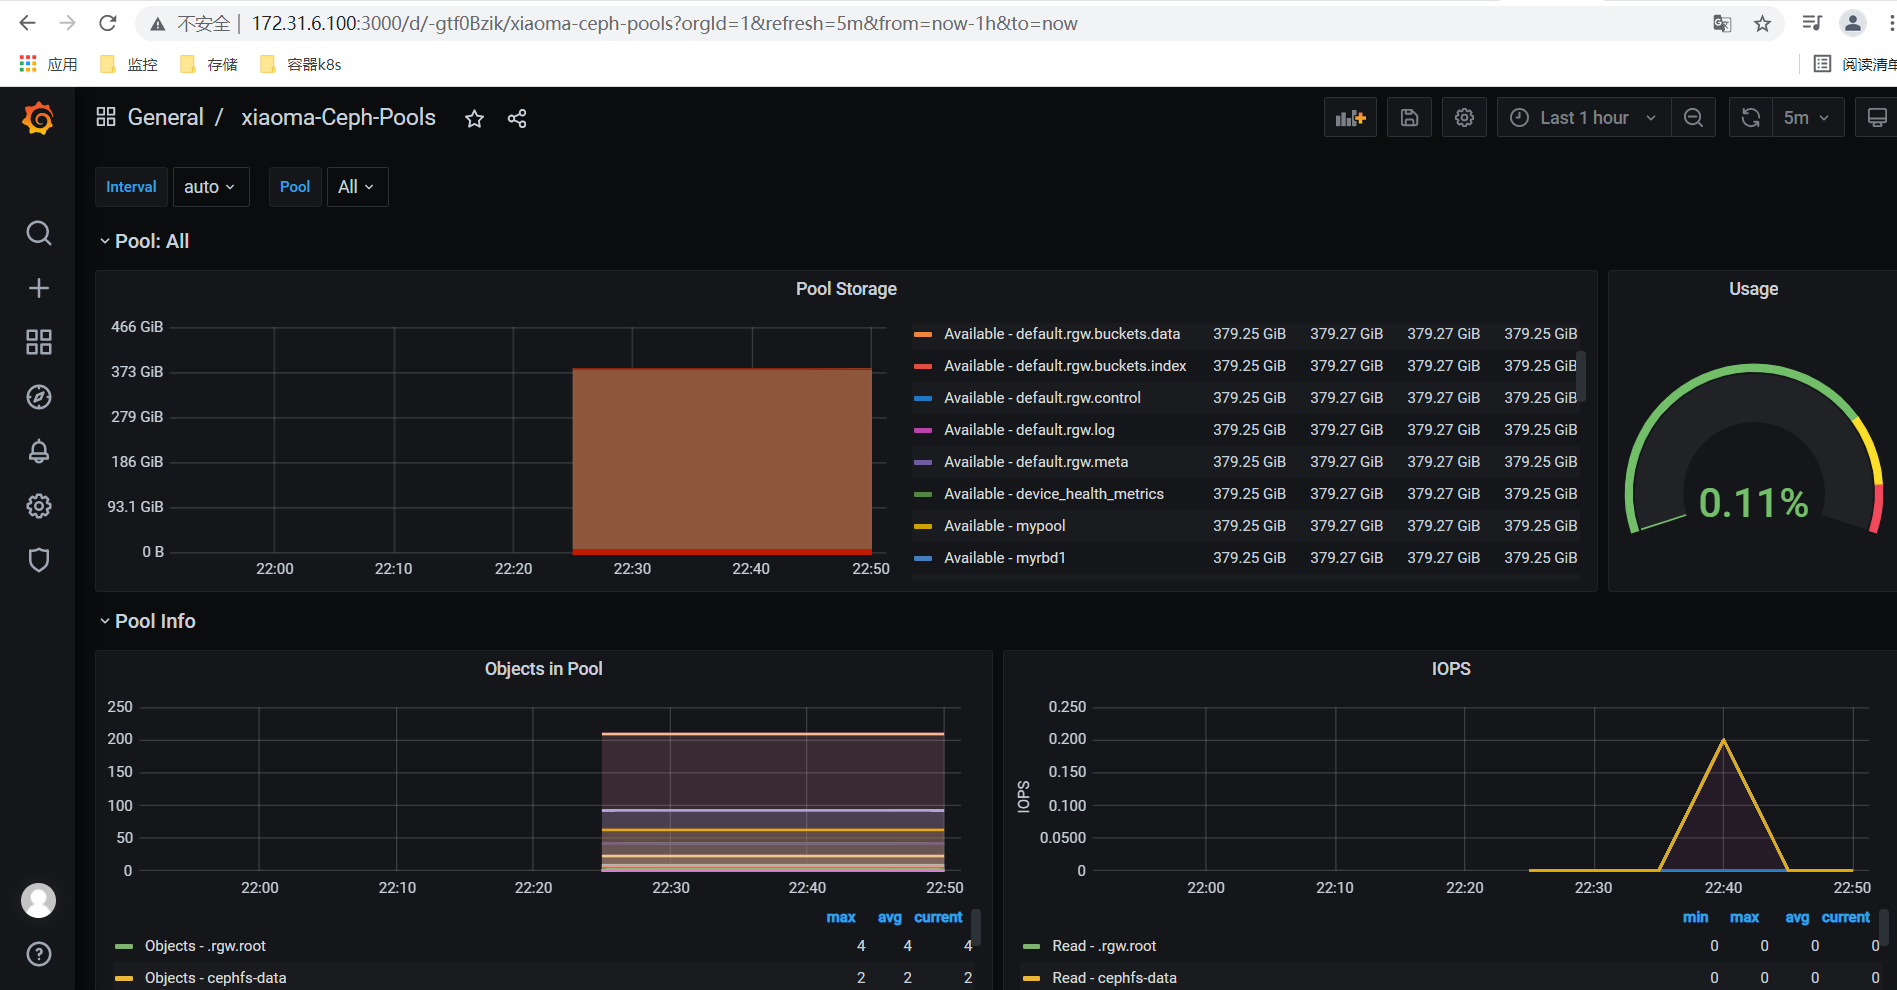
导入模块5342,查看ceph pool监控图展示;
三、Dokcer 基础
1、版本信息
在Linux系统上需要内核版本在3.10或以上,docker版本号这前一直是0.X版本或1.X版本,但是从2017年3月1号开始改为每个季度发布一次稳定版,其版本规则也是统一变更为YY.MM,例如17.09表示是2017年9月份发布的。
从2017年初推出新的项目Moby,Moby项目属于Docker项目的全新上游,Docker将是一个隶属于Moby的子产品,而且之后版本开始区分为CE版本(社区版本)和EE(企业收费版),CE社区版本和EE企业版本都是每个季度发布一个新版本,但是EE版本提供后期安全维护1年,而CE版本是4个月。
2、docker安装
(1)设置/etc/default/grub关闭swap;
root@temp01:~# docker info
WARNING: No swap limit support

root@temp01:~# vi /etc/default/grub
GRUB_CMDLINE_LINUX="net.ifnames=0 biosdevname=0 cgroup_enable=memory swapaccount=1"
root@temp01:~# update-grub
root@temp01:~#
(2)添加清华安装源;
https://mirror.tuna.tsinghua.edu.cn/help/ubuntu/

root@temp01:~# cat /etc/apt/sources.list
# 默认注释了源码镜像以提高 apt update 速度,如有需要可自行取消注释
deb https://mirrors.tuna.tsinghua.edu.cn/ubuntu/ focal main restricted universe multiverse
# deb-src https://mirrors.tuna.tsinghua.edu.cn/ubuntu/ focal main restricted universe multiverse
deb https://mirrors.tuna.tsinghua.edu.cn/ubuntu/ focal-updates main restricted universe multiverse
# deb-src https://mirrors.tuna.tsinghua.edu.cn/ubuntu/ focal-updates main restricted universe multiverse
deb https://mirrors.tuna.tsinghua.edu.cn/ubuntu/ focal-backports main restricted universe multiverse
# deb-src https://mirrors.tuna.tsinghua.edu.cn/ubuntu/ focal-backports main restricted universe multiverse
deb https://mirrors.tuna.tsinghua.edu.cn/ubuntu/ focal-security main restricted universe multiverse
# deb-src https://mirrors.tuna.tsinghua.edu.cn/ubuntu/ focal-security main restricted universe multiverse
root@temp01:~#
(1)优化内核参数;
root@tdq-mv-test:~# cat /etc/security/limits.conf
*             soft    core            unlimited
*             hard    core            unlimited
*         soft    nproc           1000000
*             hard    nproc           1000000
*             soft    nofile          1000000
*             hard    nofile          1000000
*             soft    memlock         32000
*             hard    memlock         32000
*             soft    msgqueue        8192000
*             hard    msgqueue        8192000

root@tdq-mv-test:~# cat /etc/sysctl.conf
net.ipv4.ip_forward=1
vm.max_map_count=262144
kernel.pid_max=4194303
fs.file-max=1000000
net.ipv4.tcp_max_tw_buckets=6000
net.netfilter.nf_conntrack_max=2097152

net.bridge.bridge-nf-call-ip6tables = 1
net.bridge.bridge-nf-call-iptables = 1
vm.swappiness=0
(2)安装docker;
参照官网文档https://docs.docker.com/engine/install/ubuntu/安装;
配置apt使用https;
root@tdq-mv-test:~# apt-get install apt-transport-https ca-certificates curl gnupg lsb-release

添加docker官方GPG key;
root@tdq-mv-test:~# curl -fsSL https://download.docker.com/linux/ubuntu/gpg | sudo gpg --dearmor -o /usr/share/keyrings/docker-archive-keyring.gpg

添加docker官方stable源;
root@tdq-mv-test:~# echo \
  "deb [arch=amd64 signed-by=/usr/share/keyrings/docker-archive-keyring.gpg] https://download.docker.com/linux/ubuntu \
  $(lsb_release -cs) stable" | sudo tee /etc/apt/sources.list.d/docker.list > /dev/null

安装指定版本Docker Engine;
root@tdq-mv-test:~# apt-get update
root@tdq-mv-test:~# apt-cache madison docker-ce docker-ce-cli
root@tdq-mv-test:~# apt install docker-ce=5:19.03.15~3-0~ubuntu-focal docker-ce-cli=5:19.03.15~3-0~ubuntu-focal
3、存储引擎
Overlay
一种Union FS文件系统,Linux内核3.18后支持
Overlay2
overlay的升级版,到目前为止,所有Linux发行版推荐使用的存储类型
devicemapper
是CentOS和RHEL的推荐存储驱动程序,但是依赖于direct-lvm,存在空间受限的问题,虽然可以通过后期配置解决;因为之前的内核版本不支持overlay2(集中在Centos/RHEL7.2之前版本);但当前较新版本Centos和RHEL现已经支持overlay2。
https://www.cnblogs.com/youruncloud/p/5736718.html
zfs/btrfs(Oracle-2007)
目前没有广泛应用;这些文件系统允许使用高级选项,例如创建“快照”,但需要更多的维护和设置。并且每一个都依赖于正确配置的后备文件系统。
vfs
用于测试环境,适用于无法适用Cow文件系统的情况。此存储驱动程序的性能很差,通常不建议在生产中使用。
overlay允许使用宿主机硬盘的最大空间;
修改docker存储引擎,会引起数据丢失,不要在线上环境直接修改!!!
2、镜像和基本命令
# docker search nginx  搜索镜像
# docker pull nginx  下载镜像
# docker images  查看镜像
# docker save nginx:v0.1 -o nginx:v0.1.tar.gz 导出镜像到文件
# docker load -i nginx:v0.1.tar.gz 导入镜像
# docker run --name mynginx -p 80:80 -d nginx
# curl localhost:80 访问测试
# docker logs -f f4bb5138c897 查看访问日志
# docker ps
# docker exec -it f4bb5138c897 /bin/bash
root@f4bb5138c897:/# echo "Docker test." > /usr/share/nginx/html/index.html
# exit
# docker cp index.html f4bb5138c897:/usr/share/nginx/html/  #将宿主机中的文件拷贝到容器中指定的目录中

# 常用方式,挂载目录(数据卷Volume)
# docker run -p 80:80 -v /www/web/index.html:/usr/share/nginx/html/index.html -v /www/config/nginx.conf:/etc/nginx/nginx.conf -d nginx

# 启动多个容器,一个镜像可以启动多个容器,互相隔离、独立
# docker run -p 81:80 -d nginx
# docker run -p 82:80 -d nginx
# docker run -p 83:80 -d nginx

# echo "HomePage." > /www/index.html
# docker run -p 83:80 -v /www:/usr/share/nginx/html -d nginx
# curl 192.168.3.9:83
HomePage.

停止删除nginx实例
# docker stop mynginx
# docker ps
# docker ps -a
# docker ps -qa
# docker ps -l
# docker start mynginx
# docker stop mynginx
# docker rm mynginx
# docker rm bec576cf0e42
# docker rm -f $(docker ps -aq) # 删除所有容器
(1)拉取镜像
root@docker01:~# docker pull nginx:1.20
root@docker01:~# docker pull centos:7.8.2003
root@docker01:~# docker pull centos:7.9.2008
root@docker01:~# docker pull centos:7.2.1511
root@docker01:~# docker pull ubuntu:20.04
root@docker01:~# docker pull alpine
root@docker01:~# docker pull nginx
root@docker01:~# docker pull lorel/docker-stress-ng
(2)查看镜像
root@docker01:~# docker images
root@docker01:~# docker image ls
(3)删除镜像
root@docker01:~# docker rmi nginx:latest
(4)导出镜像
root@docker01:~# docker save nginx:1.20 -o nginx-1.20.tar.gz
root@docker01:~# docker save nginx:1.20 > nginx-1.20.tar.gz
root@docker01:~# mkdir nginx-test
root@docker01:~# mv nginx-1.20.tar.gz nginx-test/
root@docker01:~# cd nginx-test/
root@docker01:~/nginx-test# tar xvf nginx-1.20.tar.gz #解压查看分层信息
root@docker01:~/nginx-test# ls
(5)导入镜像(比如拷贝到另一台HOST内导入)
root@docker01:~/nginx-test# docker rmi nginx:1.20
root@docker01:~/nginx-test# docker load -i nginx-1.20.tar.gz
或者root@docker01:~/nginx-test# docker load < nginx-1.20.tar.gz
(6)修改镜像名字/tag
root@docker01:~/nginx-test# docker tag nginx:1.20 nginx:1.20-baseimage
root@docker01:~/nginx-test# docker tag nginx:1.20 harbor.s209.local/nginx:1.20
(7)启动容器运行后台
root@docker01:~# docker run -d --name xiaoma-c1 -p 9800:80 nginx:1.20 #宿主机端口9800,容器端口80;
进入容器
root@docker01:~# docker exec -it xiaoma-c1 bash
或者root@docker01:~# docker exec -it 9fea1012de93 bash
(8)启动容器,退出容器是自动删除
root@docker01:~# docker run -it --rm -p 9801:80 nginx:1.20
root@docker01:~# docker run -it --rm alpine:latest sh
(9)批量删除容器
root@docker01:~# docker ps -a -q
04b1ccccd692
90ab2a4e5e54
root@docker01:~# docker rm `docker ps -a -q`
04b1ccccd692
90ab2a4e5e54
(10)批量关闭正在运行的容器(正常关闭)
root@docker01:~# docker stop $(docker ps -a -q)
(11)批量强制关闭正在运行的容器
root@docker01:~# docker kill $(docker ps -a -q)
(12)批量删除已退出容器
root@docker01:~# docker rm `docker ps -aq -f status=exited`
(13)本地端口81映射到容器80端口
root@docker01:~# docker run -p 81:80 --name nginx-test-port1 nginx:1.20
(14)本地IP:本地端口:容器端口
root@docker01:~# docker run -p 172.31.6.20:82:80 --name nginx-test-port2 nginx:1.20
(15)本地IP:本地随机端口:容器端口
root@docker01:~# docker run -p 172.31.6.20::80 --name nginx-test-port3 nginx:1.20
(16)本地IP:本地随机端口:容器端口/协议,默认为tcp协议
root@docker01:~# docker run -p 172.31.6.20:83:80/udp --name nginx-test-port4 nginx:1.20
(17)一次性映射多个端口+协议
root@docker01:~# docker run -p 86:80/tcp -p 443:443/tcp -p 53:53/udp --name nginx-test-port5 nginx:1.20

 浙公网安备 33010602011771号