MCP - 初始化 MCP 环境 & 创建 MCP Server (一)
MCP Server 可以运行在 Stdio 或 SSE 模式下。
- Stdio:本地进程间管道(stdin/stdout)通信,无需网络。但不支持多客户端。
- SSE:通过 HTTP 长链接通信。支持多客户端,支持服务器主动实时推送。但额外需要 Web 服务器支持。
后文展示 SSE 模式。
1、进入 python3 的 Miniconda 虚拟环境
创建及进入方法,参见: https://www.cnblogs.com/rslai/p/18741276
2、安装 fastmcp 库
pip install fastmcp
安装成功后执行 pip list | grep fastmcp 可以查看已经安装 fastmcp 。如下图

3、创建 server 项目
A)新建一个目录,例如 mcp_server,目录名可以根据需要随意起
B)在 mcp_server 目录中,创建一个文件,例如 server.py。将一下代码粘贴进去
# -*- coding: utf-8 -*-
# @Time : 2025/7/28 17:09
# @Author : yangwenjie
# @Email : 邮箱
# @File : server-sse.py
# @Project : fastmcp
# weather_sse.py
from fastmcp import FastMCP
import random

# 创建MCP服务器实例,指定端口
mcp = FastMCP("Weather Service", port=3002)

# 模拟的天气数据
weather_data = {
    "New York": {"temp": range(10, 25), "conditions": ["sunny", "cloudy", "rainy"]},
    "London": {"temp": range(5, 20), "conditions": ["cloudy", "rainy", "foggy"]},
    "Tokyo": {"temp": range(15, 30), "conditions": ["sunny", "cloudy", "humid"]},
    "Sydney": {"temp": range(20, 35), "conditions": ["sunny", "clear", "hot"]},
}


@mcp.tool()
def get_weather(city: str) -> dict:
    """获取指定城市的当前天气"""
    if city not in weather_data:
        return {"error": f"无法找到城市 {city} 的天气数据"}

    data = weather_data[city]
    temp = random.choice(list(data["temp"]))
    condition = random.choice(data["conditions"])

    return {
        "city": city,
        "temperature": temp,
        "condition": condition,
        "unit": "celsius"
    }


@mcp.resource("weather://cities")
def get_available_cities() -> list:
    """获取所有可用的城市列表"""
    return list(weather_data.keys())


@mcp.resource("weather://forecast/{city}")
def get_forecast(city: str) -> dict:
    """获取指定城市的天气预报资源"""
    if city not in weather_data:
        return {"error": f"无法找到城市 {city} 的天气预报"}

    forecast = []
    for i in range(5):  # 5天预报
        data = weather_data[city]
        temp = random.choice(list(data["temp"]))
        condition = random.choice(data["conditions"])
        forecast.append({
            "day": i + 1,
            "temperature": temp,
            "condition": condition
        })

    return {
        "city": city,
        "forecast": forecast,
        "unit": "celsius"
    }


if __name__ == "__main__":
    # 使用SSE传输方式启动服务器
    mcp.run(transport="sse")
4、启动 mcp server
在命令行中进入刚创建的目录,并执行如下命令启动 mcp server
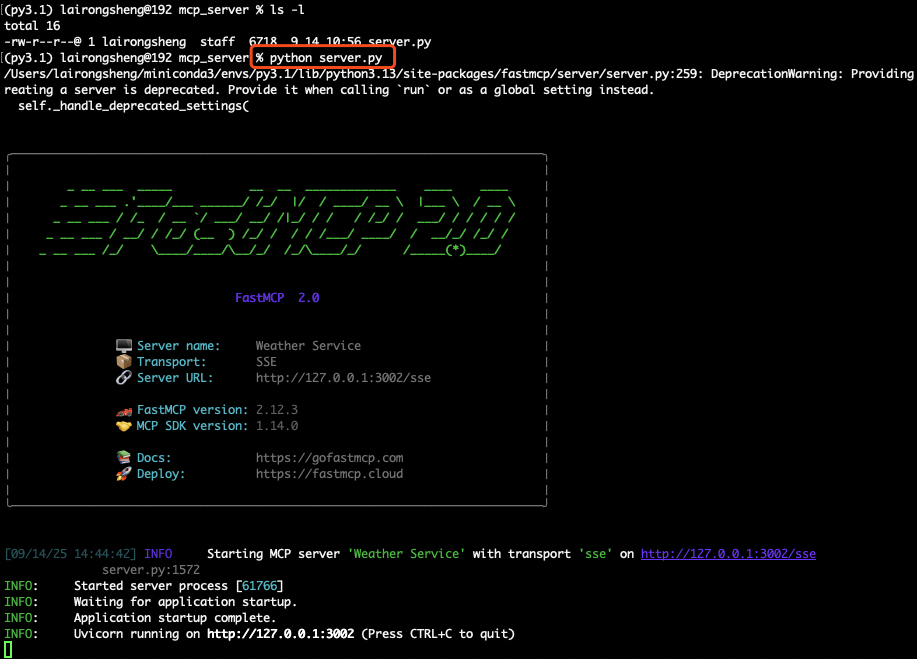
python server.py
启动成功后如下图
5、命令行测试 mcp server
A)访问 see,拿到 session_id
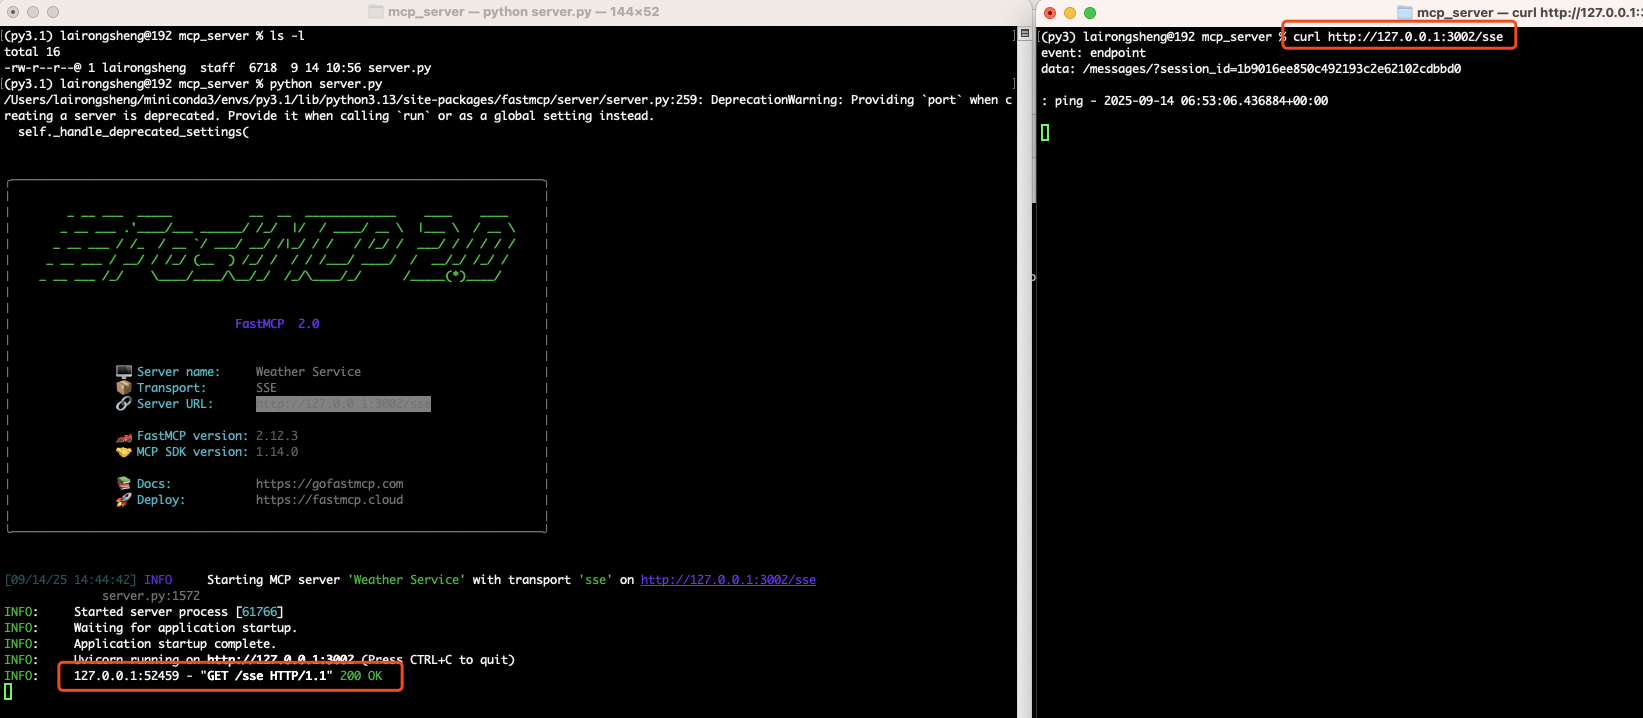
新启动一个命令行执行如下命令
curl http://127.0.0.1:3002/sse
如下图,复制下图中的 session_id ,后续命令中需要替换这个 id
B)执行初始化
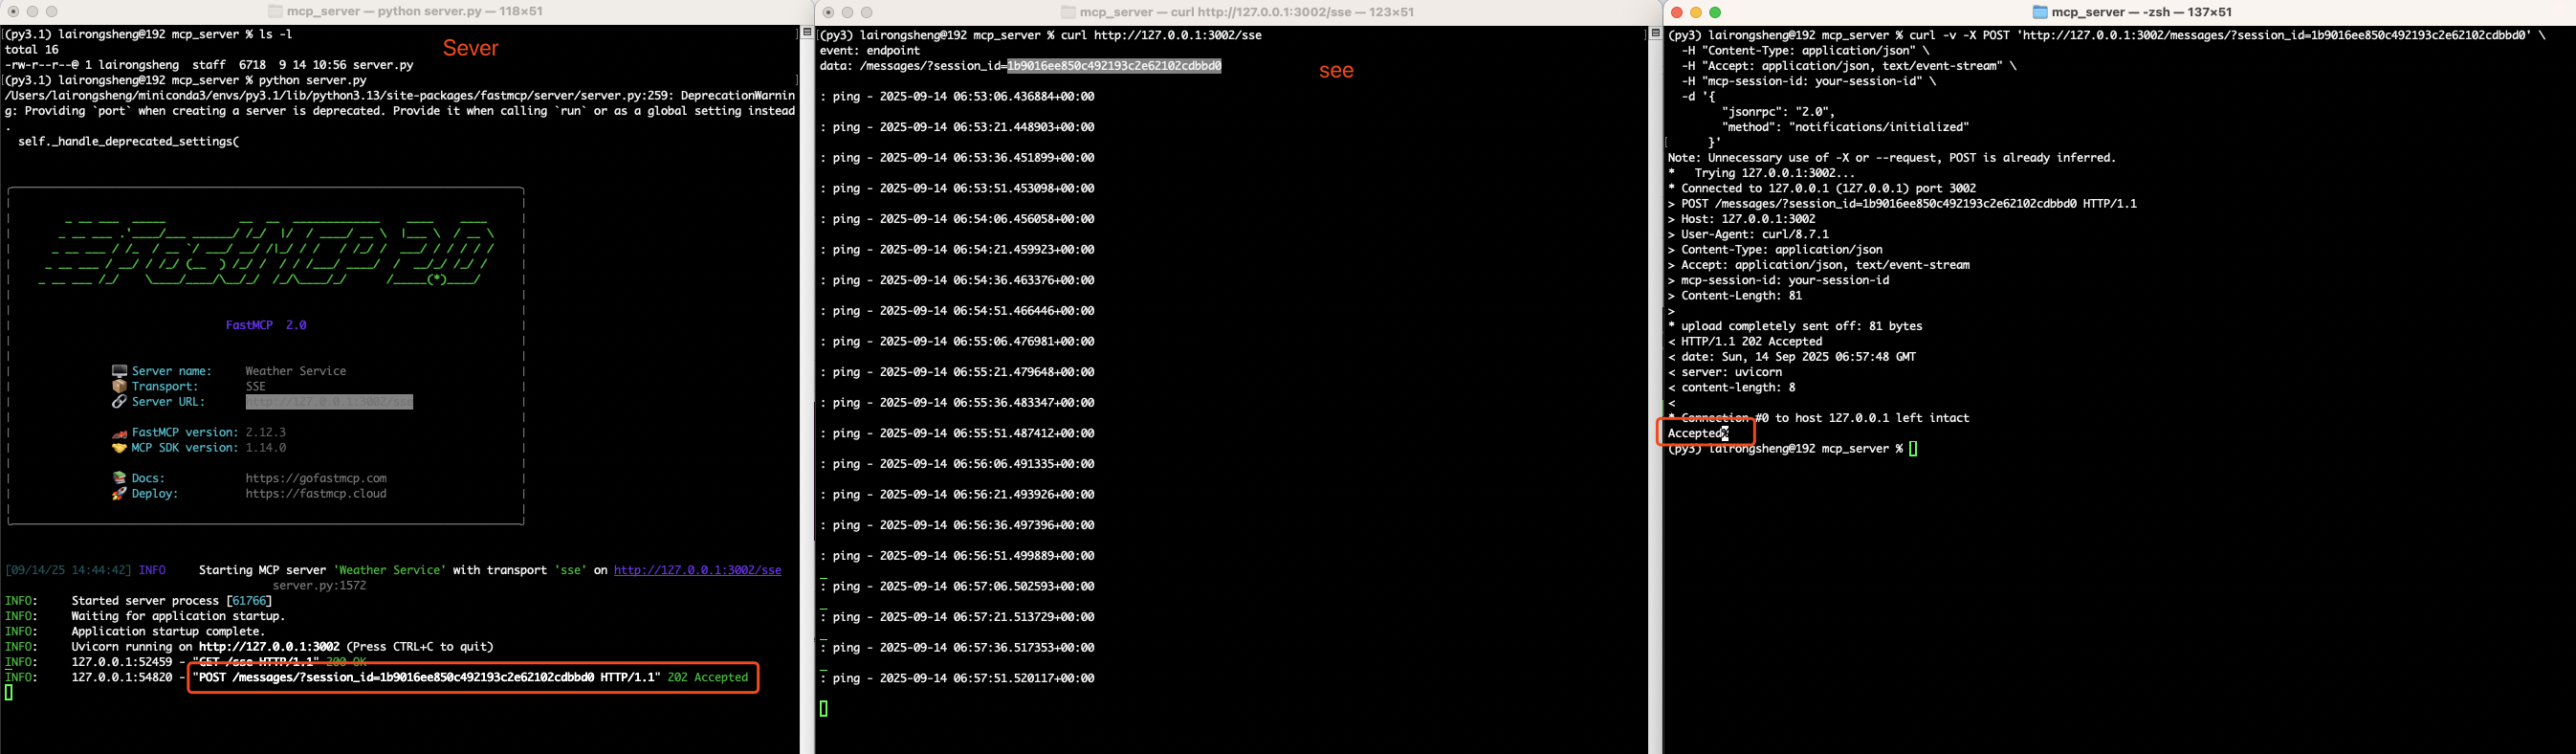
再启动一个命令行,执行如下命令。
注意:其中 1b9016ee850c492193c2e62102cdbbd0 要用你从上步中复制的 session_id 替换
curl -v -X POST 'http://127.0.0.1:3002/messages/?session_id=1b9016ee850c492193c2e62102cdbbd0' \
  -H "Content-Type: application/json" \
  -H "Accept: application/json, text/event-stream" \
  -H "mcp-session-id: your-session-id" \
  -d '{
        "jsonrpc": "2.0",
        "method": "notifications/initialized"
      }'
运行后如下图:
- 在命令行中看到 server 响应 Accepted
- 在 server 中能看到,请求地址
C)列出 mcp sever 提供的所有 tools 列表
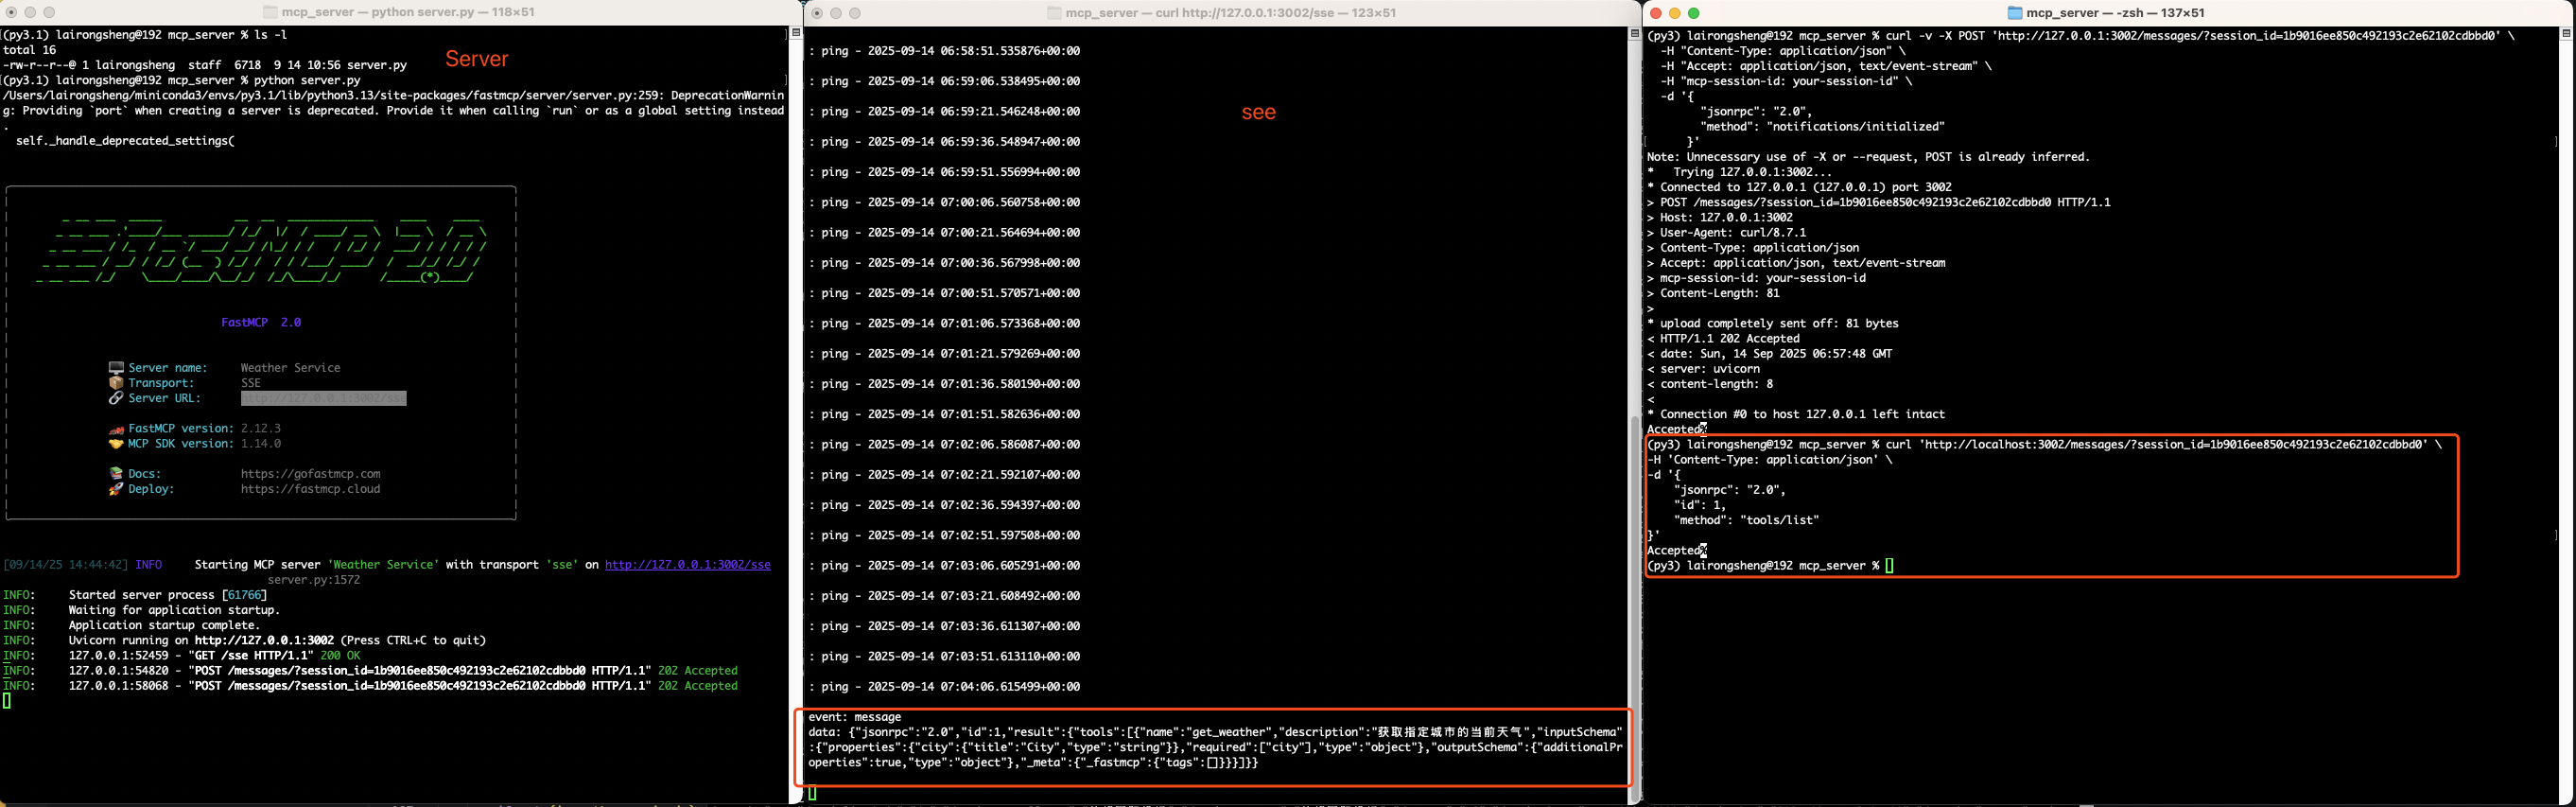
执行如下命令
curl 'http://localhost:3002/messages/?session_id=1b9016ee850c492193c2e62102cdbbd0' \
-H 'Content-Type: application/json' \
-d '{
    "jsonrpc": "2.0",
    "id": 1,
    "method": "tools/list"
}'
运行后如下图:
- 最右边执行成功后,返回 Accepted
- 在 see 中显示 server 响应 tools 列表
将 mcp 响应的 tools 列表格式化后如下:
{
  "jsonrpc": "2.0",
  "id": 1,
  "result": {
    "tools": [{
      "name": "get_weather",
      "description": "获取指定城市的当前天气",
      "inputSchema": {
        "properties": {
          "city": {
            "title": "City",
            "type": "string"
          }
        },
        "required": ["city"],
        "type": "object"
      },
      "outputSchema": {
        "additionalProperties": true,
        "type": "object"
      },
      "_meta": {
        "_fastmcp": {
          "tags": []
        }
      }
    }]
  }
}
D)调用 mcp 工具
执行如下命令
curl 'http://127.0.0.1:3002/messages/?session_id=1b9016ee850c492193c2e62102cdbbd0' \
-H 'Content-Type: application/json' \
-d '{
    "jsonrpc": "2.0",
    "id": 2,
    "method": "tools/call",
    "params": { "name": "get_weather", "arguments": {"city": "London"} }
}'
运行后如下图:
- 最右边执行成功后,返回 Accepted
- 在 see 中显示 server 响应 mcp 工具调用结果
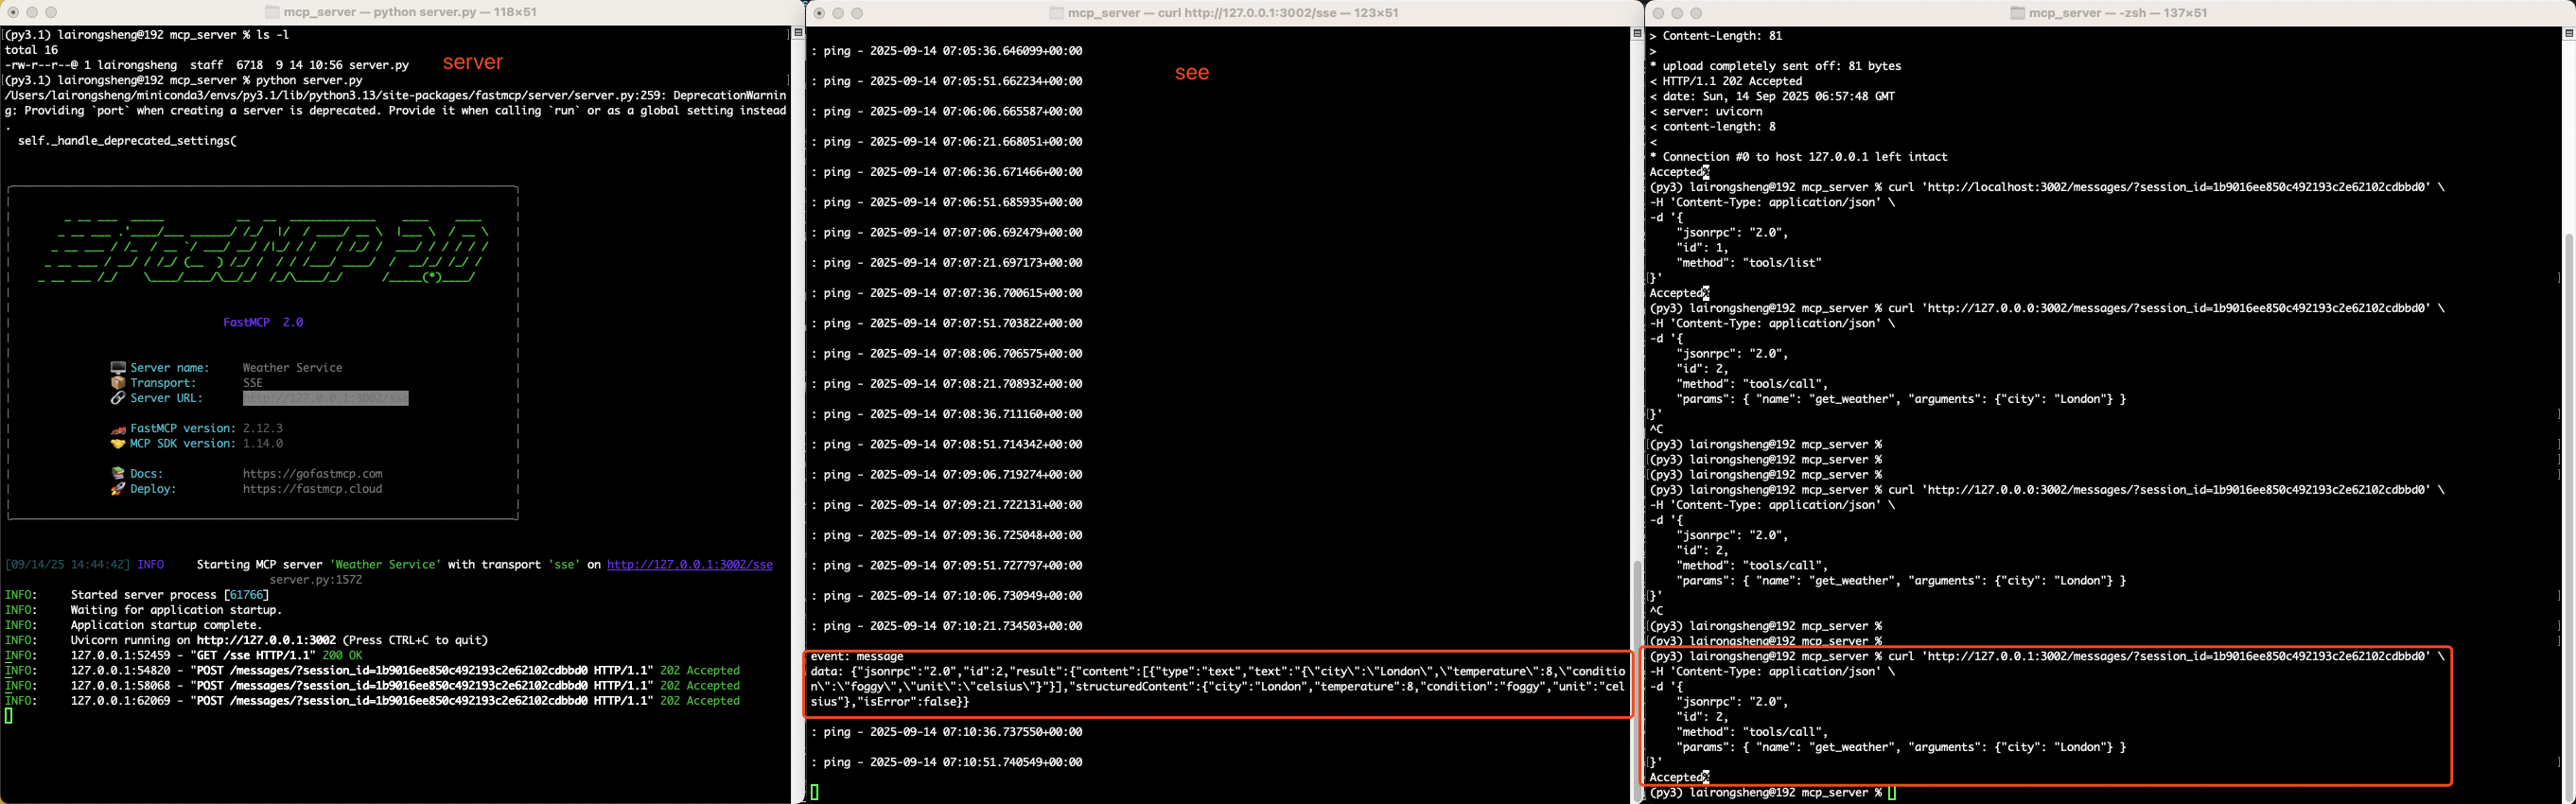
将 mcp 工具调用结果格式化后如下:
{
	"jsonrpc": "2.0",
	"id": 2,
	"result": {
		"content": [{
			"type": "text",
			"text": "{\"city\":\"London\",\"temperature\":8,\"condition\":\"foggy\",\"unit\":\"celsius\"}"
		}],
		"structuredContent": {
			"city": "London",
			"temperature": 8,
			"condition": "foggy",
			"unit": "celsius"
		},
		"isError": false
	}
}
E)列出 mcp sever 提供的所有 resource 列表
执行如下命令
curl -X POST "http://127.0.0.1:3002/messages/?session_id=c6e8970ff94c434486a7c39a175e1e74" \
  -H "Content-Type: application/json" \
  -d '{
  		"jsonrpc": "2.0",
  		"method": "resources/list",
  		"params": {},
  		"id": 1
  	}'
运行后如下图:
- 最右边执行成功后,返回 Accepted
- 在 see 中显示 server 响应 resource 列表
- 返回 resource 列表 中只包括 固定路径资源 @mcp.resource("weather://cities") ,没包括 带参数路径资源 @mcp.resource("weather://forecast/{city}")

将 mcp 响应的 resource 列表格式化后如下:
{
	"jsonrpc": "2.0",
	"id": 1,
	"result": {
		"resources": [{
			"name": "get_available_cities",
			"uri": "weather://cities",
			"description": "获取所有可用的城市列表",
			"mimeType": "text/plain",
			"_meta": {
				"_fastmcp": {
					"tags": []
				}
			}
		}]
	}
}
F)请求 固定路径 resource
执行如下命令
其中 uri 是这里的地址 @mcp.resource("weather://cities")
curl -X POST "http://127.0.0.1:3002/messages/?session_id=c6e8970ff94c434486a7c39a175e1e74" \
  -H "Content-Type: application/json" \
  -d '{
  		"jsonrpc": "2.0",
  		"method": "resources/read",
  		"params": {
  			"uri": "weather://cities"
  		},
  		"id": 1
  	}'
运行后如下图:
- 最右边执行成功后,返回 Accepted
- 在 see 中显示 server 响应 所有城市列表

G)请求 带参数路径 resource
执行如下命令:
其中 uri 是这里的地址 @mcp.resource("weather://forecast/{city}")
curl -X POST "http://127.0.0.1:3002/messages/?session_id=c6e8970ff94c434486a7c39a175e1e74" \
  -H "Content-Type: application/json" \
  -d '{
  		"jsonrpc": "2.0",
  		"method": "resources/read",
  		"params": {
  			"uri": "weather://forecast/Tokyo"
  		},
  		"id": 1
  	}'
运行后如下图:
- 最右边执行成功后,返回 Accepted
- 在 see 中显示 server 响应 东京的天气列表

源代码: mcp_server_sse.zip
参考文档:

 浙公网安备 33010602011771号