

Spring Cloud Config介绍
Spring Cloud Config为分布式系统中的外部化配置提供服务器和客户端支持。使用Config Server,您可以集中管理所有环境中应用程序的外部属性。客户端和服务器上的概念与Spring Environment和PropertySource抽象,因此它们非常适合Spring应用程序,但可以与以任何语言运行的任何应用程序一起使用。当应用程序从开发人员到测试人员进入生产过程进入生产过程时,您可以管理这些环境之间的配置,并确保应用程序具有它们迁移时所需的一切。服务器存储后端的默认实现使用git,因此它轻松支持带标签的配置环境版本,并且可以通过各种工具来访问这些内容来管理内容。添加替代实现并将其插入Spring配置很容易。
优点:
1、Spring Cloud Config Server功能:
2、HTTP,用于外部配置的基于资源的API(名称-值对,或等效的YAML内容)
3、加密和解密属性值(对称或非对称)
4、可轻松地使用Spring Boot应用程序嵌入 @EnableConfigServer
5、Config Client功能(用于Spring应用程序):
6、绑定到Config Server并Environment使用远程属性源初始化Spring
7、加密和解密属性值(对称或非对称)
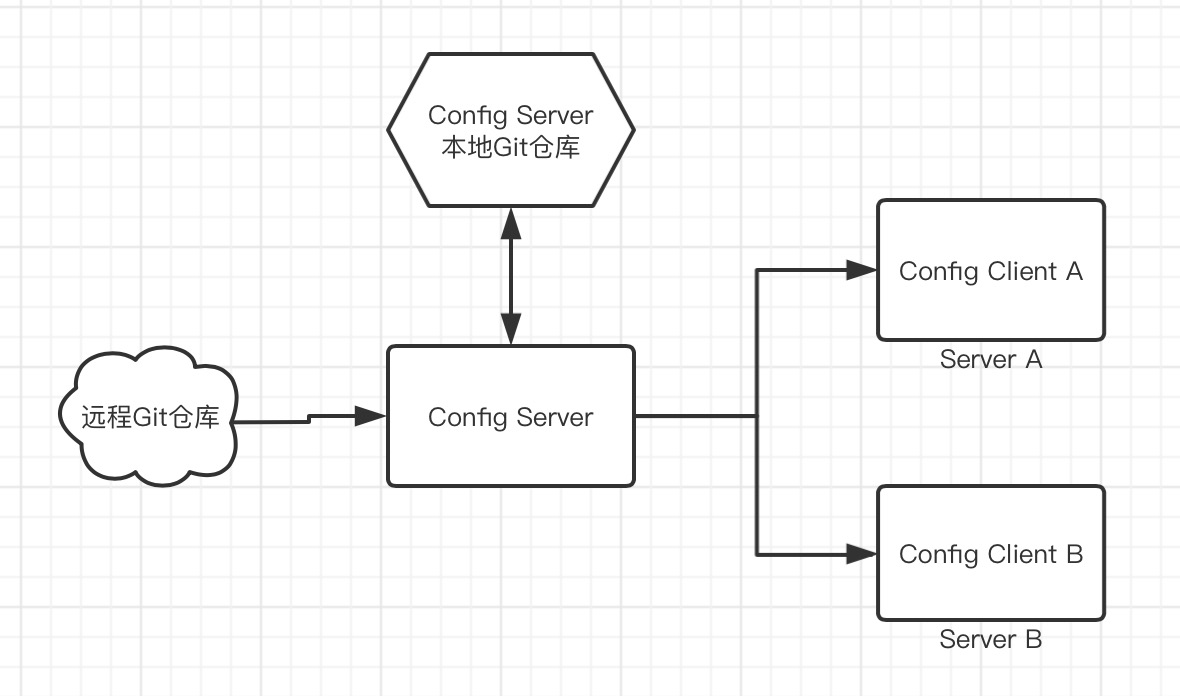
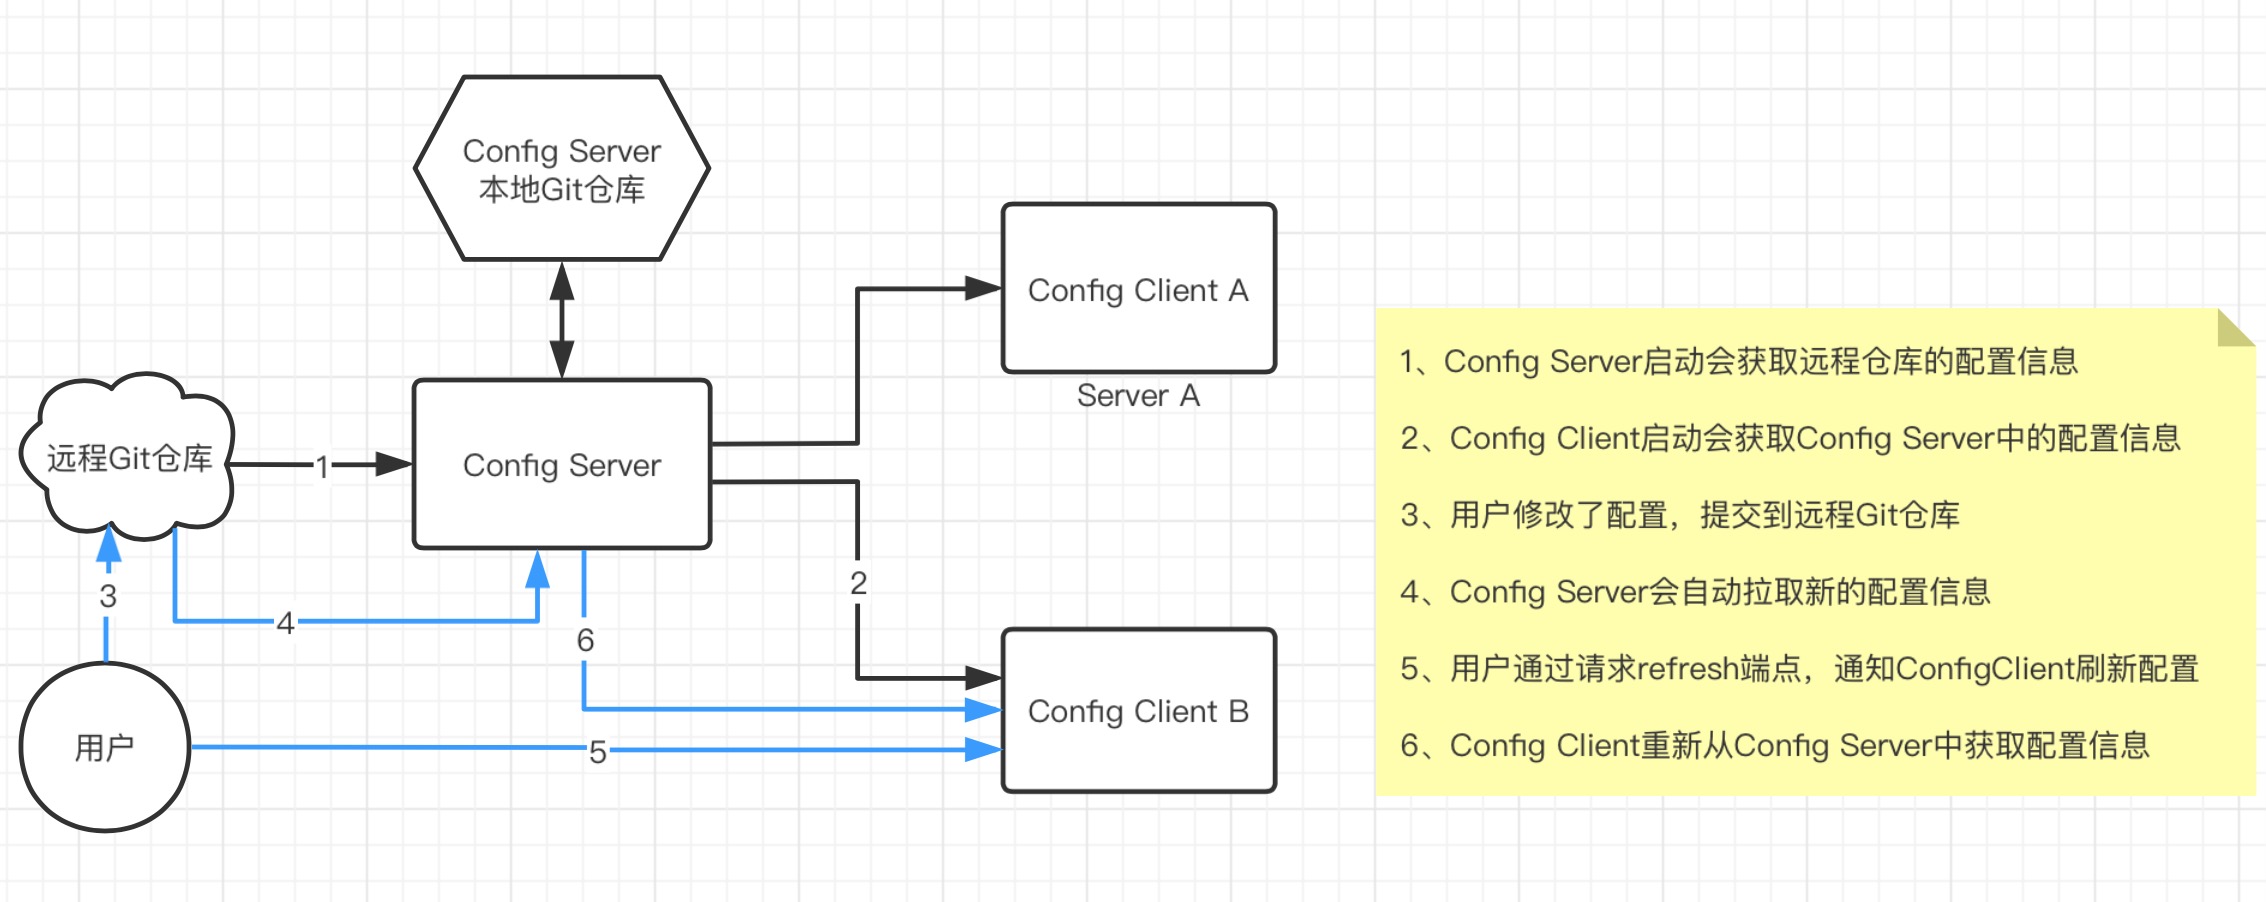
Spring Cloud Config用来为分布式系统中的基础设施和微服务应用提供集中化的外部配置支持。
- 服务端:分布式配置中心,独立的微服务应用,用来连接配置仓库(GIT)并为客户端提供获取配置信息、加密/解密等访问接口。
- 客户端:微服务架构中各个微服务应用和基础设施,通过指定配置中心管理应用资源与业务相关的配置内容,启动时从配置中心获取和加载配置信息
Spring Cloud Config架构图
Spring Cloud Config服务端搭建
准备:
在Github上准备一个配置中心仓库,如下:
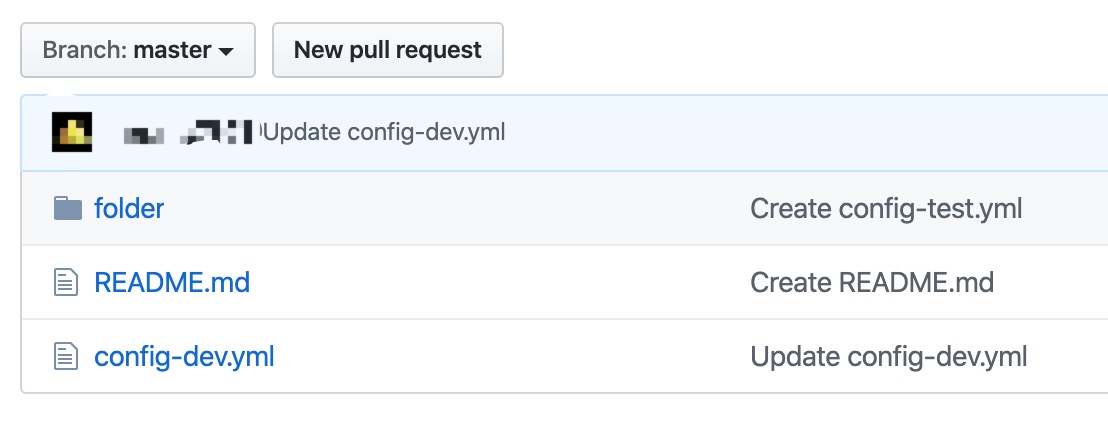
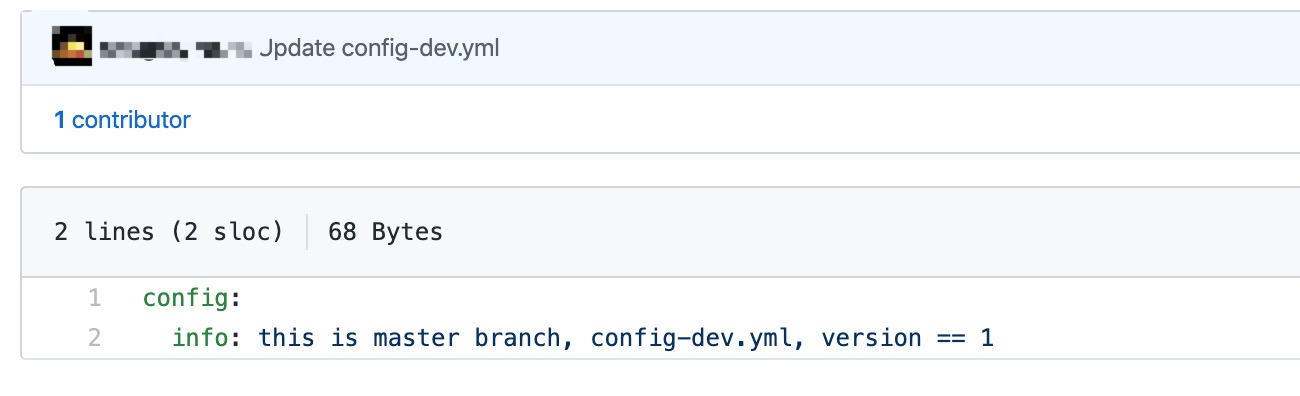
其中config-dev.yml的文件内容如下:
搭建:
1、新建一个SpringCloud模块springcloud-config-center8888,作为配置中心
2、在pom中,引入spring-cloud-config-server和spring-cloud-starter-netflix-eureka-client依赖

 1 <!-- spring cloud config server-->
 2 <dependency>
 3     <groupId>org.springframework.cloud</groupId>
 4     <artifactId>spring-cloud-config-server</artifactId>
 5 </dependency>
 6
 7 <!-- eureka client -->
 8 <dependency>
 9     <groupId>org.springframework.cloud</groupId>
10     <artifactId>spring-cloud-starter-netflix-eureka-client</artifactId>
11 </dependency>
3、编辑application.yml配置文件
 1 # 端口
 2 server:
 3   port: 8888
 4
 5 spring:
 6   application:
 7     name: cloud-config-conter
 8   cloud:
 9     config:
10       server:
11         git:
12           # git仓库地址
13           uri: https://github.com/xxxx/springcloud-config.git
14           username: xxxx
15           password: 123456
16           # 跳过SSL的验证
17           skipSslValidation: true
18           # 查找路径,默认在根路径下,以下写法表示在更目录下以及folder目录下查找文件
19           searchPaths: folder
20
21 eureka:
22   client:
23     service-url:
24       defaultZone: http://localhost:8761/eureka
4、编辑主启动类,并使用@EnableConfigServer激活配置中心服务端
1 // 激活配置中心
2 @EnableConfigServer
3 @SpringBootApplication
4 public class ConfigCenterMain8888 {
5     public static void main(String[] args) {
6         SpringApplication.run(ConfigCenterMain8888.class, args);
7     }
8 }
5、测试
1)启动测试中心模块
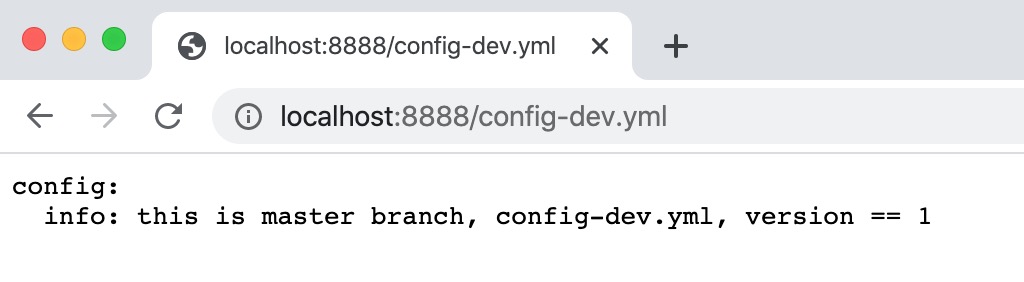
2)访问地址:http://localhost:8888/config-dev.yml,正常获取到git仓库中的文件
3)查看控制台,可以看到文件所在目录

4)进入文件所在目录,使用命令:git branch -a,可以发现目录即是本地git仓库目录(对于上面Spring Cloud Config架构图本地仓库)

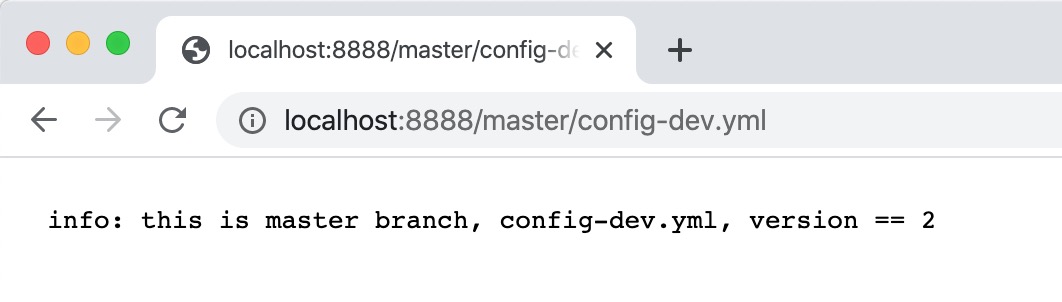
5)修改远程git仓库,github上的config-dev.yml文件的内容,改为:
config:
  info: this is master branch, config-dev.yml, version == 2
6)刷新访问地址:http://localhost:8888/config-dev.yml,查看显示内容
发现,显示的内容也跟着更新了

Spring Cloud Config配置及其他
1、配置读取规则:
/{application}/{profile}[/{label}]
/{application}-{profile}.yml
/{label}/{application}-{profile}.yml
/{application}-{profile}.properties
/{label}/{application}-{profile}.properties
比如可以访问地址:
a、查看test分支上的config-dev.yml文件信息:http://localhost:8888/config/dev/test
b、获取默认(master)分支上的config-dev.yml文件:http://localhost:8888/config-dev.yml
c、获取dev分支上的config-dev.yml文件:http://localhost:8888/dev/config-dev.yml
2、项目application.yml中配置的git属性(searchPaths)
查找路径,默认在根路径下,以下写法表示在更目录下以及folder目录下查找文件
可以在更目录下建一个folder文件夹,然后在folder文件夹建一个config-test.yml文件
访问地址:http://localhost:8888/master/config-test.yml,查看文件事,自动到根路径和folder目录下查找
3、本地仓库目录设置:
spring.cloud.config.server.git.basedir = /Users/h__d/Documents/git-repository/springcloud-config
4、本地模式-设置本地目录作为文件读取目录,编辑配置文件,配置(删除其中git仓库配置)如下:
 1 spring:
 2   application:
 3     name: cloud-config-conter
 4   profiles:
 5     # 告诉服务,我现在要启用本地配置(优先考虑采用工程目录resources下配置)
 6     active: native
 7   cloud:
 8     config:
 9       server:
10         native:
11           # 搜索配置文件的位置。默认与Spring Boot应用相同,
12           # [classpath:/,classpath:/ config /,file:./,file:./ config /]。
13           search-locations: /Users/h__d/Documents/git-repository/springcloud-config2
测试:
1)重启服务
2)springcloud-config2目录中,内容如下:

3)访问地址:http://localhost:8888/config-dev.yml,正常访问并获取内容,说明一样能访问到springcloud-config2目录下的内容
5、混合模式-设置本地目录作为文件读取目录,编辑配置文件,配置(删除其中git仓库配置)如下
 1 spring:
 2   application:
 3     name: cloud-config-conter
 4   profiles:
 5     # 混合模式
 6     active: composite
 7   cloud:
 8     config:
 9       server:
10         composite:
11           - type: native
12             search-locations: /Users/h__d/Documents/git-repository/springcloud-config2
13         # 指示配置服务器应使用远程存储库中的属性初始化其自己的环境的标志。默认情况下处于关闭状态,
14         # 因为它会延迟启动,但是在将服务器嵌入另一个应用程序时很有用。
15         bootstrap: true
测试:
1)重启服务
2)访问地址:http://localhost:8888/config-dev.yml,正常访问并获取内容,说明一样能访问到springcloud-config2目录下的内容
Bootstrap应用程序上下文
Spring Cloud应用程序通过创建“ bootstrap ”上下文来运行,该上下文是主应用程序的父上下文。它负责从外部源加载配置属性,并负责解密本地外部配置文件中的属性。这两个上下文共享一个Environment,它是任何Spring应用程序的外部属性的来源。默认情况下,引导程序属性(不是bootstrap.properties,而是引导程序阶段加载的属性)具有较高的优先级,因此它们不能被本地配置覆盖。
引导上下文使用与主应用程序上下文不同的约定来定位外部配置。可以使用bootstrap.yml来代替application.yml(或.properties),而将引导程序和外部环境的外部配置很好地分开。以下清单显示了一个示例:
bootstrap.yml
1 spring:
2   application:
3     name: foo
4   cloud:
5     config:
6       uri: ${SPRING_CONFIG_URI:http://localhost:8888}
如果应用程序需要来自服务器的任何特定于应用程序的配置,则最好设置spring.application.name(在bootstrap.yml或application.yml中)。为了将属性spring.application.name用作应用程序的上下文ID,必须在bootstrap.[properties | yml]中进行设置。
如果要检索特定的配置文件配置,还应该在bootstrap.[properties | yml]中设置spring.profiles.active。
可以通过设置spring.cloud.bootstrap.enabled=false来完全禁用引导过程(例如,在系统属性中)。
application.yml是用户级的资源配置项,bootstrap.yml是系统级的,优先级更高
要在client模块中的resources下添加一个bootstrap.yml,这很关健的,因为bootstrap.yml是比application.yml先加载的。bootstrap.yml优先级高于application.yml
Spring Cloud Config客户端搭建
搭建:
1、新建一个SpringCloud模块springcloud-config-client8889,作为配置的客户端
2、在pom中,引入spring-cloud-starter-config和spring-cloud-starter-netflix-eureka-client依赖
 1 <!-- spring cloud config client-->
 2 <dependency>
 3     <groupId>org.springframework.cloud</groupId>
 4     <artifactId>spring-cloud-starter-config</artifactId>
 5 </dependency>
 6
 7 <!-- eureka client -->
 8 <dependency>
 9     <groupId>org.springframework.cloud</groupId>
10     <artifactId>spring-cloud-starter-netflix-eureka-client</artifactId>
11 </dependency>
3、在resources下添加一个bootstrap.yml配置文件,内容如下:
 1 spring:
 2   application:
 3     name: cloud-config-client
 4   cloud:
 5     # Config客户端配置
 6     config:
 7       # 分支名称
 8       label: master
 9       # 配置文件名称
10       name: config
11       # 读取后缀名称
12       profile: dev
13       # 上述3个综合:master分支上config-dev.yml配置文件
14       # 读取http://localhost:8888/master/config-dev.yml
15       # 配置中心地址
16       uri: http://localhost:8888
17
4、在resources下添加一个application.yml配置文件,内容如下:
 1 # 端口
 2 server:
 3   port: 8889
 4
 5 eureka:
 6   client:
 7     service-url:
 8       defaultZone: http://localhost:8761/eureka
5、编辑主启动类
1 @EnableEurekaClient
2 @SpringBootApplication
3 public class ConfigClientMain8889 {
4     public static void main(String[] args) {
5         SpringApplication.run(ConfigClientMain8889.class, args);
6     }
7 }
6、编辑一个controller
 1 @RestController
 2 public class ConfigClientController {
 3
 4     @Value("${config.info}")
 5     private String configInfo;
 6
 7     @GetMapping("/configInfo")
 8     public String getConfigInfo(){
 9         return  configInfo;
10     }
11 }
7、测试
1)启动项目
2)访问地址:http://localhost:8888/master/config-dev.yml,验证配置中心配置文件能正常访问
3)访问地址:http://localhost:8889/configInfo,验证Config Client能正常获取配置中心文件内容

Config客户端动态刷新配置
现象:
1)Config客户端运行中,修改github中配置仓库的master分支config-dev.yml文件内容,将version 改为3
2)访问地址:http://localhost:8888/master/config-dev.yml,获取配置,发现获取内容(version==3)已更新
3)访问地址:http://localhost:8889/configInfo,获取配置内容(version==2),Config客户端未及时更新配置内容
动态刷新流程:
动态刷新配置:
1、Config客户端的pom依赖中,引入依赖:
1 <dependency>
2     <groupId>org.springframework.boot</groupId>
3     <artifactId>spring-boot-starter-actuator</artifactId>
4 </dependency>
2、在application.yml配置文件中,暴露刷新端点
1 management:
2   endpoints:
3     web:
4       exposure:
5         # 暴露刷新端点
6         include: refresh
3、修改controller,增加注解@RefreshScope,使配置文件自动刷新
 1 @RestController
 2 //配置文件自动刷新
 3 @RefreshScope
 4 public class ConfigClientController {
 5
 6     @Value("${config.info}")
 7     private String configInfo;
 8
 9     @GetMapping("/configInfo")
10     public String getConfigInfo(){
11         return  configInfo;
12     }
13 }
4、测试
1)重新启动,Config客户端项目
2)访问地址:http://localhost:8889/configInfo,获取配置内容(version==3)
3)Config客户端运行时,修改github中配置仓库的master分支config-dev.yml文件内容,将version 改为4
4)访问地址:http://localhost:8888/master/config-dev.yml,获取配置,发现获取内容(version==4)已更新,配置中心及时更新配置内容
5)使用curl命令,访问地址:curl -X POST http://localhost:8889/actuator/refresh,必须是post请求,刷新Config客户端配置
6)访问地址:http://localhost:8889/configInfo,获取配置内容(version==4),验证Config客户端及时更新配置内容
5、思考:要刷新所有客户端节点,难道要一个一个请求客户端刷新?有没有什么办法通知所有客户端节点刷新配置?
见下一章
本文来自博客园,作者:荣慕平,转载请注明原文链接:https://www.cnblogs.com/rongmuping/articles/16310639.html

 浙公网安备 33010602011771号