AG-Admin微服务框架入门
AG-Admin微服务框架入门
@qq群:一群: 837736451 二群 169824183
一 概要介绍
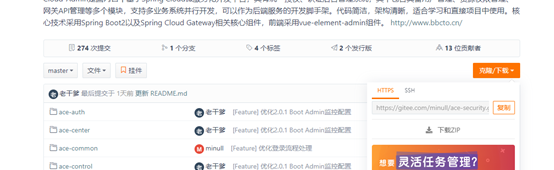
AG-Admin后台地址:https://gitee.com/minull/ace-security
AG-Admin前端地址:https://gitee.com/minull/AG-Admin-v2.0
要想玩儿转spring cloud必须进行一大波儿的学习哦,先有个心理准备。
AG-Admin基于Spring Cloud微服务化开发平台,具有统一授权、认证微服务云框架。其中包含了服务注册与发现、用户管理、资源权限管理、网关API管理等多个模块,支持多业务系统并行开发,是一个完整的微服务脚手架开发框架。
AG-Admin采用前后端分离架构,前端基于vue-admin-element框架,项目地址:https://github.com/PanJiaChen/vue-element-admin
二 基础安装
1 下载安装git
对git必要的熟练使用,因为现有的开源项目都是在git开源中国或者github上。你应具有熟练的项目拉取,提交代码能力。说了那么多来一个简单的教程:https://backlog.com/git-tutorial/cn/
2 下载安装idea
请使用IDEA集成工具开发Spring应用,什么eclipse,myeclipse还是别了,来一个IDEA安装教程
https://blog.csdn.net/yangying496875002/article/details/73603303
3 下载安装Maven,
安装教程
https://www.cnblogs.com/yyiou/archive/2017/08/22/7411409.html
想进一步了解Maven:
https://www.cnblogs.com/rjjs/p/9339632.html
4 下载安装nodejs
你应对前端框架Vue有所了解,或者对前端三大框架react,angular,vue任意一个框架有所了解,或者最低要求能够对nodejs有所了解。因为AG-Admin前端是基于vue的vue-admin-element一个 开源项目。来一个nodejs的入门教程:
https://www.cnblogs.com/zhouyu2017/p/6485265.html
5 下载并配置nginx
首先去Nginx官网下载一个最新版本的Nginx,下载地址:http://nginx.org/en/download.html。我这里下载的版本是:nginx/Windows-1.11.6。下载完成之后,得到一个.zip的压缩包,把压缩包解压到D盘根目录。
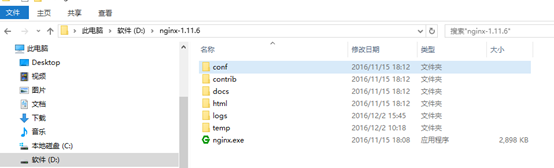
1) 修改配置文件。打开“conf”文件夹下的“nginx.conf”文件,使用如下配置全部覆盖
#user nobody;
worker_processes 1;
#error_log logs/error.log;
#error_log logs/error.log notice;
#error_log logs/error.log info;
#pid logs/nginx.pid;
events {
worker_connections 1024;
}
http {
include mime.types;
default_type application/octet-stream;
#log_format main '$remote_addr - $remote_user [$time_local] "$request" '
# '$status $body_bytes_sent "$http_referer" '
# '"$http_user_agent" "$http_x_forwarded_for"';
#access_log logs/access.log main;
sendfile on;
#tcp_nopush on;
#keepalive_timeout 0;
keepalive_timeout 65;#长连接超时时间,单位秒
#gzip on;#启用Gzip压缩
server{
listen 8104;#监听8020端口,可以改成其他端口
server_name localhost;#当前服务的域名
#charset koi8-r;
#access_log logs/host.access.log main;
location / {
if ($request_method = 'OPTIONS') {
add_header 'Access-Control-Allow-Origin' 'http://localhost:9527';
add_header 'Access-Control-Allow-Methods' 'GET, POST, OPTIONS';
add_header 'Access-Control-Allow-Credentials' 'true';
#
# Custom headers and headers various browsers *should* be OK with but aren't
#
add_header 'Access-Control-Allow-Headers' 'DNT,X-CustomHeader,Keep-Alive,User-Agent,X-Requested-With,If-Modified-Since,Cache-Control,Content-Type,Authorization';
#
# Tell client that this pre-flight info is valid for 20 days
#
return 204;
}
proxy_pass http://localhost:8765;
proxy_redirect default;
proxy_set_header Host $host;
proxy_set_header X-Real-IP $remote_addr;
proxy_set_header X-Forwarded-For $proxy_add_x_forwarded_for;
proxy_cookie_path /nginx/ /;
proxy_set_header Cookie $http_cookie;
proxy_cookie_domain domino.server localhost;
include uwsgi_params;
add_header 'Access-Control-Allow-Origin' 'http://localhost:9527';
add_header 'Access-Control-Allow-Credentials' 'true';
add_header 'Access-Control-Allow-Methods' 'GET, POST, OPTIONS';
add_header 'Access-Control-Allow-Headers' 'DNT,X-CustomHeader,Keep-Alive,User-Agent,X-Requested-With,If-Modified-Since,Cache-Control,Content-Type';
}
}
}
2)打开命令行,定位到Nginx当前目录,使用“start nginx”命令启动nginx
6了解Spring boot
因为Ag-Admin是基于Spring Cloud,而Spring Cloud是基于Spring boot,因此他是基础你必须有所了解。
来一个简单的教程:
https://www.cnblogs.com/black-spike/p/8017768.html
三 启动AG-Admin
3.1 把AG-Admin弄到自己家里来
克隆到本地
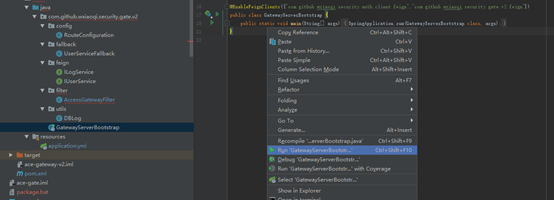
3.2 AG-Admin组成结构
使用idea打开
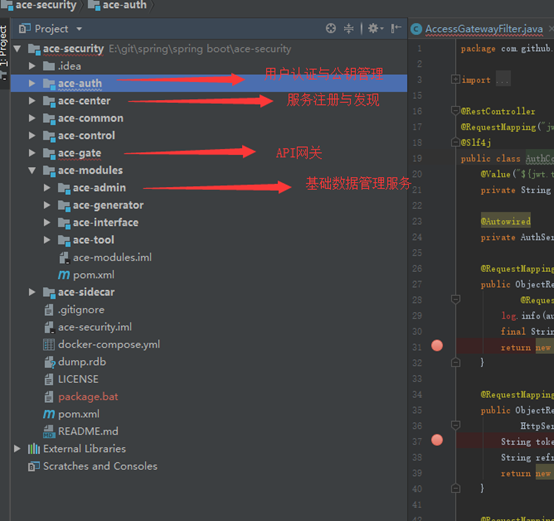
在这里先认识一下API网关就可以了,API网关是所有服务对外暴露API接口的唯一有效入口,也就是前端访问后台都是走API网关就可以了,至于API网关具体怎么回事先不要捉急去深究。其他没有标注的暂时不用去关心,我们先入门,别急。
3.3 安装Rabbit MQ
1)由于Rabbit MQ是基于erlang因此先把erlang装上,下载地址
http://www.erlang.org/downloads
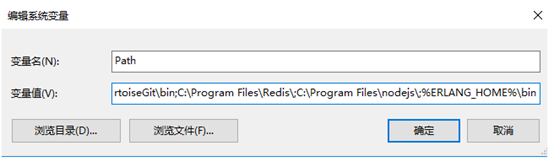
安装完成之后创建一个名为ERLANG_HOME的环境变量,其值指向erlang的安装目录,同时将%ERLANG_HOME%\bin加入到Path中
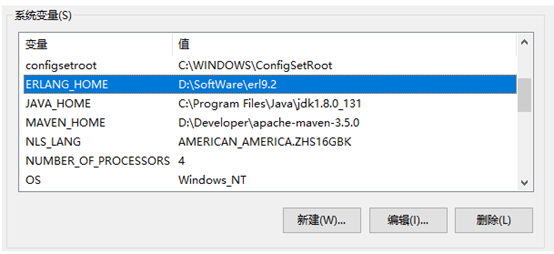
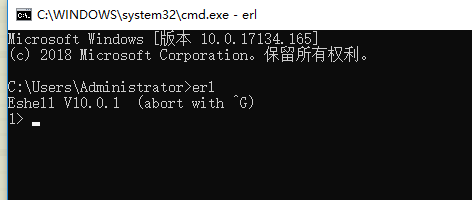
进入cmd输入:erl出现下图说明安装配置ok,如果不行请检查上行步骤
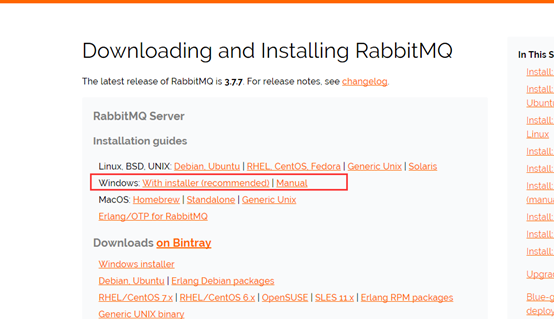
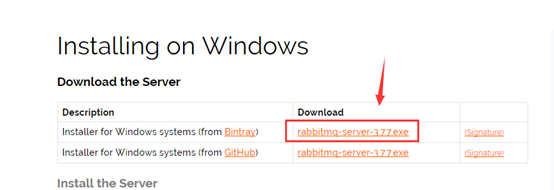
下载安装Rabbit MQ,地址:http://www.rabbitmq.com/download.html
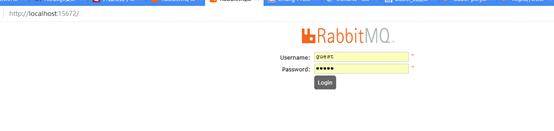
默认安装的RabbitMQ 监听端口是5672,默认用户名:guest,密码:guest。
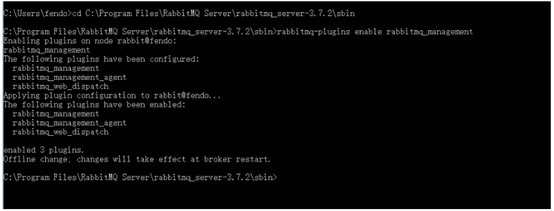
2)、RabbitMQ-Plugins插件安装
这个插件相当于是一个管理界面,方便我们在浏览器界面查看RabbitMQ各个消息队列以及exchange的工作情况,安装方法是:打开命令行cd进入rabbitmq的sbin目录(我的目录是:C:\Program Files\RabbitMQ Server\rabbitmq_server-3.7.2\sbin),输入:
rabbitmq-plugins enable rabbitmq_management
命令,稍等会会发现出现plugins安装成功的提示
然后重启服务,使用命令(此时最后以管理员运行CMD):
net stop RabbitMQ && net start RabbitMQ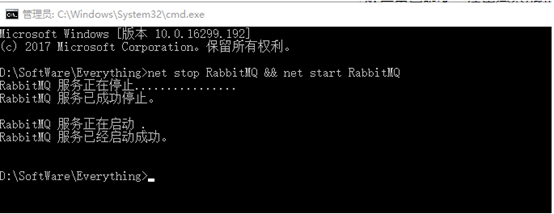
插件安装完之后,在浏览器输入http://localhost:15672进行验证
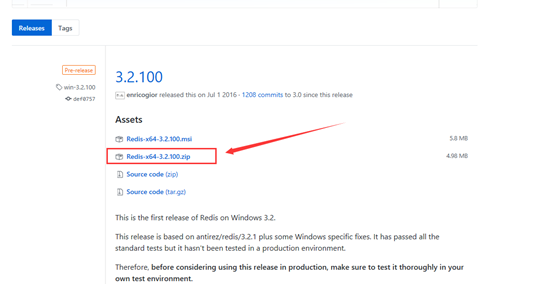
3.4 安装redies
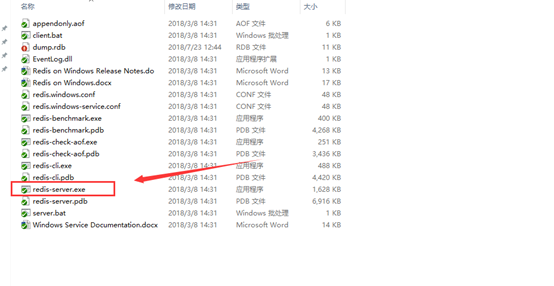
地址:https://github.com/MSOpenTech/redis/releases
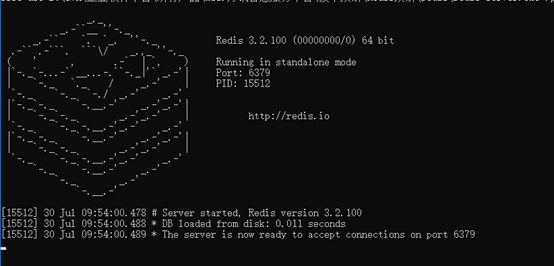
启动resies-server
3.5 数据库
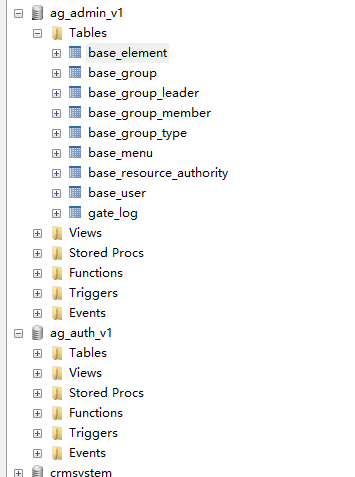
分别执行ace-admin/db/init.sql、ace-auth-server/db/init.sql 这两个脚本,执行成功之后,会创建ag_admin_v1和ag_auth_v1两个数据库以及以下一些表:
配置hosts文件
进入:C:\Windows\System32\drivers\etc
将hosts拷贝到桌面然后使用记事本打开,加入以下2句,保存将后将桌面上的hosts文件复制,到原来系统路径下的hosts粘贴覆盖
127.0.0.1 ace-admin
127.0.0.1 ACE-ADMIN
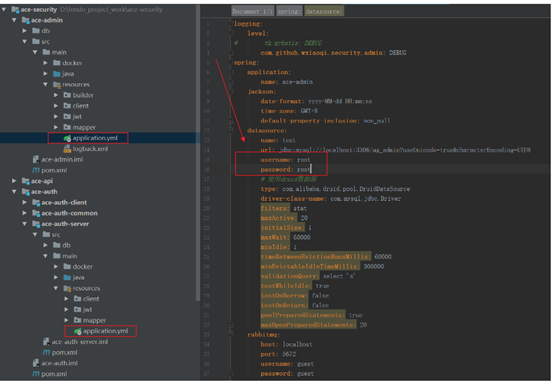
3.6 修改配置
修改ace-admin/src/main/resources/application.yml、ace-auth/src/main/resources/application.yml这两个配置文件中连接数据库的一些信息:
同时注意Rabbit MQ链接配置检查一遍

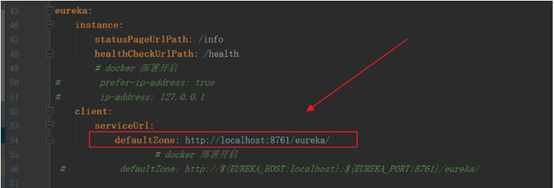
修改项目里所有的defaultZone参数,他默认用的是docker,但是我们是这本地开发的,所以改成本地的
3.7 启动
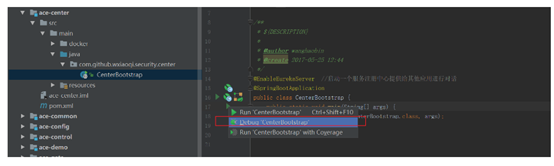
1)启动ace-center,是注册发现服务他是所有服务的中心
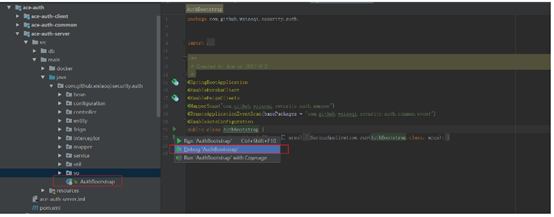
2)启动ace-auth,是认证中心
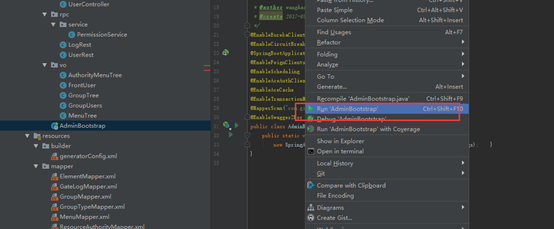
3)启动ace-admin,他在ace-modules下面是指向ag_admin_v1数据库的基础数据服务
4)启动ace-gate,网关
5)启动前端项目,AG-Admin-v2.0
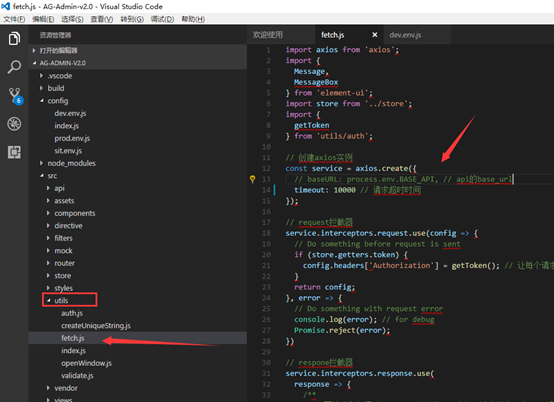
找到该目录下将base_api地址 修改为:http://localhost:8104

取消如图文件的注释保存
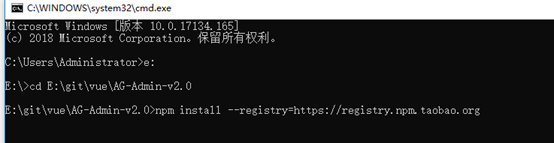
在cmd中进入项目目录:我的是E:\git\vue\AG-Admin-v2.0
输入:npm install --registry=https://registry.npm.taobao.org
如果已经安装了cnpm,则直接输入cnpm install
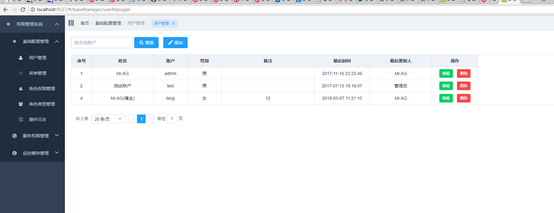
等待安装完成后输入npm run dev即可在浏览器打开:localhost:9527
如果是非H5浏览器请下载使用chrome浏览器然后把地址粘贴过来
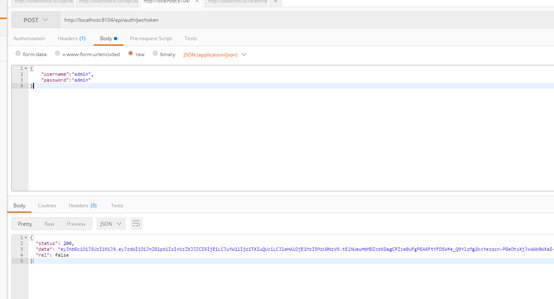
使用postman登录
四 常见问题FAQ
4.1 ace-auth,或者ace-admin启动过程中控制台有异常输出,控制台输出非mysql连接错误。或者一些类找不到
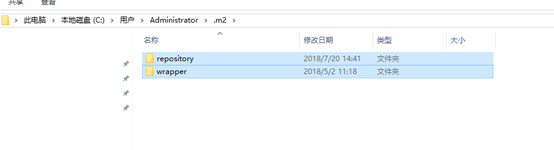
这个应该是spring cloud版本问题,请将自己maven本地仓库下所有文件删除,C:\Users\Administrator\.m2
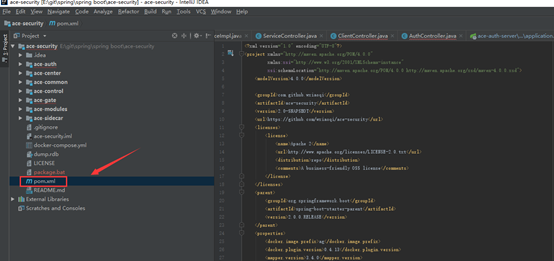
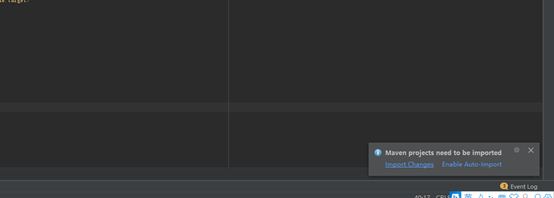
然后在ag-admin下面找到pom.xml随便修改一下内容,然后等到ideam提示导入修改,然后再次撤销刚才的修改,再次应用修改,这样做的目的是为了让maven再次下载spring cloud全部依赖,这个过程可能需要等待个10多分钟,等再次下载完成然后按照启动顺序启动。
4.2 提示数据库datasource异常
请检查各自项目下的application.yml文件中的mysql配置是否正确
4.3 提示mq连接异常
请检查application.yml文件中mq配置是否正确,可以通过http://localhost:15672/,guest,guest查看mq能否可以用
4.4 提示redies连接异常
请检查application.yml文件中redies配置是否正确,或者redies是否启动
4.5 登录过程中提示ace-admin相关连接超时
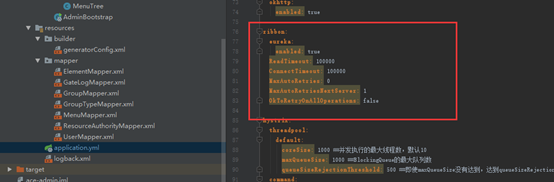
首先应检查ace-admin启动过程中控制台有无异常输出,如果异常输出请检查是否属于上面的问题,如果不是可以尝试修改application.yml里面的超时设置单位为微秒
4.6 ace-gate 部署后运行报找不到main类异常
这个是因为ace-gate的maven配置没有加入spring boot的缘故因此在pom.xml加入一下配置重新编译 部署。
<properties>
<project.build.sourceEncoding>UTF-8</project.build.sourceEncoding>
<project.reporting.outputEncoding>UTF-8</project.reporting.outputEncoding>
<java.version>1.8</java.version>
<kotlin.version>1.1.51</kotlin.version>
</properties>
<dependencies>
<dependency>
<groupId>org.springframework.cloud</groupId>
<artifactId>spring-cloud-starter-netflix-eureka-client</artifactId>
</dependency>
<dependency>
<groupId>org.springframework.boot</groupId>
<artifactId>spring-boot-starter-webflux</artifactId>
</dependency>
<dependency>
<groupId>org.springframework.cloud</groupId>
<artifactId>spring-cloud-starter-gateway</artifactId>
</dependency>
<dependency>
<groupId>org.isomorphism</groupId>
<artifactId>token-bucket</artifactId>
<version>1.7</version>
</dependency>
<dependency>
<groupId>org.springframework.boot</groupId>
<artifactId>spring-boot-starter-test</artifactId>
<scope>test</scope>
</dependency>
<dependency>
<groupId>io.projectreactor</groupId>
<artifactId>reactor-test</artifactId>
<scope>test</scope>
</dependency>
<dependency>
<groupId>org.assertj</groupId>
<artifactId>assertj-core</artifactId>
<scope>test</scope>
</dependency>
<dependency>
<groupId>org.jetbrains.kotlin</groupId>
<artifactId>kotlin-stdlib</artifactId>
<version>${kotlin.version}</version>
<optional>true</optional>
</dependency>
<dependency>
<groupId>org.jetbrains.kotlin</groupId>
<artifactId>kotlin-reflect</artifactId>
<version>${kotlin.version}</version>
<optional>true</optional>
</dependency>
<dependency>
<groupId>org.springframework.cloud</groupId>
<artifactId>spring-cloud-starter-openfeign</artifactId>
</dependency>
<dependency>
<groupId>org.springframework.cloud</groupId>
<artifactId>spring-cloud-starter-netflix-hystrix</artifactId>
</dependency>
<dependency>
<groupId>org.springframework.cloud</groupId>
<artifactId>spring-cloud-sleuth-zipkin</artifactId>
</dependency>
<dependency>
<groupId>org.springframework.amqp</groupId>
<artifactId>spring-rabbit</artifactId>
</dependency>
<dependency>
<groupId>com.github.wxiaoqi</groupId>
<artifactId>ace-interface</artifactId>
<version>2.0-SNAPSHOT</version>
</dependency>
<dependency>
<groupId>com.github.wxiaoqi</groupId>
<artifactId>ace-auth-client</artifactId>
<version>2.0-SNAPSHOT</version>
</dependency>
<dependency>
<groupId>com.github.wxiaoqi</groupId>
<artifactId>ace-common</artifactId>
<version>2.0-SNAPSHOT</version>
</dependency>
<dependency>
<groupId>com.alibaba</groupId>
<artifactId>fastjson</artifactId>
</dependency>
<dependency>
<groupId>org.springframework</groupId>
<artifactId>spring-web</artifactId>
<version>5.0.4.RELEASE</version>
</dependency>
</dependencies>
<build>
<finalName>ace-gate</finalName>
<plugins>
<!-- 此插件用来生成通用mapper的代码 -->
<plugin>
<groupId>org.mybatis.generator</groupId>
<artifactId>mybatis-generator-maven-plugin</artifactId>
<version>1.3.2</version>
<configuration>
<configurationFile>${basedir}/src/main/resources/builder/generatorConfig.xml</configurationFile>
<overwrite>true</overwrite>
<verbose>true</verbose>
</configuration>
<dependencies>
<dependency>
<groupId>mysql</groupId>
<artifactId>mysql-connector-java</artifactId>
<version>5.1.30</version>
<scope>runtime</scope>
</dependency>
<dependency>
<groupId>tk.mybatis</groupId>
<artifactId>mapper</artifactId>
<version>${mapper.version}</version>
</dependency>
</dependencies>
</plugin>
<plugin>
<groupId>org.springframework.boot</groupId>
<artifactId>spring-boot-maven-plugin</artifactId>
</plugin>
<plugin>
<groupId>org.apache.maven.plugins</groupId>
<artifactId>maven-compiler-plugin</artifactId>
<configuration>
<source>1.8</source>
<target>1.8</target>
</configuration>
</plugin>
</plugins>
</build>
五 更多交流
@qq群:一群: 837736451 二群 169824183

 浙公网安备 33010602011771号