
React全家桶打造共享单车后台管理系统项目_第1篇_项目环境搭建_首页编写
1.项目介绍
项目github地址:https://github.com/replaceroot/React-manageSystem
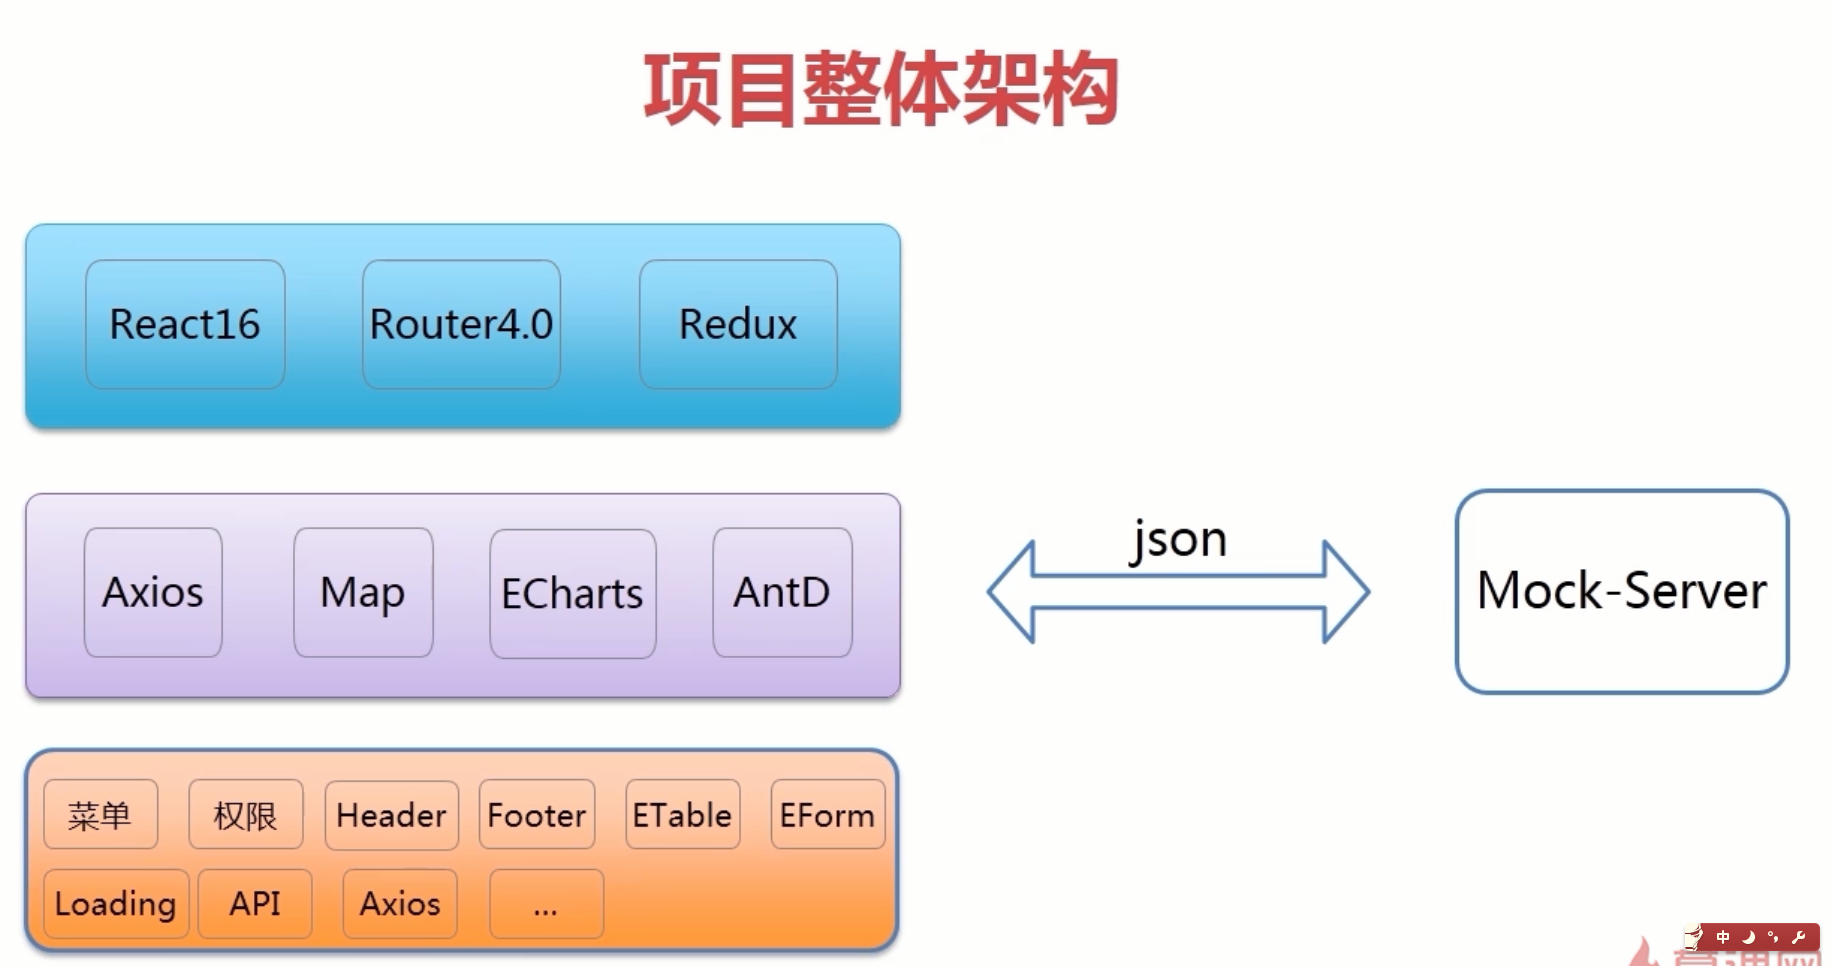
项目整体架构:
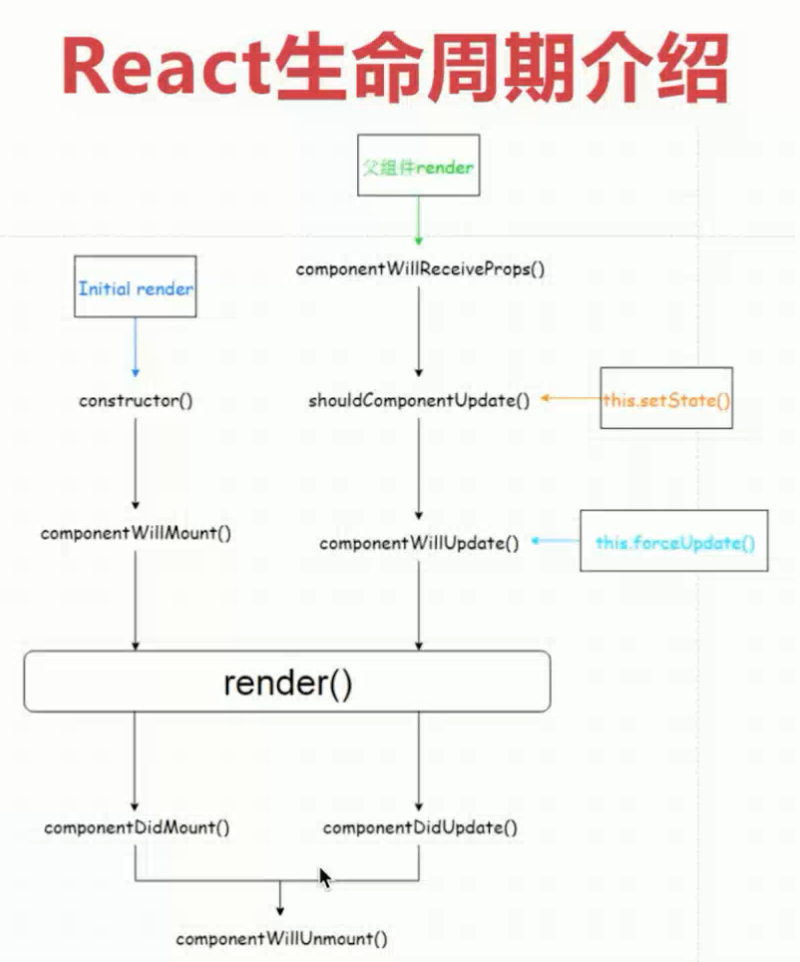
补充:调用setState之后会并列调用should update,will update,did update生命周期函数
Babel插件的作用:解析E6达到兼容效果
2.项目环境搭建
2.1 安装包
yarn add react-router-dom axios --dev
2.2 安装支付宝UI组件
yarn add antd
2.3 配置antd组件按需加载
yarn add react-app-rewired customize-cra
修改`package.json`配置文件的`scripts`字段
  "scripts": {
    "start": "react-app-rewired start",
    "build": "react-app-rewired build",
    "test": "react-app-rewired test",
    "eject": "react-scripts eject"
  }
然后在项目根目录创建一个 config-overrides.js 用于修改默认配置。
module.exports = function override(config, env) {
  // do stuff with the webpack config...
  return config;
};
babel-plugin-import 是一个用于按需加载组件代码和样式的 babel 插件(原理),现在我们尝试安装它并修改 config-overrides.js 文件。
yarn add babel-plugin-import
+ const { override, fixBabelImports } = require('customize-cra');

- module.exports = function override(config, env) {
-   // do stuff with the webpack config...
-   return config;
- };
+ module.exports = override(
+   fixBabelImports('import', {
+     libraryName: 'antd',
+     libraryDirectory: 'es',
+     style: 'css',
+   }),
+ );
记录一个小坑:
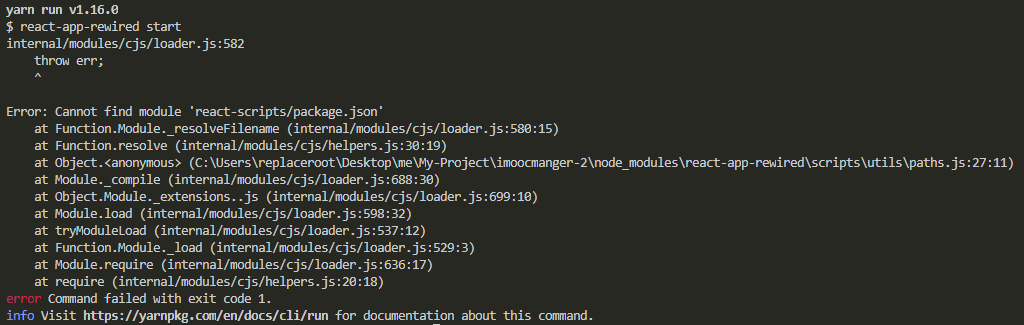
如果遇到错误,将 react-scripts添加到dev依赖中。
yarn add react-scripts --dev
如果遇到找不到babel模块的错误,就将整个 modules删除,然后重新yarn install安装一下就能解决。

重新运行项目,此时就能正常显示Button按钮了。
import React from "react";
import Child from "./Child";
import { Button } from 'antd';
import "./index.less";

export default class Life extends React.Component {
  state = {
    count: 0
  };

  handleAdd = () => {
    this.setState({
      count: this.state.count + 1
    });
  };

  render(){
    return (
      <div className="demo">
        <input type="text" placeholder="请输入内容..."/>
        <Button onClick={this.handleAdd}>点击一下</Button>
        <p>{this.state.count}</p>
        {/* 给子组件传参 */}
        <Child name={this.state.count}></Child>
      </div>
    )
  }
}
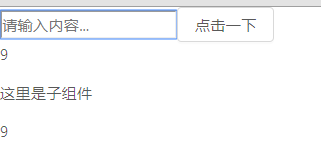
但是有一个问题,就是我们配置的less没有生效,下面解决Less和按钮主题颜色问题。
yarn add less less-loader
按照 配置主题 的要求,自定义主题需要用到 less 变量覆盖功能。我们可以引入 customize-cra 中提供的 less 相关的函数 addLessLoader 来帮助加载 less 样式,同时修改 config-overrides.js 文件如下。
- const { override, fixBabelImports } = require('customize-cra');
+ const { override, fixBabelImports, addLessLoader } = require('customize-cra');

module.exports = override(
  fixBabelImports('import', {
    libraryName: 'antd',
    libraryDirectory: 'es',
-   style: 'css',
+   style: true,
  }),
+ addLessLoader({
+   javascriptEnabled: true,
+   modifyVars: { '@primary-color': '#1DA57A' },
+ }),
);
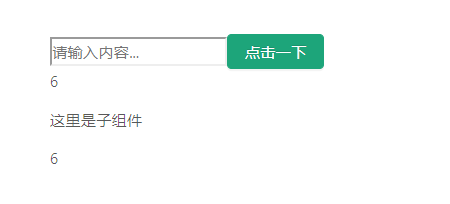
修改后重启 yarn start,如果看到一个绿色的按钮就说明配置成功了。
到这里, 基本的环境算是搭建好了,坑是真的多,也只能自己摸索,百度、Google查文档,做记录总结。
3.项目主页面编写
3.1 目录结构

具体代码参考我的github的commit代码
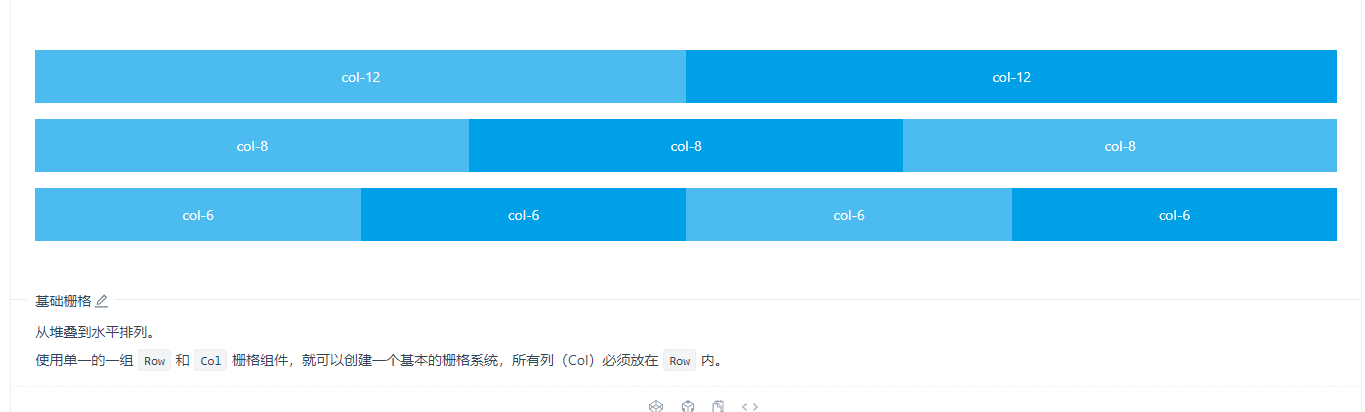
布局使用的栅格系统:https://ant.design/components/grid-cn/
左侧菜单渲染:https://ant.design/components/menu-cn/
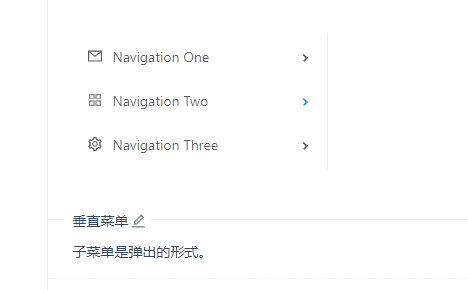
具体实现可以参考我github上的源码和官网给出的demo的源码进行对比就知道我如何使用的。
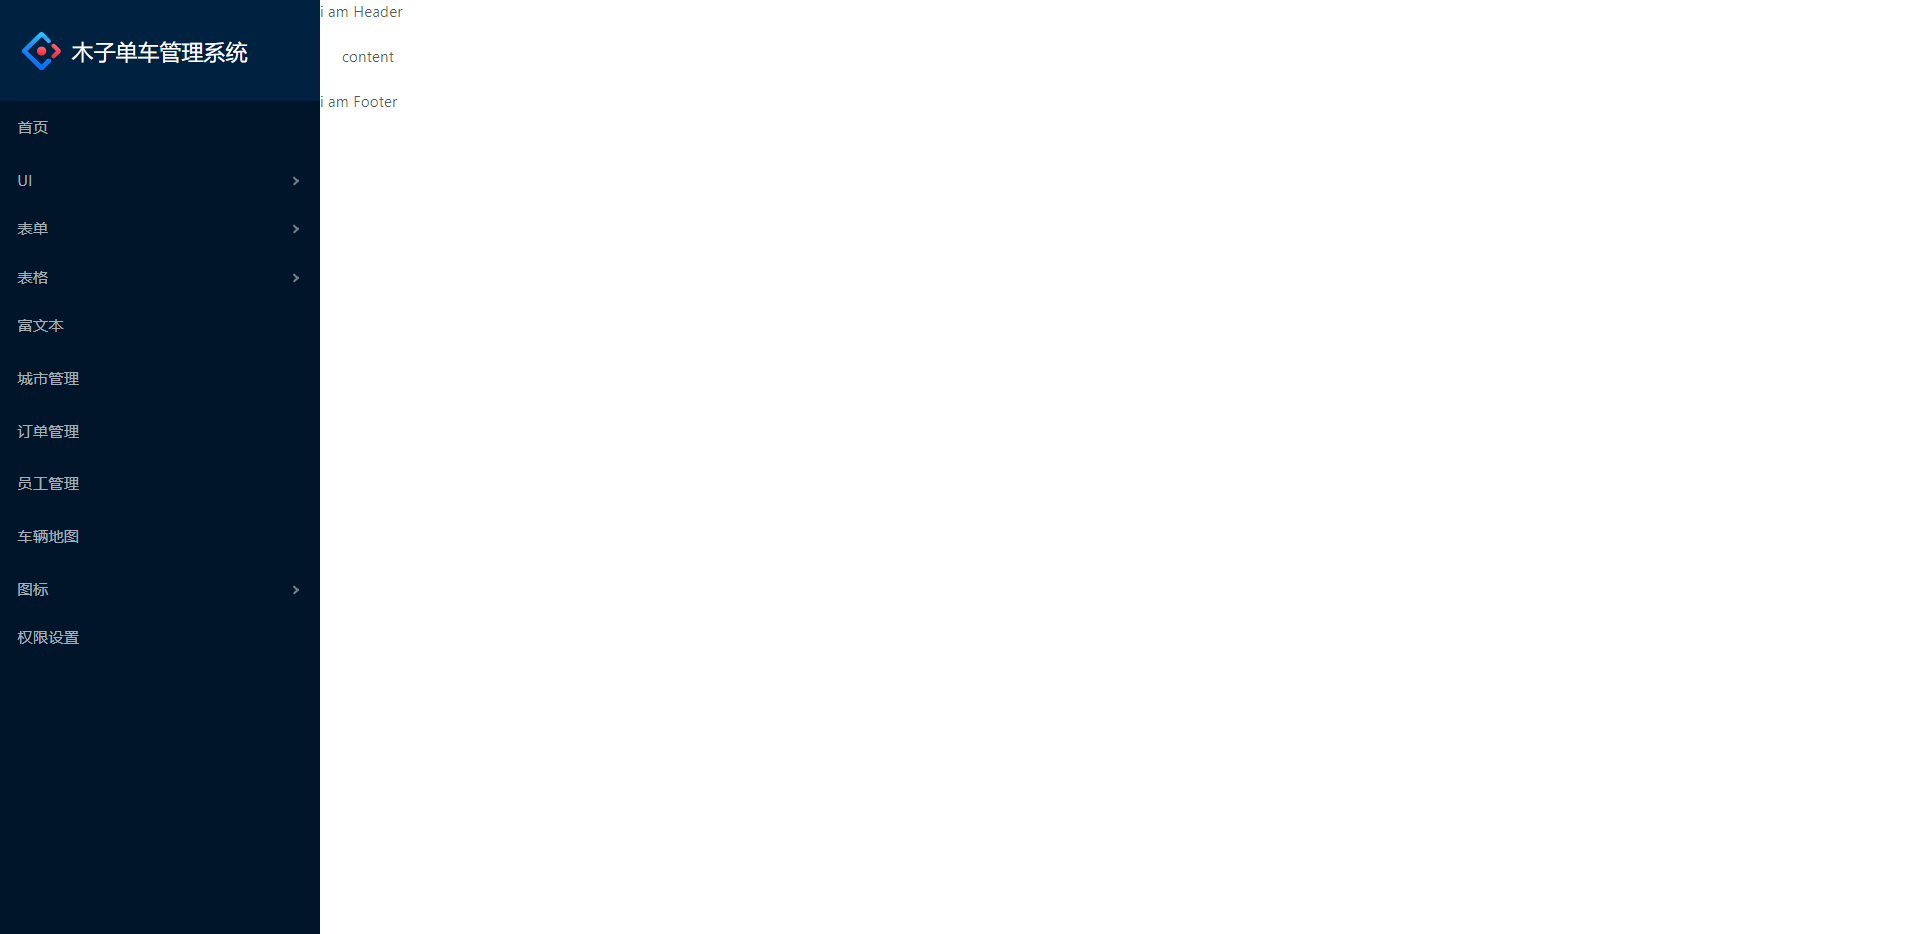
3.2左侧菜单动态渲染
重点就是动态渲染的代码


import React from "react";
import { Menu, Icon, Divider } from "antd";
import menuConfig from "../../config/menuConfig";
import "./index.less";
const { SubMenu } = Menu;

export default class NavLeft extends React.Component {
  // 加载时的生命周期函数
  componentWillMount() {
    const menuTreeNode = this.renderMenu(menuConfig);
    this.setState({
      menuTreeNode
    });
  }

  // 菜单动态渲染
  renderMenu = data => {
    return data.map(item=>{
        // 如果item中还有子项,那么就把子项递归遍历渲染到页面
      if(item.children){
        return (
          <SubMenu title={item.title} key={item.key}>
            {this.renderMenu(item.children)}
          </SubMenu>
        );
      }
      return <Menu.Item title={item.title} key={item.key}>{item.title}</Menu.Item>
    })
  };

  render() {
    return (
      <div>
        <div className="logo">
          <img src="assets/logo-ant.svg" alt="" />
          <h1>木子单车管理系统</h1>
        </div>
        <Menu theme="dark">{this.state.menuTreeNode}</Menu>
      </div>
    );
  }
}
3.3 header头部页面实现
这个部分需要发送跨域请求百度天气的API来获取数据渲染,需要安装一个JsonP。
yarn add jsonp
这里部分需要使用jsonp封装一个axios来发送跨域请求,这里涉及了jsonp使用和ES6中promise的使用方法,如果忘记了这些技术,赶紧翻下以前的笔记,百度看下博客吧。
简单的jsonp demo
getjsonp(){
    // jsonp能发起跨域请求
    this.$http.jsonp('http://127.0.0.1:3003/getlist')
        .then((res) => {
        console.log(res)
    },(err) => {
        console.log(err)
    })
}
// 封装axios发送跨域请求
import JsonP from 'jsonp'
export default class Axios {
  /* 这里使用static关键字声明了一个静态方法,实例不能直接调用,只能通过类来调用 */
  static jsonp(options){
    // 成功就是resolve,失败就是reject
    return new Promise((resolve, reject)=>{
      JsonP(options.url, {
        params: 'callback'
      }, function(err, response){
        if(response.status === 'success'){
          resolve(response)
        }else {
          reject(response.message);
        }
      })
    })
  }
}
/* 封装一个格式化时间戳的方法 */

export default {
  formateDate(time) {
    // 如果为空就返回空字符串
    if (!time) return "";
    let date = new Date(time);
    return (
      date.getFullYear() +
      "-" +
      (date.getMonth() + 1) +
      "-" +
      date.getDate() +
      " " +
      date.getHours() +
      ":" +
      date.getMinutes() +
      ":" +
      date.getSeconds()
    );
  }
};
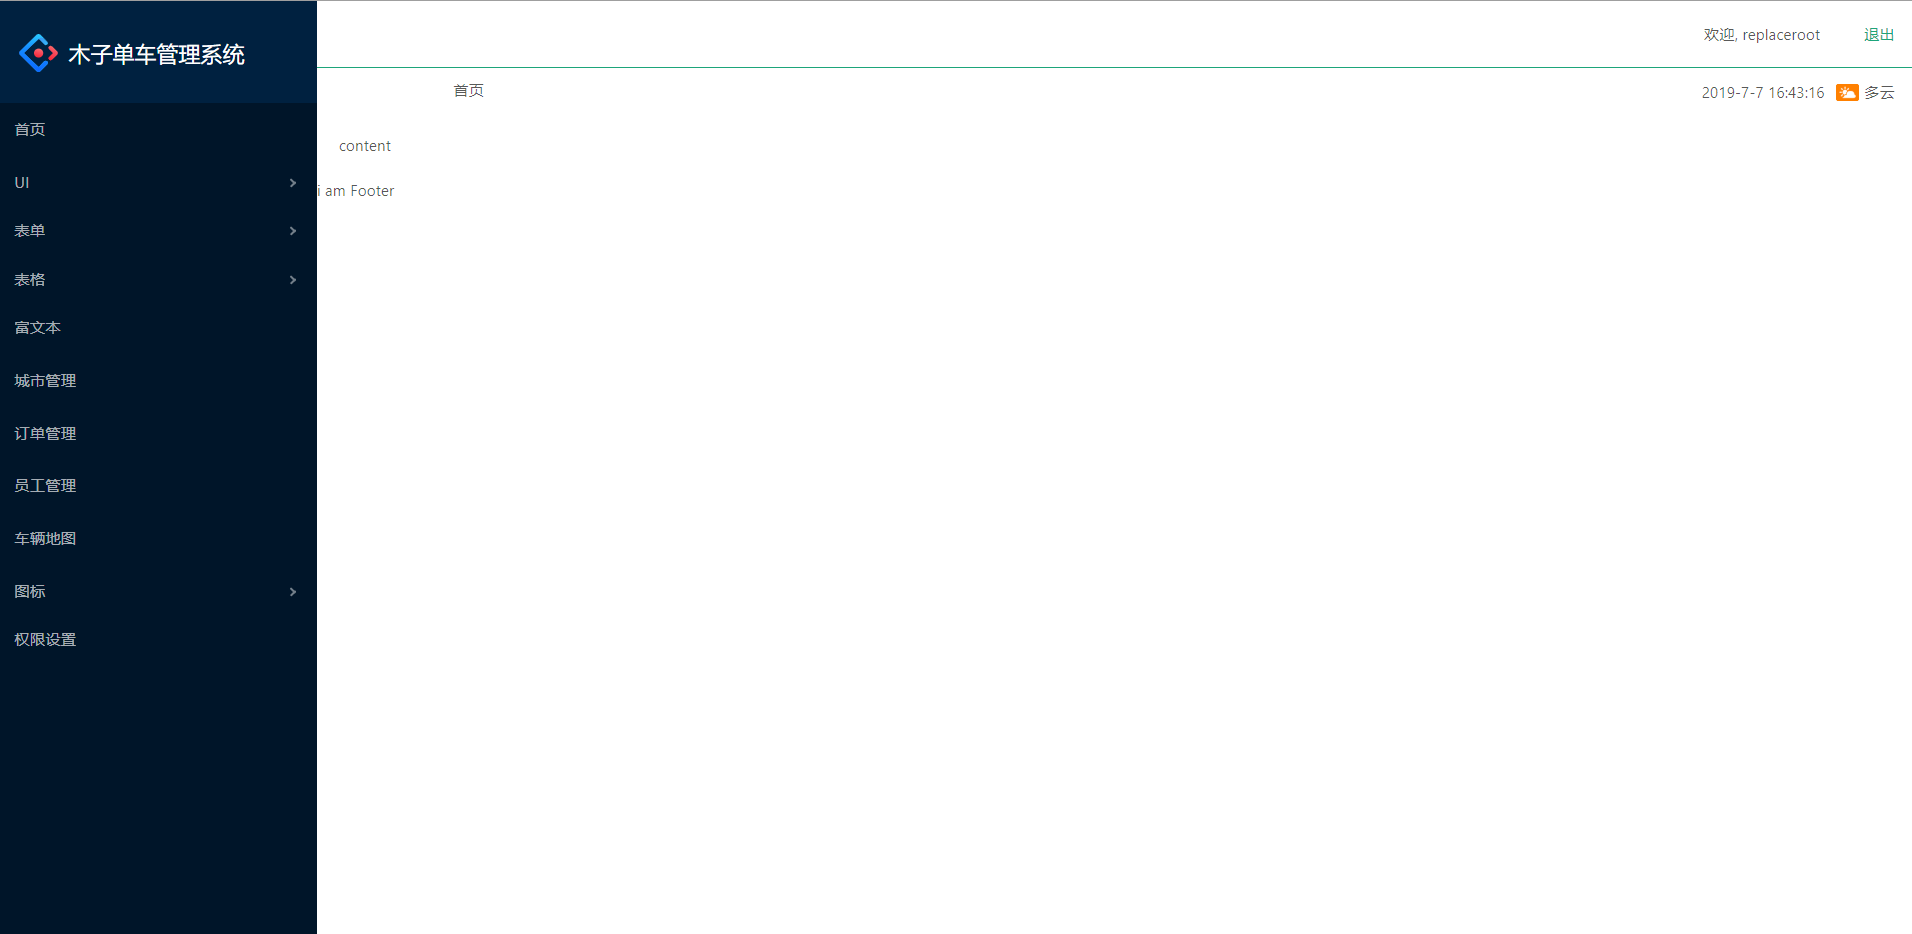
3.4 Footer页面以及content内容区域实现
增加小箭头样式
/* 实现小箭头 */
      &:after{
        position: absolute;
        content: '';
        left: 110px;
        top:39px;
        border-top: 9px solid @colorM;
        border-left: 12px solid transparent;
        border-right: 12px solid transparent;

       }
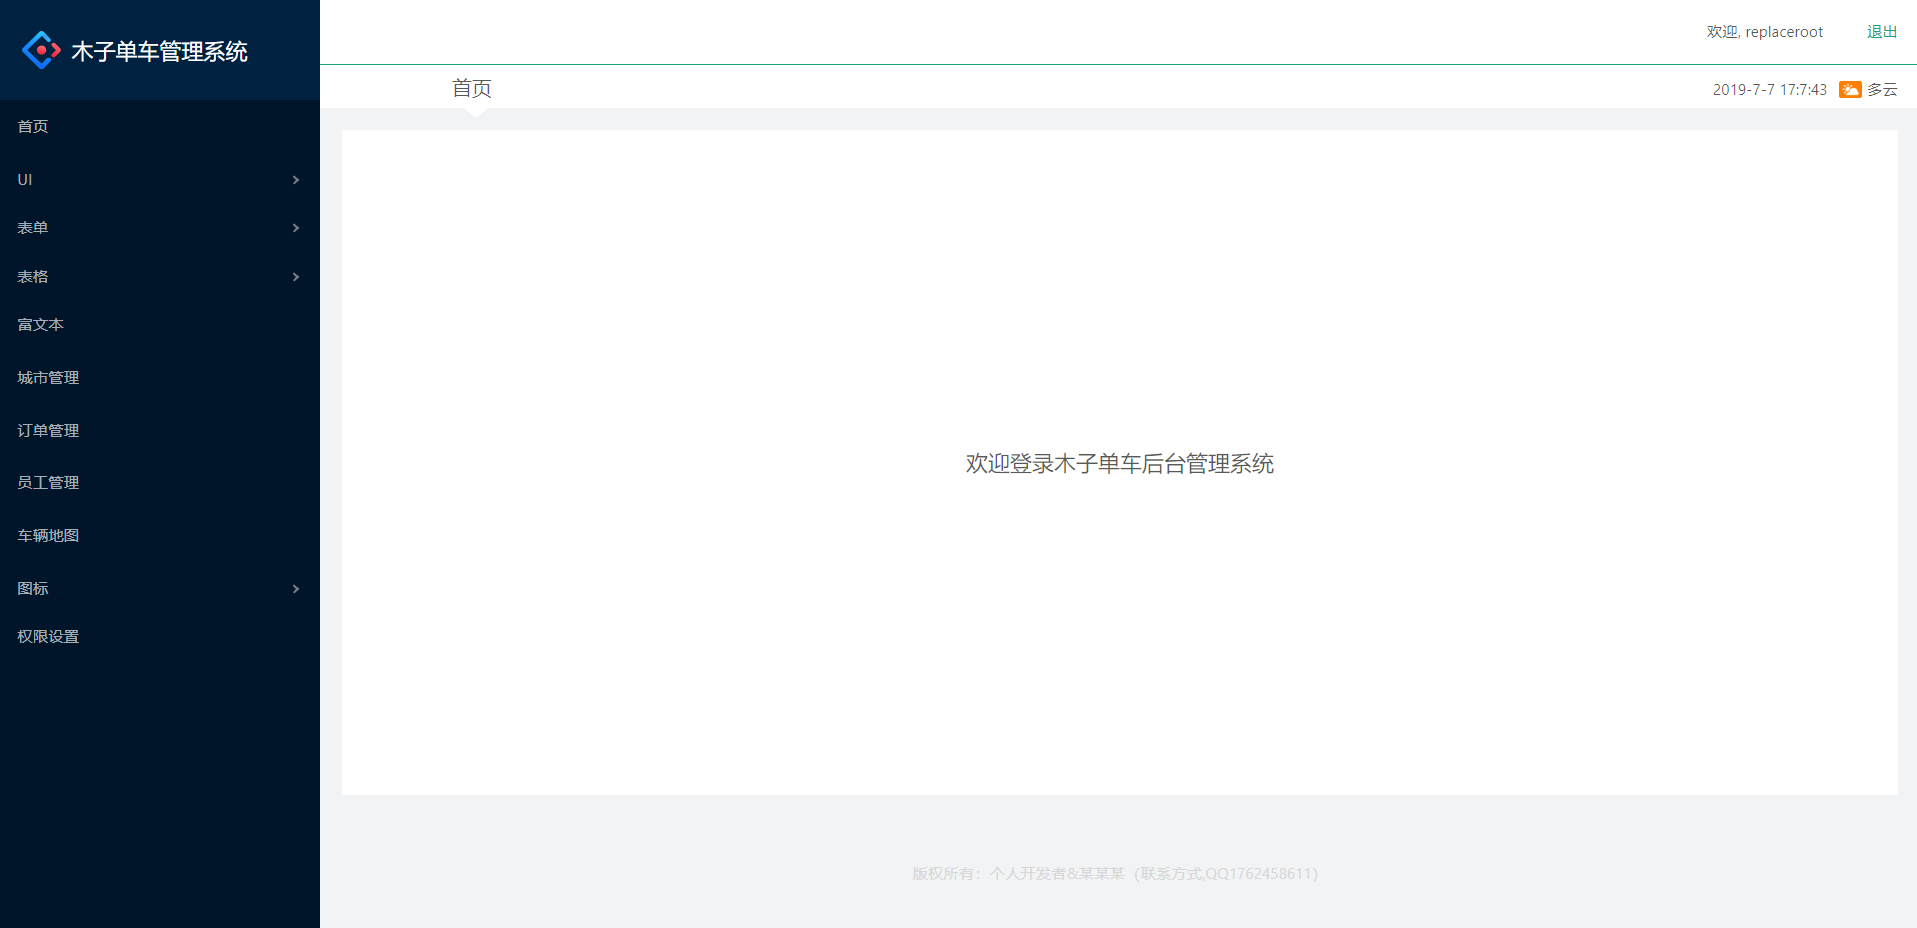
到此为止首页就编写完成了,以后会根据课程的目录来更新React路由相关的知识,其他业务功能的实现。
总结一下:很多都是基础知识,稍微难一点的就是Promise、jsonp、还有初期的环境搭建遇到的几个坑,几乎没有太难的知识点,结构和flex布局相关的内容就是一个熟练度的问题,代码量上去了,看到一个效果就知道要怎么实现,多敲多练多思考就完事了。

 浙公网安备 33010602011771号