

OAuth2 Redis 存储器
本小节,我们使用基于 Redis 存储的 RedisTokenStore。
复制出 lab-68-demo11-authorization-server-by-redis-store 项目,进行改造接入 RedisTokenStore 存储器。最终项目如下图所示:

3.1 引入依赖
修改 pom.xml 文件,额外引入 Spring Data Redis 的依赖:
<!-- 实现对 Spring Data Redis 的自动化配置 -->
<dependency>
    <groupId>org.springframework.boot</groupId>
    <artifactId>spring-boot-starter-data-redis</artifactId>
</dependency>
友情提示:想要学习 Spring Data Redis 的胖友,可以看看《芋道 Spring Boot Redis 入门》文章。
3.2 配置文件
创建 application.yaml 配置文件,添加 Spring Data Redis 的配置:
spring:
  # 对应 RedisProperties 类
  redis:
    host: 127.0.0.1
    port: 6379
3.3 OAuth2AuthorizationServerConfig
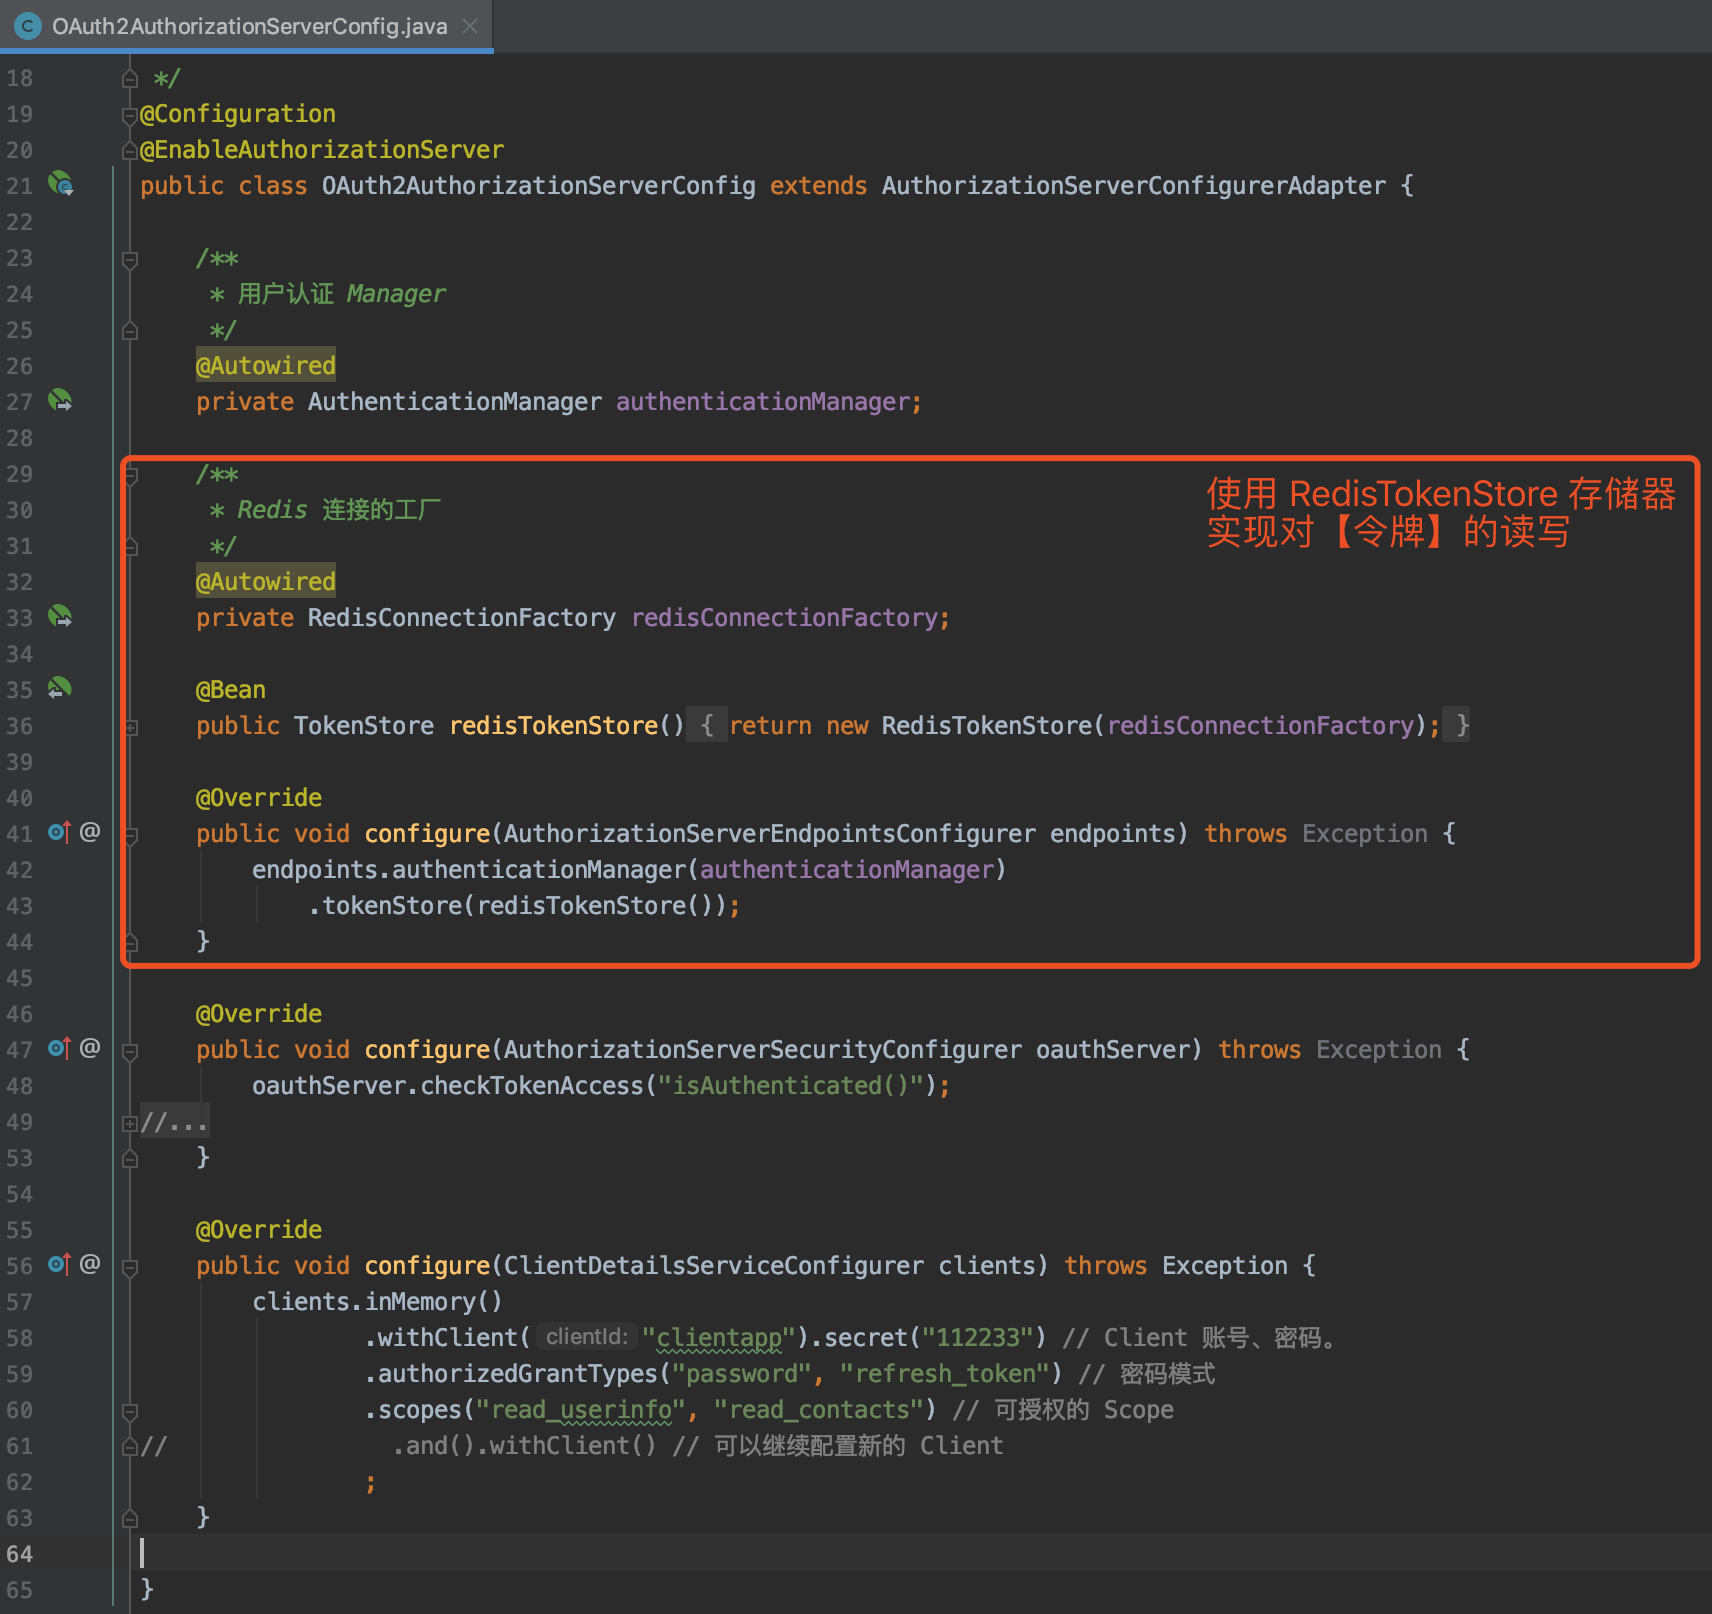
修改 OAuth2AuthorizationServerConfig 配置类,设置使用 RedisTokenStore。代码如下:
@Configuration
@EnableAuthorizationServer
public class OAuth2AuthorizationServerConfig extends AuthorizationServerConfigurerAdapter {

    /**
     * 用户认证 Manager
     */
    @Autowired
    private AuthenticationManager authenticationManager;

    /**
     * Redis 连接的工厂
     */
    @Autowired
    private RedisConnectionFactory redisConnectionFactory;

    @Bean
    public TokenStore redisTokenStore() {
        return new RedisTokenStore(redisConnectionFactory);
    }

    @Override
    public void configure(AuthorizationServerEndpointsConfigurer endpoints) throws Exception {
        endpoints.authenticationManager(authenticationManager)
            .tokenStore(redisTokenStore());
    }

    @Override
    public void configure(AuthorizationServerSecurityConfigurer oauthServer) throws Exception {
        oauthServer.checkTokenAccess("isAuthenticated()");
    }

    @Override
    public void configure(ClientDetailsServiceConfigurer clients) throws Exception {
        clients.inMemory()
                .withClient("clientapp").secret("112233") // Client 账号、密码。
                .authorizedGrantTypes("password", "refresh_token") // 密码模式
                .scopes("read_userinfo", "read_contacts") // 可授权的 Scope
//                .and().withClient() // 可以继续配置新的 Client
                ;
    }

}
具体的修改点,如下图所示:
3.4 简单测试
执行 AuthorizationServerApplication 启动授权服务器。下面,我们使用 Postman 模拟一个 Client。
① POST 请求 http://localhost:8080/oauth/token 地址,使用密码模式进行授权。如下图所示:
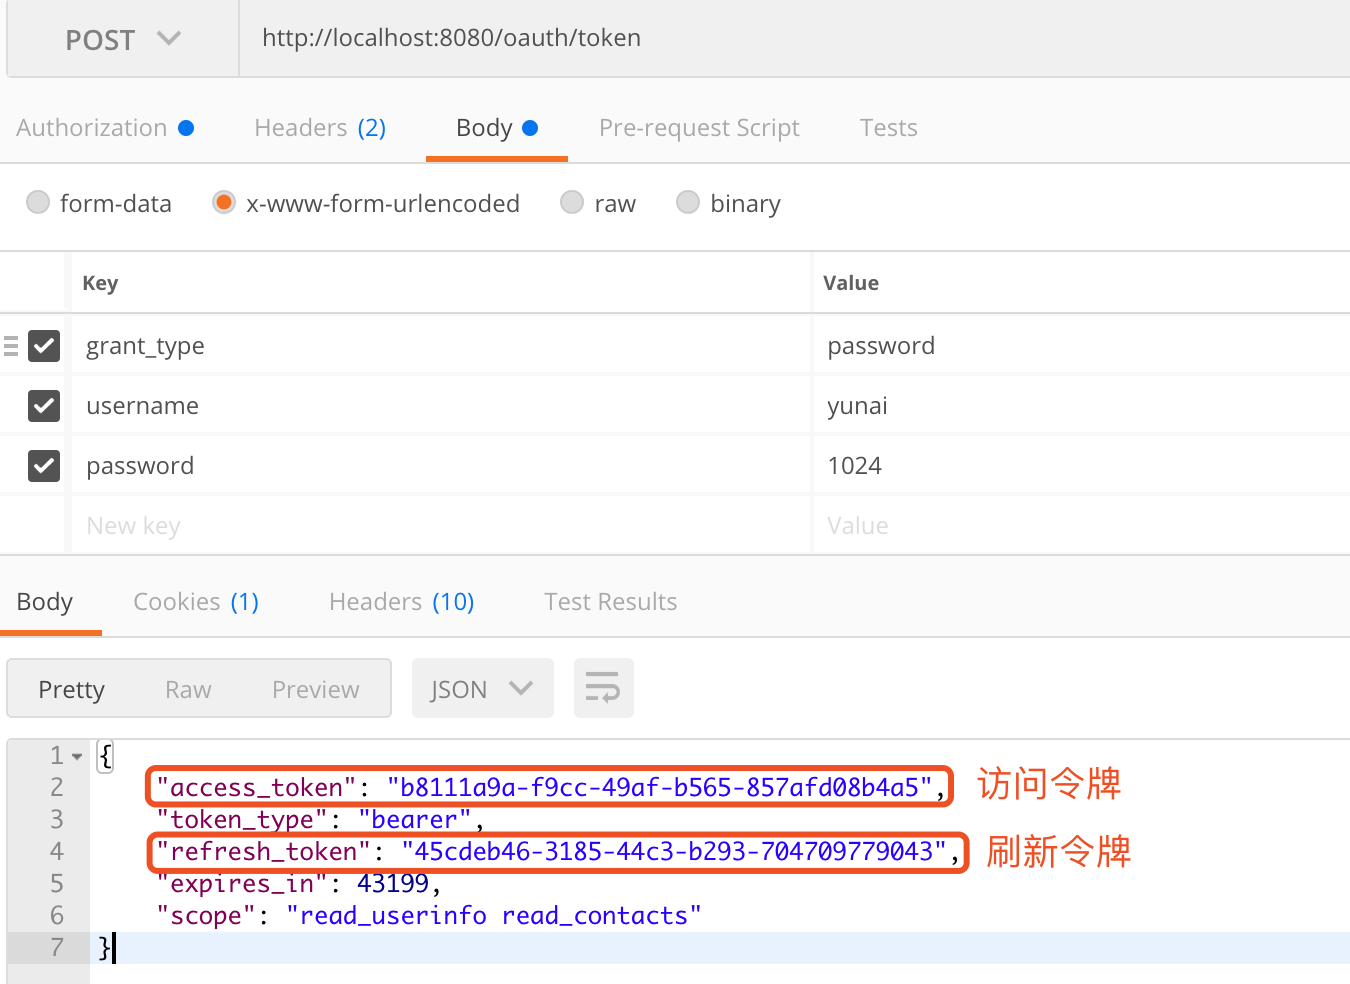
② 查看 Redis 中的 访问令牌和刷新令牌。如下图所示:


 浙公网安备 33010602011771号