
WPF 模仿微信顶部断网提示气泡
直接看顶部气泡的效果吧
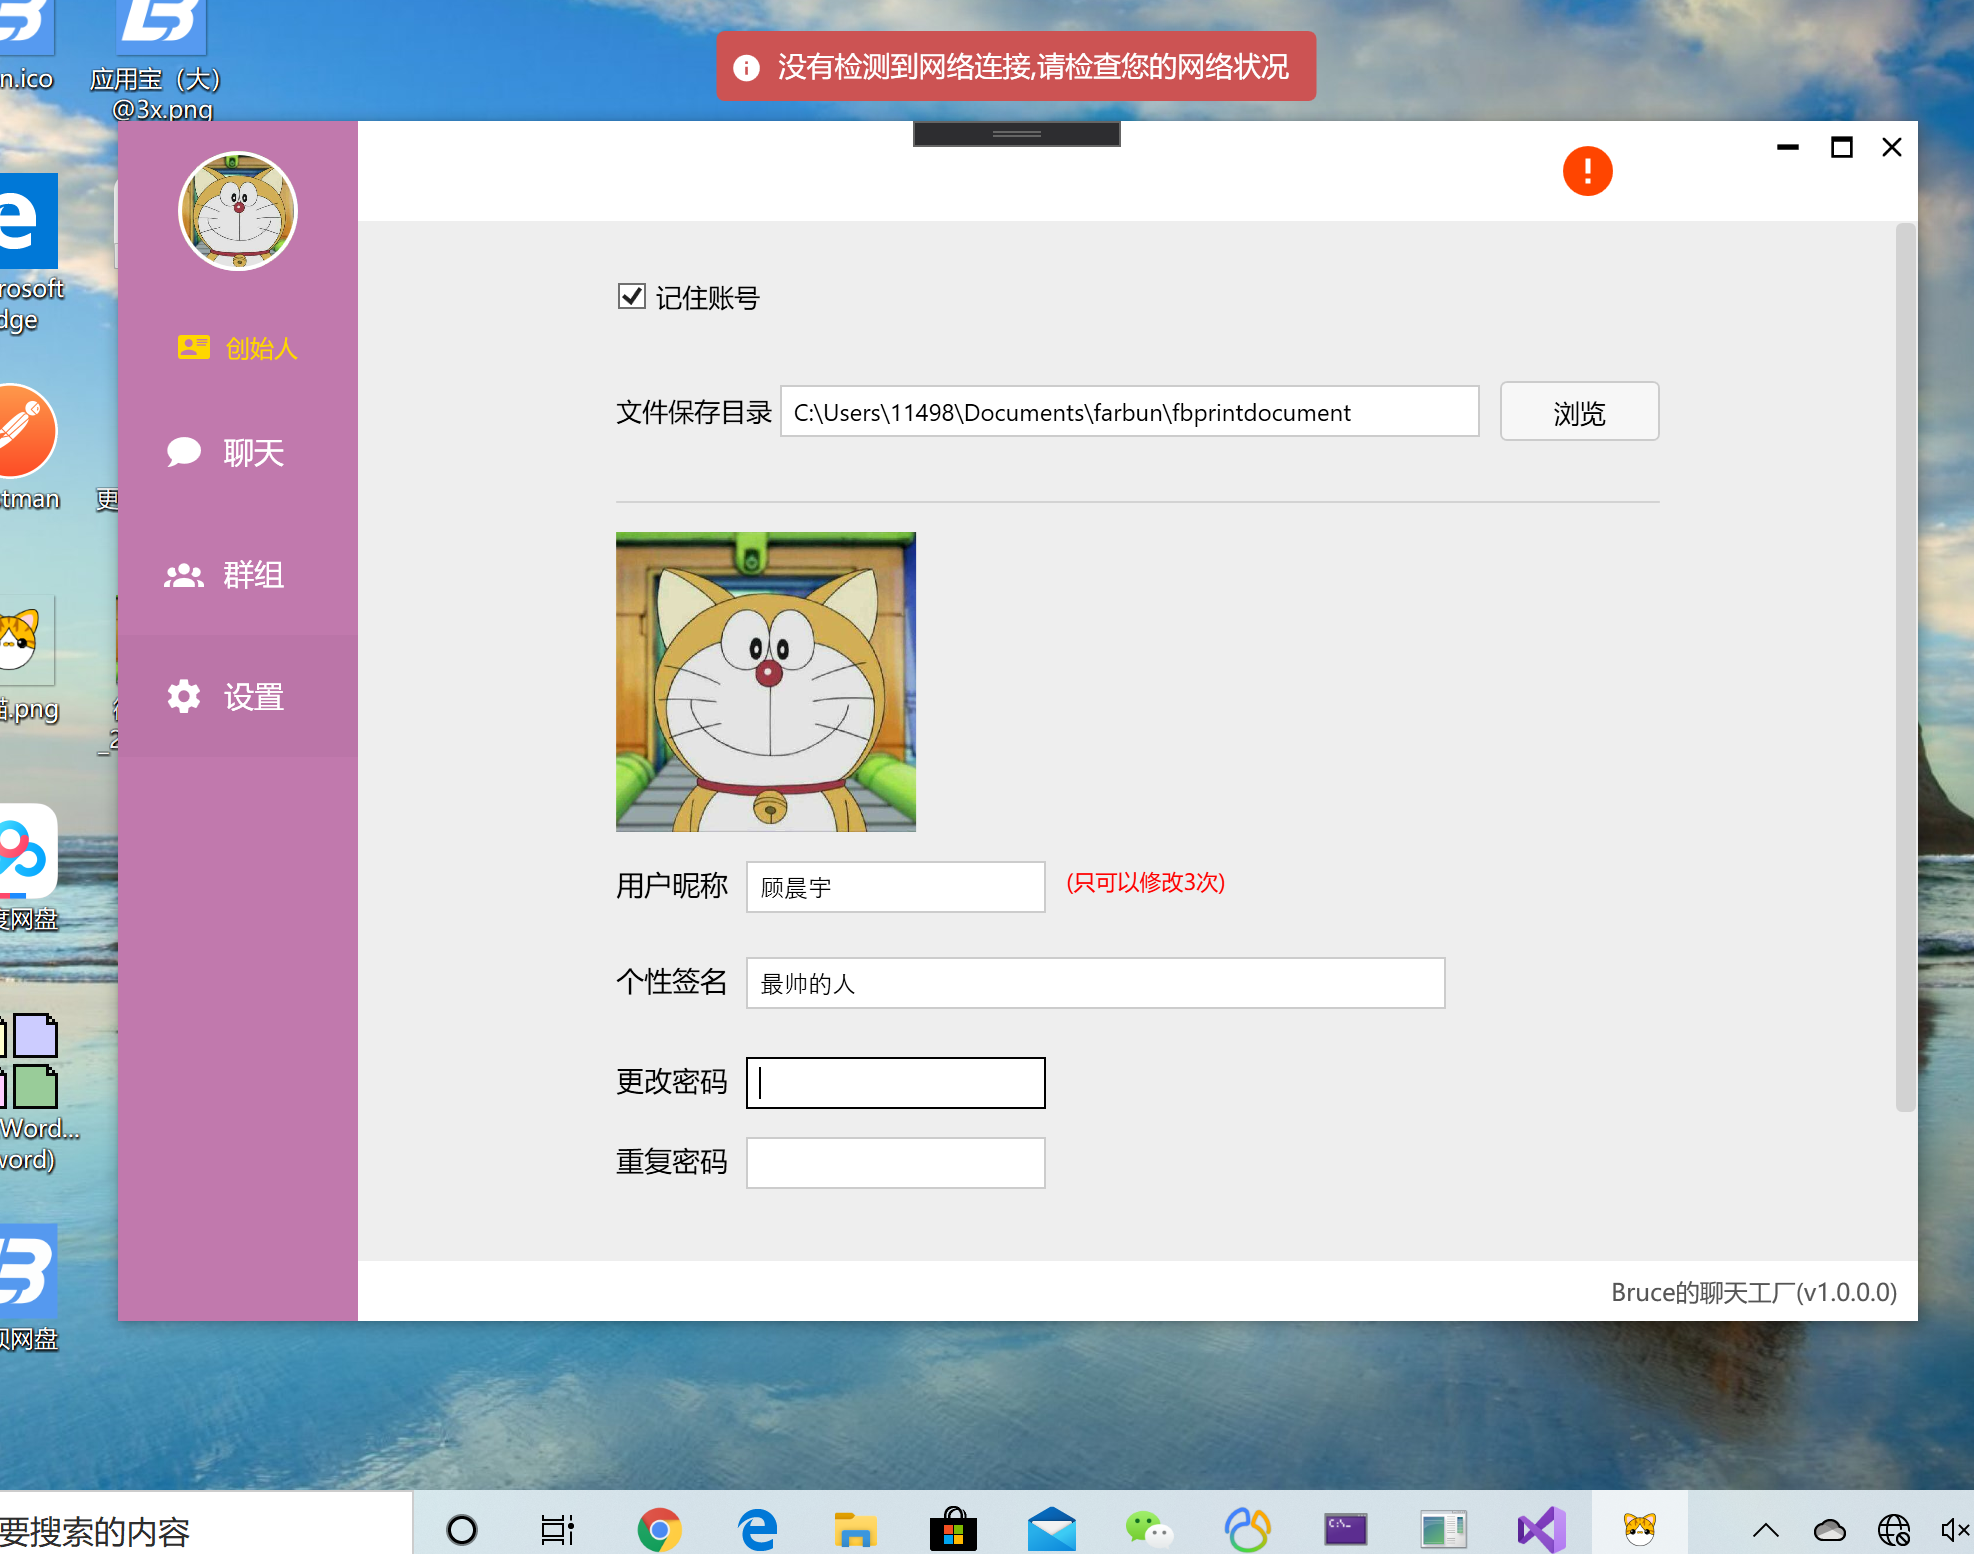
顶部气泡主要要做三个工作
1.定位到顶部居中
2.气泡需要跟随窗体
3.气泡不可以遮挡住其他程序界面
原生的WPF Poupu控件不会跟随目标移动且在Z轴上会置顶,所以存在打开其他程序被气泡遮挡的问题。我们需要一一解决。
1.气泡跟随目标移动,采用附加属性的方法,在change方法里设置气泡的位置与目标的位置相对变化即可,直接上代码
public static class PopopHelper
    {
        public static DependencyObject GetPopupPlacementTarget(DependencyObject obj)
        {
            return (DependencyObject)obj.GetValue(PopupPlacementTargetProperty);
        }

        public static void SetPopupPlacementTarget(DependencyObject obj, DependencyObject value)
        {
            obj.SetValue(PopupPlacementTargetProperty, value);
        }

        // Using a DependencyProperty as the backing store for PopupPlacementTarget.  This enables animation, styling, binding, etc...
        public static readonly DependencyProperty PopupPlacementTargetProperty =
            DependencyProperty.RegisterAttached("PopupPlacementTarget", typeof(DependencyObject), typeof(PopopHelper), new PropertyMetadata(null, OnPopupPlacementTargetChanged));

        private static void OnPopupPlacementTargetChanged(DependencyObject d, DependencyPropertyChangedEventArgs e)
        {
            if (e.NewValue != null)
            {
                DependencyObject popupPopupPlacementTarget = e.NewValue as DependencyObject;
                Popup pop = d as Popup;

                Window w = Window.GetWindow(popupPopupPlacementTarget);
                if (null != w)
                {
                    w.LocationChanged += delegate
                    {
                        var offset = pop.HorizontalOffset;
                        pop.HorizontalOffset = offset + 1;
                        pop.HorizontalOffset = offset;
                    };
                }
            }
        }

    }
在xaml中的使用办法:
helpers:PopopHelper.PopupPlacementTarget="{Binding ElementName=mainwindow}"
2.需要气泡不置顶遮挡其他打开的程序,这里是借鉴的网上的一张办法,亲测可用。
public class PopupNonTopmost : Popup
    {
        public static DependencyProperty TopmostProperty = Window.TopmostProperty.AddOwner(
            typeof(PopupNonTopmost),
            new FrameworkPropertyMetadata(false, OnTopmostChanged));

        public bool Topmost
        {
            get { return (bool)GetValue(TopmostProperty); }
            set { SetValue(TopmostProperty, value); }
        }

        private static void OnTopmostChanged(DependencyObject obj, DependencyPropertyChangedEventArgs e)
        {
            (obj as PopupNonTopmost).UpdateWindow();
        }

        protected override void OnOpened(EventArgs e)
        {
            UpdateWindow();
        }

        private void UpdateWindow()
        {
            var hwnd = ((HwndSource)PresentationSource.FromVisual(this.Child)).Handle;
            RECT rect;

            if (GetWindowRect(hwnd, out rect))
            {
                SetWindowPos(hwnd, Topmost ? -1 : -2, rect.Left, rect.Top, (int)this.Width, (int)this.Height, 0);
            }
        }

        #region P/Invoke imports & definitions

        [StructLayout(LayoutKind.Sequential)]
        public struct RECT
        {
            public int Left;
            public int Top;
            public int Right;
            public int Bottom;
        }

        [DllImport("user32.dll")]
        [return: MarshalAs(UnmanagedType.Bool)]
        private static extern bool GetWindowRect(IntPtr hWnd, out RECT lpRect);

        [DllImport("user32", EntryPoint = "SetWindowPos")]
        private static extern int SetWindowPos(IntPtr hWnd, int hwndInsertAfter, int x, int y, int cx, int cy, int wFlags);

        #endregion
    }
在xaml中就需要把我们的Popup改成这里的继承控件了。
helpers:PopupNonTopmost
3.定位问题,
如果是置顶,大家可以用top,然后设置width来居中,不要问我为什么width可以居中,我自己试的。。。
也可以用官方的办法,采用custom的定位方式,然后后台代码去调位置,但是这样调试比较麻烦,可能需要一直开关调试程序。
我建议用两种一起使用如下。
Placement="Custom"
将 PopupNonTopmost控件的定位方式设置为Custom,自定义
后台创建如下方法
public CustomPopupPlacement[] placePopup(Size popupSize,
                                           Size targetSize,
                                           Point offset)
        {
            //调整y轴
            CustomPopupPlacement placement1 =
               new CustomPopupPlacement(new Point(50, -90), PopupPrimaryAxis.Vertical);

            //调整x轴
            CustomPopupPlacement placement2 =
                new CustomPopupPlacement(new Point(500 ,1000), PopupPrimaryAxis.Horizontal);

            CustomPopupPlacement[] ttplaces =
                    new CustomPopupPlacement[] { placement1, placement2 };
            return ttplaces;
        }
最后将方法设置到控件的定位回滚事件上 ,pop1是控件名。
pop1.CustomPopupPlacementCallback =new CustomPopupPlacementCallback(placePopup);
然后就是需要自己调试那两个point了,必要的时候可以试试Popup的width属性,同样可以设置位置,亲测。
最后一切完毕就有最开始的效果了。

 浙公网安备 33010602011771号