springboot整合minio进行文件的保存
MinIO 是一个开源的、高性能的分布式对象存储系统。它主要被设计来处理大量的非结构化数据,如照片、视频、日志文件、备份和容器/虚拟机镜像等。MinIO 具有高可用性、高扩展性、且性能接近线性增长等特点。
本次我们是作为学习,故选用window版本进行运行minio
一、安装并运行:
1、下载:https://dl.min.io/server/minio/release/windows-amd64/minio.exe
2、安装,打开文件夹,使用cmd进入到命令界面,输入命令:minio.exe server d:\minio\data 后面的D盘位置就是服务启动以后,相关数据的保存地址(自定义,但不要有中文)
3、访问,输入:http://127.0.0.1:9000
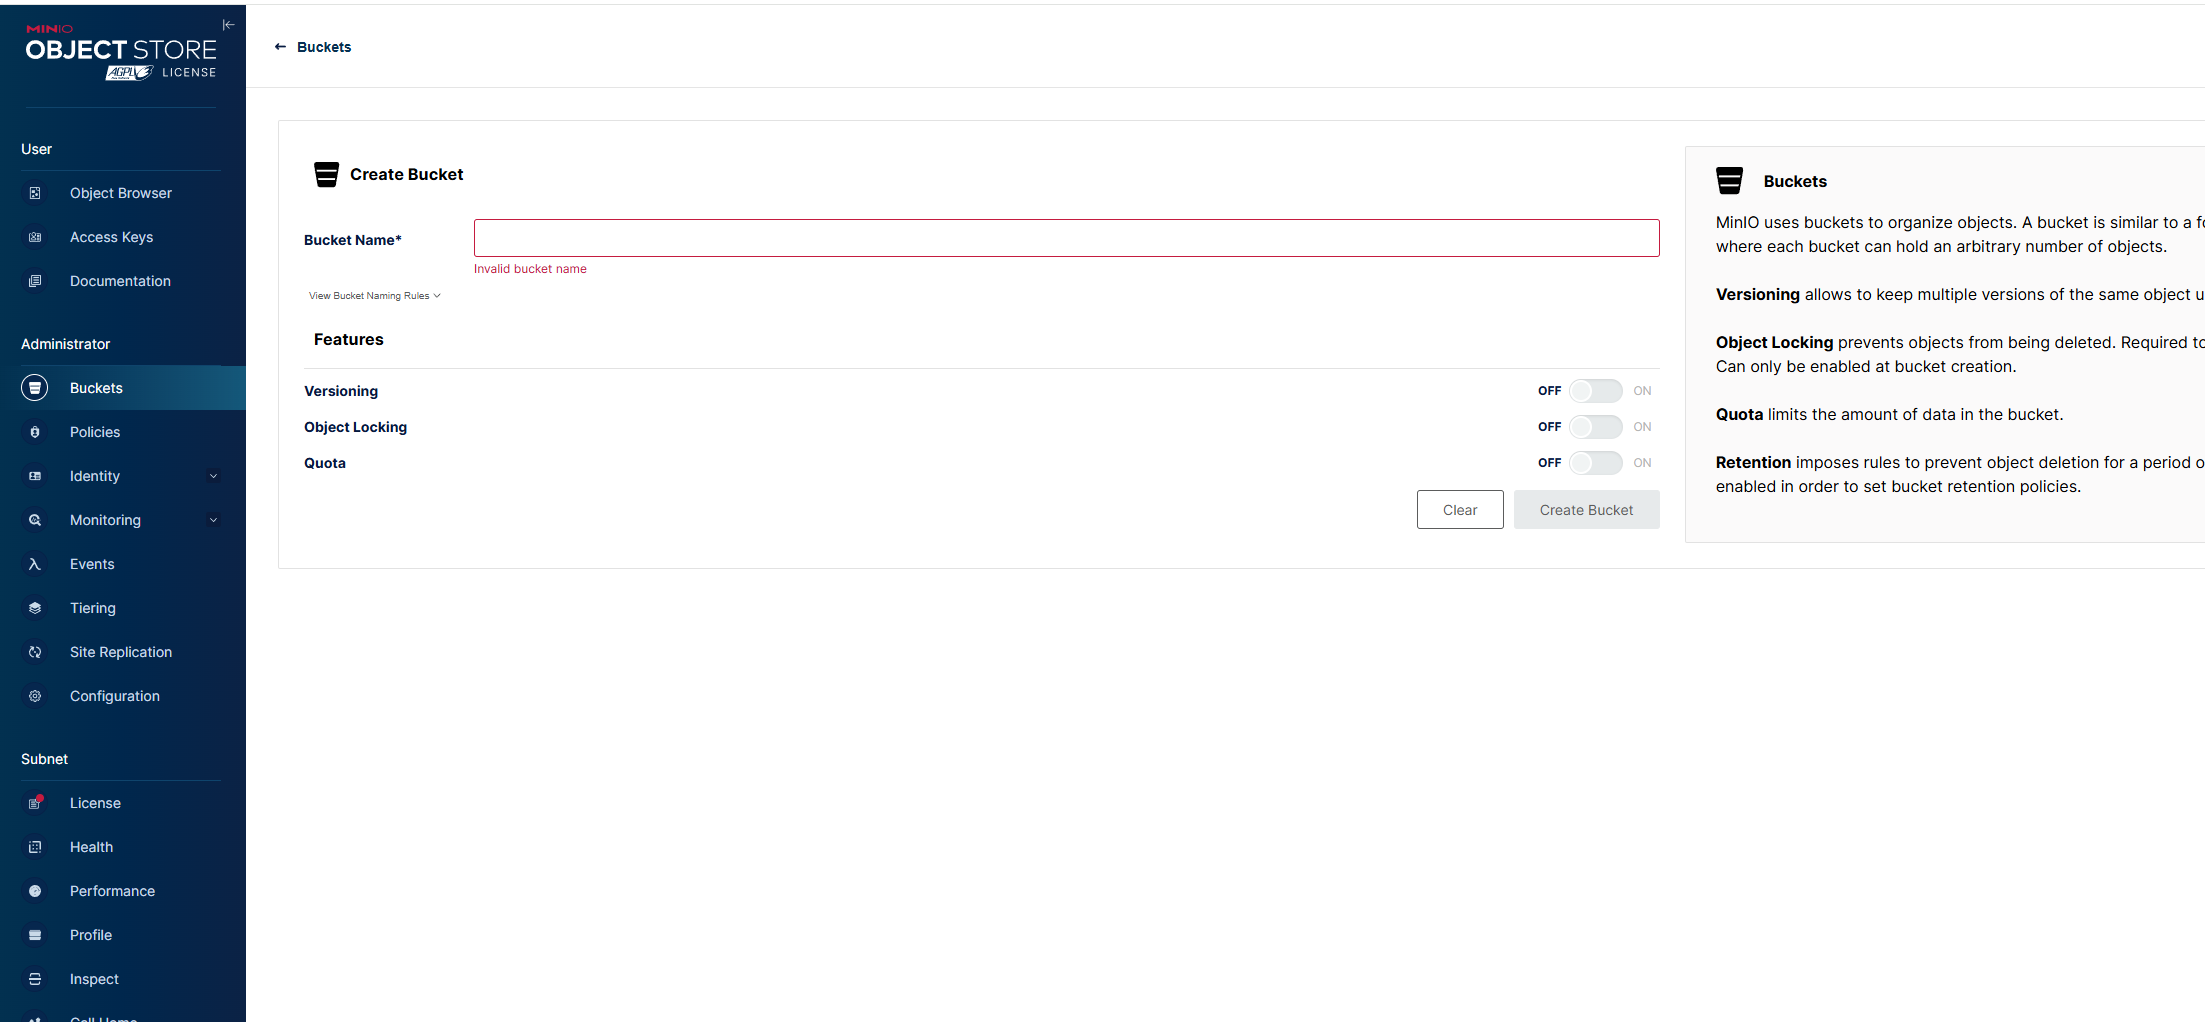
这样minio就启动成功了,页面如下:
2、安装,打开文件夹,使用cmd进入到命令界面,输入命令:minio.exe server d:\minio\data 后面的D盘位置就是服务启动以后,相关数据的保存地址(自定义,但不要有中文)
3、访问,输入:http://127.0.0.1:9000
这样minio就启动成功了,页面如下:

默认账号密码都是:minioadmin
那需要创建一个bucket(桶),通常而言,一个项目就是第一个桶,里面装的都是该项目下的一些文件

二、springboot项目中添加相关配置和依赖和代码
1、依赖
<dependencies>
    <!-- Spring Boot Starter for MinIO -->
    <dependency>
        <groupId>io.minio</groupId>
        <artifactId>minio</artifactId>
    </dependency>
    <!-- Spring Boot Starter for Web -->
    <dependency>
        <groupId>org.springframework.boot</groupId>
        <artifactId>spring-boot-starter-web</artifactId>
    </dependency>
</dependencies>
2、在application.yml
# application.yml
minio:
  endpoint: http://localhost:9000
  accessKey: YOUR_ACCESS_KEY
  secretKey: YOUR_SECRET_KEY
  bucketName: your-bucket-name
配置中bucketName是在上面的桶配置那边自己设置的桶名称;accesskey和scretKey是在minio中如下配置的:

3、创建配置类:
@Configuration
public class MinioConfig {
    @Value("${minio.endpoint}")
    private String endpoint;
    @Value("${minio.accessKey}")
    private String accessKey;
    @Value("${minio.secretKey}")
    private String secretKey;
    @Bean
    public MinioClient minioClient() {
        return MinioClient.builder()
                .endpoint(endpoint)
                .credentials(accessKey, secretKey)
                .build();
    }
}
这个是将配置信息通过代码的方式注入到IOC容器中,那别的地方就可以通过下面的方式进行注入使用了
    @Resource
    private MinioClient minioClient;
4、创建一个工具类进行文件的上传
package com.spring.aicloud.util;

import io.minio.*;
import io.minio.errors.*;
import io.minio.http.Method;
import jakarta.annotation.Resource;
import org.springframework.beans.factory.annotation.Value;
import org.springframework.stereotype.Component;

import java.io.IOException;
import java.io.InputStream;
import java.security.InvalidKeyException;
import java.security.NoSuchAlgorithmException;

@Component  //注入到IOC容器中
public class MinIOUtils {

    @Resource
    private MinioClient minioClient;

    @Value("${minio.bucket}")
    private String bucketName;

    @Value("${minio.endpoint}")
    private String endpoint;


    public String uploadFile(String fileName, InputStream stream,String contentType) throws ServerException, InsufficientDataException, ErrorResponseException, IOException, NoSuchAlgorithmException, InvalidKeyException, InvalidResponseException, XmlParserException, InternalException {
        Boolean b = minioClient.bucketExists(BucketExistsArgs.builder().bucket(bucketName).build());
        if (!b){  // 判断是否存在该桶
            minioClient.makeBucket(MakeBucketArgs.builder().bucket(bucketName).build());
        }
        minioClient.putObject(PutObjectArgs.builder()
                .bucket(bucketName)
                .object(fileName)
                .stream(stream,-1,10485760)
                .contentType(contentType)
                .build()
        );
        return endpoint + "/"+bucketName + "/" + fileName;
    }

}
5、业务的使用:
   @RequestMapping("/draw")
    public ResponseEntity draw(String question) throws Exception {
        if (!StringUtils.hasLength(question)){
            return ResponseEntity.error("问题不能为空");
        }
        try {
            Text2ImageResponse response = new Qianfan(accessKey, secretKey).text2Image().prompt(question).execute();
            byte[] b64Image = response.getData().get(0).getImage();
            String url = "";
            String fileName = "qf-" + UUID.randomUUID().toString().replace("-","");
            try (InputStream inputStream = new ByteArrayInputStream(b64Image)){
                url = minIOUtils.uploadFile(fileName,inputStream,"image/png");
            }catch (Exception e){
                throw new RuntimeException(e);
            }
            Answer answer = new Answer();
            answer.setTitle(question).setContent(url).setUid(SecurityUserInfoUtil.getSecurityUserDetails().getUid());
            answer.setModel(AiModelEnum.QIANWEN.getCode()).setType(AiTypeEnum.DRAW.getCode());
            boolean save = answerService.save(answer);
            if (save){
                return ResponseEntity.success(url);
            }
        } catch (Exception e){
            e.printStackTrace();
            return ResponseEntity.error("请求失败");
        } return ResponseEntity.error("请求失败!");
    }
其本质:将文件上传,然后返回一个URL地址将其保存到数据库,下次需要该文件的时候,通过数据库给你的URL,你再去请求下载文件服接口。也就是说提供一个上传接口、一个下载接口、我们数据库之需要存储文件的完整URL(名称+后缀)。
这里就介绍了上传图片,那其实文件也可以,比如xlxs、pdf、txt等。
下面还记录一个获取验证码的一个实例
@RestController
@RequestMapping("/captcha")
public class CaptchaController {

    @Resource
    private RedisTemplate redisTemplate;

    @Resource
    private MinIOUtils minIOUtils;

    @RequestMapping("/create")
    public ResponseEntity create(HttpServletRequest request) throws Exception {
        String url = "";
        LineCaptcha lineCaptcha = CaptchaUtil.createLineCaptcha(120, 40);
        String fileName = NameUtils.getCaptchaName(request);
        try (InputStream inputStream = new ByteArrayInputStream(lineCaptcha.getImageBytes())){
            url = minIOUtils.uploadFile(fileName,inputStream,"image/png");
            String code = lineCaptcha.getCode(); //正确的验证码
            redisTemplate.opsForValue().set(fileName, code,60, TimeUnit.SECONDS);  // 存储到redis中
        }
        return ResponseEntity.success(url);
    }


}
一个IP只会存储一个验证码(防止产生大量验证码),用IP进行加密获取key
public class NameUtils {

    /**
     * 获取验证码图片名
     * @param request
     * @return
     */
    public static String getCaptchaName(HttpServletRequest request){
        return "captcha_" + SecureUtil.md5(request.getRemoteAddr());
    }

}
其本质:
1、 ① 通过hutool生成验证码,然后上传到minio,后端将其存储到redis中,key是用户的IP,value是这个照片的code,
② 返回url给前端,前端去请求这个URL获取到图片;
2、① 登录的时候,前端拿到url,通过url获取验证码图片展示,用户输完账号密码和验证码,往后端传递账号密码和验证码
② 后端获取到验证码并校验验证码(key是用户的IP,value就是前段传递过来的图片验证码),验证通过则继续执行业务逻辑;


 浙公网安备 33010602011771号