


实验5:开源控制器实践——POX
一、实验目的
1.能够理解 POX 控制器的工作原理;
2.通过验证POX的forwarding.hub和forwarding.l2_learning模块,初步掌握POX控制器的使用方法;
3.能够运用 POX控制器编写自定义网络应用程序,进一步熟悉POX控制器流表下发的方法。
二、实验环境
Ubuntu 20.04 Desktop amd64
三、实验要求
(一)基本要求
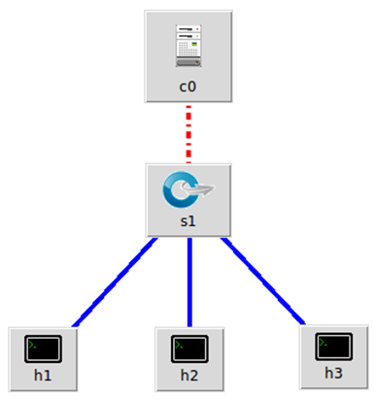
1.搭建下图所示SDN拓扑,协议使用Open Flow 1.0,控制器使用部署于本地的POX(默认监听6633端口)。
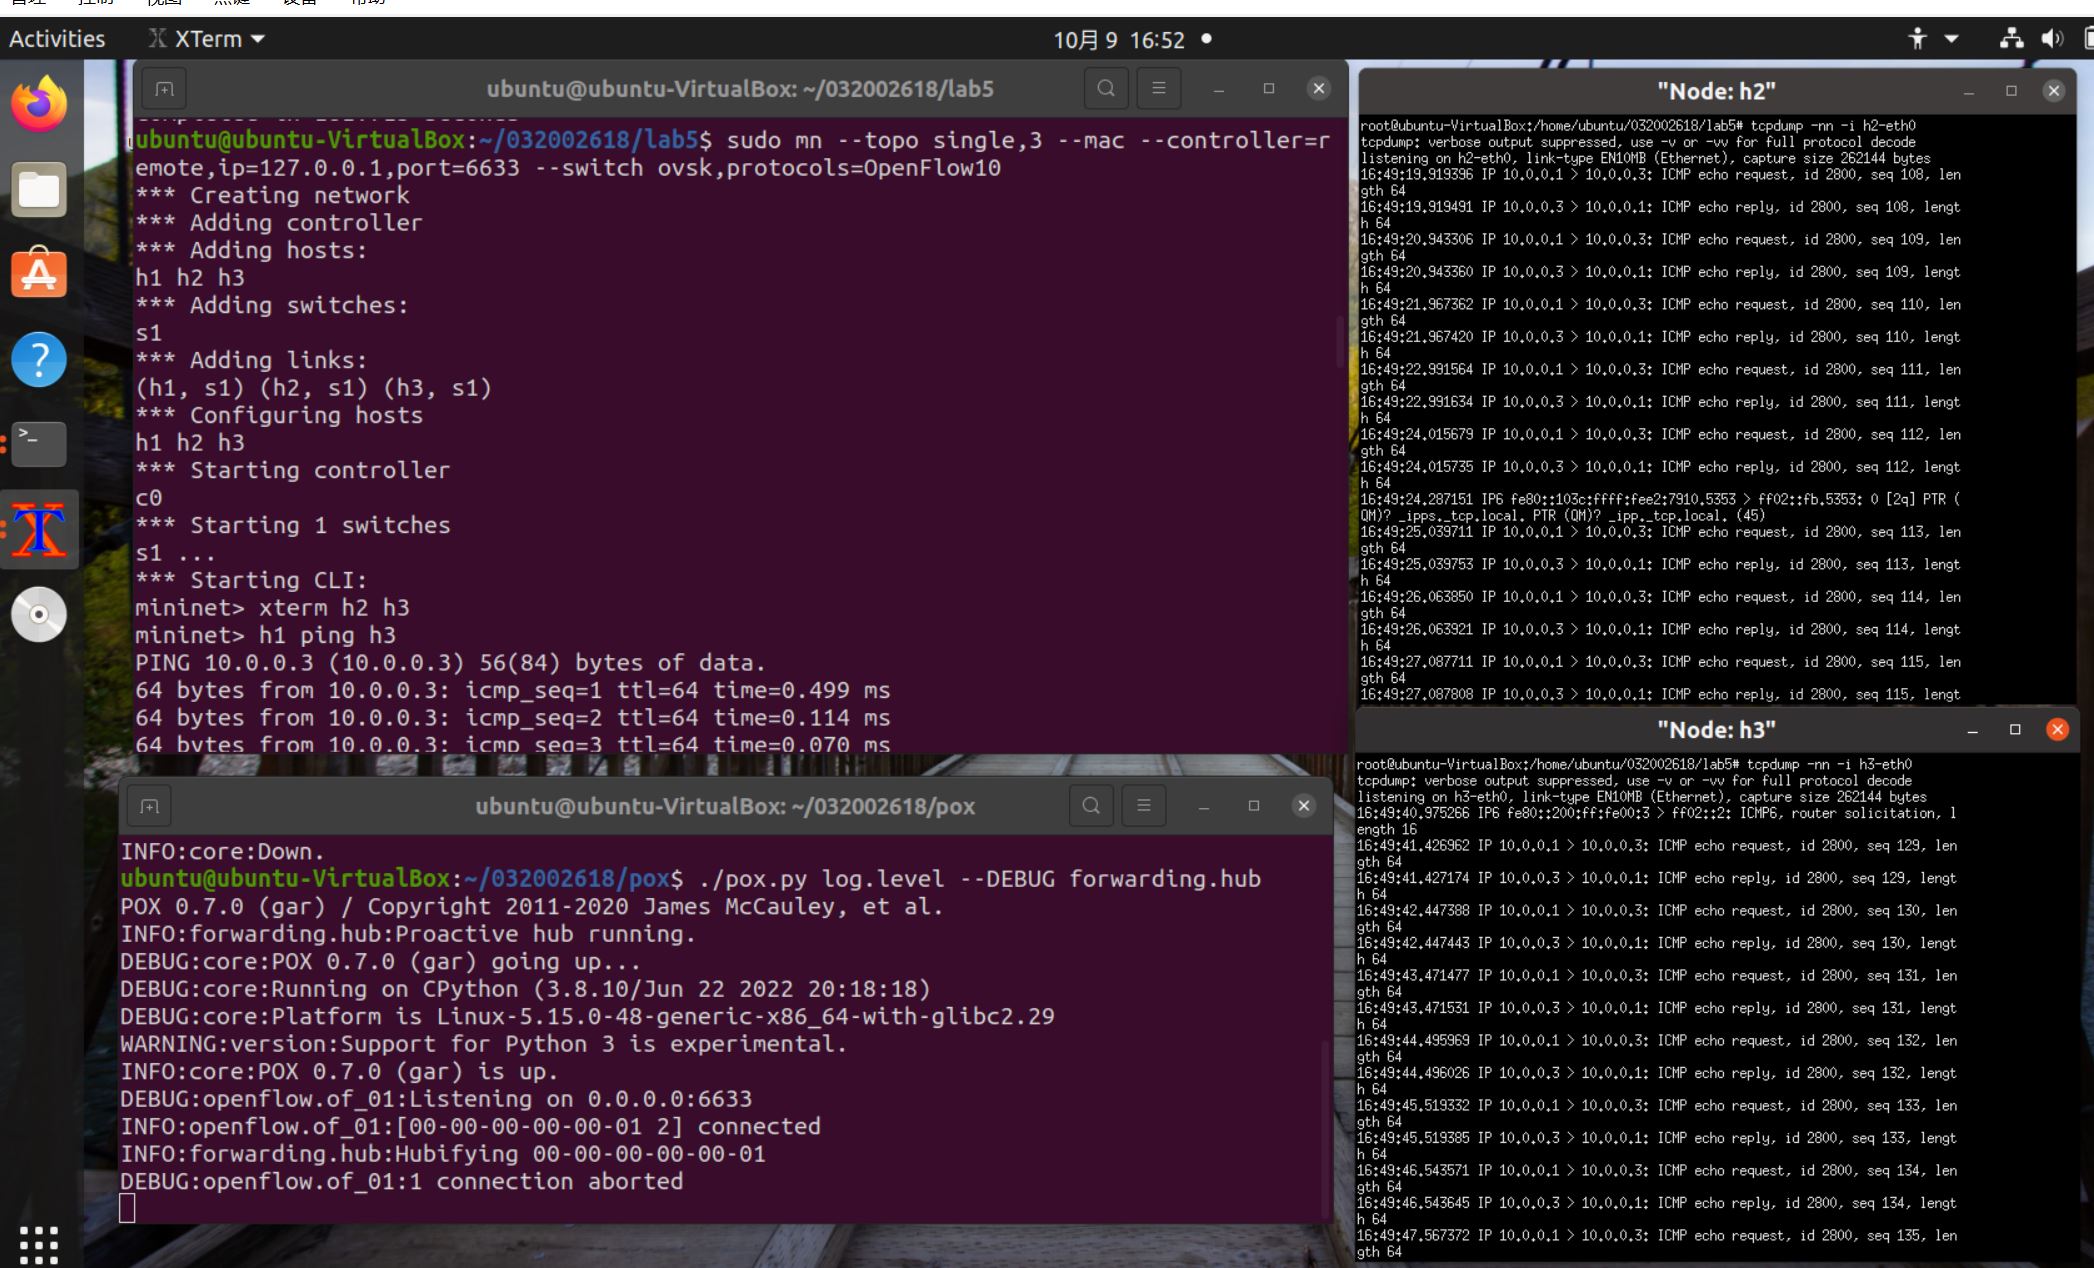
2.阅读Hub模块代码,使用 tcpdump 验证Hub模块;
-
h1 ping h3 (h3收到数据包,h2没有收到数据包)
![]()
-
h1 ping h2 (h2收到数据包,h3没有收到数据包)
![]()

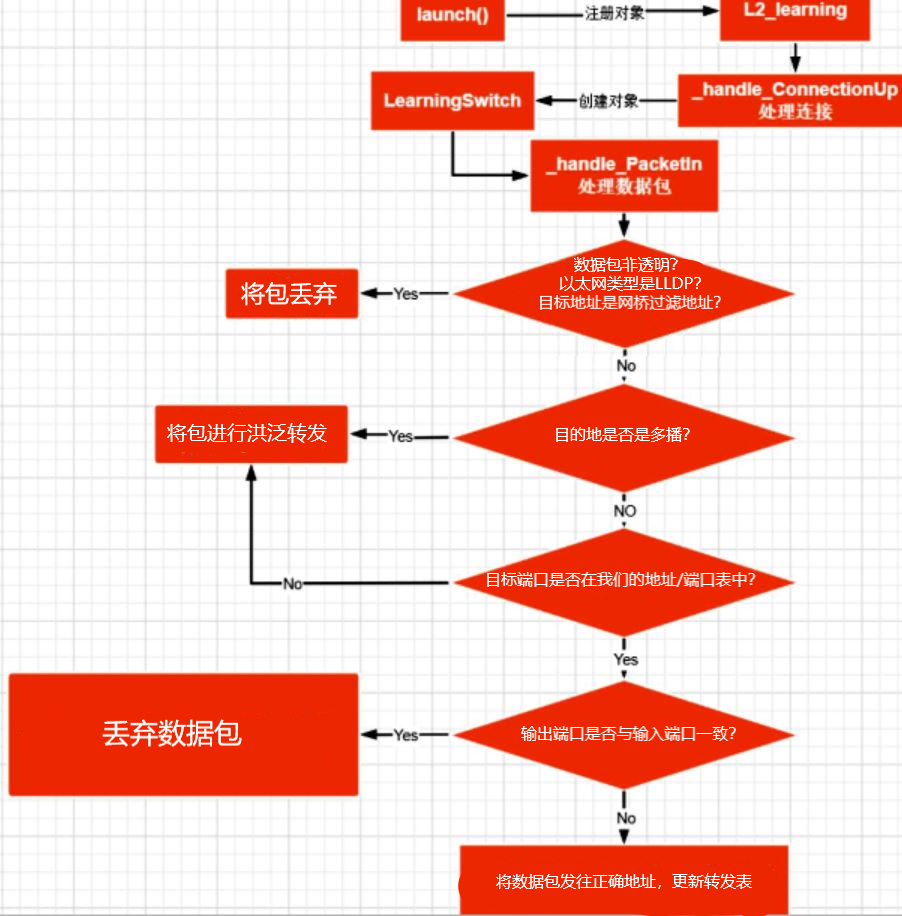
3.阅读L2_learning模块代码,画出程序流程图,使用 tcpdump 验证Switch模块。
Switch模块:让OpenFlow交换机实现L2自学习,只有目的主机可以接收到数据包。
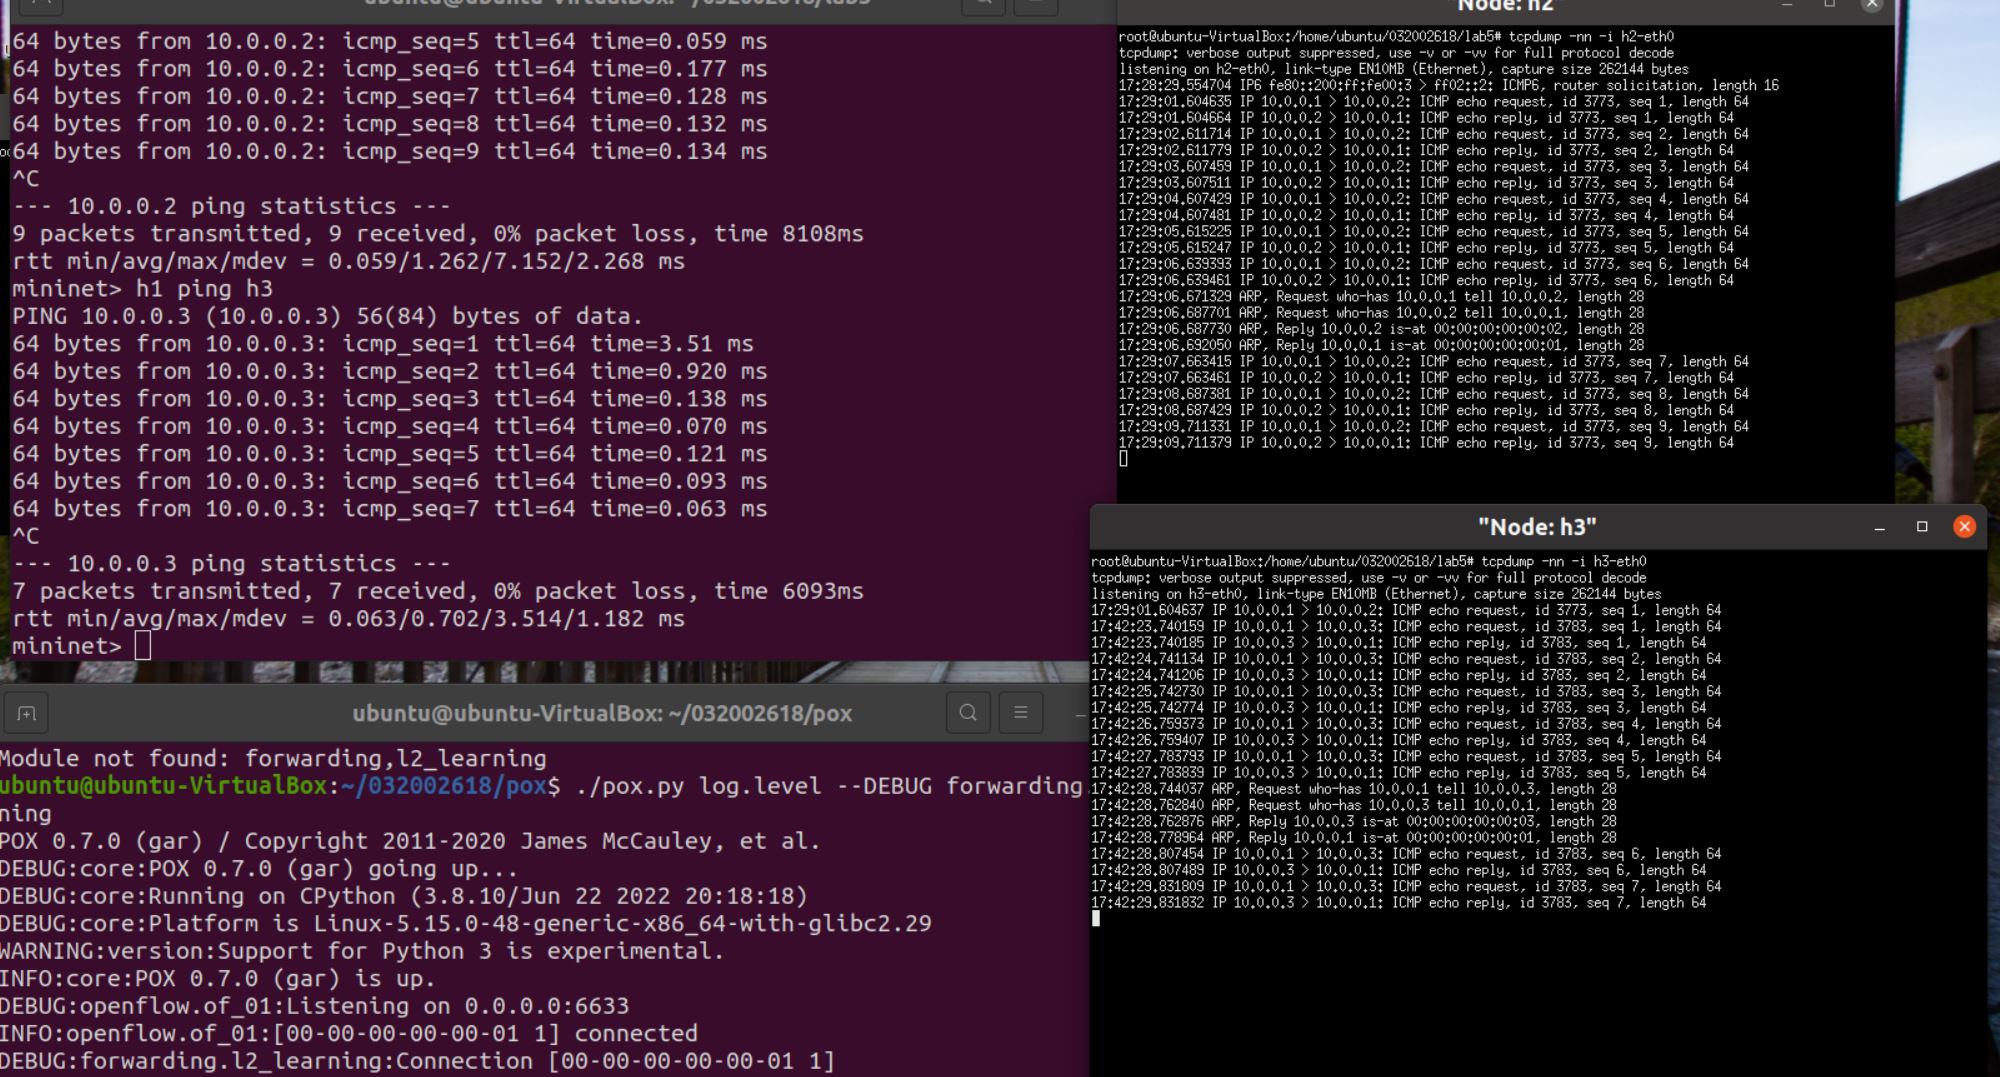
-
h1 ping h2
![]()
-
h1 ping h3
![]()

(二)进阶要求
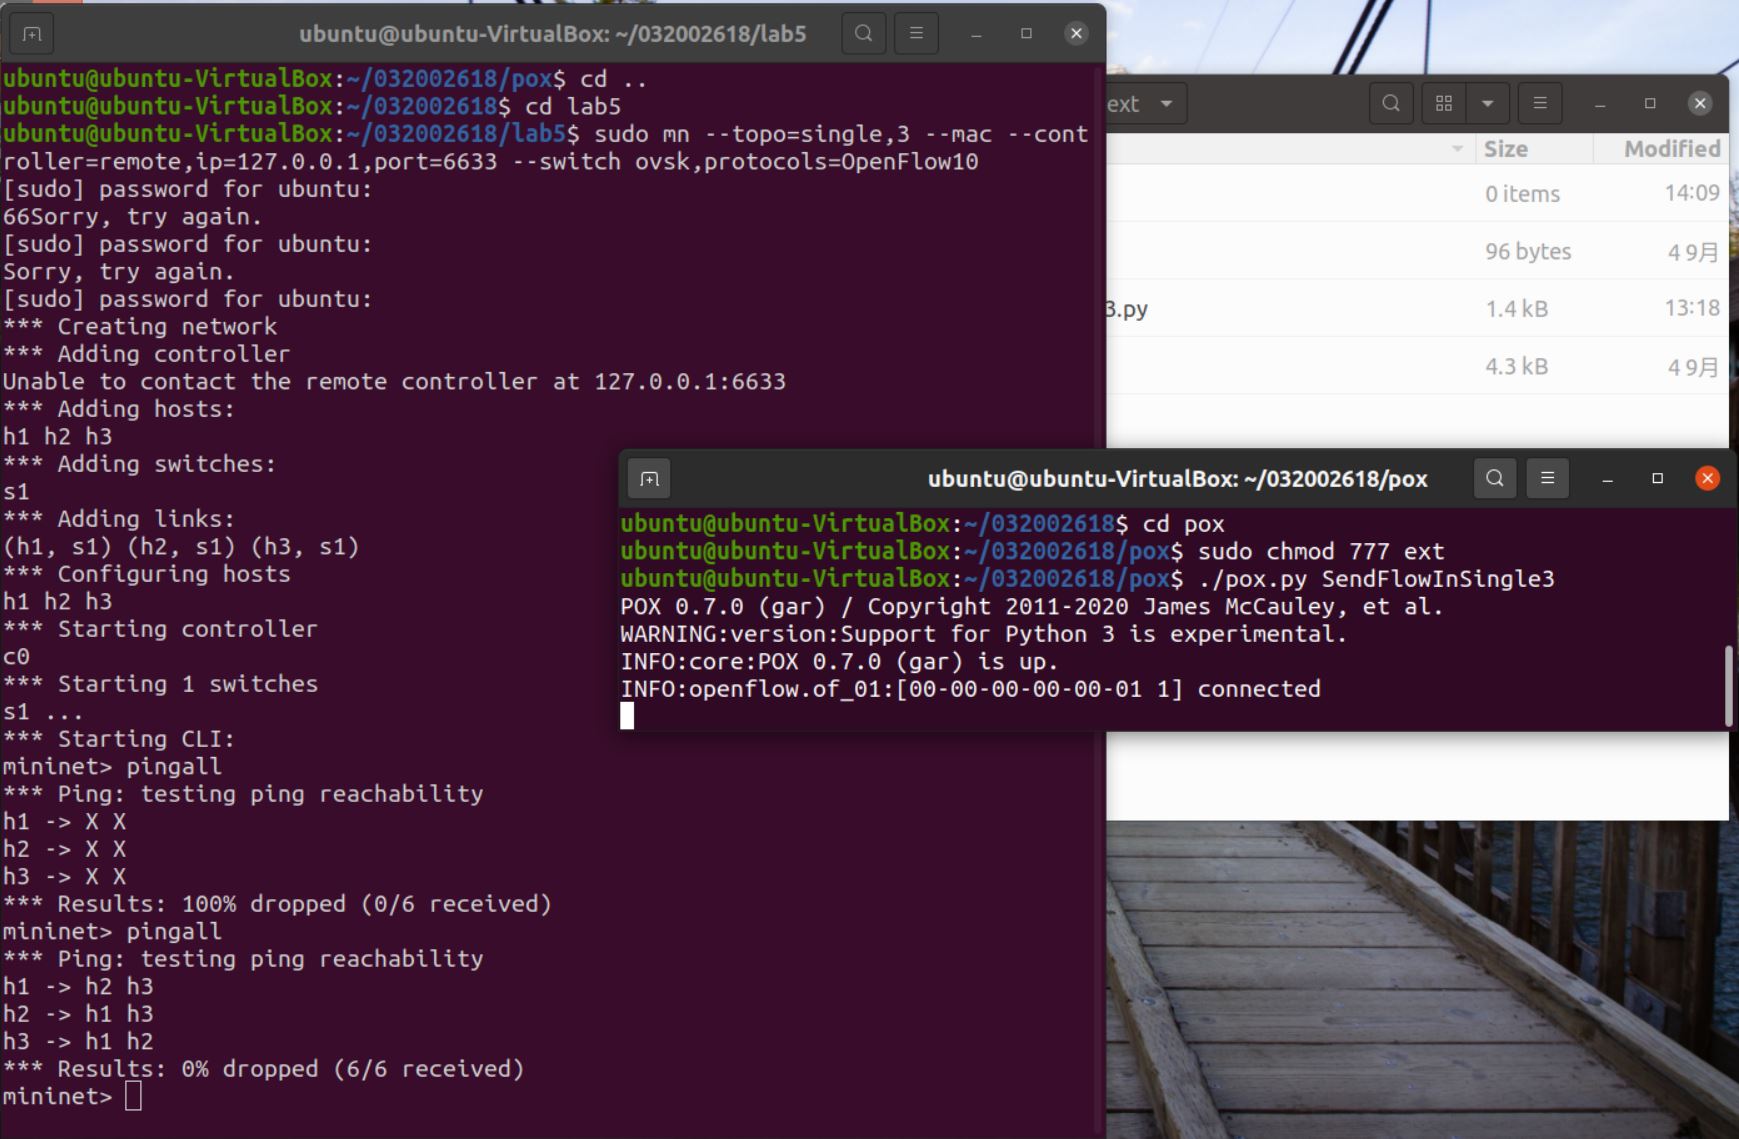
1.重新搭建(一)的拓扑,此时交换机内无流表规则,拓扑内主机互不相通;编写Python程序自定义一个POX模块SendFlowInSingle3,并且将拓扑连接至SendFlowInSingle3(默认端口6633),实现向s1发送流表规则使得所有主机两两互通。
Thus, one common way to start building your own POX module is simply to copy an existing module (e.g., forwarding/l2_learning.py) into the ext directory (e.g., ext/my_component.py). You can then modify the new file and invoke POX as ./pox.py my_component.(自己写好的pox module放进ext文件夹里。)
from pox.core import core
import pox.openflow.libopenflow_01 as of

class SendFlowInSingle3(object):
    def __init__(self):
        core.openflow.addListeners(self)
    def _handle_ConnectionUp(self, event):
        msg = of.ofp_flow_mod()  # 使用ofp_flow_mod()方法向交换机下发流表
        msg.priority = 1
        msg.match.in_port = 1  # 使数据包进入端口1
        msg.actions.append(of.ofp_action_output(port=2))  # 从端口2转发出去
        msg.actions.append(of.ofp_action_output(port=3))  # 从端口3转发出去
        event.connection.send(msg)

        msg = of.ofp_flow_mod()  # 使用ofp_flow_mod()方法向交换机下发流表
        msg.priority = 1
        msg.match.in_port = 2  # 使数据包进入端口2
        msg.actions.append(of.ofp_action_output(port=1))  # 从端口1转发出去
        msg.actions.append(of.ofp_action_output(port=3))  # 从端口3转发出去
        event.connection.send(msg)

        msg = of.ofp_flow_mod()  # 使用ofp_flow_mod()方法向交换机下发流表
        msg.priority = 1
        msg.match.in_port = 3  # 使数据包进入端口3
        msg.actions.append(of.ofp_action_output(port=1))  # 从端口1转发出去
        msg.actions.append(of.ofp_action_output(port=2))  # 从端口2转发出去
        event.connection.send(msg)

def launch():
    core.registerNew(SendFlowInSingle3)
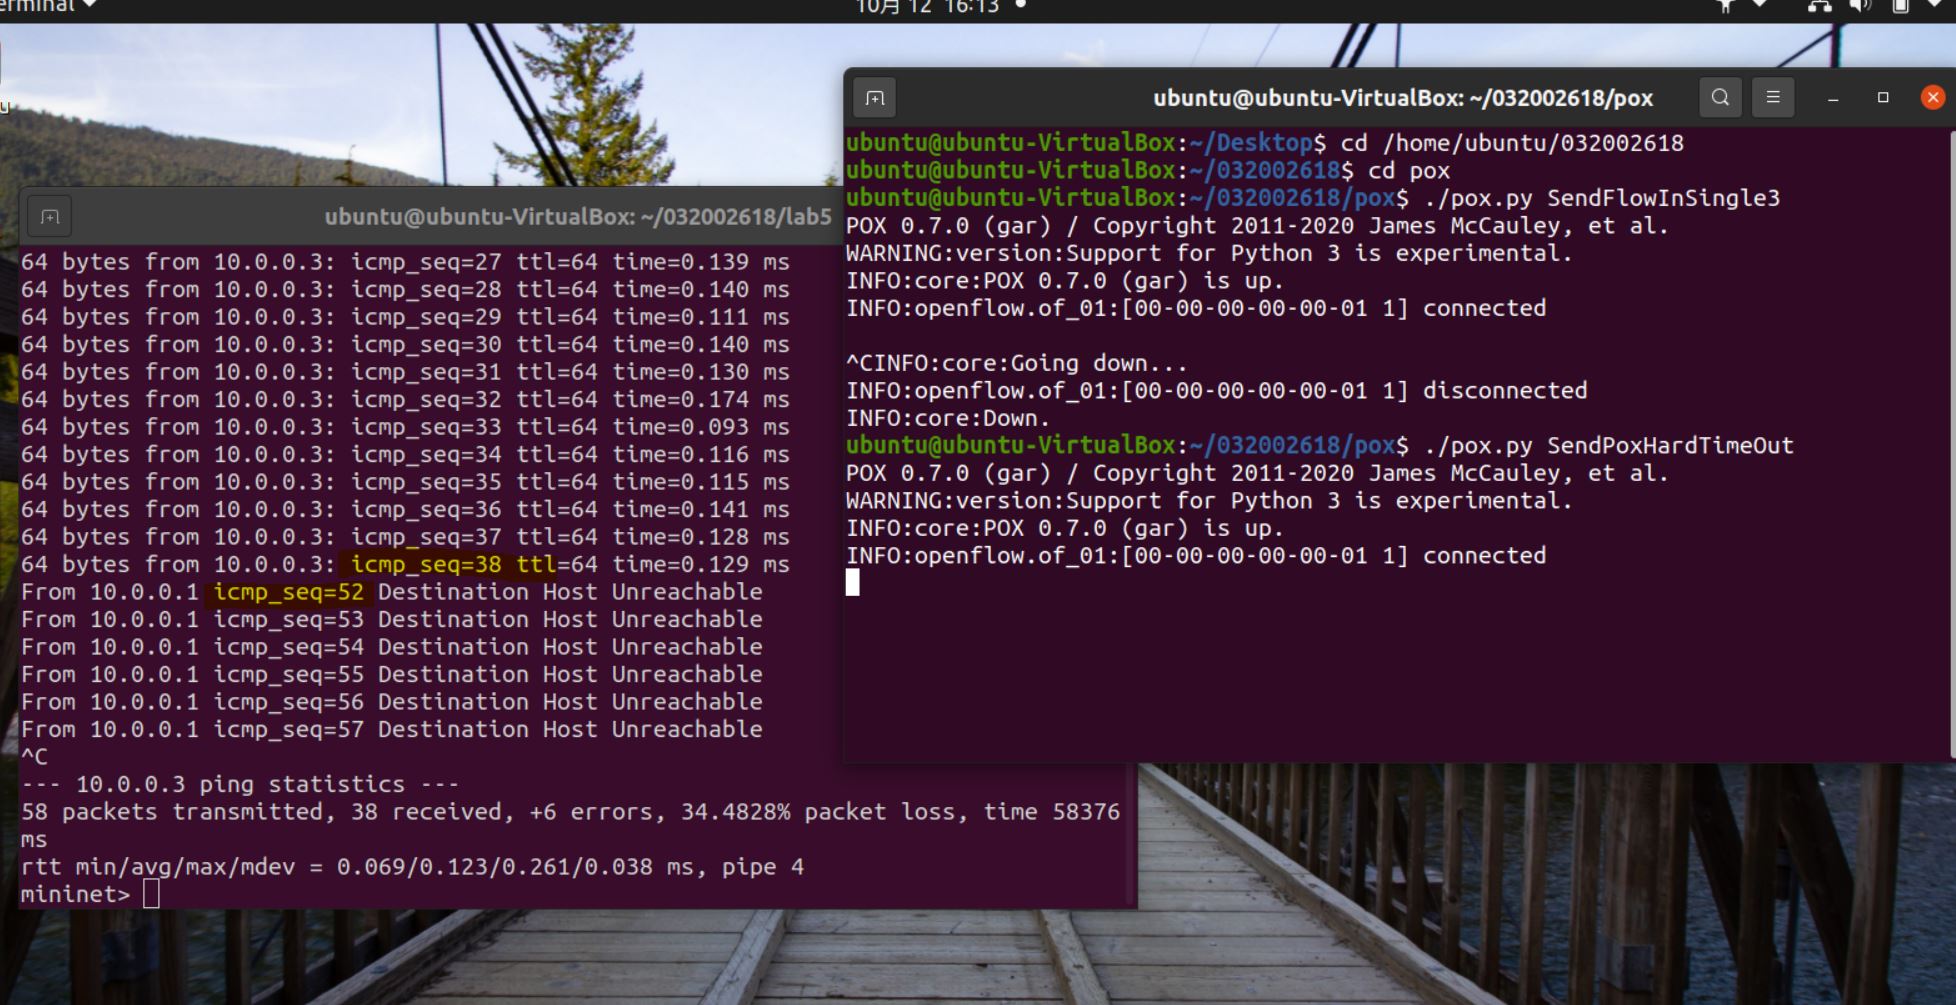
2.基于进阶1的代码,完成ODL实验的硬超时功能。
from pox.core import core
import pox.openflow.libopenflow_01 as of

class SendFlowInSingle3(object):
    def __init__(self):
        core.openflow.addListeners(self)
    def _handle_ConnectionUp(self, event):
        msg = of.ofp_flow_mod()
        msg.priority = 1
        msg.match.in_port = 1
        msg.actions.append(of.ofp_action_output(port=2))
       # msg.actions.append(of.ofp_action_output(port=3))
        event.connection.send(msg)

        msg = of.ofp_flow_mod()
        msg.priority = 1
        msg.match.in_port = 2
        msg.actions.append(of.ofp_action_output(port=1))
        msg.actions.append(of.ofp_action_output(port=3))
        event.connection.send(msg)

        msg = of.ofp_flow_mod()
        msg.priority = 1
        msg.match.in_port = 3
       # msg.actions.append(of.ofp_action_output(port=1))
        msg.actions.append(of.ofp_action_output(port=2))
        event.connection.send(msg)

def launch():
    core.registerNew(SendFlowInSingle3)
四、个人总结
本次实验有点难度,有不少东西要读,花费时间比较多。通过本次实验,能够理解 POX 控制器的工作原理。通过验证POX的forwarding.hub和forwarding.l2_learning模块,初步掌握了POX控制器的使用方法。大致通过阅读文档了解了POX控制器流表下发的方法。在读代码画流程图的过程中遇到困难,询问同学和参考对方流程图后理解。
遇到的问题:最开始不知道pox module的文件要放哪里生效,查询文档示例后了解是要放入ext文件夹,该文件夹不能写入,sudo chmod 777给权限。


 浙公网安备 33010602011771号