

ubuntu 安装mysql
1、首先需要更新全部的包:
sudo apt-get update
2、安装mysql
sudo apt-get install mysql-server
3、启动mysql服务
service mysql start
4、检查服务是否安装成功
sudo netstat -tap | grep mysql
5、mysql会自动生成一个默认的账号密码,相关配置在默认的文件夹 /etc/mysl/debian.cnf
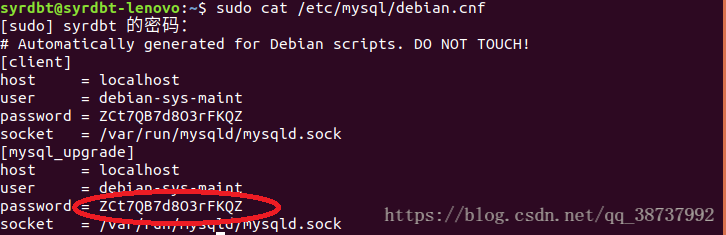
登录方式:
mysql -u debian-sys-maint -p[password]
查看全部的数据库:
show databases;
指定数据库:
use mysql;
修改root的初始密码:
update user set password=password('123456') where user='root'
update user set authentication_string=password('123456') where user='root'
如果上面报错的话,可以尝试执行:
alter user 'root'@'localhost' identified by '123456'
默认是可以本地连接的,但是远程(需要安全组开通3306端口)通过工具链接该mysql数据库会报Host ‘xxx.xxx.xxx.xxx’(本地ip) is not allowed to connect to this MySQL server 的错误,需要修改mysql数据库的user:
update user set host = '%' where user = 'root'
还是会报错:access denied for user root@112.126.67.180,继续踩坑,这是因为权限不足,根据网上的解法设置权限:
GRANT ALL PRIVILEGES ON *.* TO 'root'@'%' WITH GRANT OPTION;
依然还是不行,原因是因为客户端的密码解析必须要使用mysql_native_password,重新设置:
alter user 'root'@'%' identified with mysql_native_password by '123456';
刷新:
FLUSH PRIVILEGES;
大功告成!!!!

 浙公网安备 33010602011771号