Flume学习之路 (二)Flume的Source类型
一、概述
官方文档介绍:http://flume.apache.org/FlumeUserGuide.html#flume-sources
二、Flume Sources 描述
2.1 Avro Source
2.1.1 介绍
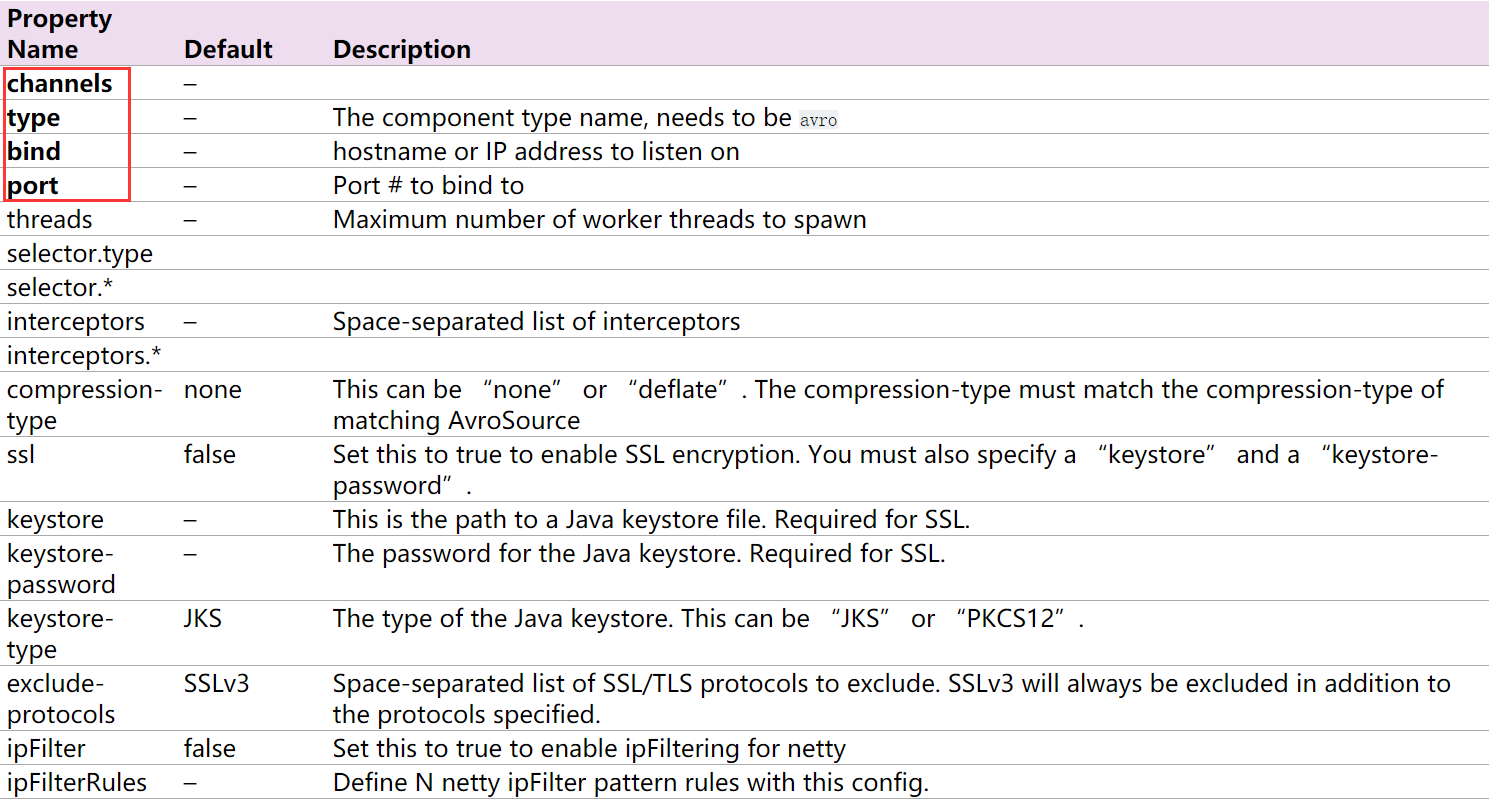
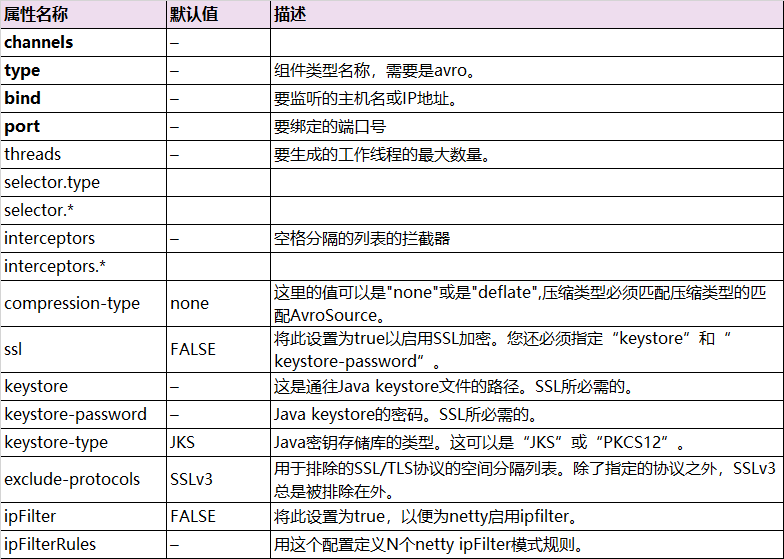
监听Avro端口,从Avro client streams接收events。当与另一个(前一跳)Flume agent内置的Avro Sink配对时,它可以创建分层收集拓扑。字体加粗的属性必须进行设置。
2.1.2 示例
示例一:示例请参考官方文档
示例二:
#配置一个agent,agent的名称可以自定义(如a1)
#指定agent的sources(如s1)、sinks(如k1)、channels(如c1)
#分别指定agent的sources,sinks,channels的名称 名称可以自定义
a1.sources = s1
a1.sinks = k1
a1.channels = c1

#配置source
a1.sources.s1.channels = c1
a1.sources.s1.type = avro
a1.sources.s1.bind = 192.168.123.102
a1.sources.s1.port = 6666

#配置channels
a1.channels.c1.type = memory

#配置sinks
a1.sinks.k1.channel = c1
a1.sinks.k1.type = logger

#为sources和sinks绑定channels
a1.sources.s1.channels = c1
a1.sinks.k1.channel = c1
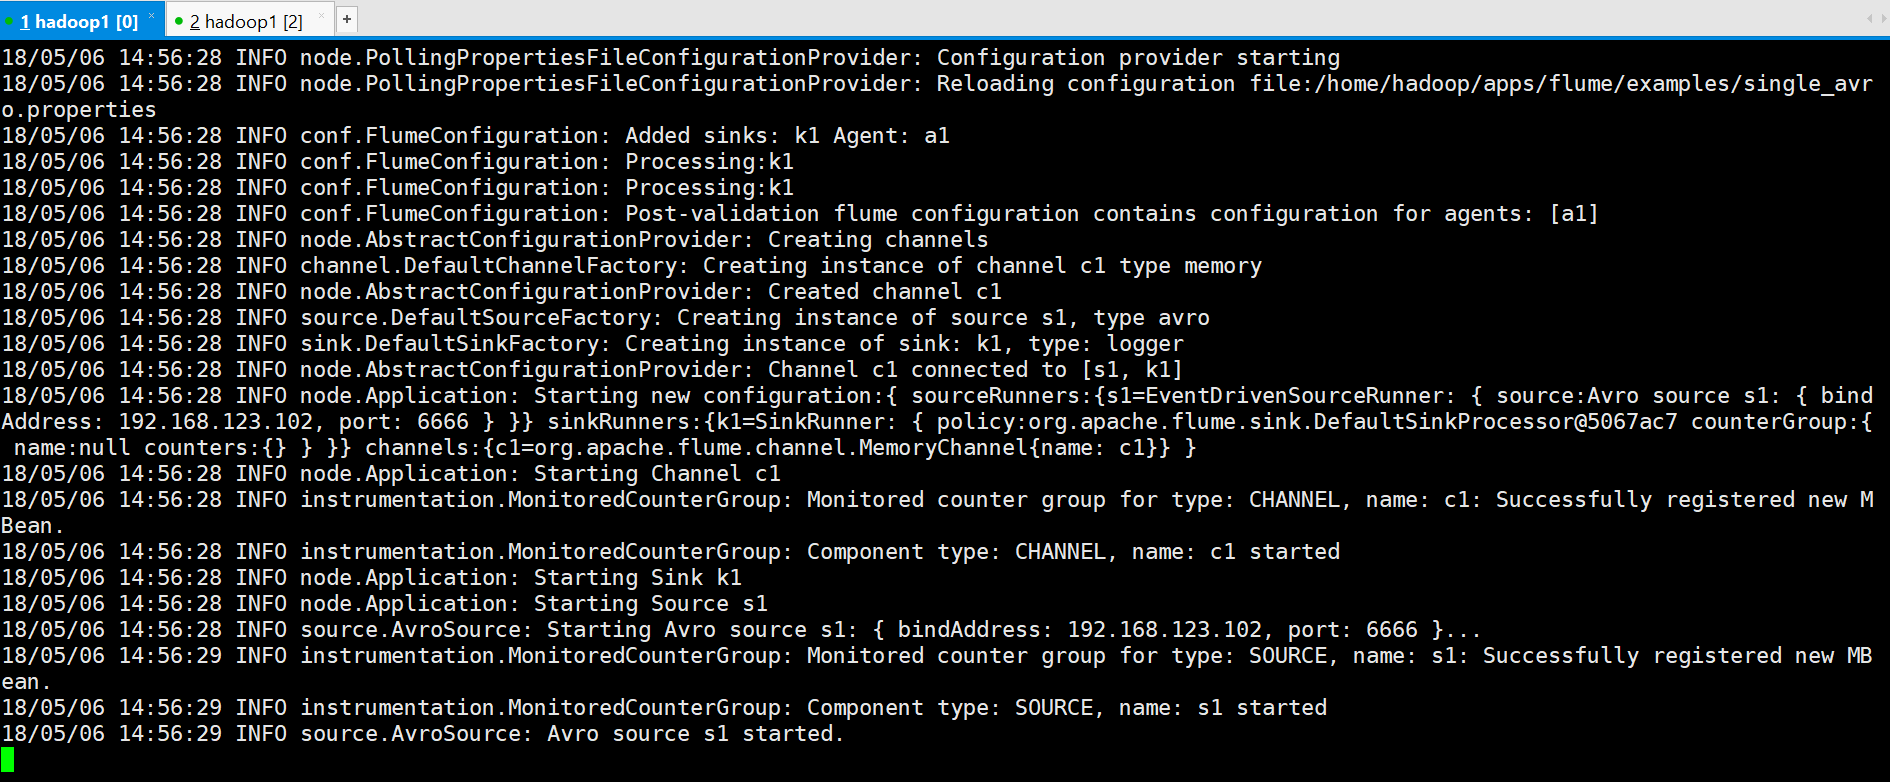
启动flume
[hadoop@hadoop1 ~]$ flume-ng agent --conf conf --conf-file ~/apps/flume/examples/single_avro.properties --name a1 -Dflume.root.logger=DEBUG,console -Dorg.apache.flume.log.printconfig=true -Dorg.apache.flume.log.rawdata=true
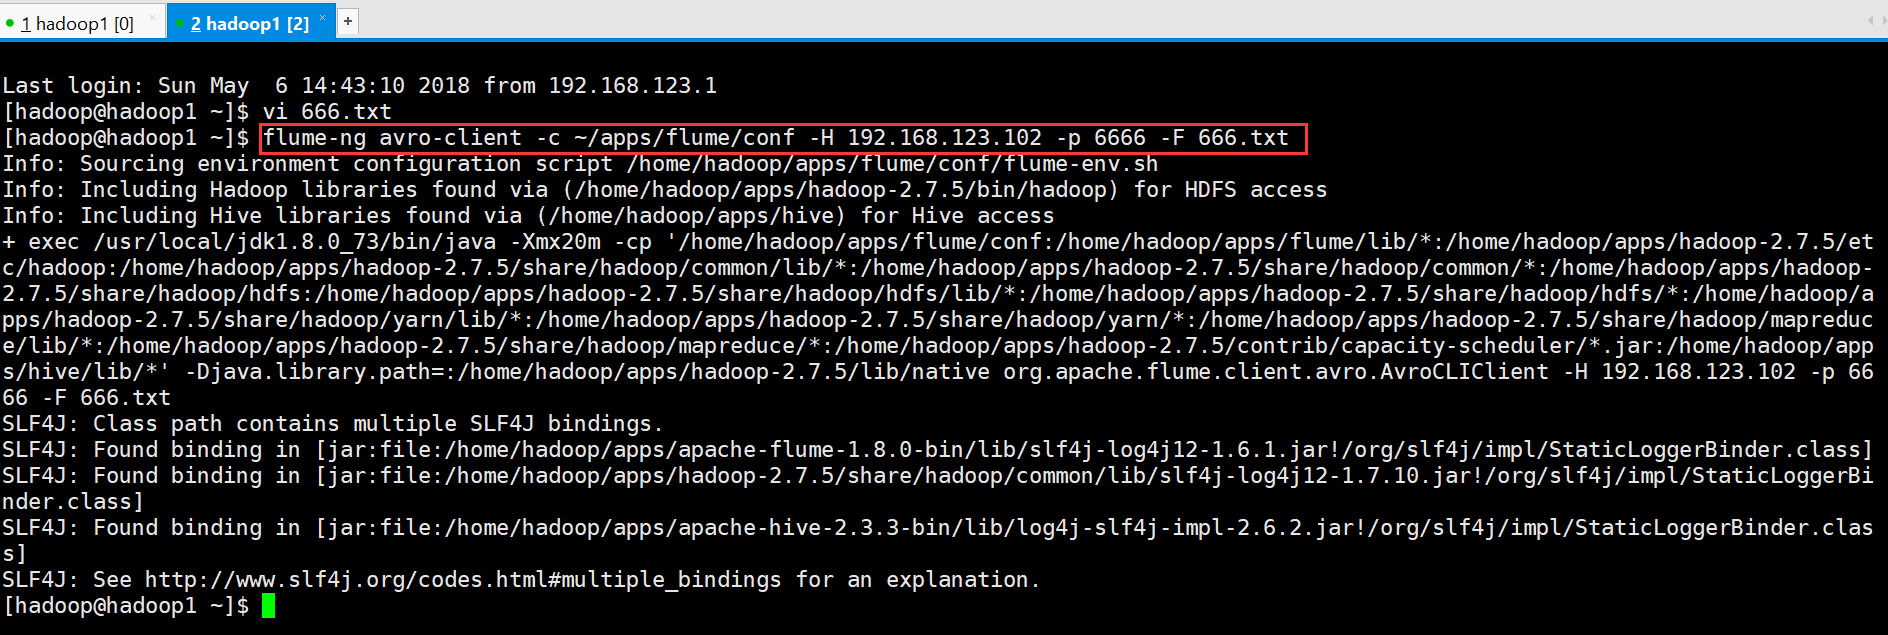
通过flume提供的avro客户端向指定机器指定端口发送日志信息:
[hadoop@hadoop1 ~]$ flume-ng avro-client -c ~/apps/flume/conf -H 192.168.123.102 -p 6666 -F 666.txt
接收到的信息

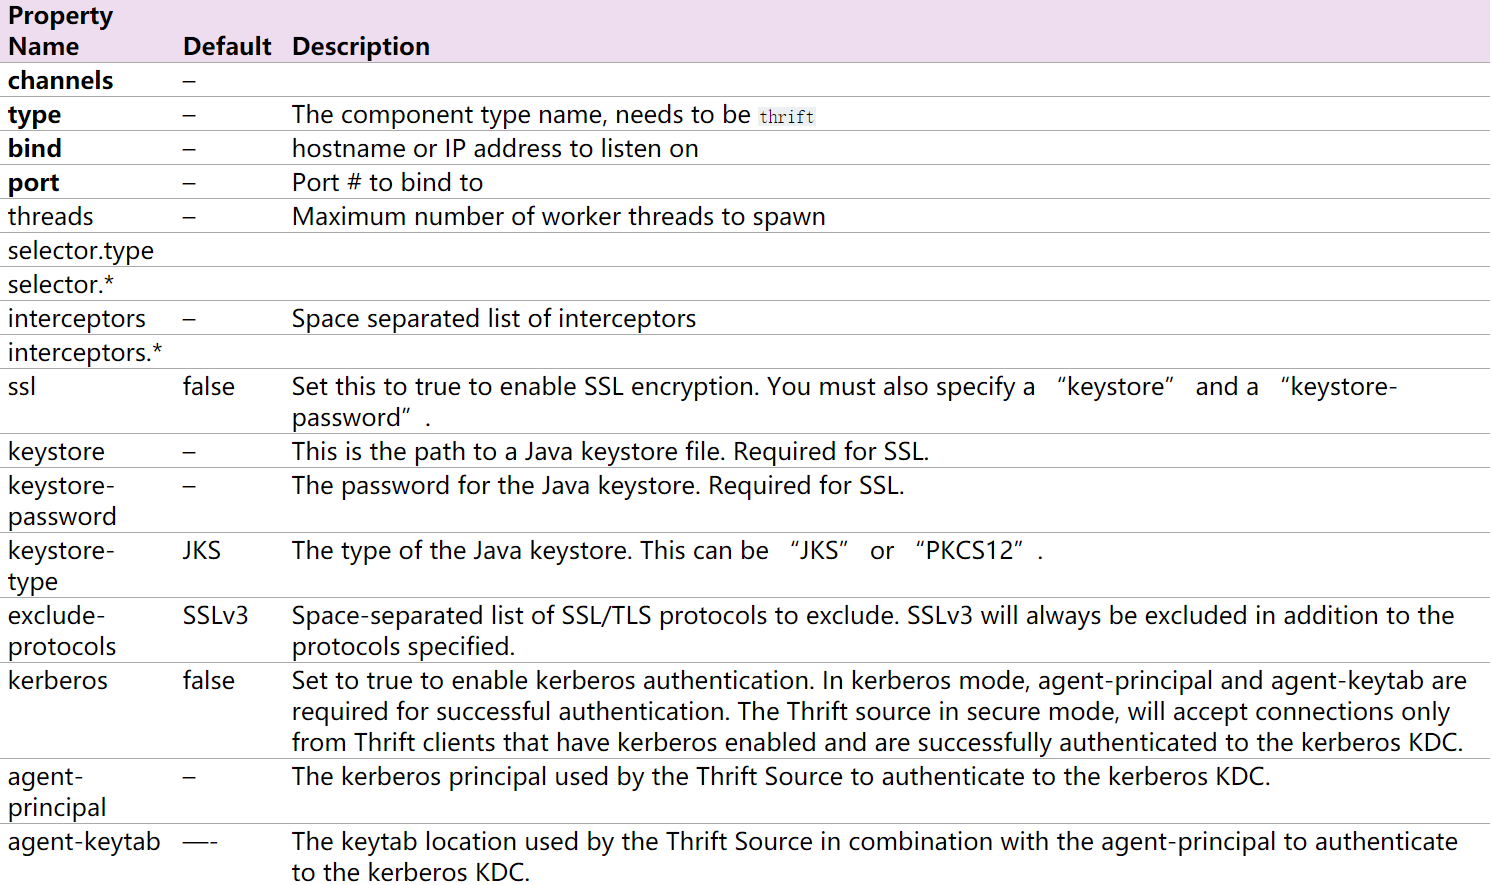
2.2 Thrift Source
2.2.1 介绍
ThriftSource 与Avro Source 基本一致。只要把source的类型改成thrift即可,例如a1.sources.r1.type = thrift,比较简单,不做赘述。
2.3 Exec Source
2.3.1 介绍
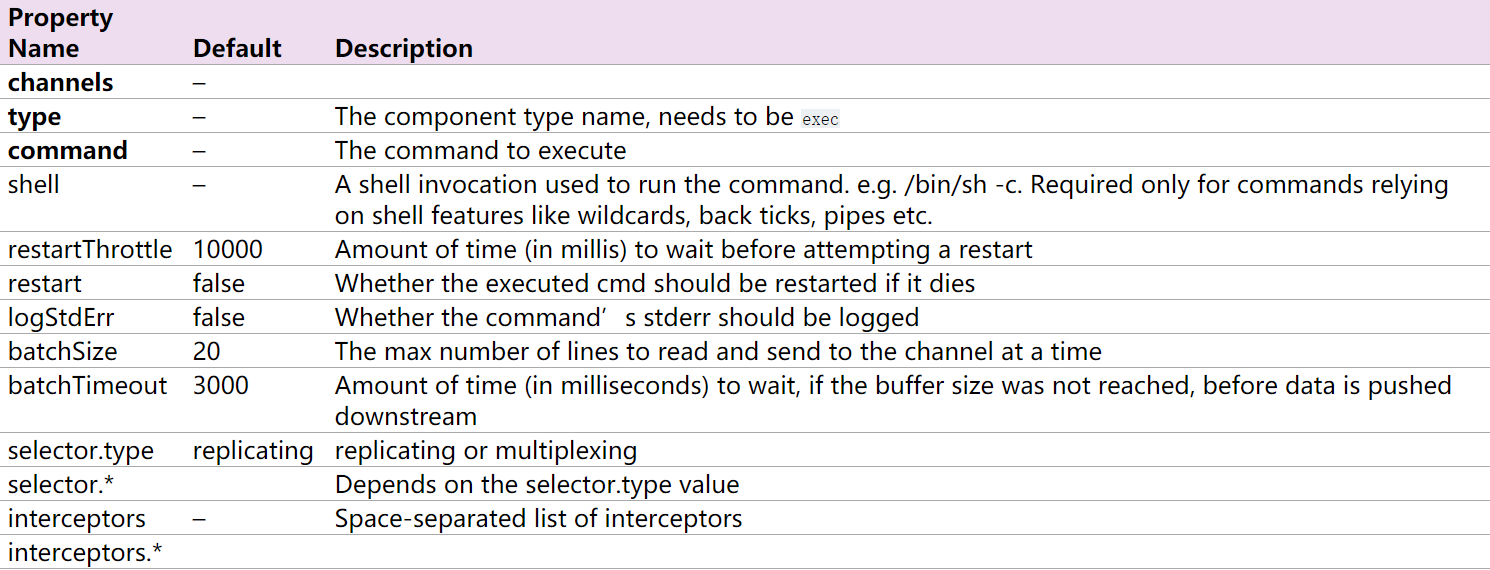
ExecSource的配置就是设定一个Unix(linux)命令,然后通过这个命令不断输出数据。如果进程退出,Exec Source也一起退出,不会产生进一步的数据。
下面是官网给出的source的配置,加粗的参数是必选,描述就不解释了。
2.3.2 示例
#配置文件
#Name the components on this agent
a1.sources= s1
a1.sinks= k1
a1.channels= c1

#配置sources
a1.sources.s1.type = exec
a1.sources.s1.command = tail -F /home/hadoop/logs/test.log
a1.sources.s1.channels = c1

#配置sinks
a1.sinks.k1.type= logger
a1.sinks.k1.channel= c1

#配置channel
a1.channels.c1.type= memory
启动命令
[hadoop@hadoop1 ~]$ flume-ng agent --conf conf --conf-file ~/apps/flume/examples/case_exec.properties --name a1 -Dflume.root.logger=DEBUG,console -Dorg.apache.flume.log.printconfig=true -Dorg.apache.flume.log.rawdata=true
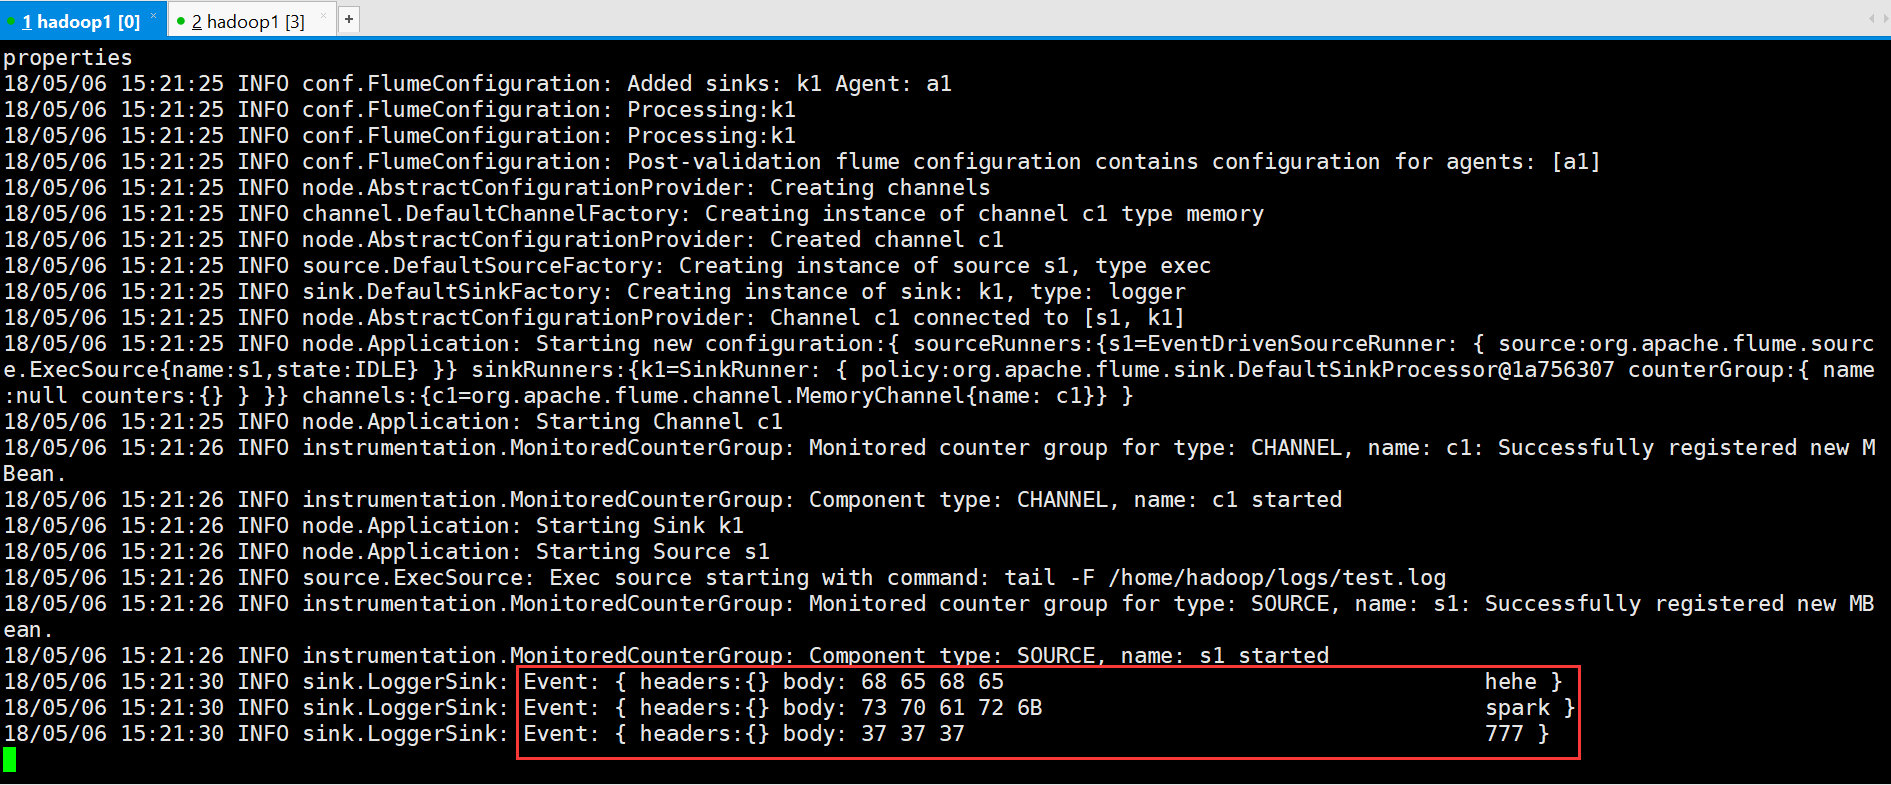
继续往日志里添加数据

接收到的信息

2.4 JMS Source
2.4.1 介绍
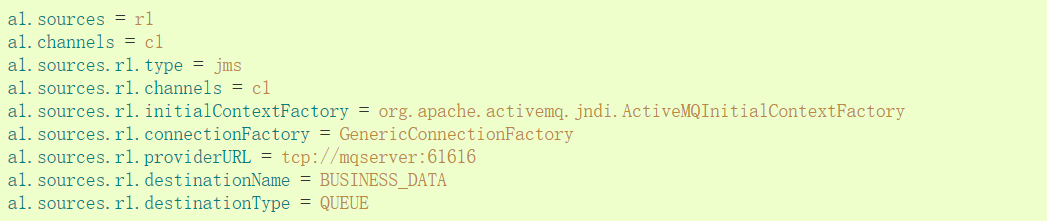
从JMS系统(消息、主题)中读取数据,ActiveMQ已经测试过
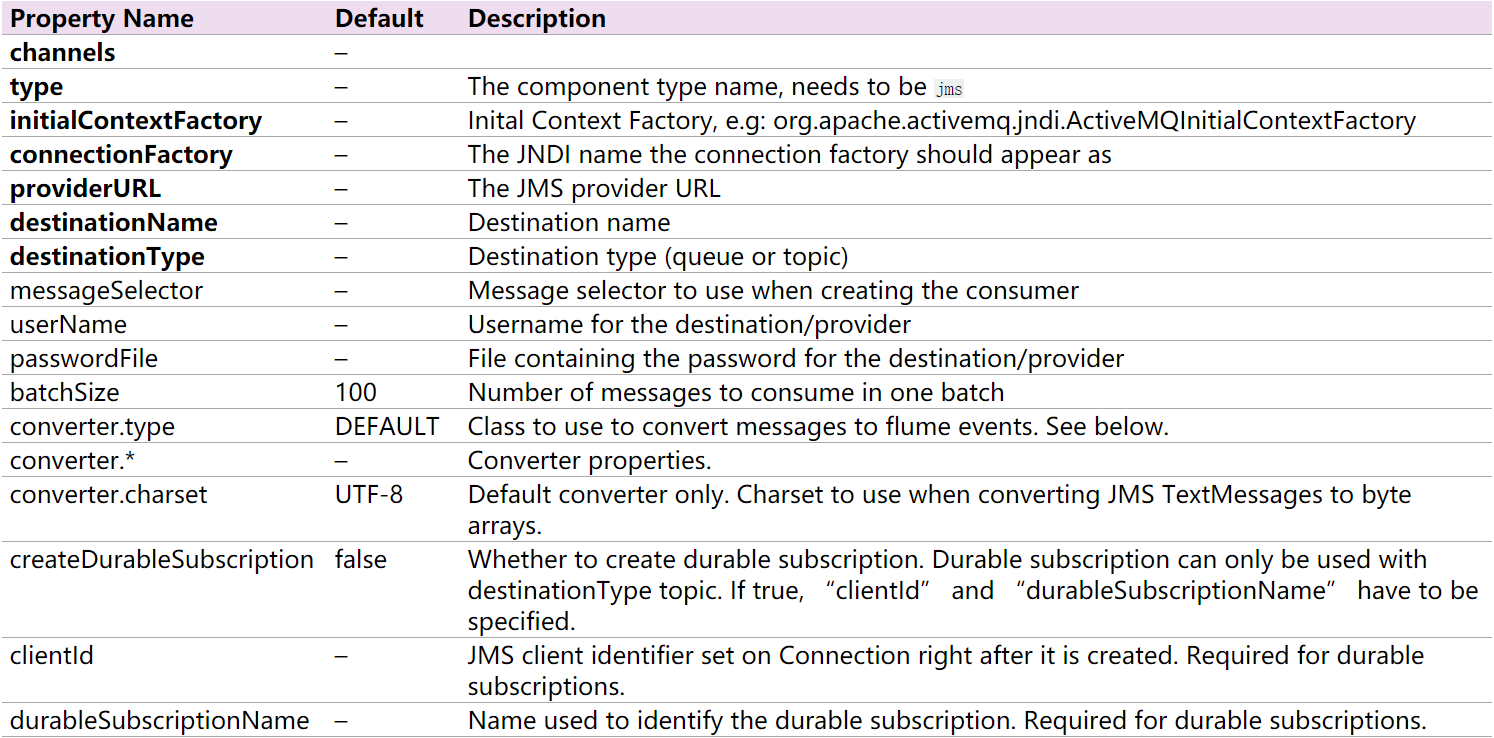
2.4.2 官网示例
2.5 Spooling Directory Source
2.5.1 介绍
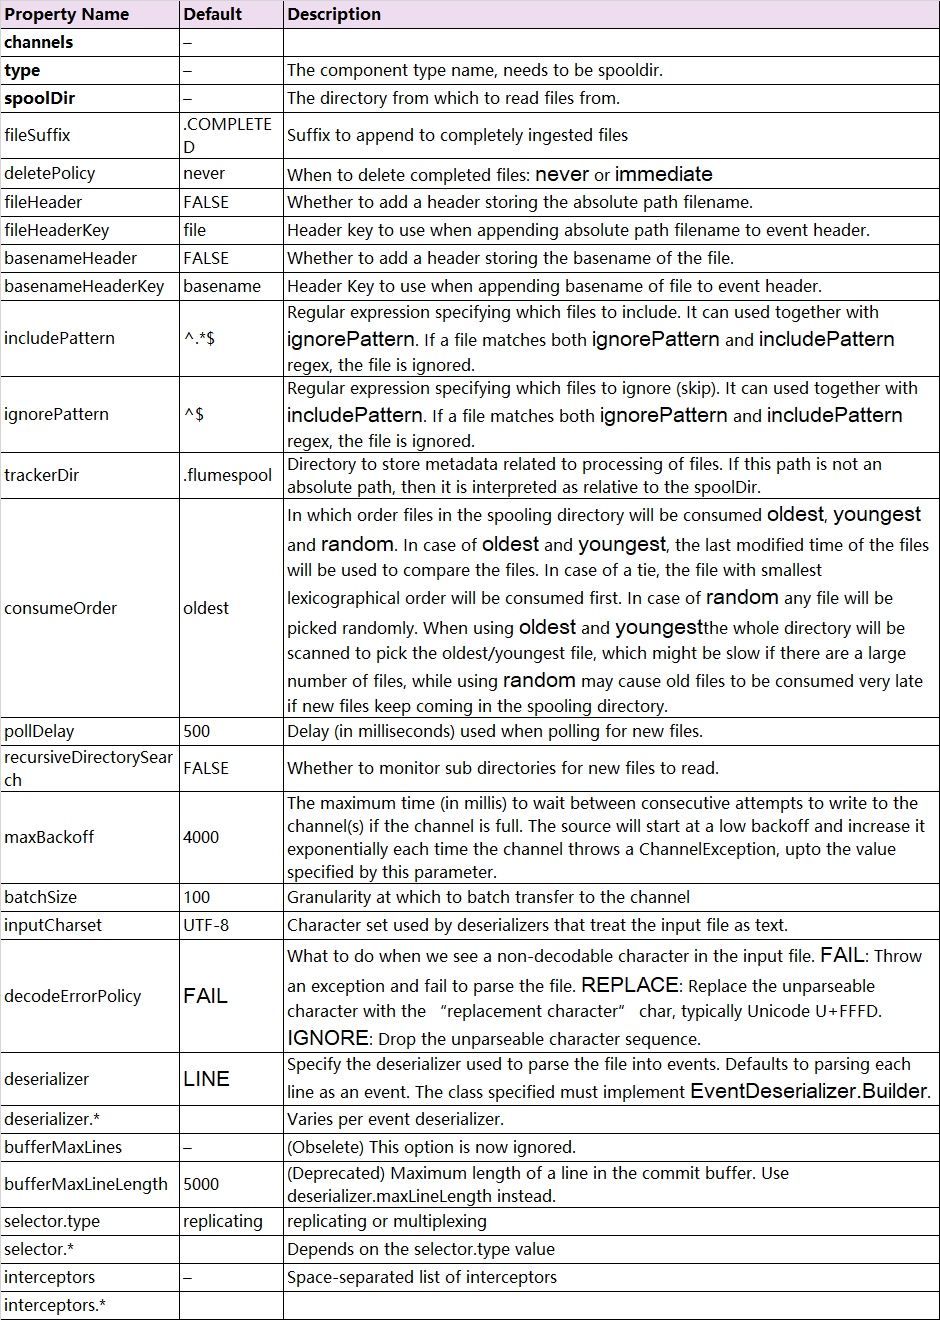
Spooling Directory Source监测配置的目录下新增的文件,并将文件中的数据读取出来。其中,Spool Source有2个注意地方,第一个是拷贝到spool目录下的文件不可以再打开编辑,第二个是spool目录下不可包含相应的子目录。这个主要用途作为对日志的准实时监控。
下面是官网给出的source的配置,加粗的参数是必选。可选项太多,这边就介绍一个fileSuffix,即文件读取后添加的后缀名,这个是可以更改。
2.5.2 示例
a1.sources = s1
a1.sinks = k1
a1.channels = c1

# Describe/configure the source
a1.sources.s1.type =spooldir
a1.sources.s1.spoolDir =/home/hadoop/logs
a1.sources.s1.fileHeader= true
a1.sources.s1.channels =c1

# Describe the sink
a1.sinks.k1.type = logger
a1.sinks.k1.channel = c1

# Use a channel which buffers events inmemory
a1.channels.c1.type = memory
启动命令
[hadoop@hadoop1 ~]$ flume-ng agent --conf conf --conf-file /home/hadoop/apps/flume/examples/case_spool.properties --name a1 -Dflume.root.logger=INFO,console
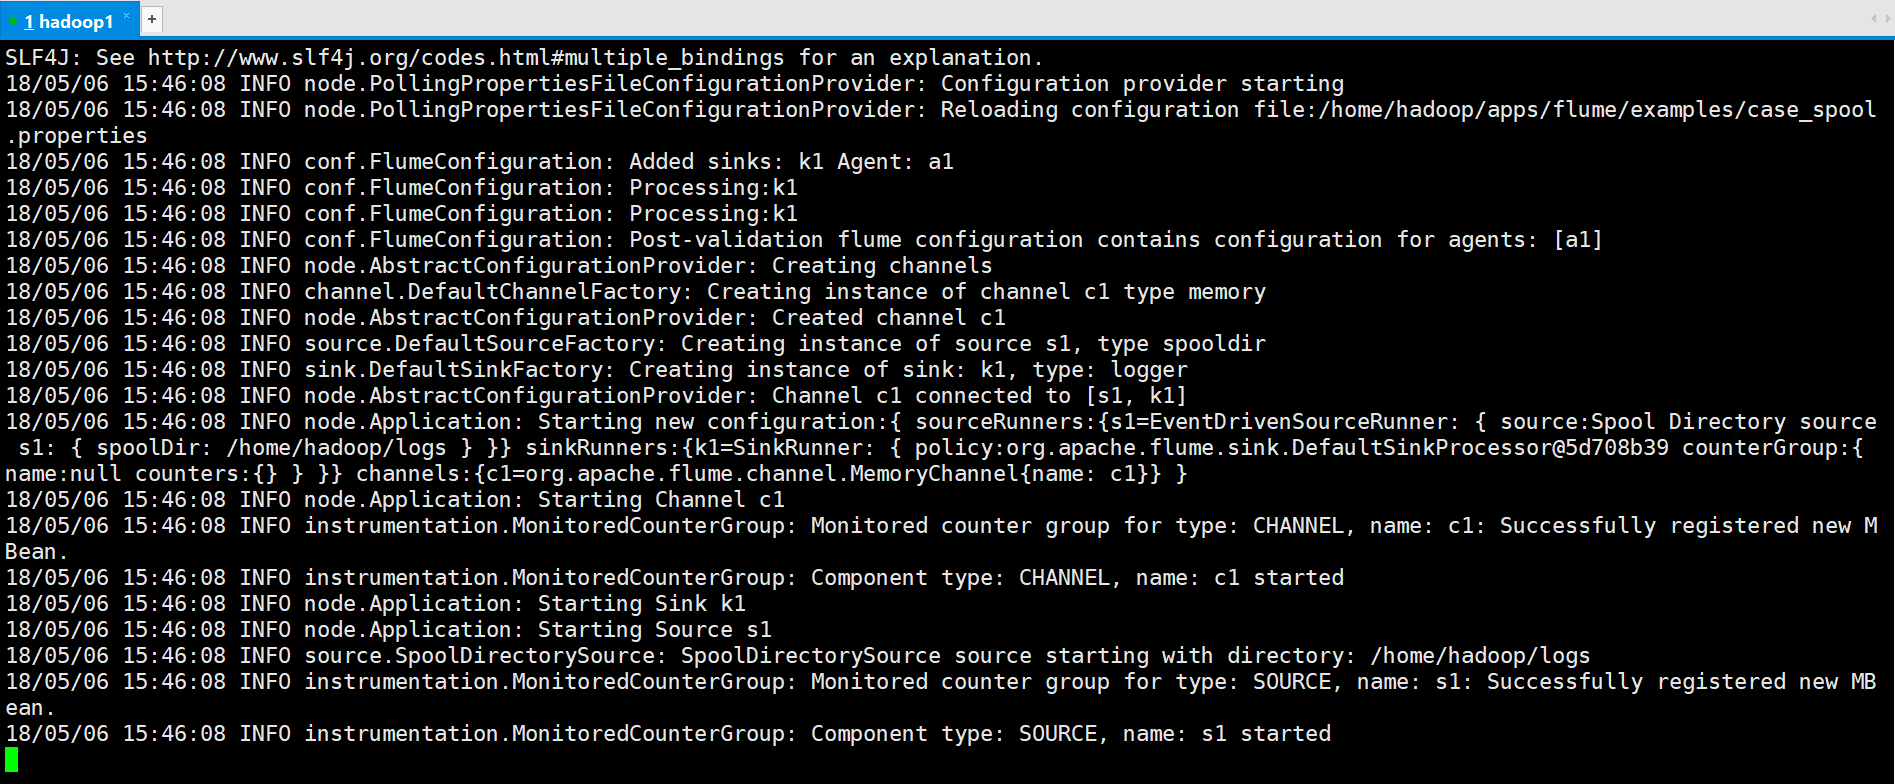
讲123.log移动到logs目录

运行结果

2.6 其他
参考https://blog.csdn.net/looklook5/article/details/40400885

 浙公网安备 33010602011771号