创建自签名证书对Microsoft App进行身份验证
Azure Active Directory(Azure AD)支持两种类型的身份验证:基于Password的身份验证和基于Certificate的身份验证。虽然可以通过Azure Portal或者Microsoft API(Microsoft Graph)创建Password,但长期保护Password不如Certificate安全,建议使用Certificate而不是Password对Microsoft App进行身份验证。
针对测试可以使用自签名公用证书,而不是使用Certificate Authority(CA)签名证书。因此接下来介绍通过Windows PowerShell来创建和导出自签名证书。
Notes: 自签名证书默认不受新任,并且可能难以维护。另外,它们可能使用过时的哈希以及不够可靠的加密套件。为了提高安全性,请购买由知名证书颁发机构签名的证书。
使用PowerShell创建证书时,可以执行加密算法和哈希算法,证书有效期和域名等参数。然后可以根据应用程序的需要,导出带或不带私钥的证书。
启动身份验证的应用程序需要私钥,而确认身份验证的应用程序需要公钥。因此需要通过PowerShell导出私钥(.pfx)和公钥(.cer)文件,公钥上传到Azure Portal,私钥用于身份验证并获取调用Microsoft API(例如 Microsoft Graph)的访问令牌。
自签名证书将具有以下配置:
- 2048位的密钥长度,虽然支持更长的值,但强烈建议你使用2048位大小来实现最佳的安全和性能组合。
- 使用RSA加密算法,Azure AD当前仅支持RSA
- 证书使用SHA256哈希算法进行签名,Azure AD还支持使用SHA384 和SHA512哈希算法记性签名的证书。
- 证书有效期只有一年
- 支持将此证书用于客户端和服务器身份验证。
创建并导出公用证书
1、Run as administrator 方式启动Windows PowerShell,指定Certificate Name,创建自签名证明之后导出。
$certname = "CertificateDemo"

$cert = New-SelfSignedCertificate -Subject "CN=$certname" -CertStoreLocation "C:\" -KeyExportPolicy Exportable  -KeySpec Signature -KeyLength 2048 -KeyAlgorithm RSA -HashAlgorithm SHA256

Export-Certificate -Cert $cert -FilePath "C:\$certname.cer"
2、导出带私钥的证书,注意扩展名为.pfx
$pwd=ConvertTo-SecureString -String "password" -Force -AsPlainText

 Export-PfxCertificate -Cert $cert -FilePath "C:\$certname.pfx" -Password $pwd
3、获取Certificate Thumbprint,这里需要注意的之前创建的证书cer 和加密的pfx thumbprint是一样的
 Get-PfxCertificate -FilePath "C:\CertificateDemo.cer" | Out-File -FilePath "C:\CertifacteDemo.cer.thumbprint.txt"

 Get-PfxCertificate -FilePath "C:\CertificateDemo.pfx" | Out-File -FilePath "C:\CertifacteDemo.pfx.thumbprint.txt"
Thumbprint                                Subject
----------                                -------
4109FE65093D660B22A44B68376C1B7339785DFB  CN=CertificateDemo

Thumbprint                                Subject
----------                                -------
4109FE65093D660B22A44B68376C1B7339785DFB  CN=CertificateDemo
4、获取Certificate· key
[convert]::ToBase64String((Get-Content C:\$certname.cer -Encoding byte)) | Out-File -FilePath "C:\$certname.key.txt"
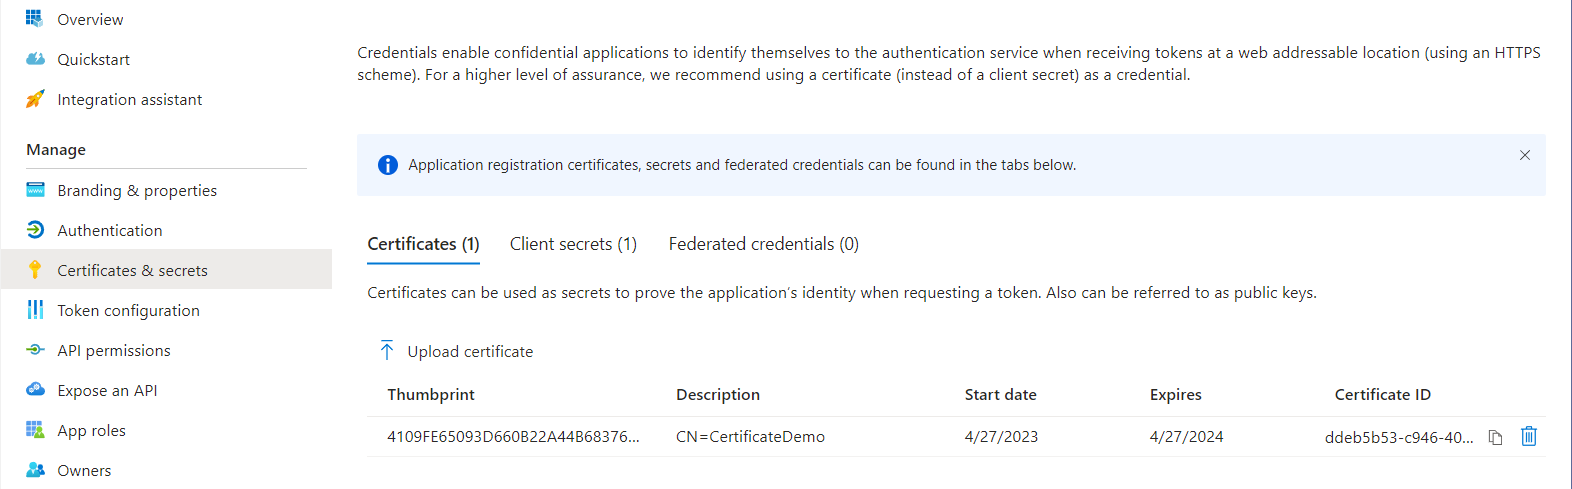
5、将.cer 证书上传到Azure Portal
6、构建GraphServiceClient,通过Manage Nuget Pakage 引入Azure.Idenity及Microsoft.Graph pakages


var scopes = new[] { "https://graph.microsoft.com/.default" };

        // Multi-tenant apps can use "common",
        // single-tenant apps must use the tenant ID from the Azure portal
        var tenantId = "52ecbac1-dbf9-4695-911f-21e0596d4b26";

        // Values from app registration
        var clientId = "d3ec7d22-6169-42eb-af81-31621a5d24d3";
        var clientCertificate = new X509Certificate2("CertificateDemo.pfx", "password");

        // using Azure.Identity;
        var options = new TokenCredentialOptions
        {
            AuthorityHost = AzureAuthorityHosts.AzurePublicCloud
        };

        // https://learn.microsoft.com/dotnet/api/azure.identity.clientcertificatecredential
        var clientCertCredential = new ClientCertificateCredential(
            tenantId, clientId, clientCertificate, options);

        return new GraphServiceClient(clientCertCredential, scopes, " https://graph.microsoft.com/");
    }
Notes:
1)、这里构建X509Certificate2 需要用带有私钥的Certificate .pfx进行身份验证
2)、GraphServiceClient有个可选参数baseUrl,这个程序不会自动判断(至少当前Graph版本不是,不确认之后Microsoft 会不会优化),可以通过openid-configuration 获取 https://login.microsoftonline.com/tenantId/.well-known/openid-configuration
最后构建完GraphServiceClient之后可以Invoke API获取所需objects。
