微信小程序与django后端的图片传输、存储与访问
一、小程序传输图片到后端
使用api:wx.chooseMedia (选择本地照片/拍摄照片), wx.uploadFile (上传文件)
wx.chooseMedia:
https://developers.weixin.qq.com/miniprogram/dev/api/media/video/wx.chooseMedia.html
wx.uploadFile:
https://developers.weixin.qq.com/miniprogram/dev/api/network/upload/wx.uploadFile.html
1. js文件,添加存放图片本地路径的属性
data: {
    filePath:"../../../image/blankimg.jpeg"
 },
2. 选择图片
uploadImg(){
    var that = this
    wx.chooseMedia({
      count:1, //一次性上传个数
      mediaType:['image'], //image or video or both
      sizeType:['compressed'], //是否压缩图片
      success:(res)=>{
        console.log(res.tempFiles)
        that.setData({  //设置filePath
          filePath:res.tempFiles[0].tempFilePath
        })
      }
    })
  },
3. 上传图片,使用选择图片时获取的本地路径。文件传输到后端使用字典格式{name: file,name: file},字典的key值就是在api中设置的'name'。
submit(){
  var that = this
  var time = util.formatTime(new Date())
  var name = time.substring(0,10).replaceAll('/','')+time.substring(11)
  wx.uploadFile({
    filePath: that.data.filePath, //图片本地路径
    name: name, //图片名 作为在后端提取图片文件的key
    url: app.globalData.url + 'english/upload_img', // 后端接口
    formData:{ // 传输一些需要的数据
           name:name,
           id : res.data.task_id
    },
    success:(res)=>{
           console.log(res)
           if(res.statusCode==200){
             wx.showToast({
               title: '创建成功',
             })
             setTimeout(function(){
               wx.navigateTo({
                 url: '../chooseTasker/chooseTasker?task_id='+id,
               })
             },2000)
           }
    }
   })
}
二、django后端接收图片并存储
1. 设置settings.py,在底部添加以下两行。MEDIA_ROOT是项目中保存上传的文件的根目录,MEDIA_URL是要访问存放文件目录时使用的地址。
MEDIA_ROOT = os.path.join(BASE_DIR, 'img')
MEDIA_URL = '/media/'
2. 设置根urls.py。
from django.contrib import admin
from django.urls import path, include
from django.conf.urls.static import static # 添加本行
from django.conf import settings # 添加本行

urlpatterns = [
    path('admin/', admin.site.urls),
    path('english/',include('pp_english_server.urls'))
]+ static(settings.MEDIA_URL, document_root=settings.MEDIA_ROOT) # 将文件路径添加进来
3. models
在django的模型中支持ImageField的存储。一定要记得设置upload_to,这里表示图片将被存放在根目录下的哪一个文件夹中,若没有该文件夹则会自动创建。例如,现在代码中设置的图片存储路径是img/taskimg。
class Task(models.Model):
    id = models.AutoField(primary_key=True)
    create_time = models.DateTimeField(null=True)
    words = models.TextField(validators=[validate_comma_separated_integer_list],max_length=255,null=True)
    due_date = models.DateField(null=True)
    creator = models.CharField(max_length=20)
    title = models.CharField(max_length=255)
    message = models.CharField(max_length=255, null=True)
    image = models.ImageField('表情',upload_to="taskimg",null=True) # 使用ImageField upload_to必不可少
4. 迁移模型
每次更改models都要进行迁移
在终端进入项目所在目录,依次执行以下命令
python manage.py makemigrations
python manage.py migrate
5. 接收图片接口,django接收到的文件将是InMemoryUploadedFile格式,此格式可以直接存储到ImageField中。
@api_view(['POST'])
def upload_img(request):
    if request.method == 'POST':print(request.FILES)
        id = request.data['id']
        name = request.data['name'] # 提取文件的key
        img = request.FILES[name] # 提取文件本身
        task = Task.objects.filter(id=id)[0]
        task.image.save(name,img) # 将文件存储到数据库中  格式:model.column.save(name,file)
        if Task.objects.filter(id=id)[0].image is not None:
            return Response('success')
        return Response()
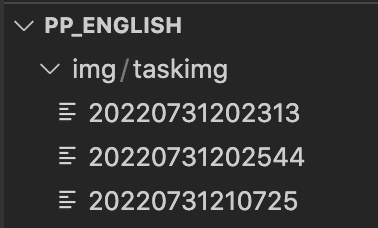
触发该接口,可以发现图片成功存储在项目根目录下img的taskimg文件夹中
数据库中也存入了图片的名字

三、小程序端使用已上传的图片
1. 后端接口,将图片的根目录访问url和文件名传给前端,用于组合成图片的网络地址
@api_view(['POST'])
def get_task_content(request):
    if request.method == 'POST':
        task_id = request.data['taskId']
        task = Task.objects.filter(id=task_id)[0]
        res={}
        res['image']=str(task.image) # 取出存储在数据库中的图片名,转为字符串格式
        res['root'] = 'media'  # 图片根目录的访问地址
        res['words'] = eval(task.words)
        words = eval(task.words)
        res['title'] = task.title
        return Response(res)
2. 在js文件的data中,添加存储图片网络地址的属性
data: {
    image:""
  },
3. 前端请求中,在数据返回后组合成图片的网络地址(服务器地址+图片根目录访问url+图片名称)
onLoad(){
  var that = this
  wx.request({
      url: app.globalData.url + 'english/get_task_content',
      method:'POST',
      data:{
        taskId : taskId
      },
      success:(res)=>{
        console.log(res)
        that.setData({
          title:res.data.title,
          message:res.data.message,
          words:res.data.words,
          image:app.globalData.url + res.data.root + '/' + String(res.data.image) // 组合成图片的网络地址
        })
      }
    })
}
4. 在wxml中绑定this.data.image。可以使用mode="widthFix"设置图片宽度固定,图片高度将随图片宽度等比例适应。
<image mode="widthFix" src="{{image}}"></image>
此时已实现微信小程序与django后端之间的图片传输、存储、访问。

 浙公网安备 33010602011771号