【平台开发】— 8.前端-从[项目管理]来看vue
现在要来实现【项目管理】这个功能了。
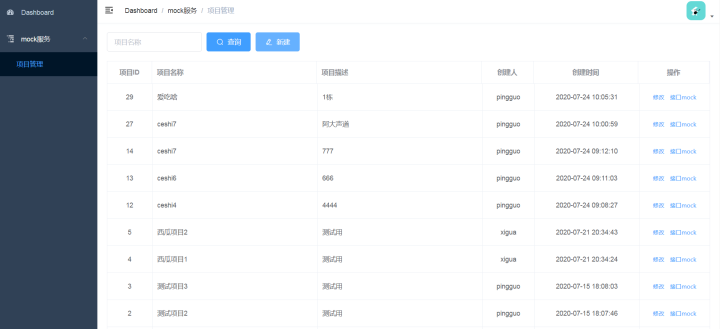
想象一下页面,元素大概就是:列表页、查询框、新增按钮、编辑、mock入口按钮。
那先来实现列表和新建,也顺带着整理一下用到的vue相关指令知识。
一、后端
后端就不再详说了,跟前面差不多的套路。
在ProjectController 里增加新的接口/list 。这里是遵循了restful 风格 ,新增的话就换成post方法。
暂时没有真正实现用户权限,所以统一写死一个创建者setCreateUser("pingguo")。
@RestControlle
@RequestMapping(value = "/project")
public class ProjectController {

    @Autowired
    ProjectService projectService;

    @GetMapping("/list")
    public Result projectList() throws Exception {
        List<Project> projectList = projectService.getProjectList();
        return Result.success(projectList);
    }

    @PostMapping("/list")
    public Object add(@RequestBody Project project) throws Exception {
        project.setCreateTime(new Date());
        project.setUid(1);
        project.setCreateUser("pingguo");
        projectService.add(project);
        return Result.success(project);
    }
}
调用接口,测试OK。

二、前端部分
重点在这了(ps:列表暂时是还没做分页的,后面会单独补上分页)。
前端代码篇幅较大,附上源码地址:地址
页面介绍
前端vue文件里其实最重要的就是2个部分:
<template>...</template>:网页内容<script>...</script>: 交互
以项目列表为例,在<script>...</script>中,首先要导入我们要使用到的api模块。
import { getProjectList, createProject } from '@/api/project'
当然了,在项目的api模块下要先写好这个2个组件,这里在之前登录部分中也讲过。
import request from '@/utils/request'

export function getProjectList(params) {
  return request({
    url: '/my_platform/project/list',
    method: 'get',
    params
  })
}

export function createProject(data) {
  return request({
    url: '/my_platform/project/list',
    method: 'post',
    data
  })
}
1. data()
export default {} 定义了这个模块被导出,所以其他模块可以导入这个模块去使用。
而data()这个方法中,定义了这个组件返回的变量。以我目前的理解,<template>...</template> 中需要用到的变量,都可以在这里定义。
    data() {
      return {
        list: null,
        listLoading: true,
        dialogStatus: undefined,
        dialogUpdateVisible: false,
        createInfo: {
          projectName: '',
          description: ''
        }
      }
    }
比如这里的list,就是用来存放后端返回的列表数据,然后跟el-table进行绑定。
    <el-button class="filter-item" style="margin-left: 10px;" type="primary" icon="el-icon-edit"
                 @click="projectCreate(createInfo)">
        新建
      </el-button>
    </div>
    <div style="margin-top:20px;"></div>
    <el-table
      v-loading="listLoading"
      :data="list"  // 看这里,看这里,看这里
      element-loading-text="Loading"
      border
      fit
      highlight-current-row>
      <el-table-column align="center" label="项目ID" width="95">
        <template slot-scope="scope">
          {{ scope.row.id }} //每一列要展示的数据字段,id
        </template>
      </el-table-column>
      <el-table-column label="项目名称">
        <template slot-scope="scope">
          {{ scope.row.projectName }} //每一列要展示的数据字段,projectName
        </template>
      </el-table-column>
2. created()
它的作用就是初始化数据。比如这里的获取项目列表,我肯定是要先拿到数据后,才在html进行渲染出来。
所以在这里就调用了请求项目列表的方法projectGet()。
    created() {
      this.projectGet()
    },
    methods: {
      projectGet() { //调用后端接口,获取项目列表
        this.listLoading = true
        getProjectList().then(response => {
          this.list = response.data
          this.listLoading = false
        })
      },
3. methods
这里就是写各种方法的地方了,比如我这个组件需要可以查询后端列表接口,还要调用创建项目的接口,
所以在这里就可以写上我们要用的2个方法。
    methods: {
      projectGet() { //调用后端接口,获取项目列表
        this.listLoading = true
        getProjectList().then(response => {
          this.list = response.data
          this.listLoading = false
        })
      },
      requestInfo() {
          this.createInfo.projectName = '',
          this.createInfo.description = ''
      },
      projectCreate() {
        this.requestInfo()
        this.dialogStatus = 'create'
        this.dialogUpdateVisible = true
      },
      handleCreate() { //调用后端接口,创建项目
        this.dialogStatus = 'create'
        this.dialogUpdateVisible = true
        createProject(this.createInfo).then(() => {
          this.dialogUpdateVisible = false
          this.projectGet()
        })
      }
vue指令
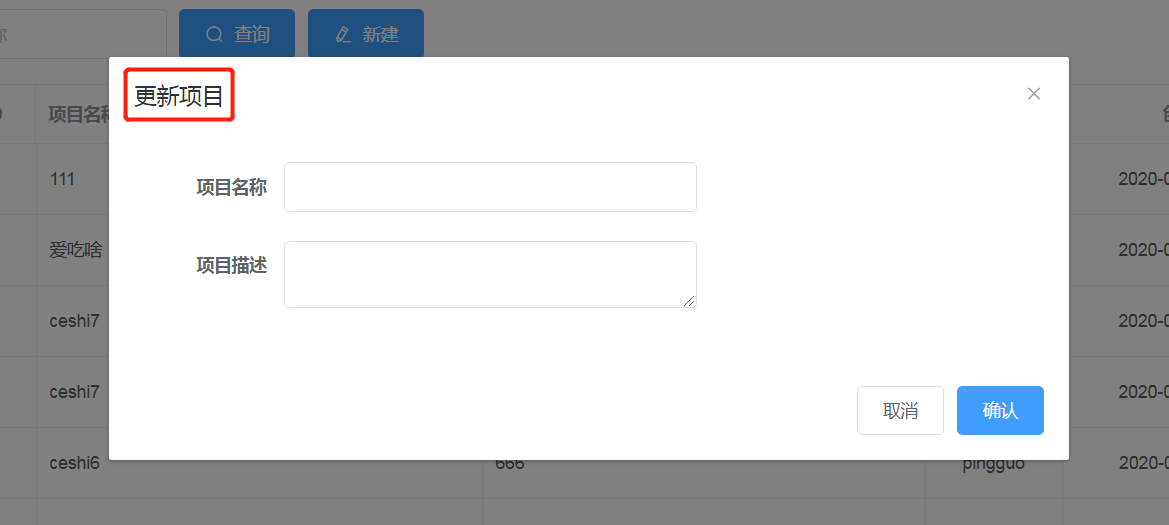
前端代码里可以看的很多的:、@,以新增项目页面的代码为例:
    <el-dialog :visible.sync="dialogUpdateVisible" :title="dialogStatus==='create'?'添加项目':'更新项目'" >
      <el-form ref="dataForm" :model="createInfo" label-position="left" label-width="70px" style="width: 400px; margin-left:50px;">
        <el-form-item label="项目名称" prop="title">
          <el-input v-model="createInfo.projectName" />
        </el-form-item>
        <el-form-item label="项目描述">
          <el-input v-model="createInfo.description" :autosize="{ minRows: 2, maxRows: 4}" type="textarea" />
        </el-form-item>
      </el-form>
      <div slot="footer" class="dialog-footer">
        <el-button @click="dialogUpdateVisible = false">
          取消
        </el-button>
        <el-button type="primary" @click="dialogStatus==='create'?handleCreate():updateData()">
          确认
        </el-button>
      </div>
    </el-dialog>
1. v-bind
缩写就是:, 比如这里的title属性就是跟 dialogStatus进行了绑定, dialogStatus是定义在了data里的返回字段。
:title="dialogStatus==='create'?'添加项目':'更新项目'"
这里的目的就是当 dialogStatus是"create" 时,页面标题显示添加项目,否则就是显示更新项目。

2. v-on
缩写就是 @,用于绑定HTML事件。还是看上面的创建页面代码:
        <el-button type="primary" @click="dialogStatus==='create'?handleCreate():updateData()">
          确认
        </el-button>
这里就是绑定了一个click事件,当 点击确定按钮就会触发。当dialogStatus为 "create",调用 handleCreate()方法创建项目。
3. {
就是模板语法了,可以放很多东西:表达式、字符串、正则等等。
这里就是用来展示每一行展示的字段数据,比如创建时间。
      <el-table-column label="创建时间" width="220" align="center">
        <template slot-scope="scope">
          {{ scope.row.createTime }}
        </template>
最后,列表和新增的效果就是酱紫。


 浙公网安备 33010602011771号