Ubuntu16.04常用C++库安装及环境配置
1. 常用非线性求解库Ceres
#===========================================================================================
# Ceres Solver install
#============================================================================================
# Dependencies: CMake, google-glog, gflags, BLAS & LAPACK, Eigen3, SuiteSparse and CXSparse.
sudo apt install cmake
sudo apt install libgoogle-glog-dev
sudo apt install libatlas-base-dev liblapack
sudo apt install libeigen3-dev
sudo apt install libsuitesparse-dev
# cmake and make git clone https://ceres-solver.googlesource.com/ceres-solver cd ceres-solver git checkout $(git describe --tags) # Checkout the latest release mkdir build && cd build cmake .. -DBUILD_TESTING=OFF -DBUILD_EXAMPLES=OFF make sudo make install
2. 常用C++扩展库Boost
2.1 以 boost-1-58-0 为例,安装到系统默认路径
#============================================================================================
# Boost install
#============================================================================================
# remove existed boost
rm -f /usr/lib/libboost*
rm -fr 'find / -name libboost*'
# download Boost by wget
sudo apt install wget
wget https://dl.bintray.com/boostorg/release/1.58.0/source/boost_1_58_0.tar.gz
tar -zxvf boost_1_58_0.tar.gz
cd boost_1_58_0
# install dependencies
sudo apt update
sudo apt install build-essential g++ python-dev autotools-dev libicu-dev libbz2-dev libboost-all-dev
# build environment and compile
./bootstrap.sh && ./b2
# install
sudo ./b2 install
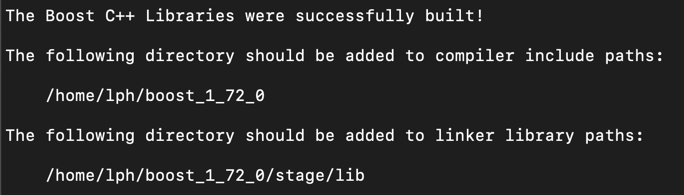
可能会出现下面的提示,构建工程的时候注意一下就是了。
# //////////////////////////////////////////////////////////////////////////////////////////////////////////
# The following dir should be added to compiler include paths: ~/Downloads/mvs_project/boost_1_58_0
# The following dir should be added to linker library paths: ~/Downloads/mvs_project/boost_1_58_0/stage/lib
# //////////////////////////////////////////////////////////////////////////////////////////////////////////
2.2 如果不想或者没有权限安装到系统路径,可以自行指定安装路径,以boost-1-72-0为例
#==============================================================================
# Boost 1.72.0 Install
#==============================================================================
wget https://dl.bintray.com/boostorg/release/1.72.0/source/boost_1_72_0.tar.gz
tar xvf boost_1_72_0.tar.gz

cd boost_1_72_0

./bootstrap.sh --with-libraries=all --with-toolset=gcc

./b2 toolset=gcc

mkdir boost-bin

./b2 install --prefix=./boost-bin
与上面类似也会得到如下提示
如果出现如下的提示,表示所需文件没有下载完全
cv:~/3rdparty/boost$ ./bootstrap.sh --with-libraries=all --with-toolset=gcc --prefix=./boost-bin
Building Boost.Build engine with toolset gcc...
Failed to build Boost.Build build engine, Consult 'bootstrap.log' for more details
解决方法也很简单,将相应的文件夹更新一下
cv:~/3rdparty/boost$ git submodule update --init --recursive
3. 常用视觉计算处理库OpenCV
#============================================================================================
# OpenCV Install
#============================================================================================
# refresh and upgrade and pre-installed packages/libraries:
sudo apt update
# install some developer tools
sudo apt install build-essential cmake pkg-config

# OpenCV needs to be able to load various image file formats from disk such as JPEG, PNG, TIFF, etc. In order to load these images from disk, OpenCV actually calls other image I/O libraries that actually facilitate the loading and decoding process.
sudo apt install libjpeg8-dev libtiff5-dev libjasper-dev libpng12-dev

# Use the following commands to install packages used to process video streams and access frames from cameras
sudo apt install libavcodec-dev libavformat-dev libswscale-dev libv4l-dev libxvidcore-dev libx264-dev

# OpenCV ships out-of-the-box with a very limited set of GUI tools, which allow you to debug your code and build very simple applications. The “highgui” module relies on the GTK library
sudo apt install libgtk-3-dev

# install libraries that are used to optimize various functionalities inside OpenCV, such as matrix operations:
sudo apt install libatlas-base-dev gfortran

# installing the Python development headers and libraries for both Python 2.7 and Python 3.5
sudo apt install python2.7-dev python3.5-dev
sudo pip install numpy && sudo pip3 install numpy
安装好依赖项之后进行编译安装
#============================================================================================
# config cmake
#============================================================================================
mkdir build && cd build

cmake -DCMAKE_BUILD_TYPE=RELEASE -DCMAKE_INSTALL_PREFIX=/usr/local -DWITH_GTK_3_X=ON -DWITH_TBB=OFF -DWITH_V4L=ON ..

make

sudo make install
在cmake步骤,如果需要使用opencv_contrib里面的功能,需要加上下面的命令
#============================================================================================
# if opencv_contrib is needed then add the following commands when cmake
#============================================================================================
-D OPENCV_EXTRA_MODULES_PATH=opencv_contrib_path/modules \
-D BUILD_EXAMPLES=ON \
-D INSTALL_PYTHON_EXAMPLES=ON \
-D INSTALL_C_EXAMPLES=OFF
如果卡在ippicv下载的地方,可以手动下载配置路径,重新cmake(附下载地址:OpenCV3.4.5对应的是ippicv-2019)
# ippicv_2019_lnx_inte164_general_20180723.tgz
# save the tarball as you want, and then change the configuration
        "opencv-3.4.5/3rdparty/ippicv/ippicv.cmake"
# change row 47 from the following
        "https://raw.githubusercontent.com/opencv/opencv_3rdparty/${IPPICV_COMMIT}ippicv/"
# to your saved path
        "file:~/Downloads/"
安装完成后需要进行如下的配置,以保证正常调用
cd /etc/ld.so.conf.d
sudo vim opencv.conf
# add in end of the file
        "/usr/local/lib" and then update

sudo ldconfig
4. 李代数库Sophus
#============================================================================================
# Install Sophus
#============================================================================================
sudo apt install git -y

git clone https://github.com/strasdat/Sophus.git

cd Sophus

git checkout a621ff

# Compile and install
mkdir build && cd build

cmake ..

make

sudo make install
5. 线性和非线性方程组求解库g2o,类似于Ceres
#============================================================================================
# Ubuntu Install g2o
#============================================================================================
# Dependencies
sudo apt install libqt4-dev qt4-cmake libqglviewer.dev libsuitesparse-dev libcxsparse3.1.2 libcholmod-dev -y

# Compile and install
git clone https://github.com/RainerKuemmerle/g2o

cd g2o

mkdir build && cd build

cmake ..

make

sudo make install
6. 可视化依赖库 OpenGL 及其拓展 glew
#============================================================================================
# Ubuntu install opengl
#============================================================================================
sudo apt install build-essential libgl1-mesa-dev

sudo apt install freeglut3-dev libglew-dev libsdl2-dev libsdl2-image-dev libglm-dev libfreetype6-dev

#============================================================================================
# Ubuntu install glew
#============================================================================================
apt-cache search glew

sudo apt install libglew-dbg libglew-dev libglew1.10 libglewmx-dbg libglewmx-dev libglewmx1.10 glew-utils

sudo apt install libxmu-dev
如果在C++工程编译链接时出现下面的错误,解决方案如下
#============================================================================================
# Problem
# CMake Error: The following variables are used in this project, but they are set to NOTFOUND.
# Please set them or make sure they are set and tested correctly in the CMake files:
# GLUT_Xmu_LIBRARY (ADVANCED)
# linked by target "openglsupport" in directory {$PATH}

# -- Configuring incomplete, errors occurred!
#============================================================================================
# Solution
sudo apt install libxmu-dev
7. C++开源线性代数库 Eigen
该库提供了快速的有关矩阵的线性代数运算,包括解方程等功能。此库不同于其他库的特殊之处在于,它是一个纯用头文件搭建起来的库,因此在使用中没有.so或.a 之类的二进制文件,只需引入Eigen的头文件即可。
7.1 直接apt命令安装
#============================================================================================
# Ubuntu Insall Eigen
#============================================================================================
# Default install path is /usr/include/eigen3
sudo apt install libeigen3-dev
当需要编译包含 Eigen 头文件的项目时,需要在 CMakeLists.txt 中指定 Eigen 的头文件目录。
#============================================================================================
# CMakeLists.txt
#============================================================================================
# add include headers
include_directories( "/usr/local/eigen3" )
7.2 源码编译安装到指定路径下
git clone https://gitlab.com/libeigen/eigen.git --branch 3.3

cd eigen

mkdir eigen_bin && mkdir eigen_build && cd eigen_build

cmake -DCMAKE_INSTALL_PREFIX=../eigen_bin ..

make && make install
此种情况下如果要使用编译好的Eigen库,可以在CMakeLists.txt中通过find_package来搜索
#============================================================================================
# CMakeLists.txt
#============================================================================================

set(Eigen3_DIR /path/to/eigen/eigen-bin/share/eigen3/cmake)

find_package(Eigen3 REQUIRED)

include_directories( ${Eigen3_INCLUDE_DIRS} )
8. 安装 GFLAGS 命令行参数解析库和 GLOG 日志库
8.1 gflags
#==============================================================================
# Install Gflags
#==============================================================================
git clone https://github.com/gflags/gflags.git

cd gflags && git checkout 2.2.2 && git checkout -b 2.2.2

mkdir gflags-build gflags-bin && cd gflags-build

cmake -DCMAKE_INSTALL_PREFIX=../gflags-bin -DBUILD_SHARED_LIBS=ON ..

make && make install
8.2 glog
#==============================================================================
# Install Glog
#==============================================================================
git clone https://github.com/google/glog.git

cd glog && git checkout 0.4.0 && git checkout -b 0.4.0

mkdir glog-bin glog-build && cd glog-build

cmake -DCMAKE_INSTALL_PREFIX=../glog-bin ..

make && make install
附:另外如果在ldconfig时出现下面的错误,按如下方法解决
#============================================================================================
# Problem /sbin/ldconfig.real: /usr/local/cuda-9.0/lib64/libcudnn.so.7 is not a symbolic link
#============================================================================================
# Solution: Create the new link manually
ls -lh /usr/local/cuda-9.0/lib64/libcudnn.so.7
sudo ln -sf /usr/local/cuda-9.0/lib64/libcudnn.so.7.1.4 /usr/local/cuda-9.0/lib64/libcudnn.so.7

 浙公网安备 33010602011771号