CNN笔记与Pytorch实现
卷积
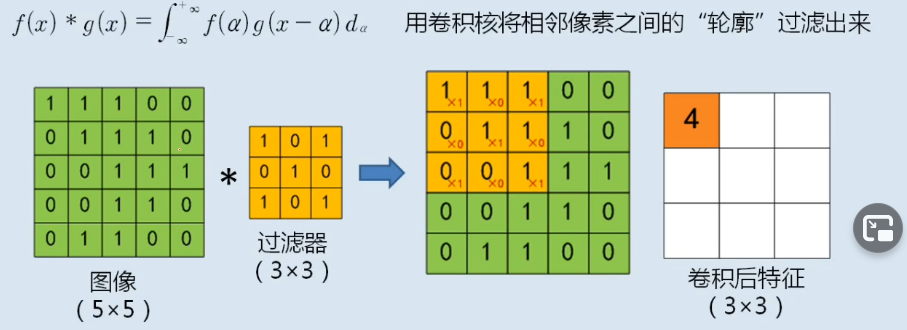
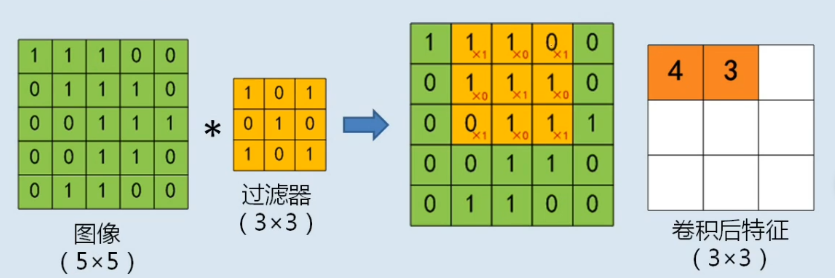
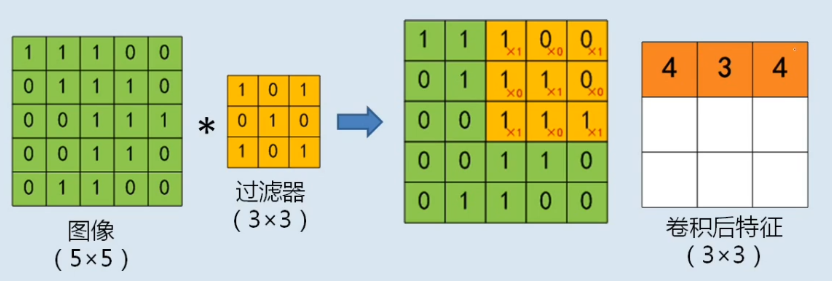
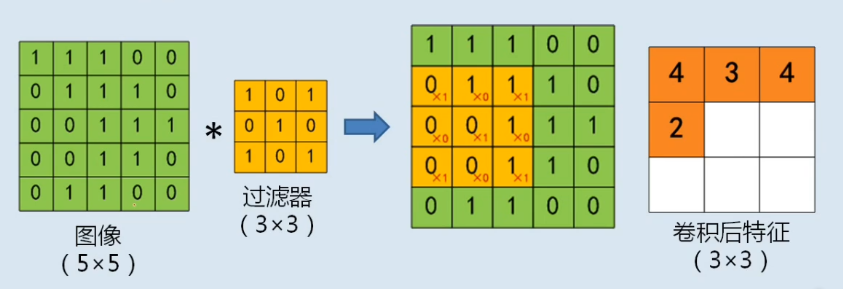
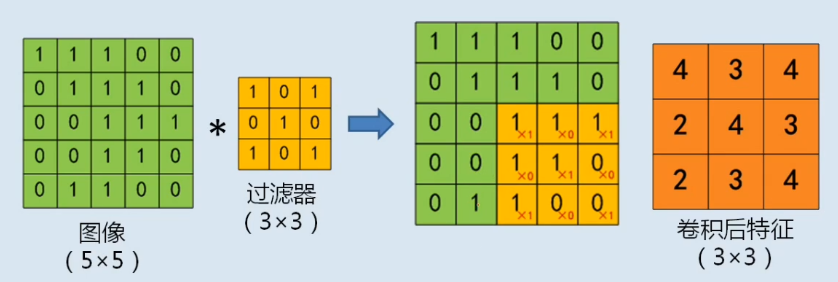
卷积核
    |
    |
    |
   \ /
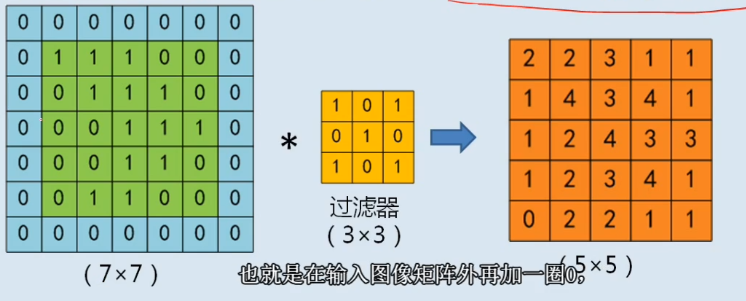
填充
\[p=(f-1)/2
\]
\[p:填充大小
\]
\[f:kernel/fillter 大小
\]
步长 stride
卷积核每次移动距离
公式:
\[O=(n-f+2p)/s + 1
\]
\[n: size { } of { }input
\]
\[f: size of filter
\]
\[p: size of padding
\]
\[s: size of stride
\]
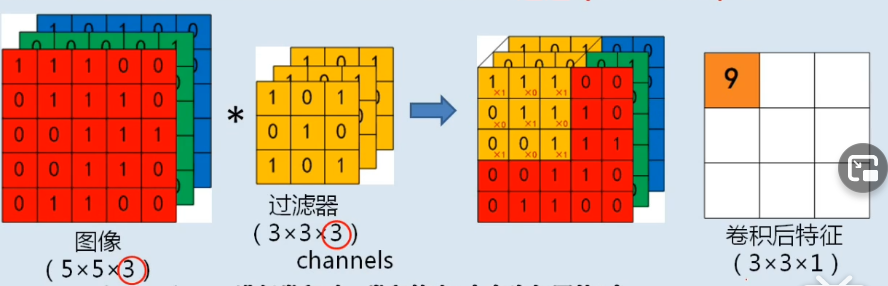
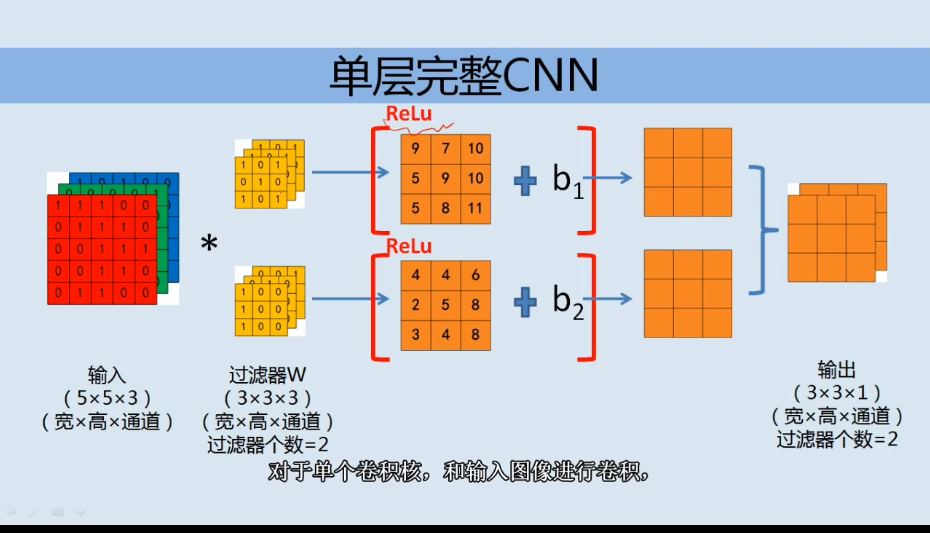
通道 channel
累加:
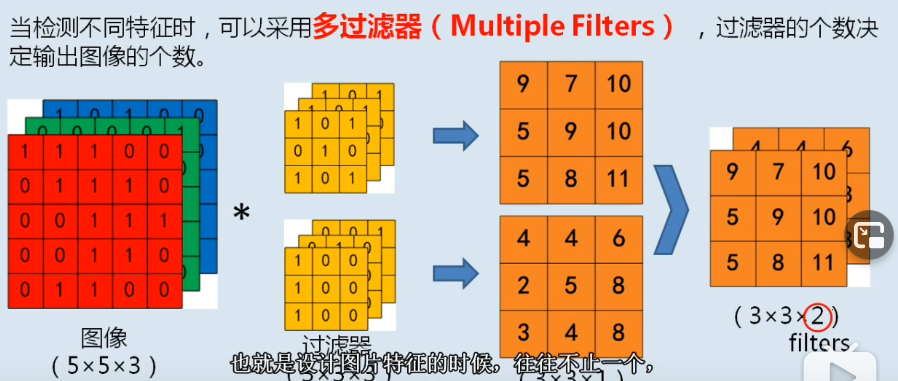
多过滤器
过滤器数量与output channel数量相同
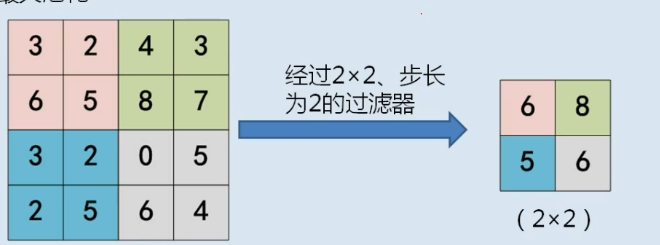
池化 pooling
常见池化层
- max-pooling
- average-pooling
池化后与FC layer的连接
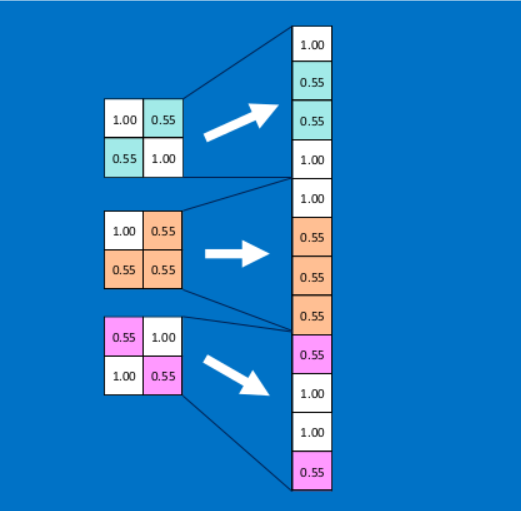
全连接层在整个卷积神经网络中起到“分类器”的作用,即通过卷积、激活函数、池化等深度网络后,再经过全连接层对结果进行识别分类。首先将经过卷积、激活函数、池化的深度网络后的结果串起来,如下图所示
代码
Pytorch conv2d 全部代码
:
import torch
import torch.nn as nn
import torch.nn.functional as f


class Net(nn.Module):

    def __init__(self):
        super(Net, self).__init__()
        #两个卷积层
        self.conv1 = nn.Conv2d(in_channels=1, out_channels=6, kernel_size=5)
        self.conv2 = nn.Conv2d(6, 16, 5)
        #三个全连接层
        self.fc1 = nn.Linear(16 * 5 * 5, 120)
        self.fc2 = nn.Linear(120, 84)
        self.fc3 = nn.Linear(84, 10)

    def forward(self, x):
        #1:先使用conv1 2:relu函数激活 3:max_pool激活(大小为 2x2)
        x = f.max_pool2d(f.relu(self.conv1(x)), (2, 2))
        #上一步输出值进行同样操作
        x = f.max_pool2d(f.relu(self.conv2(x)), 2)
        #对两个卷积和池化后的数据处理为一维,以输入接下来的fc层
        x = x.view(-1,self.num_flat_features(x))
        x = f.relu(self.fc1(x))
        x = f.relu(self.fc2(x))
        x = self.fc3(x)

    def num_flat_features(self,x):
        size = x.size()[1:]
        num_features = 1
        for s in size:
            num_features *= s
        return num_features

net = Net()
print(net)
conv2d源码:
    def __init__(
        self,
        in_channels: int,
        #out_channels which equals to the numbers of kernels
        out_channels: int,
        kernel_size: _size_2_t,
        stride: _size_2_t = 1,
        padding: _size_2_t = 0,
        dilation: _size_2_t = 1,
        groups: int = 1,
        bias: bool = True,
        padding_mode: str = 'zeros'  # TODO: refine this type
    ):
创建一个卷积层:
self.conv1 = nn.Conv2d(in_channels=1, out_channels=6, kernel_size=5)
也可写成
conv1 = nn.Conv2d(1, 6, 5)输入为一channel,即灰度图,输出为6通道,核为5,不分别指定长宽即为正方形
参考
图片参考自
006卷积神经网络CNN的基本概念
以及
卷积神经网络CNN【5】FC全连接层

 浙公网安备 33010602011771号