
vue生命周期学习心得(下)
此文接vue生命周期学习心得(上)http://www.cnblogs.com/pengshadouble/p/7488330.html
通过vue生命周期学习心得(上),大至了解了vue生命周期的8个阶段及相关钩子函数触发的时间点,这章我们通过简单的代码看一下具体的运行结果:
<template>
  <div id="container">
    <headers></headers>
    <router-view></router-view>
    <!--<hello></hello>-->
  </div>
</template>

<script>
  import Hello from './components/Hello'
  export default {
   data() {
     return {
       message: 'vue的生命周期!'
     }
   },
    beforeCreate: function () {
      console.log('%c创建前(beforeCreate)...... ', 'color: red');
      console.log('data: '+ this.message);
      console.log('el: '+ this.$el);
      this.init()
    },
    created: function () {
      console.log('%c创建后(created)......', 'color: red');
      console.log('data: '+ this.message);
      console.log('el: '+ this.$el);
      this.init()
    },
    beforeMount: function () {
      console.log('%c挂载前(beforeMount)......', 'color: red');
      console.log('data: '+ this.message);
      console.log('el: '+ this.$el);
    },
    mounted: function () {
      console.log('%c挂载后(mounted)......', 'color: red');
      console.log('data: '+ this.message);
      console.log('el: '+ this.$el);
    },
    beforeUpdate: function () {
      console.log('%c更新前(beforeUpdate)......'+ new Date(), 'color: red');
      console.log('data: '+ this.message);
      console.log('el: '+ this.$el);
    },
    updated: function () {
      console.log('%c更新后(updated)......'+ new Date(), 'color: red');
      console.log('data: '+ this.message);
      console.log('el: '+ this.$el);
    },
    beforeDestroy: function () {
      console.log('%c销毁前(beforeDestroy)......', 'color: red');
      console.log('data: '+ this.message);
      console.log('el: '+ this.$el);
    },
    destroyed: function () {
      console.log('%c销毁完成后(destroyed)......', 'color: red');
      console.log('data: '+ this.message);
      console.log('el: '+ this.$el);
    },
    methods:{
      init() {
        console.log('%c事件初使化成功(methods)......', 'color: blue')
      }
    }
  }
</script>

<style>
#app {
  font-family: 'Avenir', Helvetica, Arial, sans-serif;
  -webkit-font-smoothing: antialiased;
  -moz-osx-font-smoothing: grayscale;
  text-align: center;
  color: #2c3e50;
  margin-top: 60px;
}
</style>
(此代码来源于项目的一部分,重点关注<script></script>部份即可!)
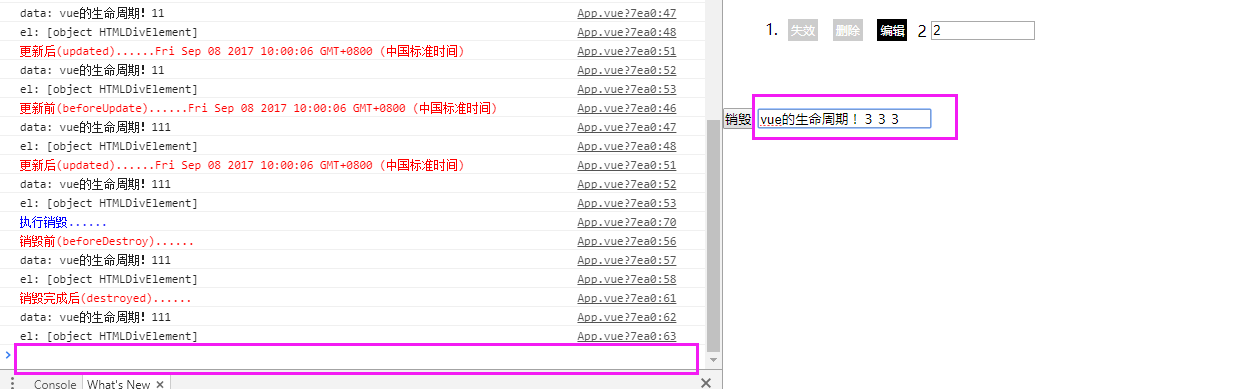
以下是运行结果:

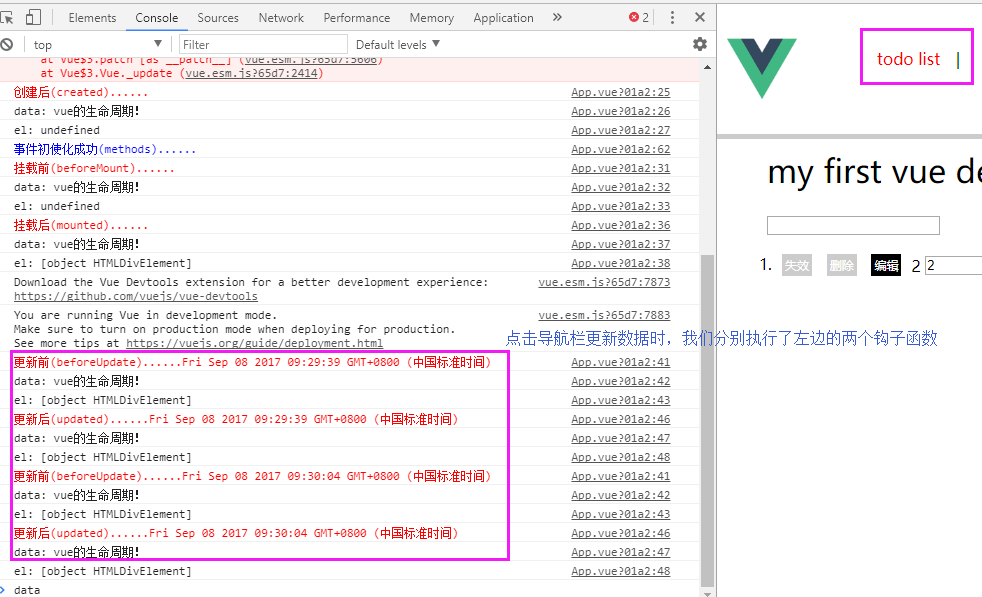
从上面的截图中,我们并不能很清楚的了解到destroy阶段的相关信息,这个时候我们可以在页面添加一个按钮来执行我们销毁vue实例的方法,再添加一个文本框来看一下实例销毁后会有什么样的效果.....
一、添加操作按钮和文本框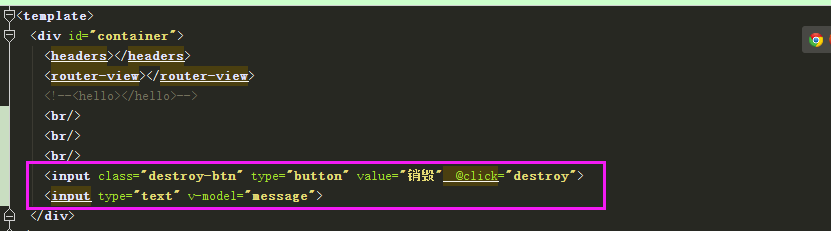
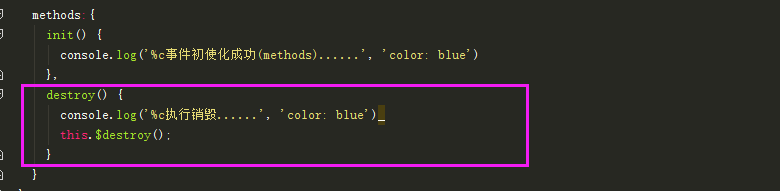
二、添加destroy方法用于销毁实例
三、接下来,我们就可以看看效果了,首先在没有销毁vue实例之前,我们的文本框与数据具体双向绑定的效果,如图:
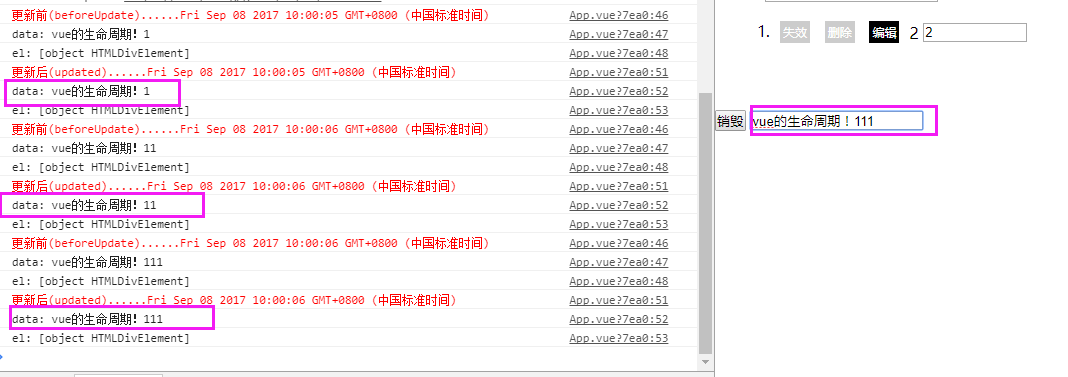
四、接下来,我们执行我们vue实例销毁的方法

五、此时,我们再看看文本还具有双向绑定的功能吗?如下图所示,文本框已经不具有双向绑定的功能了,虽然我们原先生成的dom元素还存在,但执行了destroy操作,后续就不再受vue控制了~~~
最后,通过对vue生命周期的了解,对于我们后期vue的学习会更加得心应手~~
前端的学习是一条漫长的路~~加油!!!
