


Docker 学习总结
docker version 查看版本
docker search java 搜索镜像
docker images 查看本地镜像列表
docker pull java:8 从仓库获取java:8的镜像 docker pull 地址/java:8
docker rmi java 删除镜像 docker rmi -f $(docker images) 删除所有的镜像
容器的命令
docker run 创建并启动一个容器
-d 后台
-P 随机端口
-p 映射端口
-network 指定网络
docker ps 获取容器列表 docker ps -a 获取所有的容器
docker save -o yearning.rar zhangsean/yearning 打包镜像到本地
docker load --input yearning.rar 导入镜像
docker logs docker logs --since 30m 容器ID
docker stop 停止容器
window10 家庭版 安装Docker 并部署 微服务
window10 安装docker 直接安装是不行的
打开“控制面板” 找到 “程序与功能” 进入程序与功能后 点击“启用或关闭”
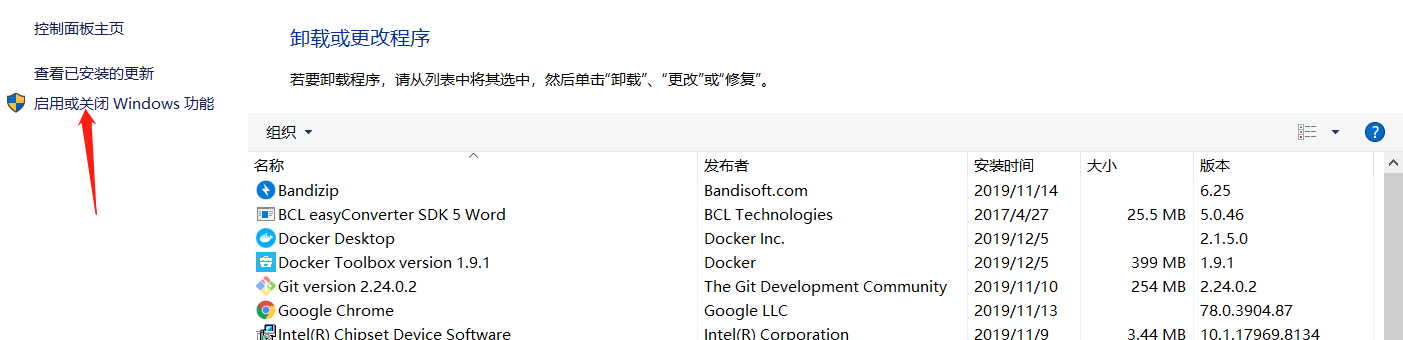
找到 Hyper-V 并启用

window10 家庭版的好像没有这个选项 需要我们安装
新建文件 hyperv.cmd 添加以下内容后以管理员的身份运行,运行会自动安装 Hyper-V 安装完后继续上一步
pushd "%~dp0"

dir /b %SystemRoot%\servicing\Packages\*Hyper-V*.mum >hyper-v.txt

for /f %%i in ('findstr /i . hyper-v.txt 2^>nul') do dism /online /norestart /add-package:"%SystemRoot%\servicing\Packages\%%i"

del hyper-v.txt

Dism /online /enable-feature /featurename:Microsoft-Hyper-V-All /LimitAccess /ALL
以管理员身份 打开cmd 执行
REG ADD "HKEY_LOCAL_MACHINE\software\Microsoft\Windows NT\CurrentVersion" /v EditionId /T REG_EXPAND_SZ /d Professional /F
现在进行安装
安装完成之后
打开 cmd
docker version
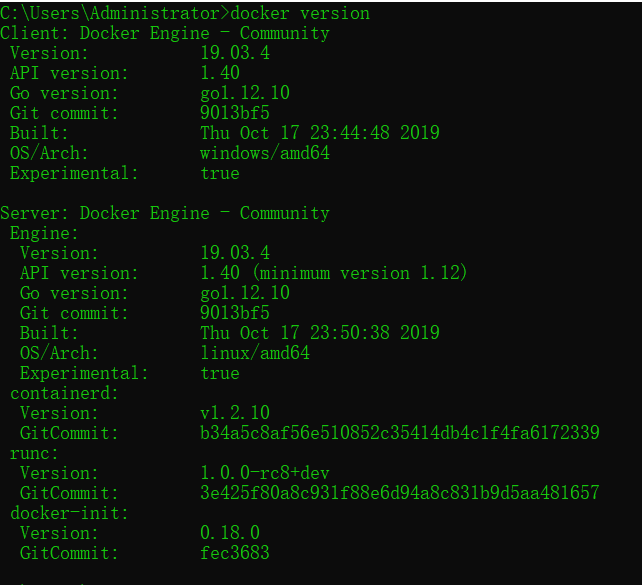
docker 已经安装完成
我以我练习用的项目为例
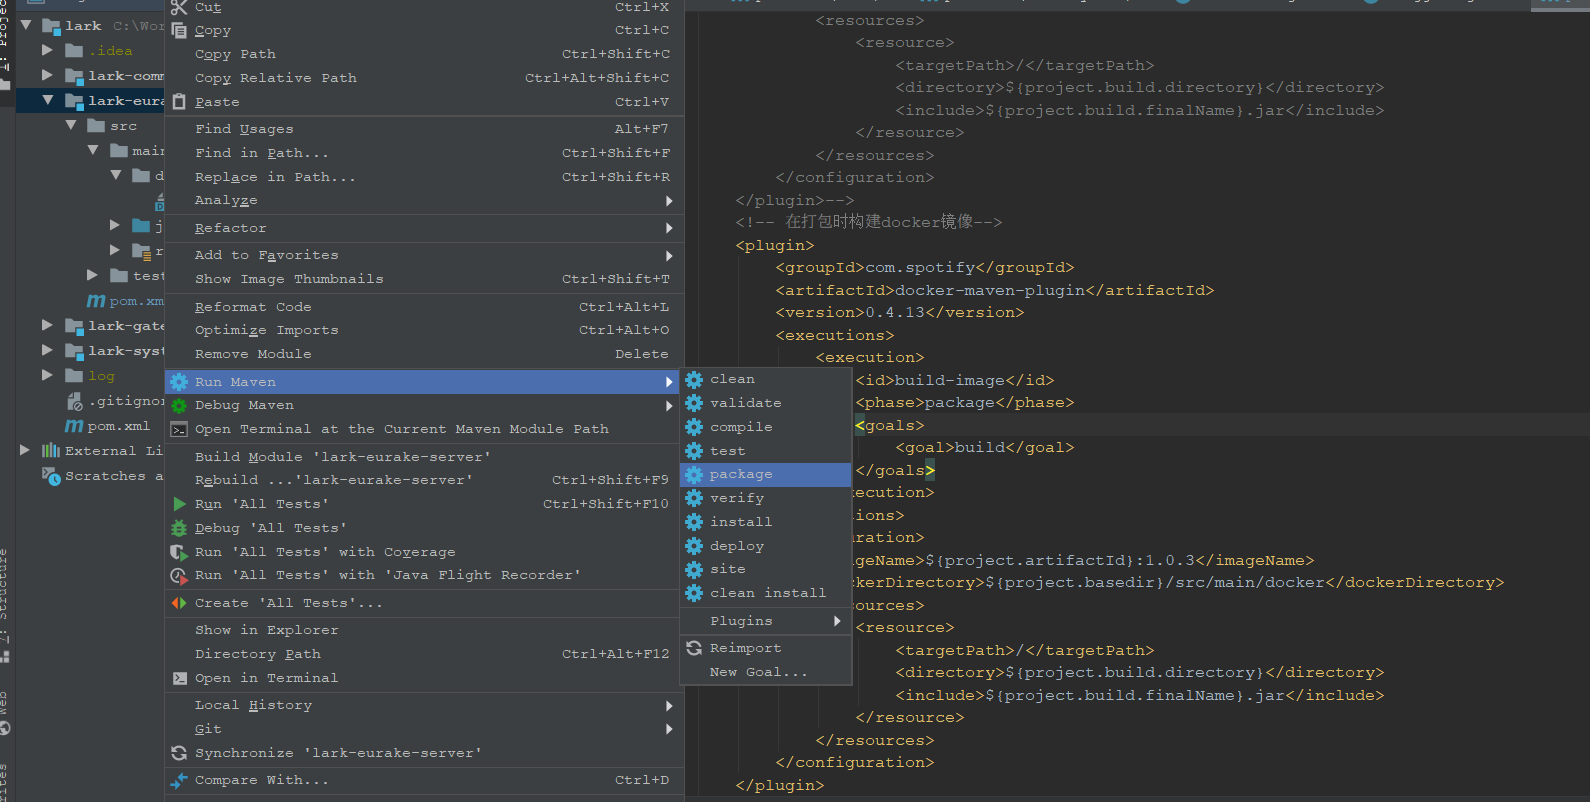
在项目中pom.xml 文件中配置插件
<!-- 在打包时构建docker镜像-->
            <plugin>
                <groupId>com.spotify</groupId>
                <artifactId>docker-maven-plugin</artifactId>
                <version>0.4.13</version>
                <executions>
                    <execution>
                        <id>build-image</id>
                        <phase>package</phase>
                        <goals>
                            <goal>build</goal>
                        </goals>
                    </execution>
                </executions>
                <configuration>
                    <imageName>${project.artifactId}:1.0.3</imageName>
                    <dockerDirectory>${project.basedir}/src/main/docker</dockerDirectory>
                    <resources>
                        <resource>
                            <targetPath>/</targetPath>
                            <directory>${project.build.directory}</directory>
                            <include>${project.build.finalName}.jar</include>
                        </resource>
                    </resources>
                </configuration>
            </plugin>
        </plugins>
    </build>
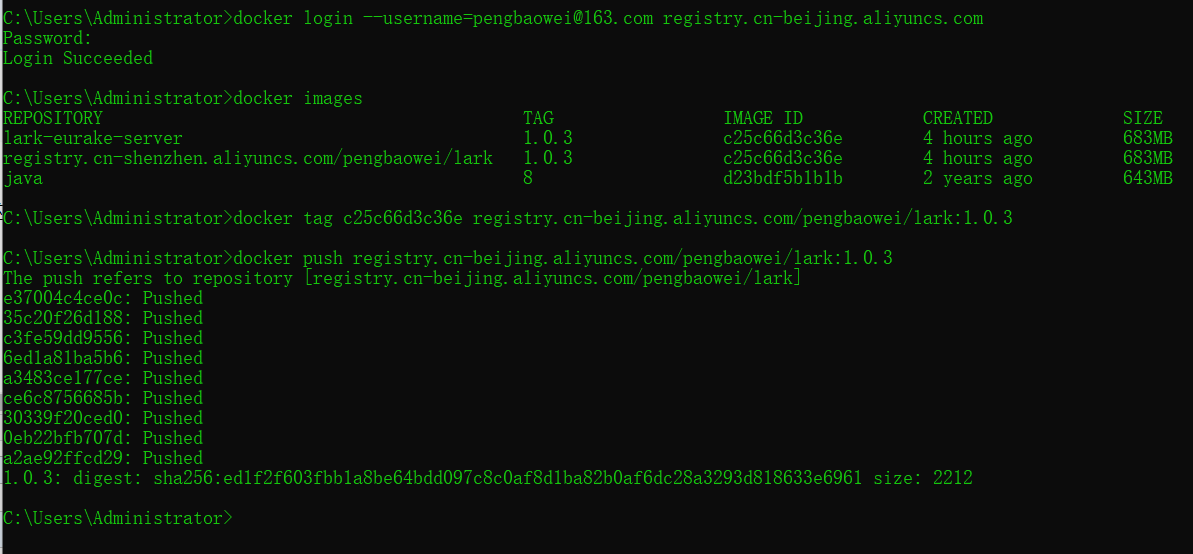
配置好之后 我们要将项目构建成镜像 推送镜像库中
开启远程Docker访问
在window 中开启远程访问 点击小鲨鱼 找到settings 按下图勾选 后重启docker服务器 linux 可以网上查看
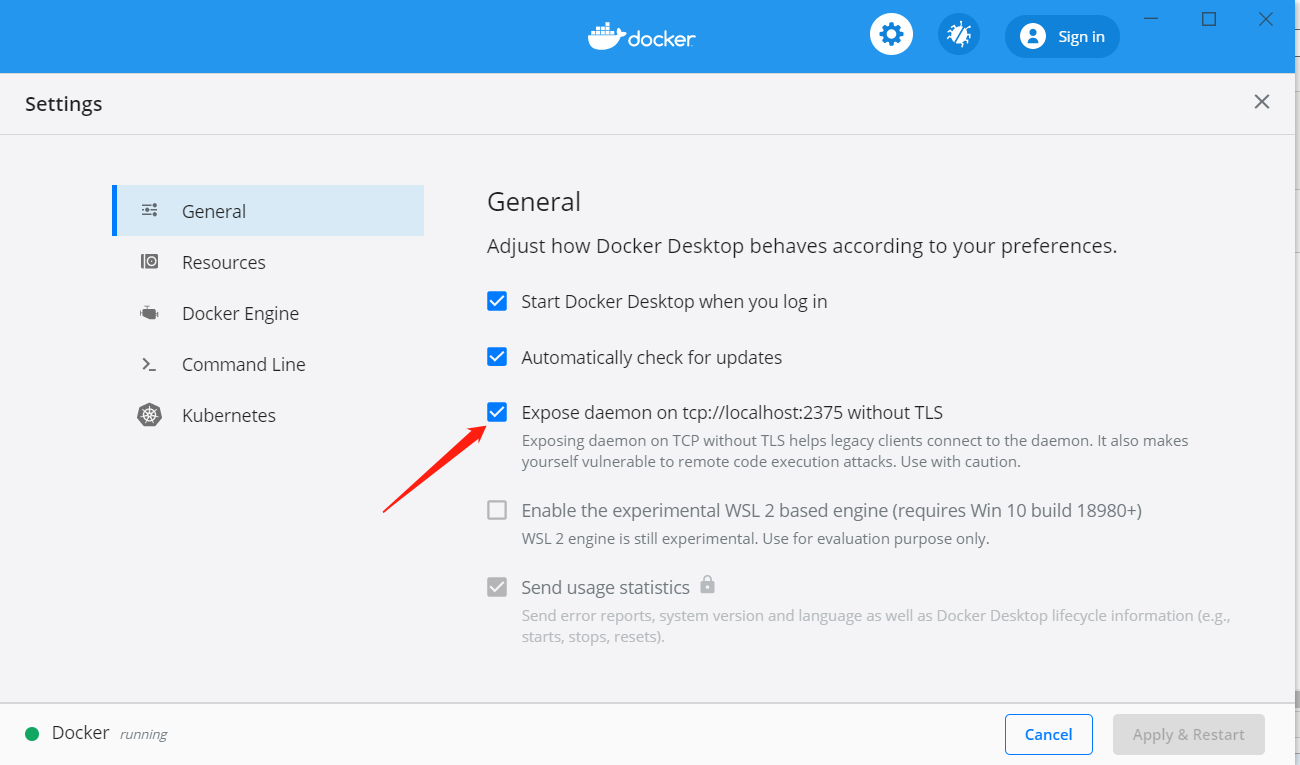
如果是远程访问 需要在客户端配置 DOCKER_HOST 环境变量 默认:localhost:2376
镜像上传和运行
先看看所有的镜像 docker images

pom 文件中docker 插件中配置了
<execution>
                        <id>build-image</id>
                        <phase>package</phase>
                        <goals>
                            <goal>build</goal>
                        </goals>
                    </execution>
所以在打包时 就会生成镜像
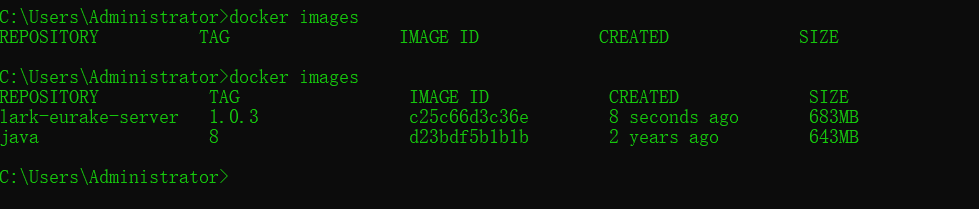
看到已经上传上去了
启动 :docker run -d -p 80:80 lark-eurake-server:1.0.3

看看容器列表

查看一下日志 docker logs --since 30m c6ad0c452640


端口号时 80
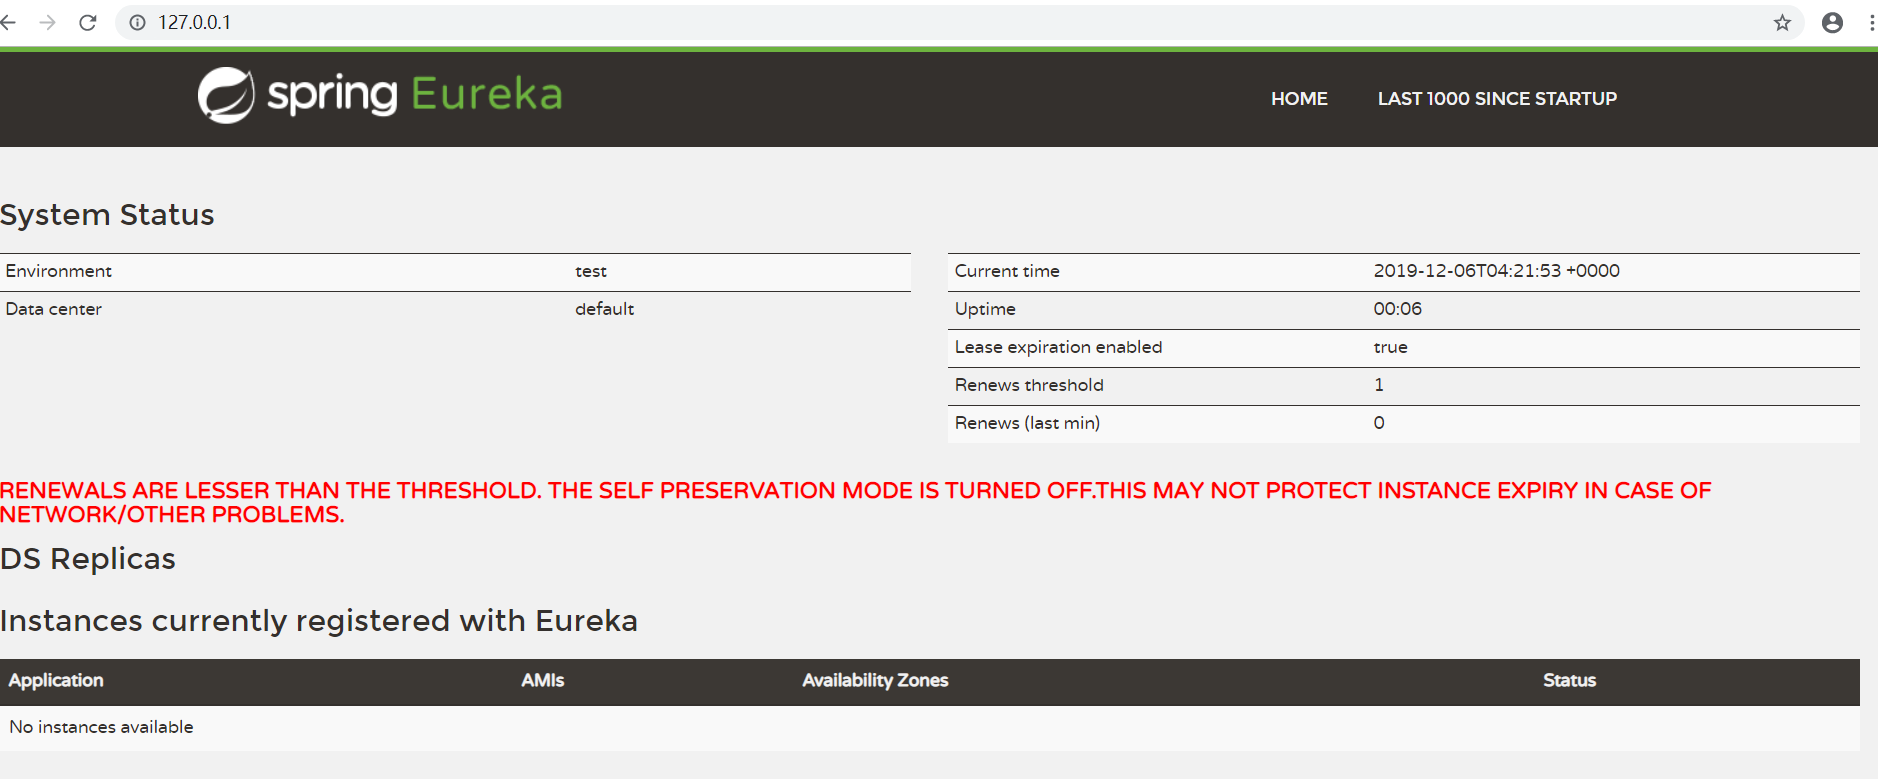
在启动时候我们将80 端口豪映射到宿主机 80 端口上呢 直接访问 127.0.0.1:80
上传镜像到阿里云容器镜像服务仓库中
登录阿里云服务器找到 容器镜像服务
创建仓库
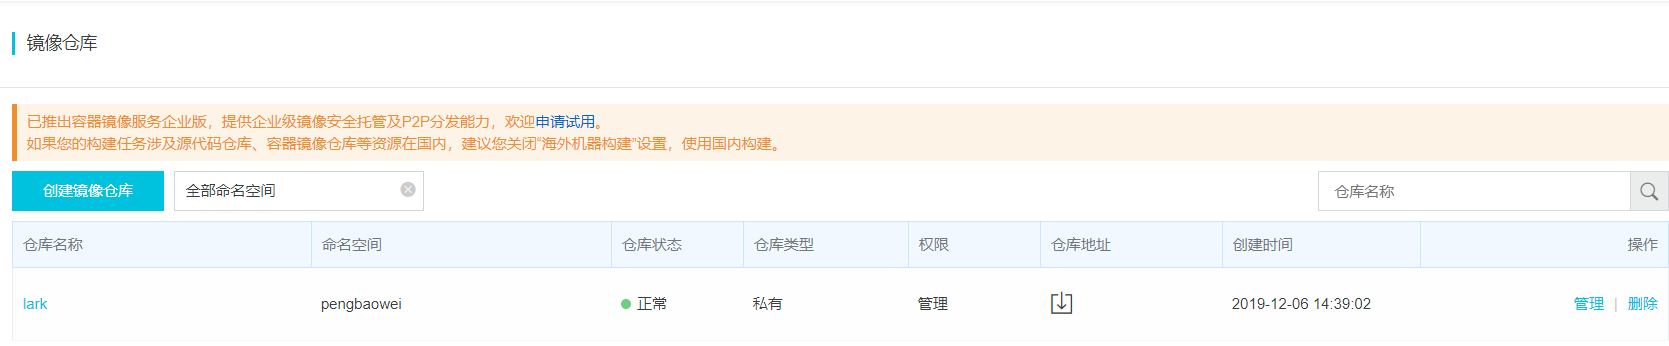
点击管理
会看到详细的示例


 浙公网安备 33010602011771号