centos部署zabbix
- 关闭防火墙
[root@localhost ~]# systemctl stop firewalld.service
- 关闭防火墙的开机自启
[root@localhost ~]# systemctl disable firewalld.service
Removed symlink /etc/systemd/system/dbus-org.fedoraproject.FirewallD1.service.
Removed symlink /etc/systemd/system/basic.target.wants/firewalld.service.
- 替换防火墙参数
[root@localhost ~]# sed -i 's/SELINUX=enforcing/SELINUX=disabled/' /etc/selinux/config
- 查看防火墙状态
[root@localhost ~]# grep SELINUX=disabled /etc/selinux/config
SELINUX=disabled
- 关闭当前防火墙
[root@localhost ~]# setenforce 0
- · a. 安装 数据库
- # rpm -Uvh https://repo.zabbix.com/zabbix/3.0/rhel/7/x86_64/zabbix-release-4.4-1.el7.noarch.rpm
# yum clean all - # yum -y install zabbix-server-mysql zabbix-web-mysql zabbix-agent mariadb mariadb-server
· b. 安装Zabbix server,Web前端,agent
创建初始数据库
# dnf install -y mysql-server mysql-devel mysql-libs
# systemctl start mysqld
启动数据库服务,并将其配置为开机自启:
Systemctl enable mariadb.service
Systemctl start mariadb.service
· c
- # mysql -uroot -p
password
mysql> create database zabbix character set utf8 collate utf8_bin;
mysql> grant all privileges on zabbix.* to zabbix@localhost identified by 'password';
mysql> quit; - 导入初始架构和数据,系统将提示您输入新创建的密码。
- # zcat /usr/share/doc/zabbix-server-mysql*/create.sql.gz | mysql -uzabbix -p zabbix
- 编辑配置文件 /etc/zabbix/zabbix_server.conf
- DBPassword=password
· d. 为Zabbix server配置数据库
把 DBSocket=/tmp/mysql.sock (估计是原来安装时,自动侦测的)
改为 DBSocket=/var/lib/mysql/mysql.sock
· e. 为Zabbix前端配置PHP
- 编辑配置文件 /etc/httpd/conf.d/zabbix.conf
# php_value date.timezone Asia/Shanghai
· f. 启动Zabbix server和agent进程
- 启动Zabbix server和agent进程,并为它们设置开机自启:
- # systemctl restart zabbix-server zabbix-agent httpd
# systemctl enable zabbix-server zabbix-agent httpd - yum install langpacks-zh_CN.noarch
- 现在您的Zabbix server已经安装完成并开始运行
- 连接到新安装的Zabbix前端: http://server_ip_or_name/zabbix
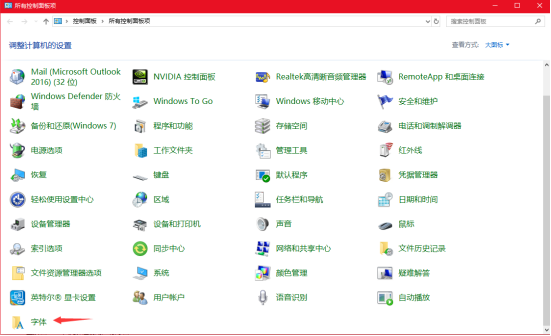
根据Zabbix文件里步骤操作: - 在控制面板中找到一个字体 ,例如黑体
· · 配置Zabbix前端
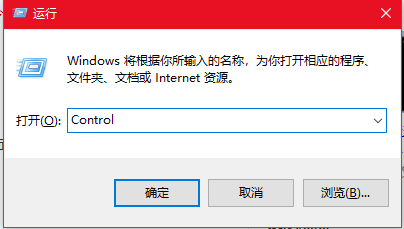
Win+R 输入Control


修改配置文件vim /usr/share/zabbix/include/locales.inc.php
修改内容:'zh_CN' => ['name' => _('Chinese (zh_CN)'), 'display' => true],
查找字体文件夹find / -name graphfont.ttf
把字体文件上传到/usr/share/zabbix/fonts
[root@DaMoWang zabbix-server-mysql-4.0.0]# cd /usr/share/zabbix/fonts/
[root@DaMoWang fonts]# ls
graphfont.ttf
[root@DaMoWang fonts]# rz -E # 上传字体文件到当前目录下
rz waiting to receive.
[root@DaMoWang fonts]# ls
graphfont.ttf simhei.ttf
# 把文件名改为小写
[root@DaMoWang fonts]# mv SIMHEI.TTF simhei.ttf
# 修改/usr/share/zabbix/include/defines.inc.php
修改内容: define('ZBX_GRAPH_FONT_NAME', 'simhei');
重启服务
systemctl restart zabbix-server
systemctl restart httpd
安装Grafana及其Zabbix插件
# yum install yum install https://dl.grafana.com/oss/release/grafana-6.3.2-1.x86_64.rpm
# systemctl start grafana-server
# grafana-cli plugins list-remote
# grafana-cli plugins list-remote | grep zabbix
id: alexanderzobnin-zabbix-app version: 3.9.0
# grafana-cli plugins install alexanderzobnin-zabbix-app
成功
✔ Installed alexanderzobnin-zabbix-app successfully
Restart grafana after installing plugins . <service grafana-server restart>
不成功多试几次
# systemctl restart grafana-server
设置开机启动:systemctl enable grafana-server
浏览器输入http://localhost:3000登录grafana,默认用户名为admin,默认密码为admin


 浙公网安备 33010602011771号